Like a tagine, only cooked in whatever pot you have to hand. A whole shelf of wonderful store cupboard ingredients make this recipe deep, smokey, rich and utterly unctuous. As firey or sweet with chilli as you would like: just add more of the hot stuff to ramp up the heat.
This rich stew can be a plant based or meat free dish, we added paneer for our vegetarian … but Tofu, large hunks of roasted vegetables or chickpeas would work well as veggie or vegan options. Just remember that not all these need as long to cook as lamb will do.
Don’t attempt to rush this meal: it is a slow cook. Savour collecting the ingredients; the grinding of the spices and the gentle changes in the flavours as the sauce starts to come together. Cook indoors on a rainy Sunday or bubble away over a woodfire on a blazing Saturday.
Ingredients to marinade the meat:
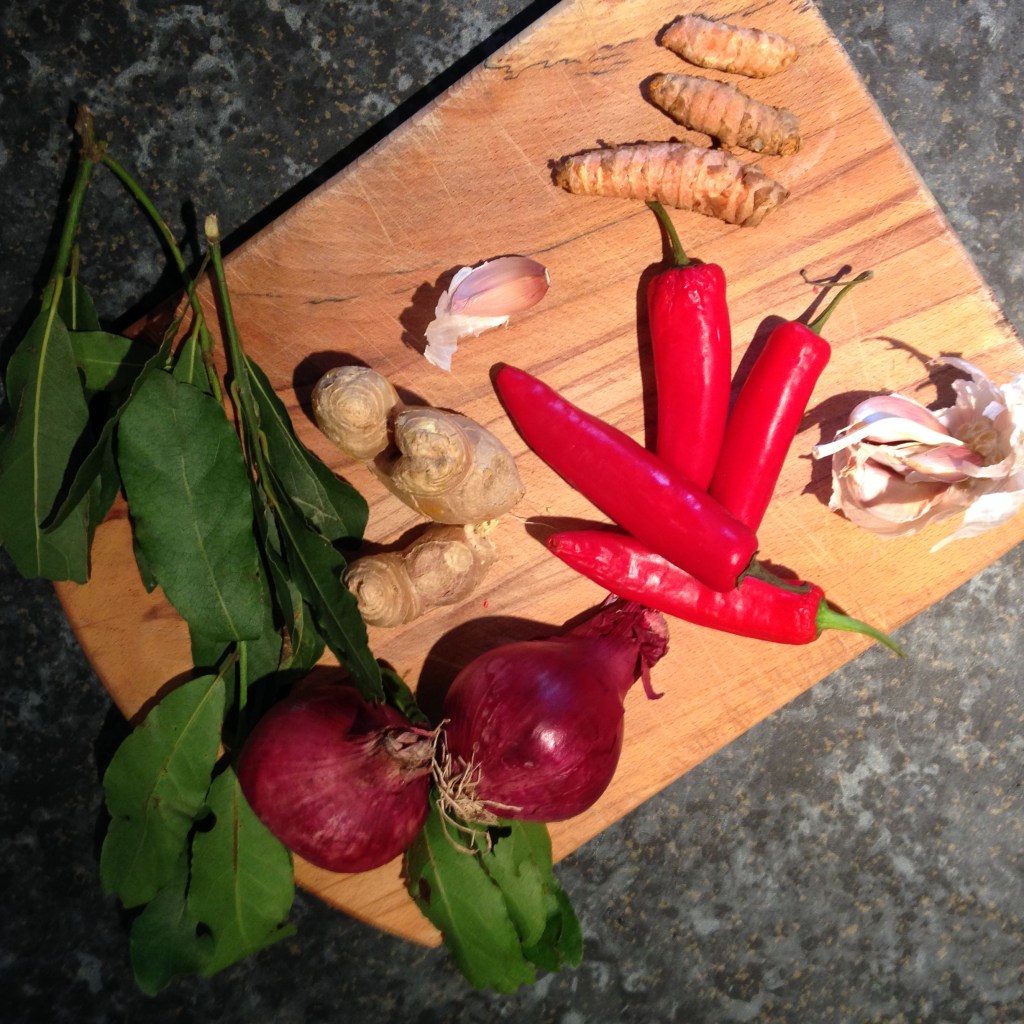
Store cupboard ingredients make this dish the perfect go to food. We love La Chinata smoked paprika (hot or sweet); Belazu Rose Harissa and Saffron strands. Homegrown, dried and flaked Espelette chillies are just perfect for colour, flavour and heat.
1kg of lamb shoulder, large dice (or a block or two of paneer cubed)
2 tsp red peppercorns (ground)
2 tsp cinnamon
2 tsp dried Espelette chilli flakes
2 tsp black peppercorns (ground)
2 tbsp smoked paprika
2 inches fresh grated ginger
1 inch fresh grated turmeric
3 garlic cloves crushed
2 tsp salt
a couple of teaspoons of Belazu Rose Harissa paste. One day we might venture into making our own paste but today, this is what we used. It is darn good, a blend of spices like carawy, cumin and rose petals. Hard to beat.
Cover the meat/cheese with the marinade and leave in the fridge for a couple of hours. Maybe chill with a beer.
Starting to cook…
Collect up the next round of ingredients:
3 x red onions, finely diced
2 x fresh red ripe chillies. Your choice for adding heat. We like Espelette or Aleppo, definitely an Annuum or Frutescens as Chinense or Baccatum flavour is not quite right here.
2 x tins of chopped tomatoes
1 pint of tomato juice
a good pinch of saffron strands
1 & 1/2 pints of lamb stock (add saffron strands into the stock to bring them back to life a little)
100g dried apricots
100g pitted dates
100g sultanas
100g flaked almonds
Heat your cooking vessel to fry off the marinated meat/paneer. Once it has browned remove and keep to one side until the sauce has been prepared.
Fry off the meat in batches to seal in the flavour. Not too much at one time.
Fry off finely chopped red onions and red chillies. Add tinned tomatoes, bring to a bubble, then add the meat back. Cheese does not need as much cooking time as lamb but the sauce itself does need a reasonable cooking time to develop its flavours and depth fully.
Top up with tomato juice and stock. Bring to the boil, add fruit & nuts.
Allow it to simmer…
We love to cook outdoors. Our Kadai firebowl is perfect for a dish like this.
Bubble away for a good couple of hours. Check tenderness of meat. Add a bit more tomato juice if the sauce is becoming a little thick or dry. This can be especially important when cooking outside. Taste and season, including a squeeze of honey to balance the spices.
Perfect comfort food to feed the soul
Serve with traditional cous cous, wholemeal flatbread, plain yoghurt, roasted veggies, a tomato & onion salad, a handful of coriander. It’s up to you.
If you’d like to know more about how then read on.
It is true that supplementary plant food can support your plant being the very best it can be. However, it is also true that too much of good thing can lead to many issues. Just like in us humans.
Get your chillies’ basic diet right – something that contains good levels of the core nutrients. Only after that, add a little extra. Only if needed. Sometimes less is more.
You can overfeed your chilli plants in a number of ways:
Give them too much feed in one hit;
Feed them too often;
Not disperse built up of nutrient salts.
Lots of chilli growers favour a nutrient poor growing medium. This allows them to add whatever goodies they want, in the quantities they want, when the plant needs it. If you do opt for a more nutritious compost as part of your mix, remember that this will usually contain a general plant food that can last up to six weeks. Read the label to know what you are starting with before even thinking about adding extra.
After settling on your basic soil mix (this is our fave soil mix right now) how can you ensure you are giving the right amount of the right type of feed to your chillies?
Let’s start with the core components of a feed and then move on to quantity afterwards. If you want a clear guide to general fertilisers, the RHS guide is right here. Not chilli specific but well worth a read. Here’s The Birdhouse version with our precious chilli plants in mind…
Let’s get our heads around NPK
NPK, say WHAT?!
You know, check the back of that bottle of Miracle Gro liquid feed lurking on the top shelf in your shed – the one that has been there since 1994. See the ingredient list (NPK) next to some dodgy numbers (24: 8: 16)? That. That is the NPK number.
The NPK number can be interpreted and used in a few ways. It does not take a PhD to understand NPK but a little explanation goes a long way. The first thing is to know what N, P and K are and what they do…
N = Nitrogen Leaves are the powerhouse of the plant. They are packed full of chlorophyll, the green stuff. Chlorophyll uses the energy from sunlight to convert water and CO2 into plant sugar energy. A major component of chlorophyll is…you guessed it…Nitrogen. Boom! You want healthy leaves get some Nitrogen in yer plants!
P = Phosphorus- Tissue development is what Phosphorus is all about. A vigorous root system, strong supportive stems and full seed development all happen as a result of the right P balance. Phosphorus =Workhorse.
K = Potassium– In charge of transport and defence within the plant. This means levels of photosynthesis, uptake of nutrients from the roots AND removal of wastes are all reliant on the correct levels of potassium. Potassium also supports strong cell wall production, making plants better equipped to deal with infection, drought and pests. And it helps fruit set. You are our all round HERO, Potassium!
We have written previously about role of these macro plant nutrients in detail. Do look at at our blog post: NPK Values for chilli plants
A large percentage of feeds, fertilsers and magic cures for plants contain these three wonder nutrients. UK law says the quantity of NP and good old K must be stated on the label of each product.
Overdo (or underdo for that matter) any one of these core nutrients then your plants will not thank you. Get the balance right and you will have more chillies. Simple.
Ratio
The second way to consider the NPK number is as a ratio. The elements are always in the same order to avoid confusion. Ask yourself, are the N, P & K values balanced or imbalanced? Average chicken manure pellets have a 4:2:1 ratio. More nitrogen. Tomorite is 4:3:8, more potassium. A fertilister that contains a balance of N, P & K would have numbers the same or very close.
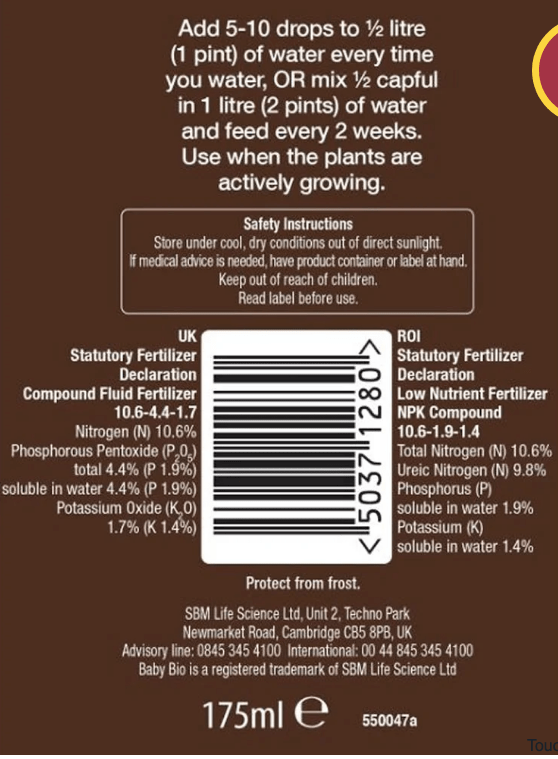
Just make sure you are looking at the correct percentages. You want the less obvious, pure element percentage – not the chemical compoundpercentage, e.g. Phosphorus Pentoxide 4.4% is actually only 1.9% Phosphorus. Granted this is a touch confusing but, using the same example, the true numbers are in brackets with their chemical symbol, e.g. Phosphorus Pentoxide 4.4 % (P 1.9%). Think you’ve got it? You can test your new found decoding skills on the labels below:
Baby Bio: the NPK declared as 10.6: 4.4: 1.7, this is the ratio of the compounds containing NPK. On closer inspection, the available elemental NPK is actually 10.6: 1.9: 1.4, less Phosphorus that the label would first indicate.
Tomorite: 4: 3: 8 is what the label says but if you want to know the levels of each macro nutrient ACTUALLY available to your plants look at the numbers in the brackets 4: 1.3: 6.6.
As a result of being able to crack the code of the NPK ratio, you can decide which fertiliser will suit your chillies’ needs at different times in their life. Growing first leaves? …choose feed that has a larger N number than the P and the K. Time to set fruit? …then perhaps opt for a K heavy ratio.
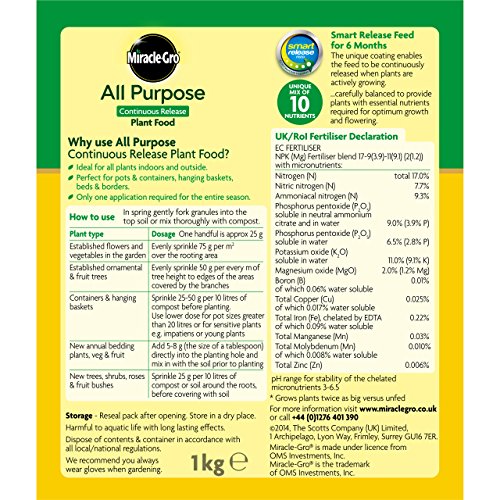
Miracle Gro All Purpose Plant Food: 17: 9: 11 is what they say. Look at the element % though and you are down to 17: 3.9: 9.1
Just don’t overdo it. Always better to be a little under what the labels say than to double up and hope for double the chillies.
Concentration
The third way of using NPK is the SIZE of the numbers…the 7s in Growmore’s 7: 7: 7 means 7%. The higher the number the higher the concentration of the nutrient within the packet. The lower the number the less of each nutrient is in there. Chilli Focus is 3: 1: 4.4, so a relatively low concentration. Some specialist feeds will have higher numbers, for example TopRose Gold 12: 5: 10.
If you’re interested in the NPK value of pretty much any kind of organic item you could use as a fertilser then check out NPK of everything chart from The Nutrient Company. From apple leaves, to bat guano to leather scraps to insect frass. It’s all right there.
Talking of organic, some fertilisers are synthetic chemicals and others are derived from organic source. It is up to you which you choose. The natural route can be the slower route as organic compounds are somewhat larger and take time to break down and release the nutrients required. Organics can be homegrown, homemade and as natural as your own style of gardening. You are less likely to ‘burn’ your plants with a ‘hot’ mix of organics than synthetic versions of the same chemical. However, synthetics are quicker to act, good for exact measurements and excellent as a remedy for a growth issue.
If you opt for a super high strength feed, watch out. It would be tempting and easy to make a mix that is stronger than it should be, expecially with small quantities. Perhaps invest in a measuring jug or syringe?
Now we know what the NPK number is, how should we administer them?
Before you pump up the volume on the feed, think about…
Checking the nutritional value of your soil. Especially important with potted chilli plants. Soil choice will provide your plants with their first foods. Baby plants need baby food, a low nutrient soil mix and dilute levels of fertiliser (if any) will give the best results.
Consider how long the existing soil nutrients will last before adding anything extra;
Think about what the plant is up to, does it need a higher percentage of one nutrient for this particular point of growth? e.g. is it flowering?
Once you are clear on the above you can add feed via the soil, watering, top dressing or as a foliar feed.
Feeding through the soil…
If you decide to use a low nutrition compost mix then a handful of a general purpose feed could be for you. Gromore, that sort of thing.
Depending on the plant growth stage (e.g. is it in vegetative or bloom stage) this can dictate the type of additonal feed a plant needs. When the plants are seedlings it makes sense that they would need very dilute amounts of general goodness, perhaps with an added boost of nitrogen to really get the leaves going. A light soil mix, with a careful handful of chicken manure pellets thrown in could do this. Gently does it for the baby plants though (can we say this enough?) Chicken manure pellets have an NPK value of approximately 4: 2: 1. Again, better to be more dilute than overwhelm the little darlings.
As the plants mature they continue to need feeding. The good thing about chillies is that they regularly need potting on. This gives you a chance to pop a little extra food (or none at all) in the mix if you feel they need perking up. Or to change the menu. A fish, blood & bone mix (5: 5: 6.5) could be useful with more mature plants. Remember that lots of compost bases (your own homegrown black gold, supermarket multipurpose, Jack Magic, John Inness Number whatever) all contain nutrition already so go easy on the added stuff.
Some growers stick with soil based feeding only but generally, soil additives will last six weeks or so, any longer and extra will be required. So, in their final growing medium it could become important to feed via other methods than mixing into the soil.
How else can we add nutrients?
Via watering, top dressing or a foliar spray.
We have been using Chilli Focus liquid feed (2.7: 0.4: 3.6) for the last few seasons. It is gentle (at the correct dilution); somewhat organic and has kelp for an all round boost.
Another chance to hone your new found skills of plant food label interpretation. Certificate in the post.
Deep into the flowering & fruiting season, we still only feed about once a week, depending on the weather. We use a 10ml to 1L dilution for the feed, with water as needed in between. We always water and feed from the bottom unless flushing the soil through.
Too much feed will actually build up the nutrient salts to toxic levels in the soil. This could stunt growth, cause root burn or all manner of undesirable side effects. CAREFUL!
Eek! How do we stop salts building up in the soil?
Firstly, by adding less feed. On sunny days, the plant is working at full rate and doing everything it can to grow, flower and fruit. It is using the nutrients at the fastest pace then. A feed on a day like this is perfect. However, things slow down somewhat on cloudy days, especially earlier in the UK season when daylight hours are shorter. Ease up on the feed at these times, maybe less water too as everything is slower. Just feed tomorrow instead. Less feeding, less chance of salts building up.
Secondly, in the flowering season, it can be important to give plants a detox. Pick a super sunny day, where photosynthesis and transpiration rates are high and ‘top water’ the pots. Use a sprinkle setting on your hose, or a rose on the watering can and gently allow the water to trickle through from the top of the soil and run out of the holes in the bottom. This will collect and dissolve any nutrient salts that have built up earlier in the season, redistribute them into the soil and the plant can then resue them. Do not feed directly after this!
Err, just a sec, back to kelp…what is that good for?
It’s a wonderstuff. No, really.
Alys Fowler explains the benefits of a seaweed feed. And James Carr writing on Fine Gardening tells you all about the chemical composition of the average seaweed feed ‘A. nodosum contains at least 60 elements, including many of those known to be essential for terrestrial plants: nitrogen (N), phosphorus (P), and potassium (K), boron, calcium, copper, iron, magnesium, molybdenum, sulfur, and zinc.’
We like seaweed for its natural, gentle and all-round boost it can give our plants. We’d love to have a go at collecting, using and refining a seaweed mulch and feed ourselves but we’re not quite ready to go there yet. One day.
Foliar application of nutrients
A foliar spray can be used to apply certain nutritional boosts. Dilute seaweed extract can be applied this way. As can dissolved Epsom salts. Epsom salts are Magnesium Sulphate and are used 1tsp dissolved per litre to boost the ‘green’ in leaves.
Even Chilli Focus can be applied as a foliar spray as plants can absorb a large percentage of required nutrients into their structure via their leaves & stems. This is especially helpful in areas that have high pH soil and chillies are planted in open ground. High pH can limit the uptake of nutrients. However, for the general chillihead hobby grower, foliar sprays tend to be kept for remedies rather than general feeds.
A few words of caution for foliar feeding:
Timingand temperature Don’t cover your plants with a foliar feed in full, bright, hot sunlight, you’ll surely burn them as the droplets turn to lenses and maginify the sun’s rays. Ouch! Keep it to morning or evening (when stomata are fully open) and when the temperatures are under 27 degrees. Fast evaporation of water in full midday sun could also leave nutrient salts exposed on the leaf and ‘burn’ the plant chemically. Double ouch!
Humidity Spraying increases humidity. Super high humidity could tip your chilli plants into the danger zone. They might not be able to cool themselves effectively. Plant cooling down happens by transpiration: opening of the stomata (pores) on the leaves and allowing water out into the environment. If the surrounding air is very humid (nearly full of water already) this process cannot happen properly. Plants will overheat. Hardly the effect you are intending when applying a foliar feed or remedy.
Concentration Make sure the spray is a high concentration. This seems to go against everything we have been saying about low levels of feed but this is different. A spray that contains a lower concentration of the nutrients than found in the actual plant could end up drawing out the plants’ own nutrients…from the higher concentration to the lower. This is obviously not what you want to happen.
Spray size. The finest possible mist setting is the best one. You want to coat the leaves but not form large droplets. The finer the mist the quicker and more effective the absorbtion of the nutrients.
Leaf Health
Leaves are a wonderful indicator of health in chilli plants. A regular leaf check will give you an insight into what is going on. Take your time though. You might end up creating an unecessary secondary issue if you misdiagnose. For example: one sees cluster of crinkled new growth on one’s Scotch Bonnet. One might be tempted to grab a Cal-Mag spray and apply. Whilst this could be signs of a calcium definiciency it is just as likely be overwatering or a hidden colony of aphids. Take a day or so to diagnose before rushing in with extra nutrients. You could be the cause of an imbalance, rather than a knight in shining armour.
A very popular, handy graphic showing the symptoms of chemical deficiencies in your chilli plants
So NP & K are not the only tools in the kit then?
Nope, meet a few more of the team…
Magnesium- Chlorophyll could not do its crazy chemistry without the prescence of Magnesium. Cell division, protein production, enzyme activation and respiration all happen smoothly because Magnesium is there. As is the uptake, transportation and metabolisim of Phosphorus.
Calcium- cell walls just aren’t the same without the correct levels of calcium. It literally holds them together. Low Calcium can cause serious issues in every area of the plant: crinkled and distorted new leaves and buds; older leaves wilt much quicker and fruit is likely to get ‘blossom end rot’.
Sulphur – essential in the formation of chlorophyll (yes that old chestnut) It is a component of an enzyme involved in nitrogen uptake. Low sulphur = low nitrogen, even if it is available. It can be hard to tell a sulphur deficiency from a nitrogen one.
There are many more micro nutrients required for super plant fuction. Look for a feed that contains a good few of them to support your plants.
And finally, a quick word about…top dressing
It is unusual to top dress in pot grown plants, as chillies often are, but it can be handy to apply a general feed this way for chillies growing in open ground. Natural rain and watering from the top can cause nutrients to leach away from the plant quicker than in pot grown plants. Apply a granular feed around the base of the plant and water in thoroughly to disperse the fertiliser evenly. A good shower prevents burn from concentrated chemical fertilser on the leaves neat the soil surface or roots near the top. As always, do not be tempted to put extra grains of fertilser down.
A few of the symptoms of fertiliser burn can be found in this Gardening Know How article.
In conclusion YES, you can overfeed your chilli plants. Try not to.
It’s tempting to go nuts with plant food in the hope that more feed equals more chillies. But STOP, and consider whether your plants need that extra food, it might do more harm than good.
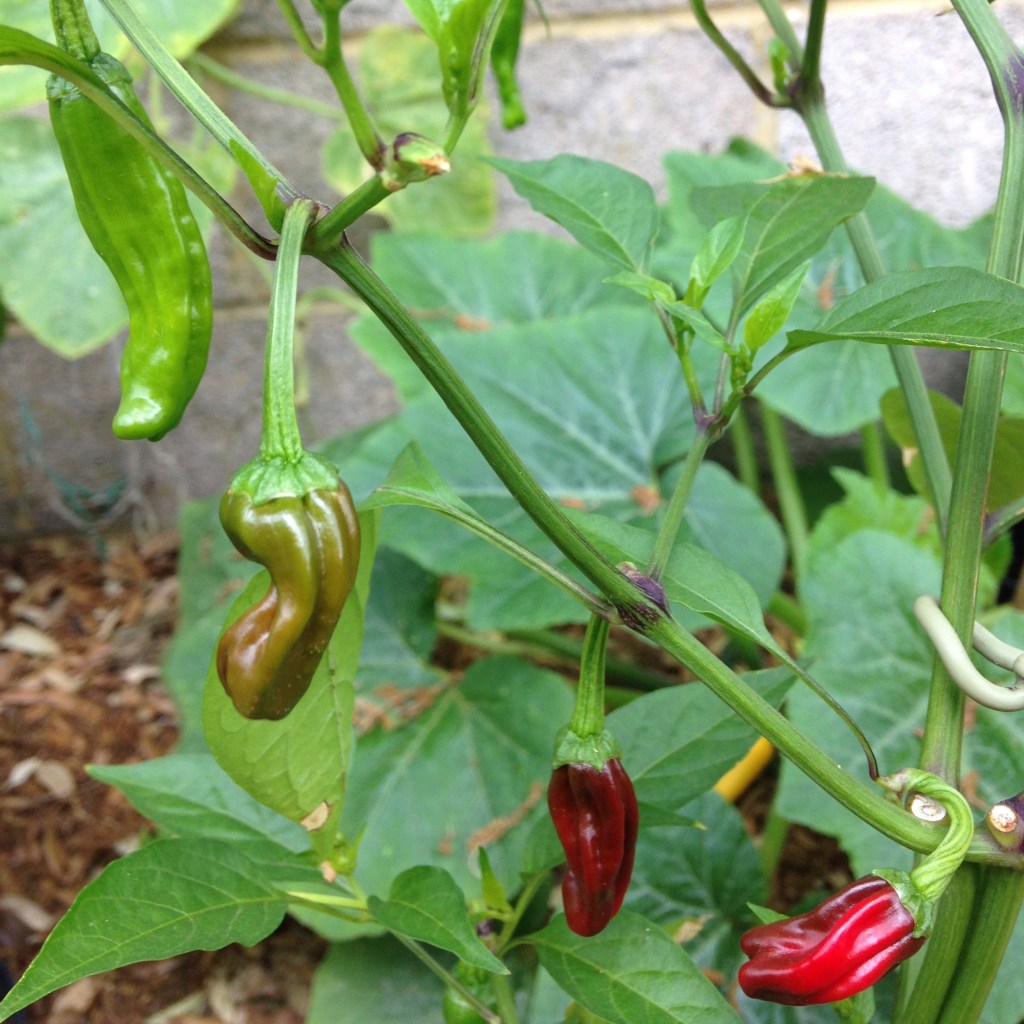
We have tried it everywhere: chillies indoors… chillies outdoors… chillies in pots… in the ground… even a hanging basket. In the kids’ flower patch… on their bedroom windowsills… in a milk bottle… greenhouse… polytunnel… grow room. You name it, we’ve tried it…well, not on a spaceship but we hear chillies do very well up there!
Grow them where you can!
During late Spring in the UK we all do the dance of the chilli plants: in and out of the greenhouse, attempting to harden off whilst not melting the plants in sub zero night temperatures. Location is key and conditions seem to change on an hourly basis. The forecast fluctuates between nights of minus two and days of 25 degrees.
Where’s a plant to go?!
So, exactly where are we growing our chillies?
No straight forward answer, sorry!
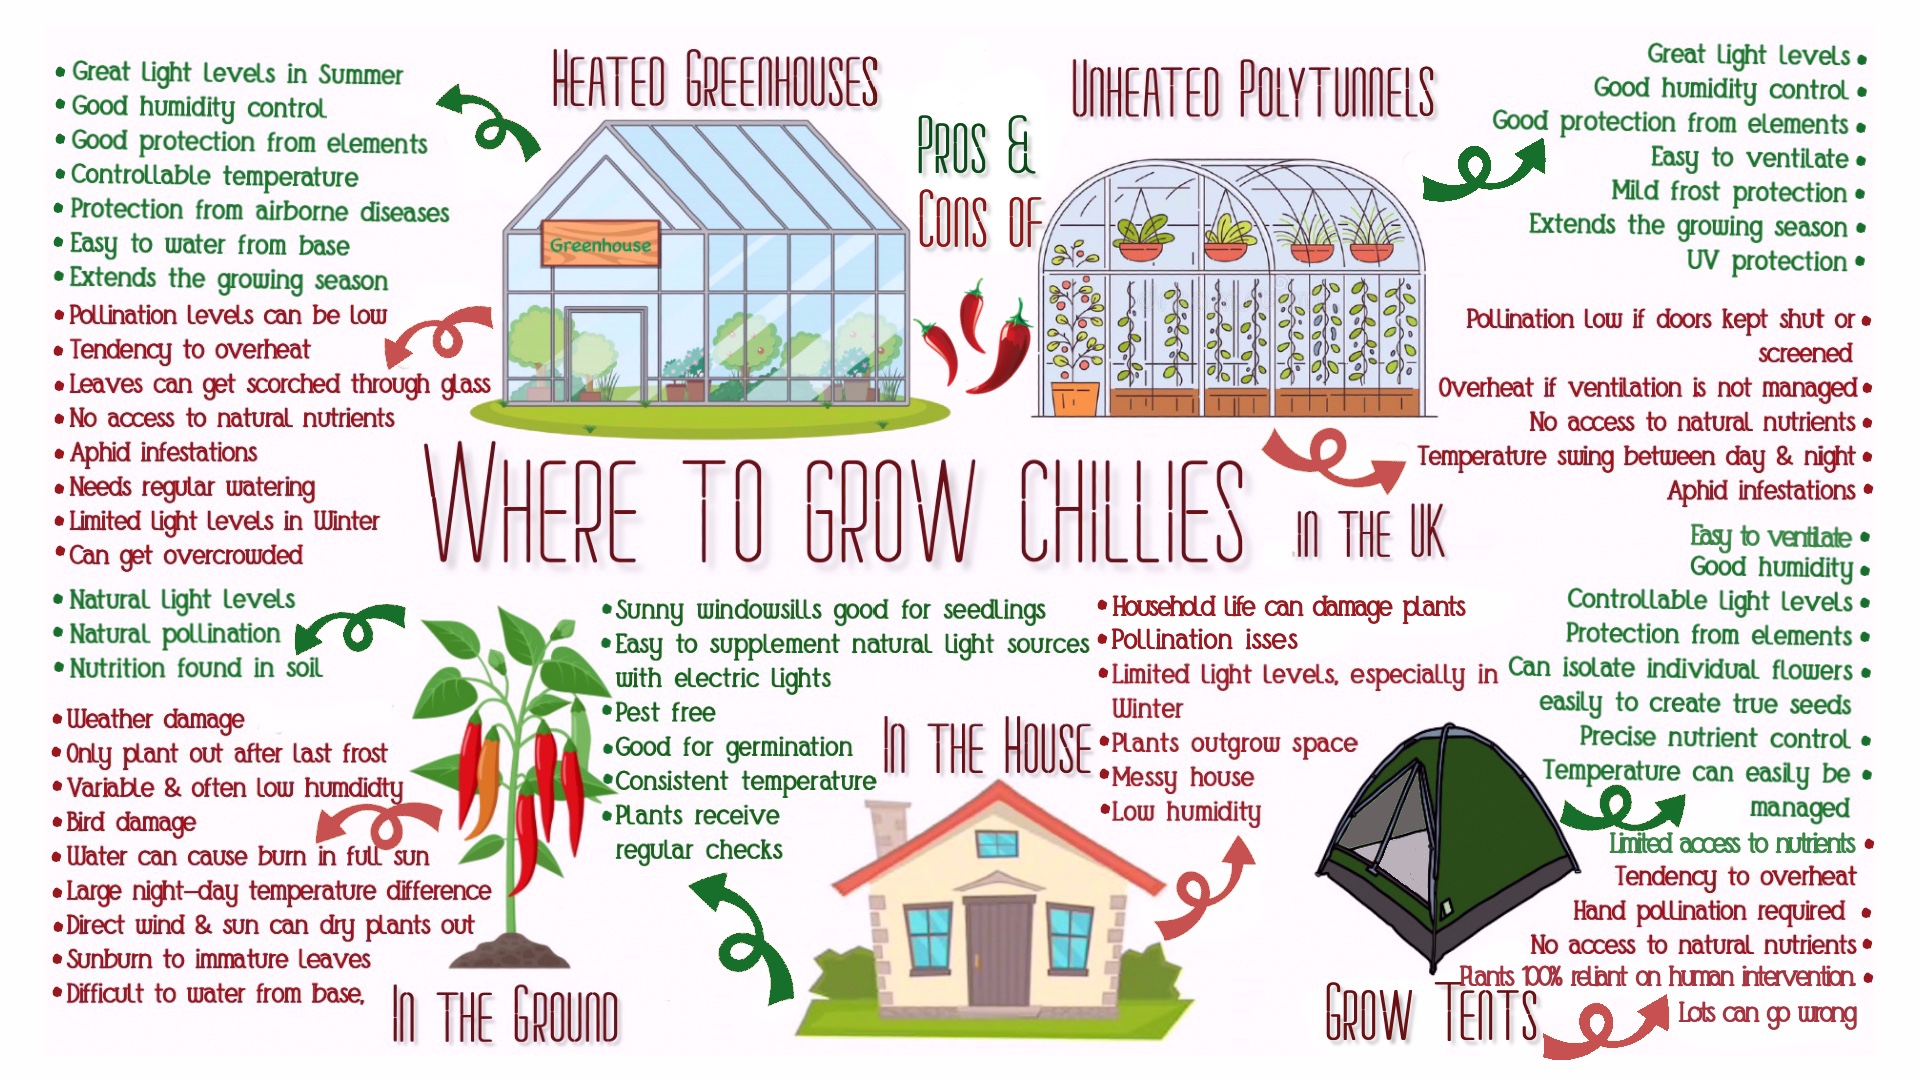
Each location has general pros and cons. In addition to those, each location also depends on unique factors to do with one’s own set up. For example: Greenhouses … is your greenhouse heated? Is it in full sun all day? Is it under a massive oak tree (see final photo)? Does it have a cat that likes to chew your plants, then sit on them? Will you be planting in the ground or in pots? Does the neighbour use pesticides right next to the door? All these variables ALSO need to be factored in when considering if a greenhouse is best for your chillies.
So, first let us consider what chilli plants prefer for optimum growth & yield in terms of:
Light;
Temperature;
Humidity;
Nutrition and pH;
Support/protection/space;
Pollination.
And then think of how to provide these at each general location. By no means definitive but here’s a visual to help compare…
At the Birdhouse, our outdoor growing season for chillies is limited to mid May to mid October. This is just not long enough for many of the chilli vareties we love to grow and so we extend by using lighter, warmer, safer places for our plants at either end of the season: namely the house early on and greenhouse & polytunnel in Autumn.
So here we go, this is how we do it…
Light:
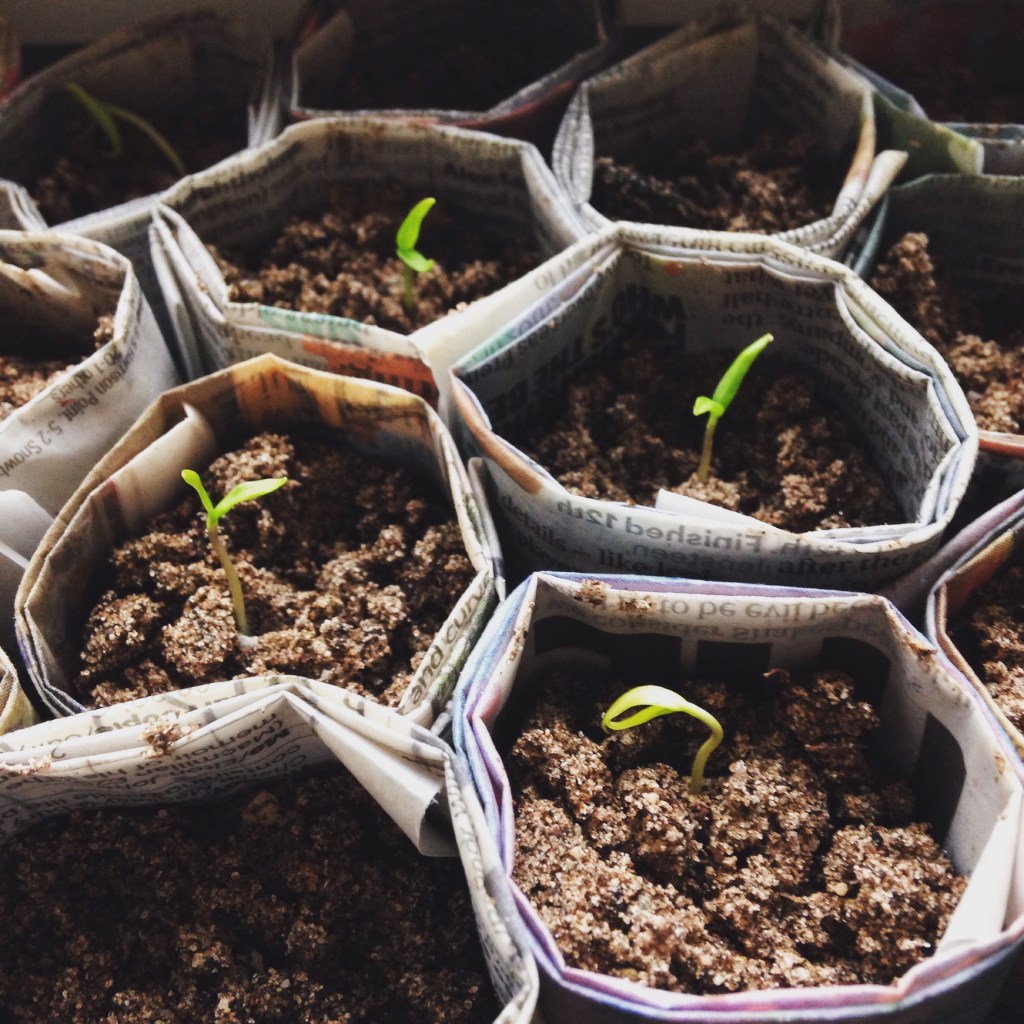
In the house for Germination: We germinate in a transparent propagator. Light is not a required element for actual germination of chilli seeds – although one of our hacks to get tricky seeds to germinate is to fluctuate light exposure on the seeds. We place our propagator right next to a window. The emergent seedlings are then tight little plants, not the leggy beasts created by some in a darkened airing cupboard.
Birdhouse Seedling Headquarters is set up in a spare room of the house. Our light kit comprises two items: a low-tech south facing sunny windowsill and a high-tech full spectrum grow light. The great outdoors is just too darn dark to even consider in January.
Germinate near a window to avoid leggy seedlings
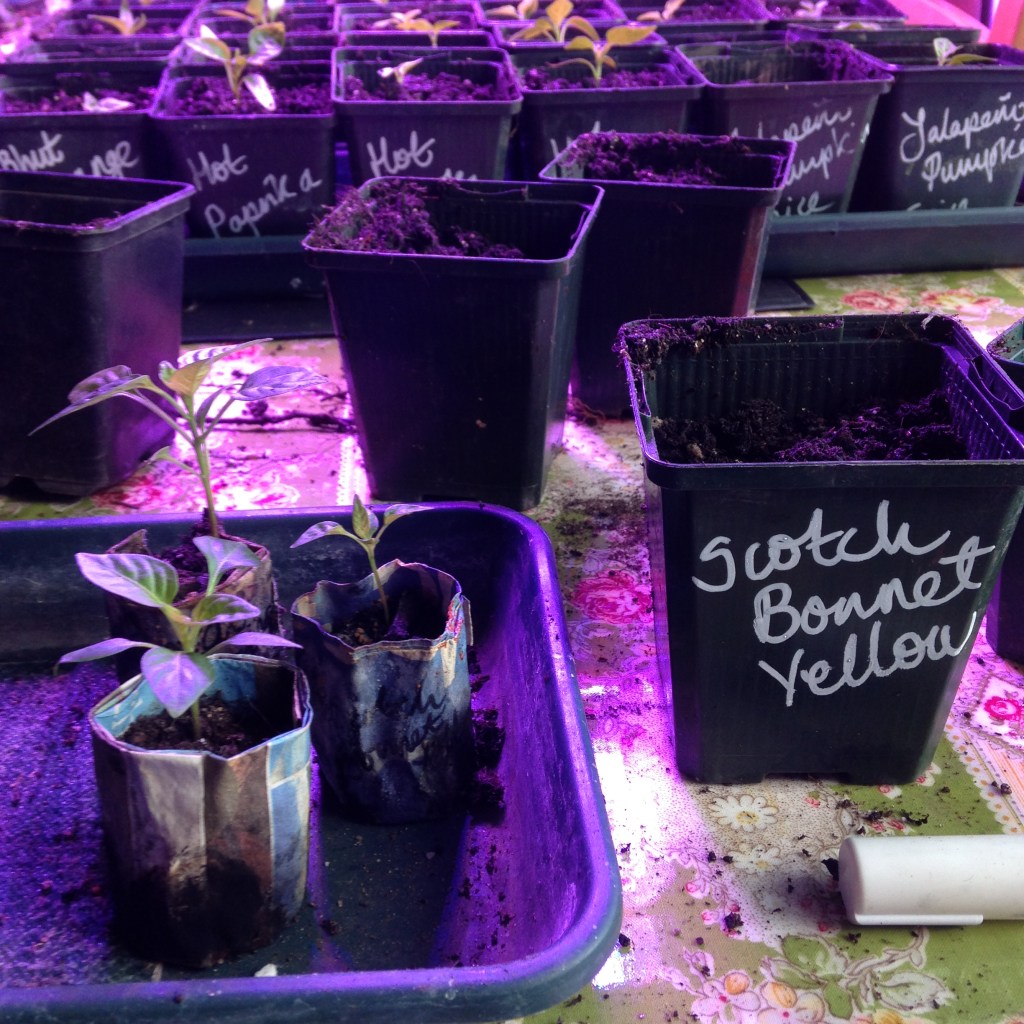
Under a grow light for good vegetative growth. Use a timer
Sunny windowsill for quick growing annuums
Eventually all seedlings can be on the windowsill
Under Grow lights for seedlings: As soon as a seedling starts to show strong green cotyledon we move them to a paper pot under the a blue spectrum grow light for 16 hours a day. As they grow true leaves & eventually show roots from the bottom they progress to 9cm square pots under the grow light or on the windowsill. At this stage roatation is crucial as we only have one grow light and limited windowsill space. The plants will bend towards the sunlight so moving them around encourages them to bend the other way, strengthening their stems.
On the Windowsill for established seedlings: Space becomes limited as plants get bigger. Certain plants prefer to grow under the grow lights, Chinense types, especially. Others can cope on a sunny windowsill as long as they are turned to allow equal access to the light. In the UK the days are lengthening nicely in April.
Into the Greenhouse for growing plants: Once the plants are developing well they move to the greenhouse. Our greenhouse is next to a big oak tree but receives sun from 11am until sunset.
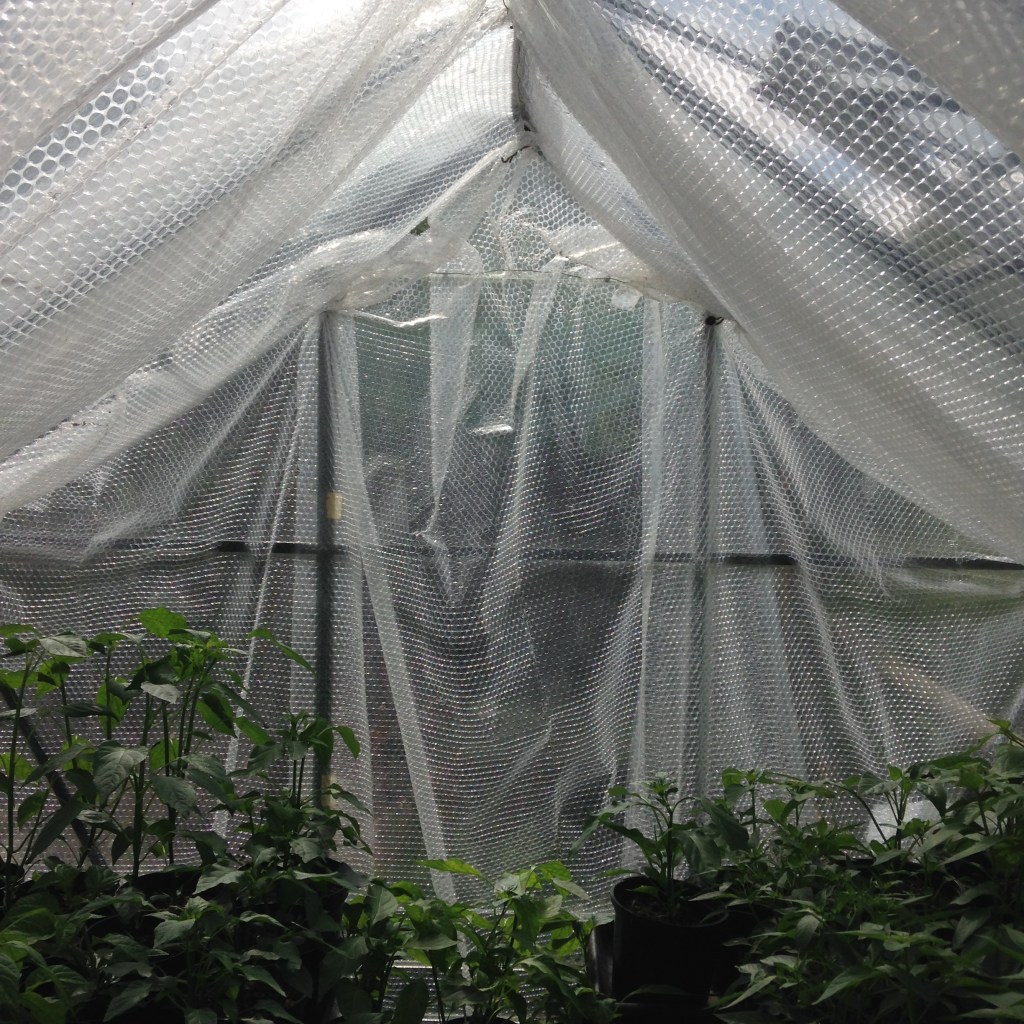
Young plants move up to the greenhouse. Protect leaves from direct sun as the raised UV light levels can damage them. Bubblewrap early on acts both as an insulator and light shade.
Paint-on shading can help protect leaves from scorching later on.
Spill out into the polytunnel to avoid overcrowding: the hardier types move out to the polytunnel when more space is needed. There are good light levels in there with the added bonus of built-in UV protection.
Planting outside: it is worth taking your time to harden the chillies off. This is for a number of reasons but, in terms of light, sunburn is an ugly thing that reduces photosynthesis. Just 10 mins in direct sun can scorch the leaves permanently. Make use of dappled shade, partially cloudy days or only put your plants in direct sun at the beginning or the end of the day. A week of this and they’ll be tough enough. Careful with the watering, droplets on leaves magnify the sun’s rays and will leave burnt patches.
Sunburned chilli leaf
Back intothe Greenhouse for the last few pods: All outdoor light levels are subject to the time of year so that means that when Autumn approaches productivity drops off. We wait for the remaining fruit to ripen and then compost everything. No need for light there.
Temperature
Dans la Maison pour le Germination: Chillies like it hot. At germination stage we keep our seeds in a heated propagator between 25-36 degrees. This makes for pretty good germination rates. The propagator is heated at the base. We place our Chinense seeds down there and the others nearer the cooler top area.
Heated propagator keeps the germinating seeds at a constant high temperature
Tourjours dans la maison pour les Petit Babies: Seedlings are kept on heat mats in our grow room, under the warm grow light. This really boosts their growth and stops the external temperature fluctuations affecting them too much. At this stage constant temperature stresses them least. We water from the base with warm water. They stay in the house until space runs out: windowsills, dining table, anywhere that keeps them out of the icy blasts of a British Spring.
A la Serre: Then it is off to the heated greenhouse. Our chillies are kept warmer than our children (probably better fed too, ha!) We only move them out of the house if we can keep the greenhouse at a minimum of 10 degrees at night. On the odd night it gets colder we feel like very bad parents indeed.
A heater with a thermostat is your friend here. Ours is placed under the staging as direct hot air can cause the leaves to wilt and ultimately die off. Our greenhouse is set on a raised pad of concrete slabs. These store warmth during the day to release at night. Every little helps.
Bubblewrap, an electric heater and a warm stone floor all help keep the heat in and warm the plants at night
Et les plantesadultes: As a rule, at flowering and fruiting stage, we do not like our greenhouse to drop below 10 degrees at night or head above 35 degrees during the day. Flower drop, leaf wilt and less fruit setting is the result of temperatures outside of this range. A healthy difference between day and night temperatures is welcome though. Most chilli plants seem to do better with a bit of a break from high heat.
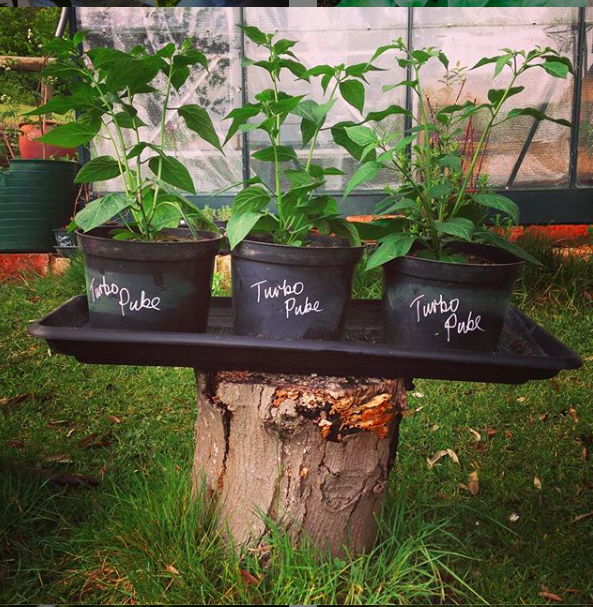
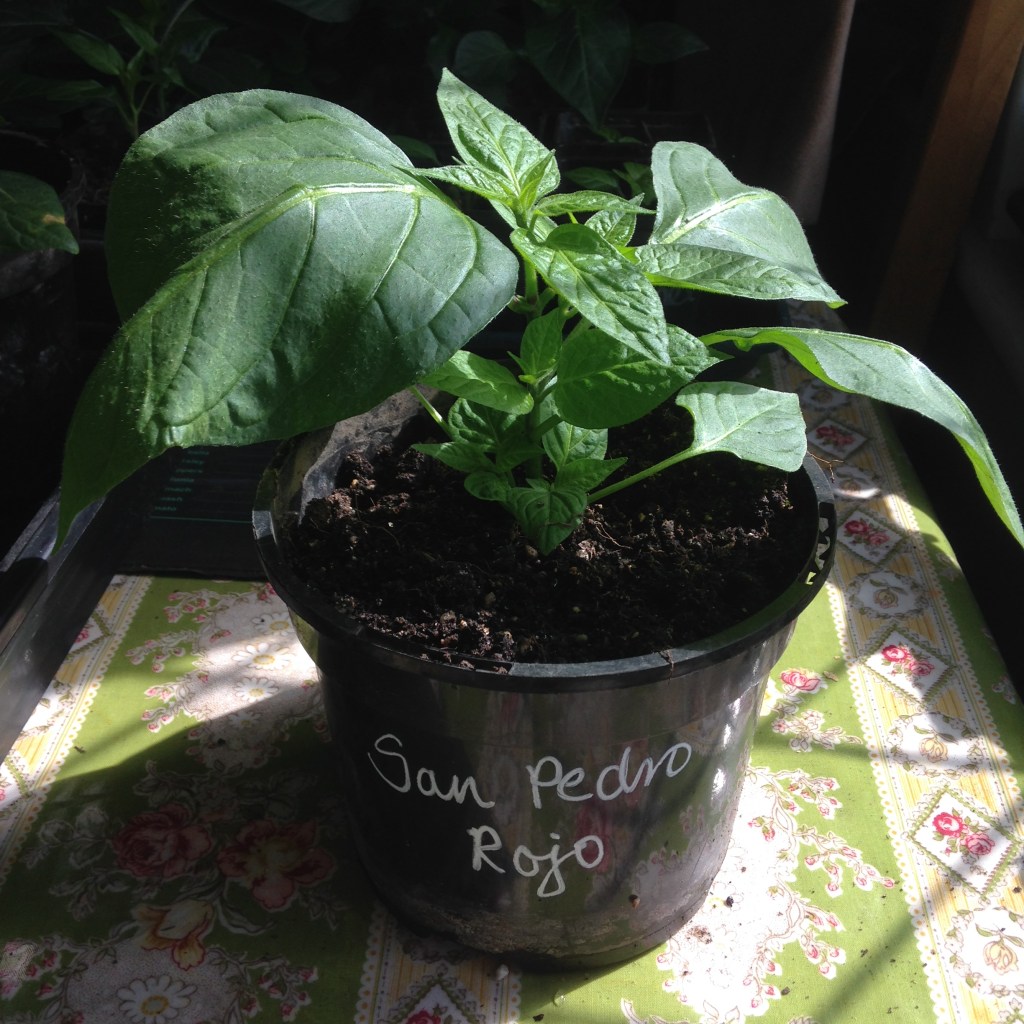
The more hardy chilli types…pubescens in our case, are sent off to the polytunnel as soon as outside night temperatures are hovering near to 10. We did this at the end of April in 2020.
Light a candle, place a terracotta pot on feet over the top. The terracotta absorbs and radiates the heat and keeps the temperature up far better than a naked flame. Safer too!
In May, there can sometimes be a cold snap, at a time when you least suspect it. Not great for an unheated polytunnel so we have a paraffin heater and candles under terracotta pots to keep the cold at bay. These strategies have meant that our brave San Pedro Rojos and Turbo Pubes have recently survived a week of zero nights in the tunnel. Huzzah!
Just look at the pubescens now
As Summer approaches, our priority moves towards cooling down, not heating up. A fan, ventilation through doors and windows and some shading will be options then. We generally leave the door wide open all Summer long. It still gets steamy in there but the air flow is better. This is our first Summer witha polytunnel but we fully expect to just roll up both doors and leave them there!
A la fin: As the evenings cool off we shut the greenhouse and polytunnel doors and only open up again during sunny days. Just long enough to keep those last few plants going to harvest their final fruit. Any plants still fruiting outside can be brought back inside to ripen off the last pods.
Humidity
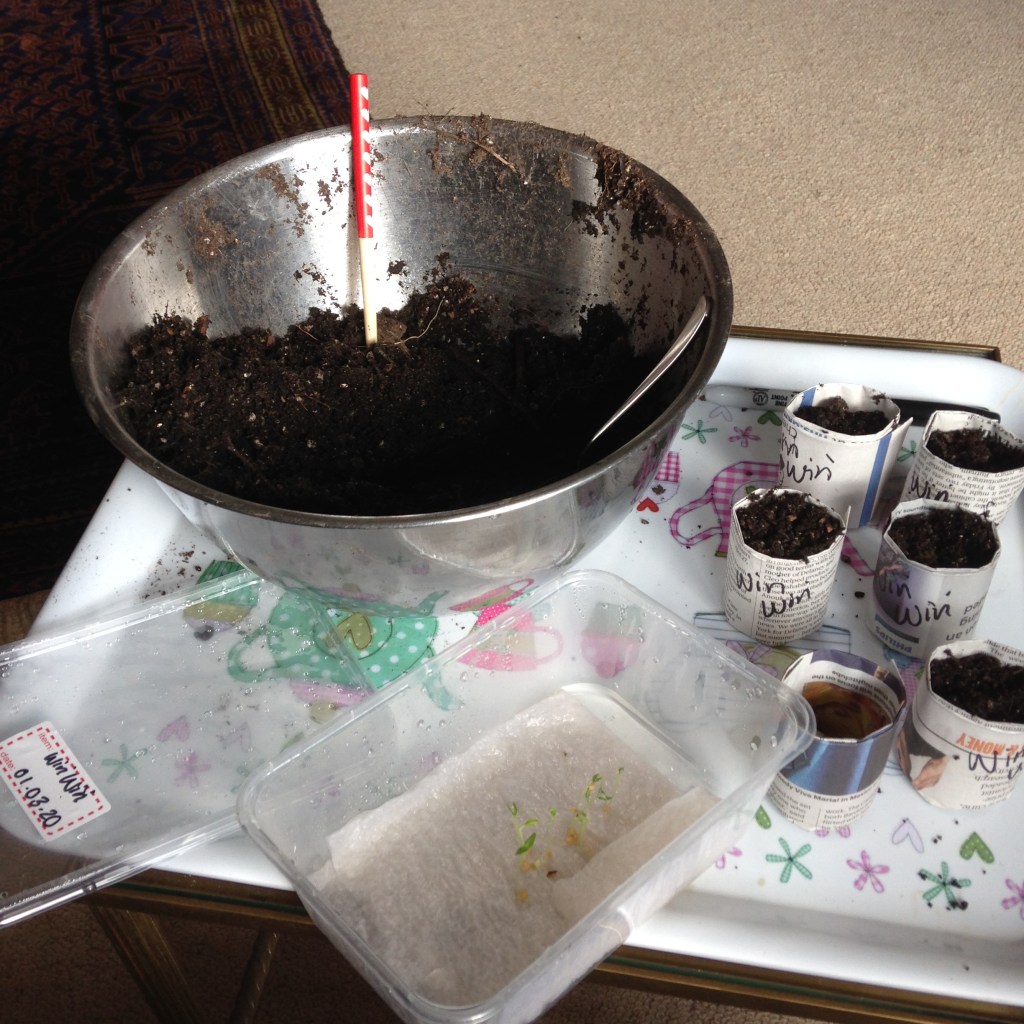
Initially in the house: When germinating our seeds we pay special attention to the humidity of their environment. We soak seeds to give them an initial hit of moisture. We lay them onto an almost dripping paper towel inside a plastic takeaway container – no expense spared here! And spray. We click down three of the four corners down. This keeps the moisture in and around the seed but gives a little air flow. We regularly spray as the water evaporates.
Tea soaked seeds in almost selaed takeaway box
Emergent seedlings need to be kept moist
Pot on once seedlings have good green leaves
Spray to keep seedlings moist under the drying grow light
As the seedlings mature, they are placed into paper pots of warmed, damp soil. They are watered from the base and misted if need be. The grow light and fan can be drying so we have spray bottles at the ready. Seedlings can rapidly deteriorate when dehydrated and many never recover. Keep it moist!
Chinense varieties do like humidity a little higher whereas the other are fine at moderate levels. Indoors, a regular misting will allow you to tailor humidity to each plant.
Humidity for older plants: Once the plants are in the greenhouse and they are watered from the base and the humidity levels are high during the day. Perfect for the Chinenses. The polytunnel gets a real humidity hit early morning as that is when the sun is first on it. We open the doors up mid morning to get air flowing through. Better for the Baccatums.
Outdoors, the wind and the sun can really dry chilli plants out. A good drink in the morning will help plants stay hydrated all day. Annuums will be fine in this environment. Pubescens have hairy leaves to collect their very own ‘cloud’ around their leaves. Humidity sorted.
Nutrition and pH.
At each stage of growth the nutrition levels need to be right for the plant. Growing in any sort of container means essential nutrients have to be added by you. They won’t appear magically.
In containers: Too much feed can be detrimental so don’t think more is better. Minerals can build up in soil and cause all sorts of trouble. Follow the instructions on the back of the bottle and make sure you give the plants plenty of water in between feeds. If in doubt, give less. Don’t forget to consider the existing nutritional value the soil you are using. Homemade compost and shop bought multipurpose can be surprisingly rich. Check the pH of your growing medium. An optimal range would be 6.0-6.8. Slightly acidic.
Open Ground: If you are planting out into your garden, or even into open beds within a greenhouse or polytunnel it is wise to prepare the ground with a basic feed first and then top up as is needed. We like to add Birdhouse compost to ‘feed’ the soil, a sprinkle of blood, fish and bone mix. And, this year, a banana compost, hopefully to support good strong, drought resistant plants. Our local soil is chalky, well above pH 7.0, often closer to 8.0. Far too alkaline for chillies really. This can be corrected with an addition of sulphur in early Spring. Then we use Chilli Focus weekly to keep those chillies focussed!
Soil will need to be revitalised if you plant in the same place each year. A thick top mulch and a sprinkle of Sulphur dust in the Autumn will mean beds are ready for action the following Spring.
Support/Protection/Space
Each chilli plant will need to be given enough space to be its best self. This is actually one of our (many) chilli failings. Too many plants, crowded in together. We’re trying really hard this year to pot up into the biggest pots possible – incrementally of course. A larger pot footprint then gives each plant more breathing room to do its own thing. Already the size and balance of the plants looks far healthier this year.
Some plants really do require support: stakes, frames, string, wires, whatever. There is nothing more heart breaking than a full branch of chillies being snapped off. A cane in the right place at the right time will help plants stand up strong. This is particularly important for chillies planted in the ground with little else around them.
And then protection…depending on where you have chosen your chillies’ final growing place, you may need to fend off unwanted visitors (strong sunshine initially, wind, birds, greenfly, slugs & snails, weeds, diseases, pets, frost and children) This is especially true when planting outside.
In a greenhouse the greenfly is omnipresent…ready to pop out thrips at an alarming rate. It is up to you how you choose to deal with them. We are squishers here. Ladybird farmers too. And later in the season, we encourage as many hoverflies as possible. And if all that fails, a night or two out in the open for an infected plant will generally clear the greenfly off and stop other plants being infected. Other folk try neem, Bug Off and soapy water. Up to you but be warned. You will have a greenfly in a greenhouse. Fact.
And eventually, back to the original question of where we grow our chillies?
Given the UK climate, growing undercover gives an extended season. Warm and light seems just right. We like to grow in pots as Birdhouse soil is be predominantly chalk, with an extra sprinkle of flint. For more infomation about our potting soil mix check out our previous blog post:
Katsu curry: crazy Japanese, French, Indian hybrid of a dish. Panko coated, pan fried escallops of anything you could possibly imagine: beef, pork, chicken, Tofu, veggies, and in our case, cauliflower.
Smothered in a velvety blanket of sweet, savoury, spicy and creamy curry sauce. Think of curry sauce on chips…think of a creamy Korma…think of that classic school dinner curry from the 1980s: foods that comfort you to the core. This is that.
We happen to have made a vegan/gluten free version here but this can easily be vegetarian or include meat. The choice is for you to make, every time you make it. And make it you will, time and time again.
A whole host of store cupboard ingredients combine to make a fab weekday dinner, a Wagamama recreation or a starter for a datenight at home.
This is our version of a Japanese classic: Katsu curry:
For the Katsu:
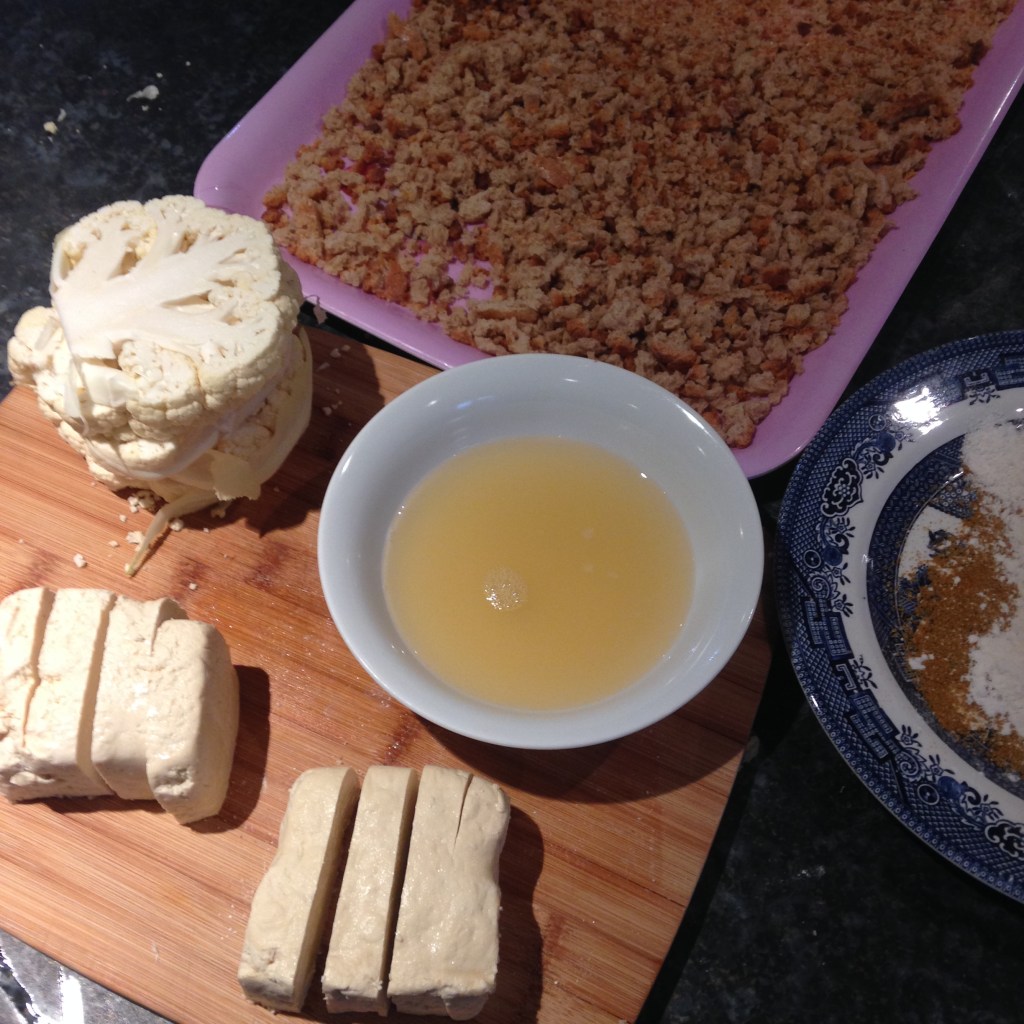
1 large cauliflower
Panko crumbs (we actually used leftover sourdough crumbs this time)
sunflower oil to fry
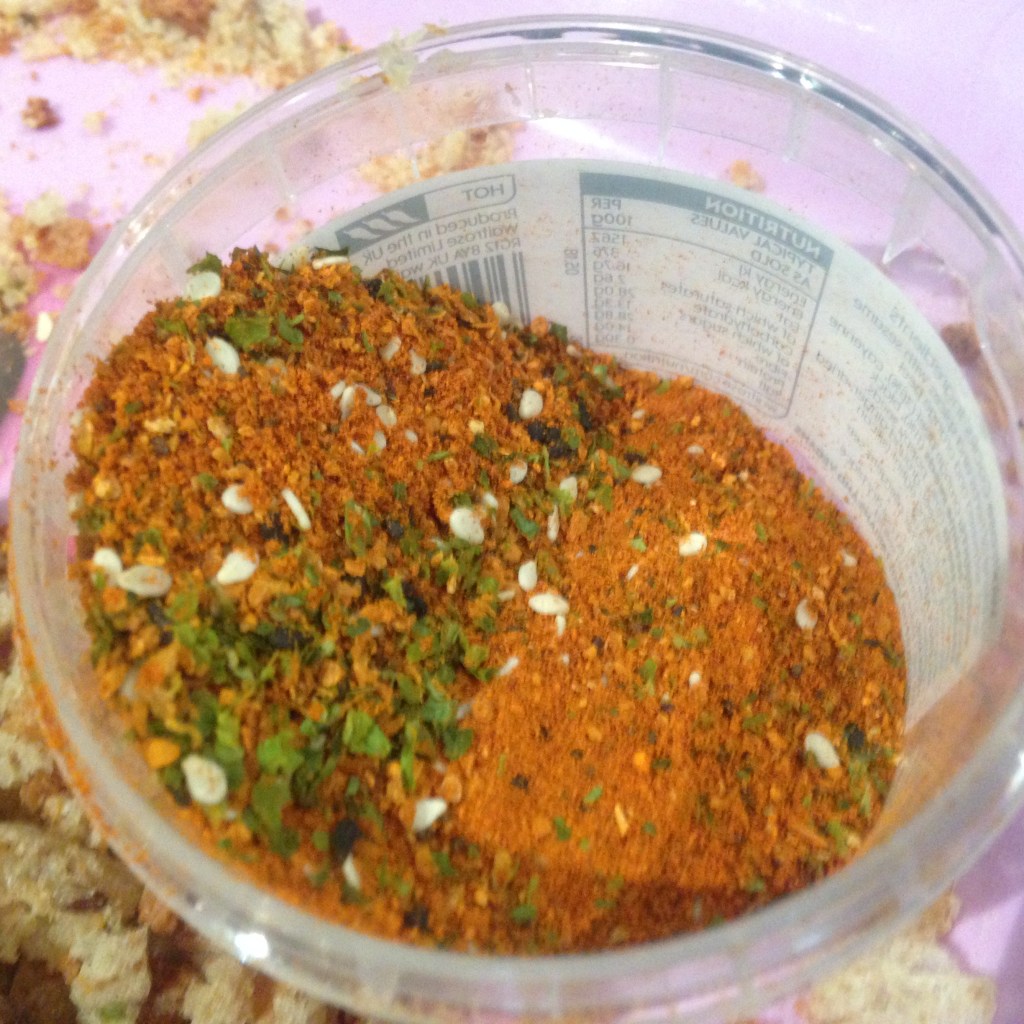
spice seasoning of your choice (we found a cute little pot of Schichimi Togarashi. A Japanese seven spice blend with seaweed, orange peel and sesame seeds)
Flour
Aquafaba (tinned chickpea water)
Collect your pané ingredients
Chunky slices of cauliflower
Spiced, seasoned flour mix
Coat each slice in flour
Dip in aquafaba
Add your spice mix to your breadcrumbs
Press the crumbs onto the cauliflower slices
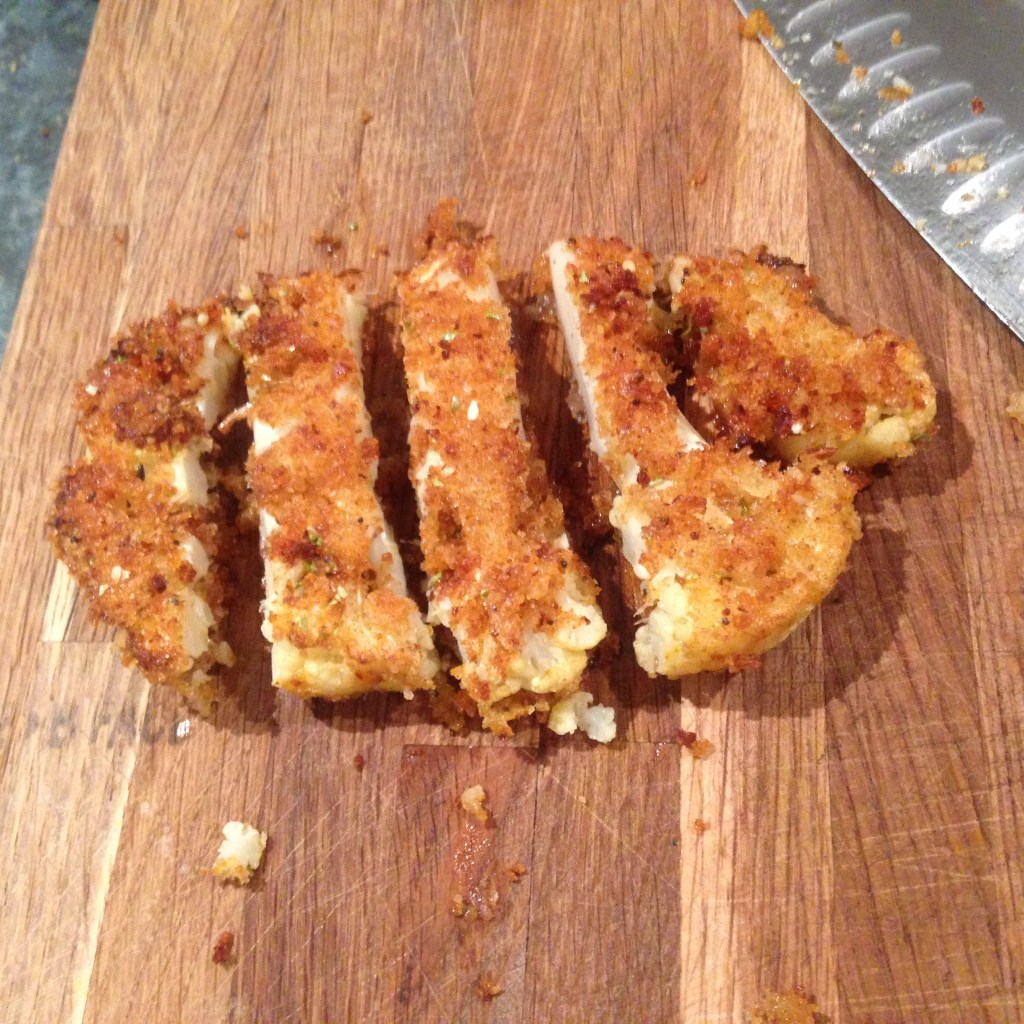
Shallow fry in sunflower oil
Slice katsu to serve
Making cauliflower katsu: try it with chicken, Tofu or slices of aubergine
We’ve used aquafaba instead of the classic egg in our pané process. (Told you it was a bit French). It’s worth mentioning that aquafaba is a little less sticky than egg but did tick a lot of boxes: used a ‘waste’ product; made the dish vegan, store cupboard ingredient, and, most importantly it did stick the crumbs onto the cauliflower. Egg replacer could also be used to help the coating stick.
Another point of note is that a cauliflower does not slice up with zero wastage. What do we do with the left over odd florets and leaves? Well, watch this space for Bang Bang Cauliflower and cauliflower leaf soup!
Now for the Curry sauce:
Hmm, now what on earth did we actually put in there? Copious internet research presents many many many recipes. So many. Our biggest inspirations were:
Essentially this is a French roux based sauce, but with coconut milk as the liquid and Indian curry powder to flavour. Made by the Japanese.
Core common ingredients are as follows:
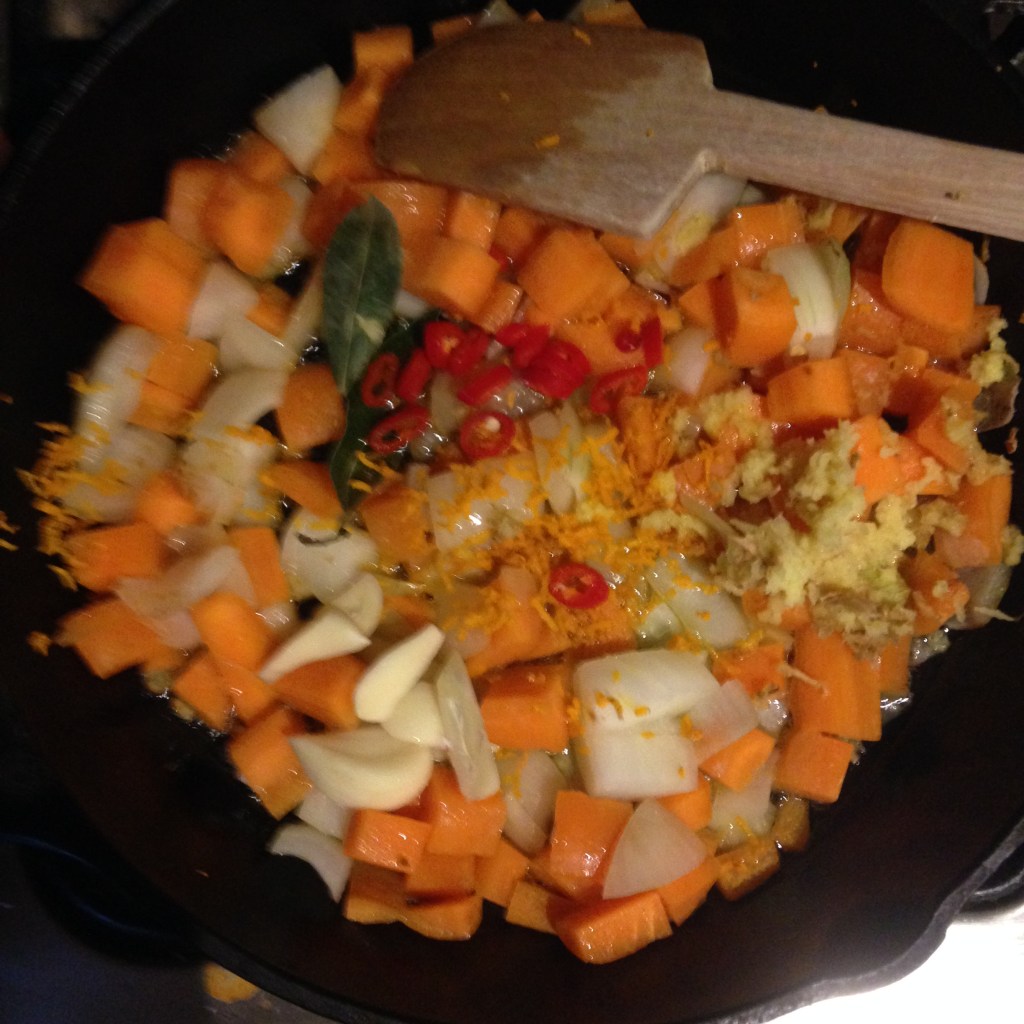
2 carrots
an onion
5 garlic cloves, roughly chopped
a thumb sized piece of ginger
turmeric (we used 2cm grated fresh but 1/2 tsp powdered would work)
flour (we used cornflour to keep this GF)
curry powder (pick a GF brand like Sharwoods)
500 ml veggie stock: homemade, cubes, low salt, GF, up to you
And further ingredients that we have selected to make our sauce our own:
1 can of coconut milk (we used light)
soy sauce to taste (use GF if you want) about 50mls
honey: to taste. About 2 tbsp
1 teaspoon of garam masala (beware gluten can lurk in spice blends)
2 fresh red chillies
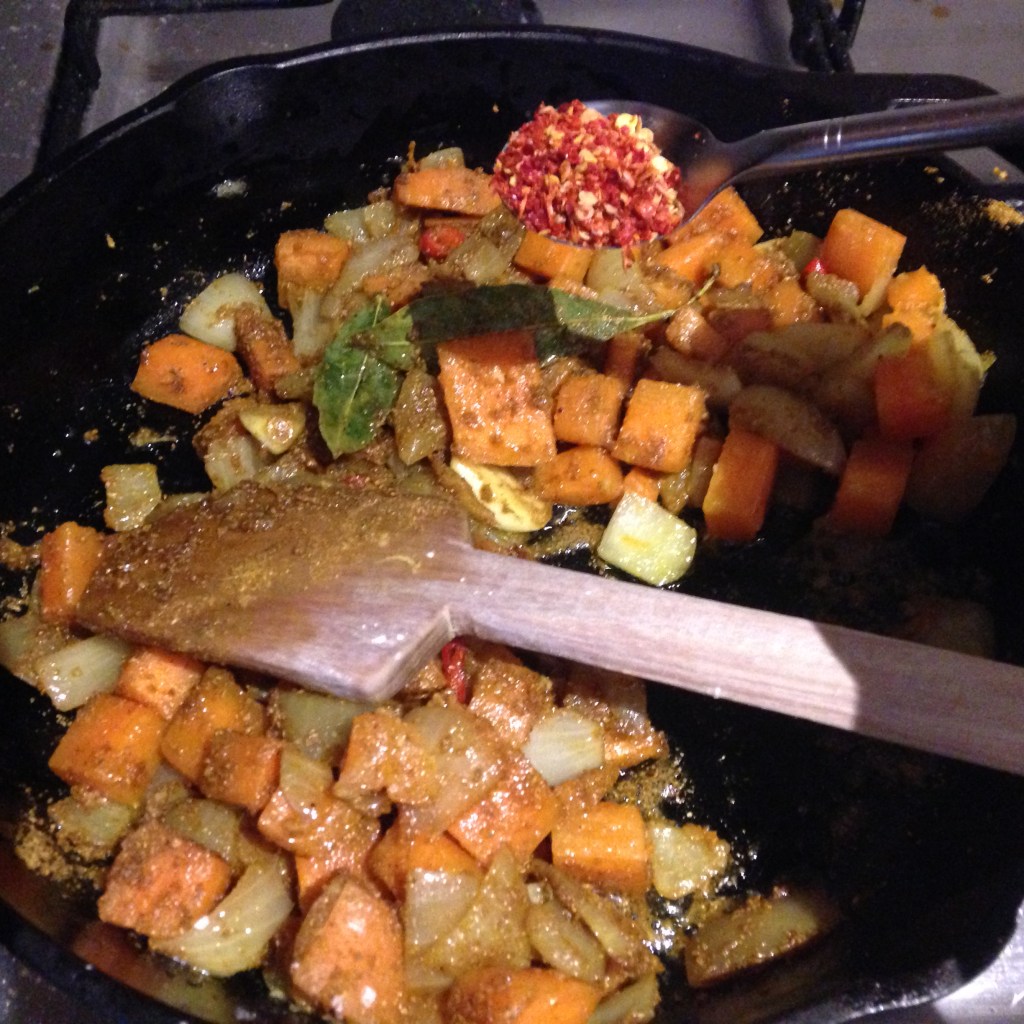
1 tsp your fave chilli flakes, not too hot
2 curry leaves
Saute veggies, ginger, garlic until they start to caramelise
Add spices, leaves & flour
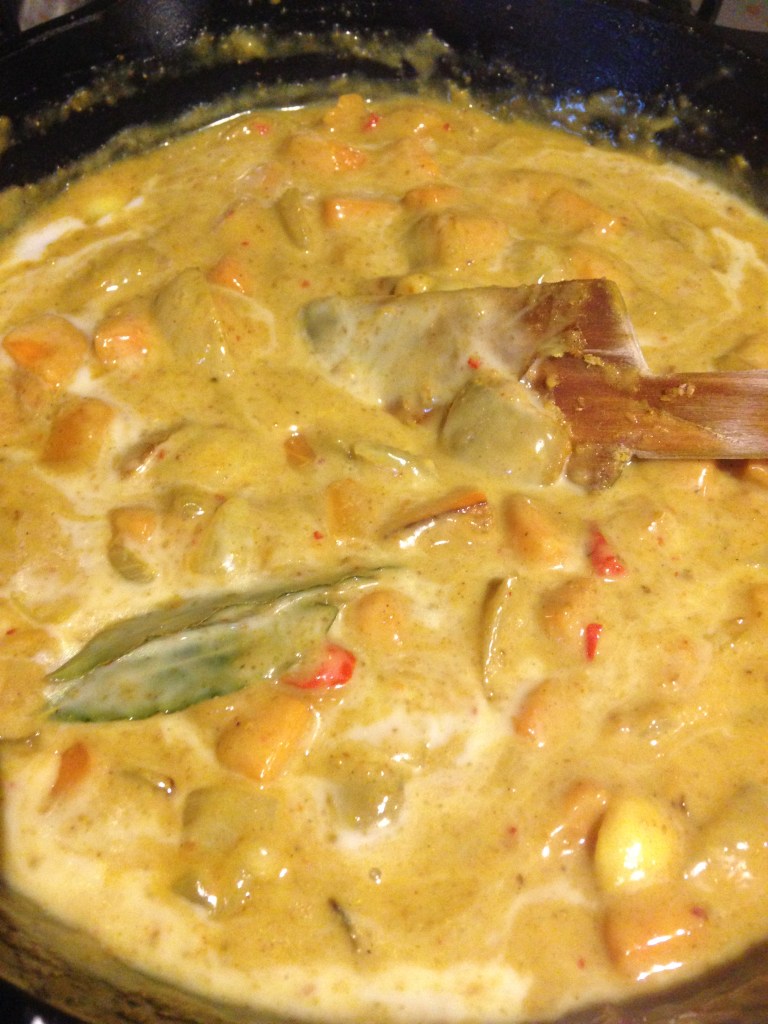
Add the coconut milk and stock gradually
Bubble the sauce until the veggies are soft and the spices cooked out. Remove curry leaves and blitz the whole dang thing.
Return to the pan and simmer, reduce until it is the thickness you like. It should coat the breaded katsu, not too thin. This is why we like to keep the veggies in the mix, rather than strain them out like some other recipes do.
Add honey and soy to adjust the seasoning to your liking.
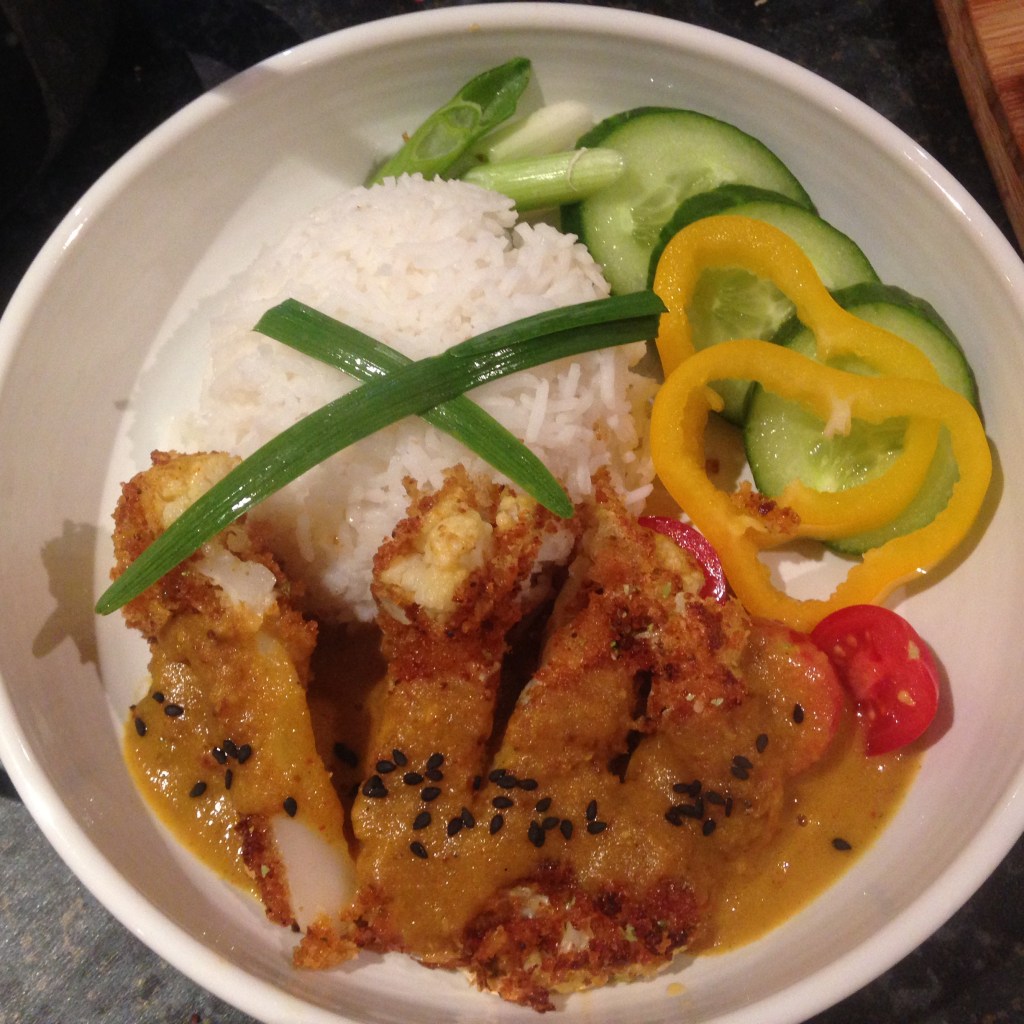
And there you have it, our Cauliflower Katsu Curry (Vegan and Gluten Free)
Serve with plain boiled sticky rice and a cheeky pickled salad.
We’re still in comfort food season in the UK. There may be sunshine during the day but the nights are cooler and a hearty dish is just the ticket. Meat doesn’t happen every day at The Birdhouse so when it does it is given careful consideration from beginning to end. An unexpected sunny evening has led us to cook outside. Everything is better outside, isnt it?
Meatballs are a family fave. Any style is good but, household heritage dictates that it is curried meatballs today. Lamb takes spices well and has the fat to avoid drying out too much. Let’s go make meatballs!
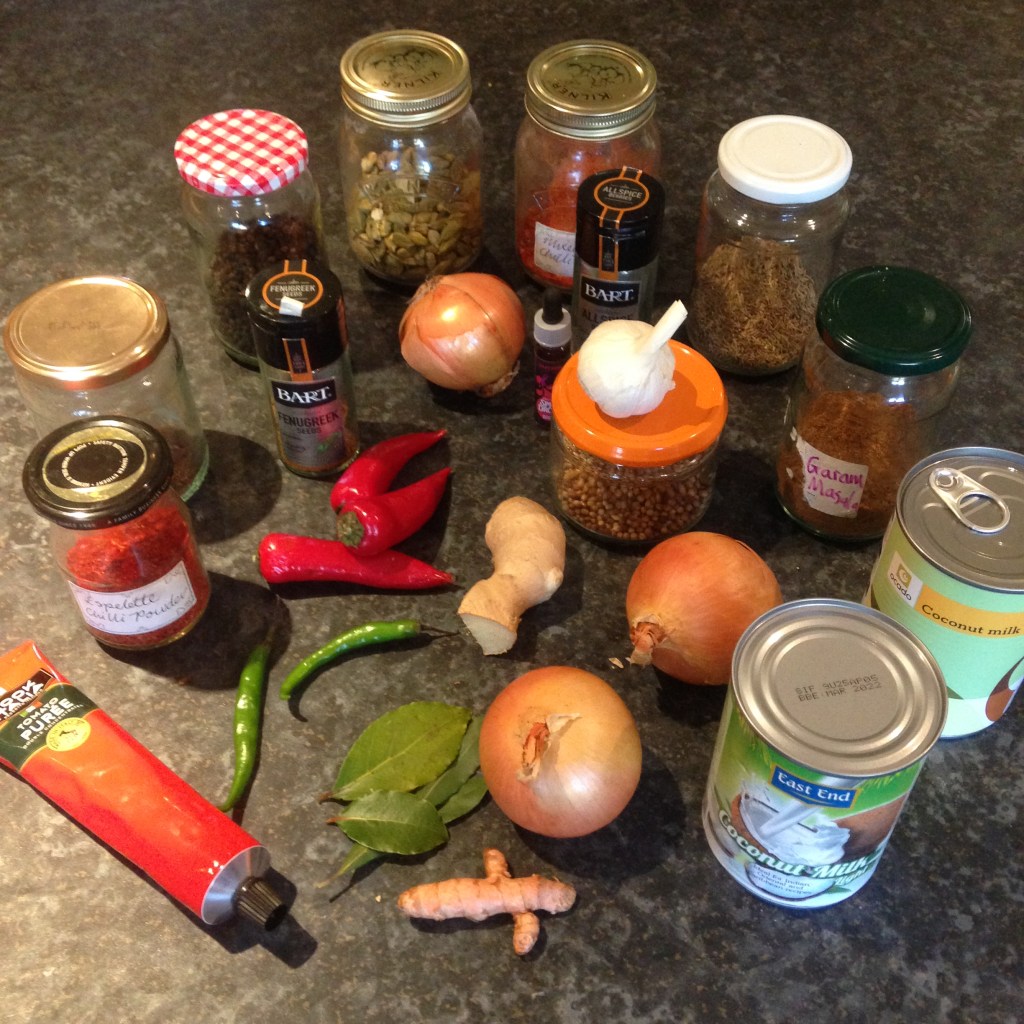
The more the merrier
You should be prepared for the vast quantity of ingredients we have used here. This is Pakistani Asian cooking. Every Pakistani household would have all of these ingredients to hand. If you don’t then perhaps buy a jar of sauce. Unapologetic.
The dish is our own Birdhouse recipe. Not necessarily unique but no recipe books were opened or packet mixes used. All ingredients were carefully chosen, as basic as possible and blended by us for our own tastes. No hacks here. All quantities can be adjusted to suit your good selves. We are just a guide.
We have a wonderful local butcher: Kevin. He will supply all sorts of meaty goodies at the drop of a hat. He has minced a kilo of lamb shoulder for us. This will easily feed our family of six and maybe we’ll use any leftover sauce to turn into a ‘slightly’ more veggie meal next week (add a can of chickpeas, fry off some paneer, slice in tofu, a bag of spinach…your choice).
Here we go:
For the meatballs:
1kg lamb mince
2 green finger chillies, finely chopped (check they’re good and hot)
10 cardamom pods (yes, really ten)
3 allspice berries
3 cloves
3 cloves of garlic, crushed
a small handful of coriander seeds
a tablespoon of black peppercorns
half a cup of fried onions. These can be fried by hand or, bought pre-fried.
teaspoon of salt
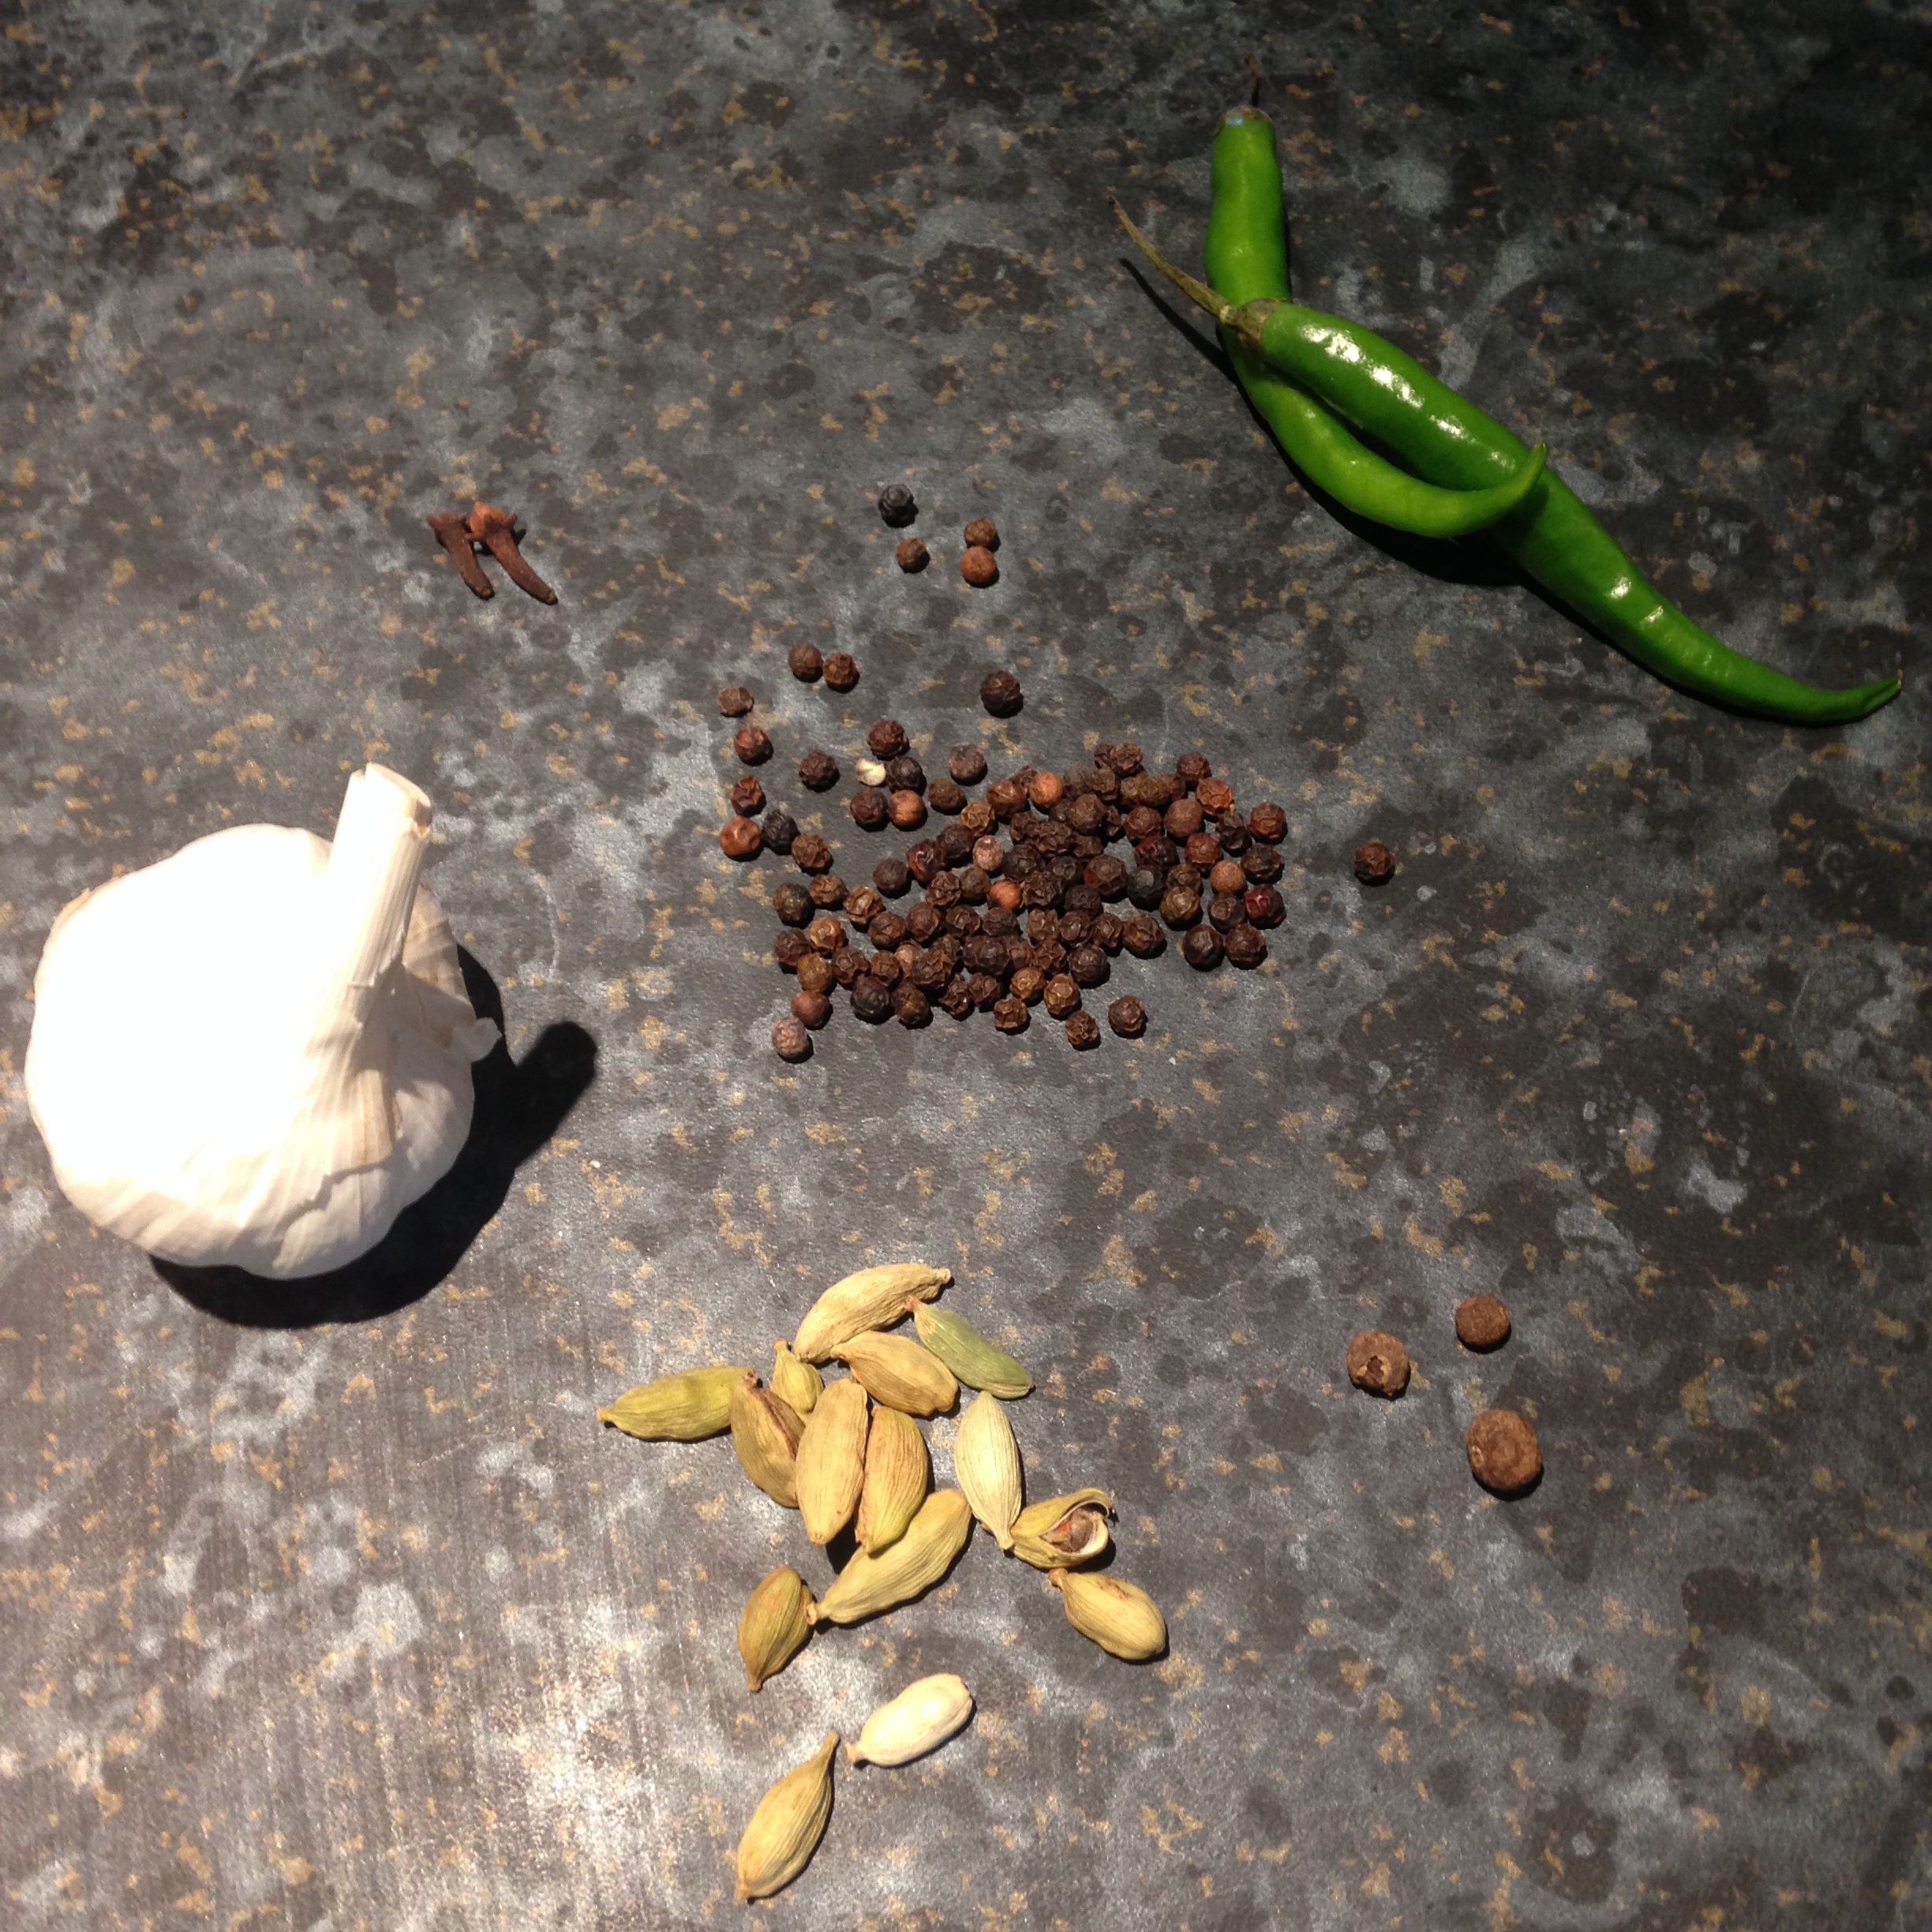
The meatballs are flavoured with highly aromatic spices. This is not a dish for the fainthearted.
Spices for lamb meatballs
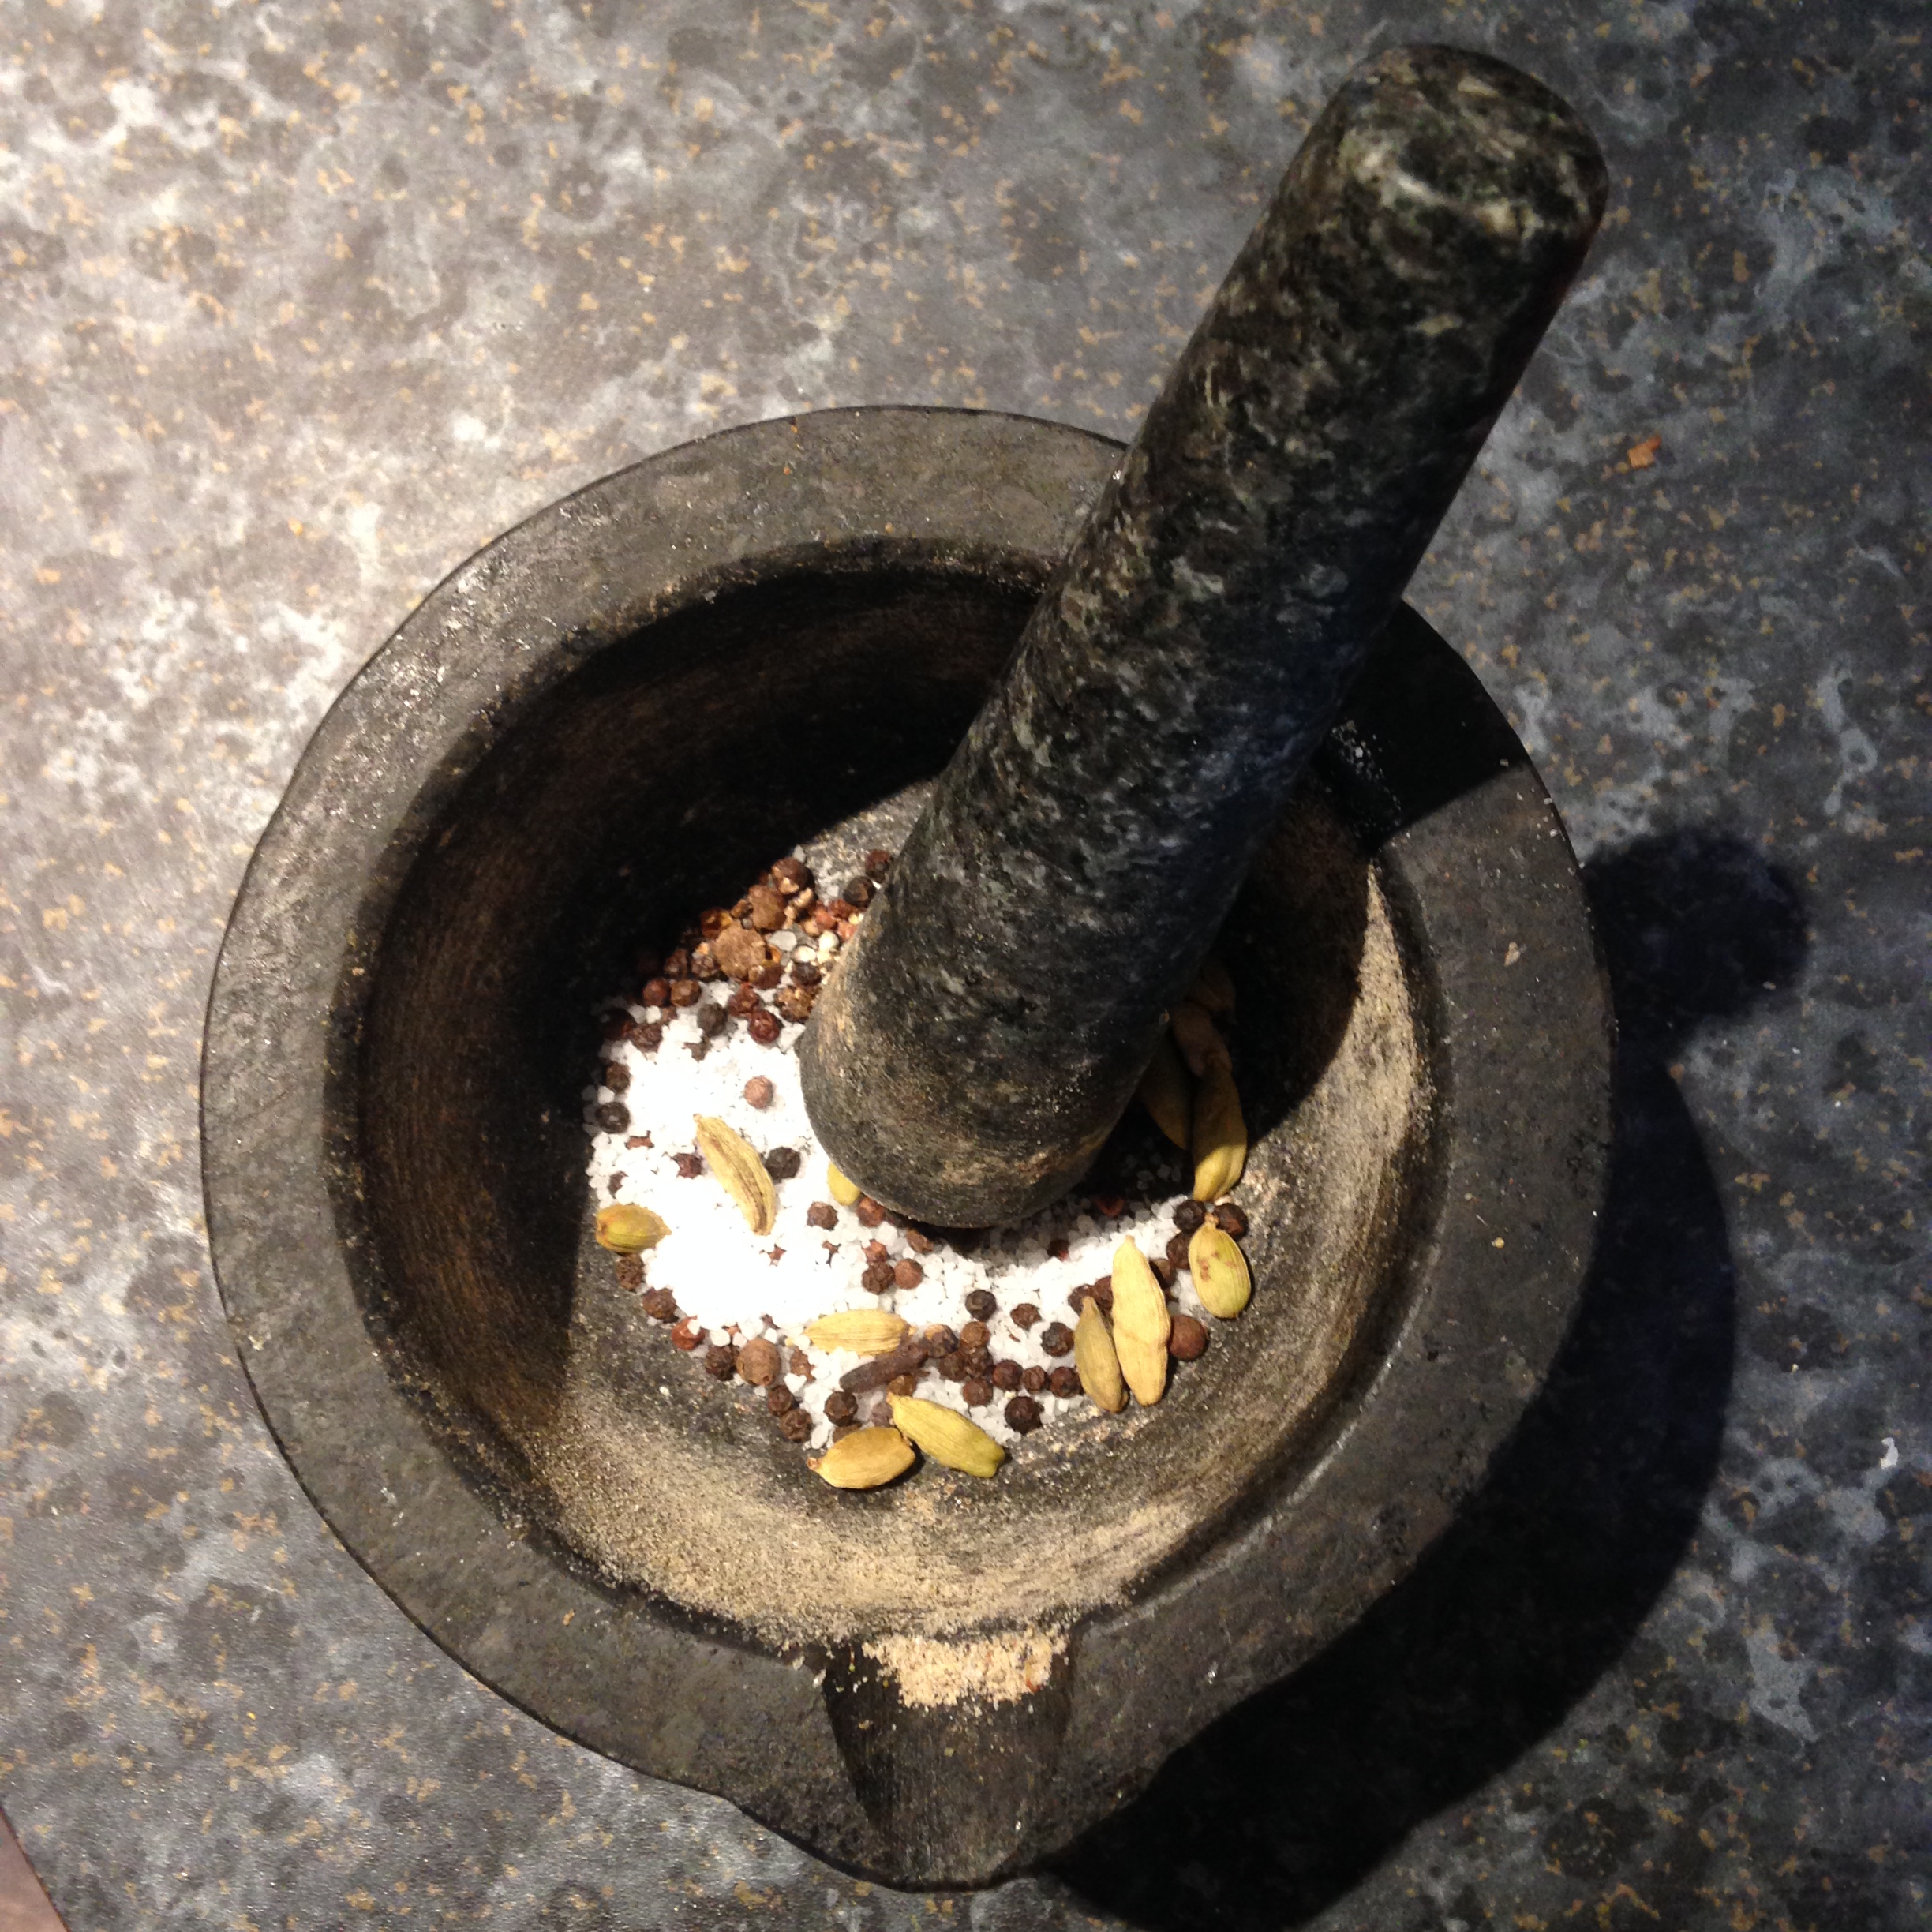
Cardamom, black peppercorns, allspice & clove ground up with salt
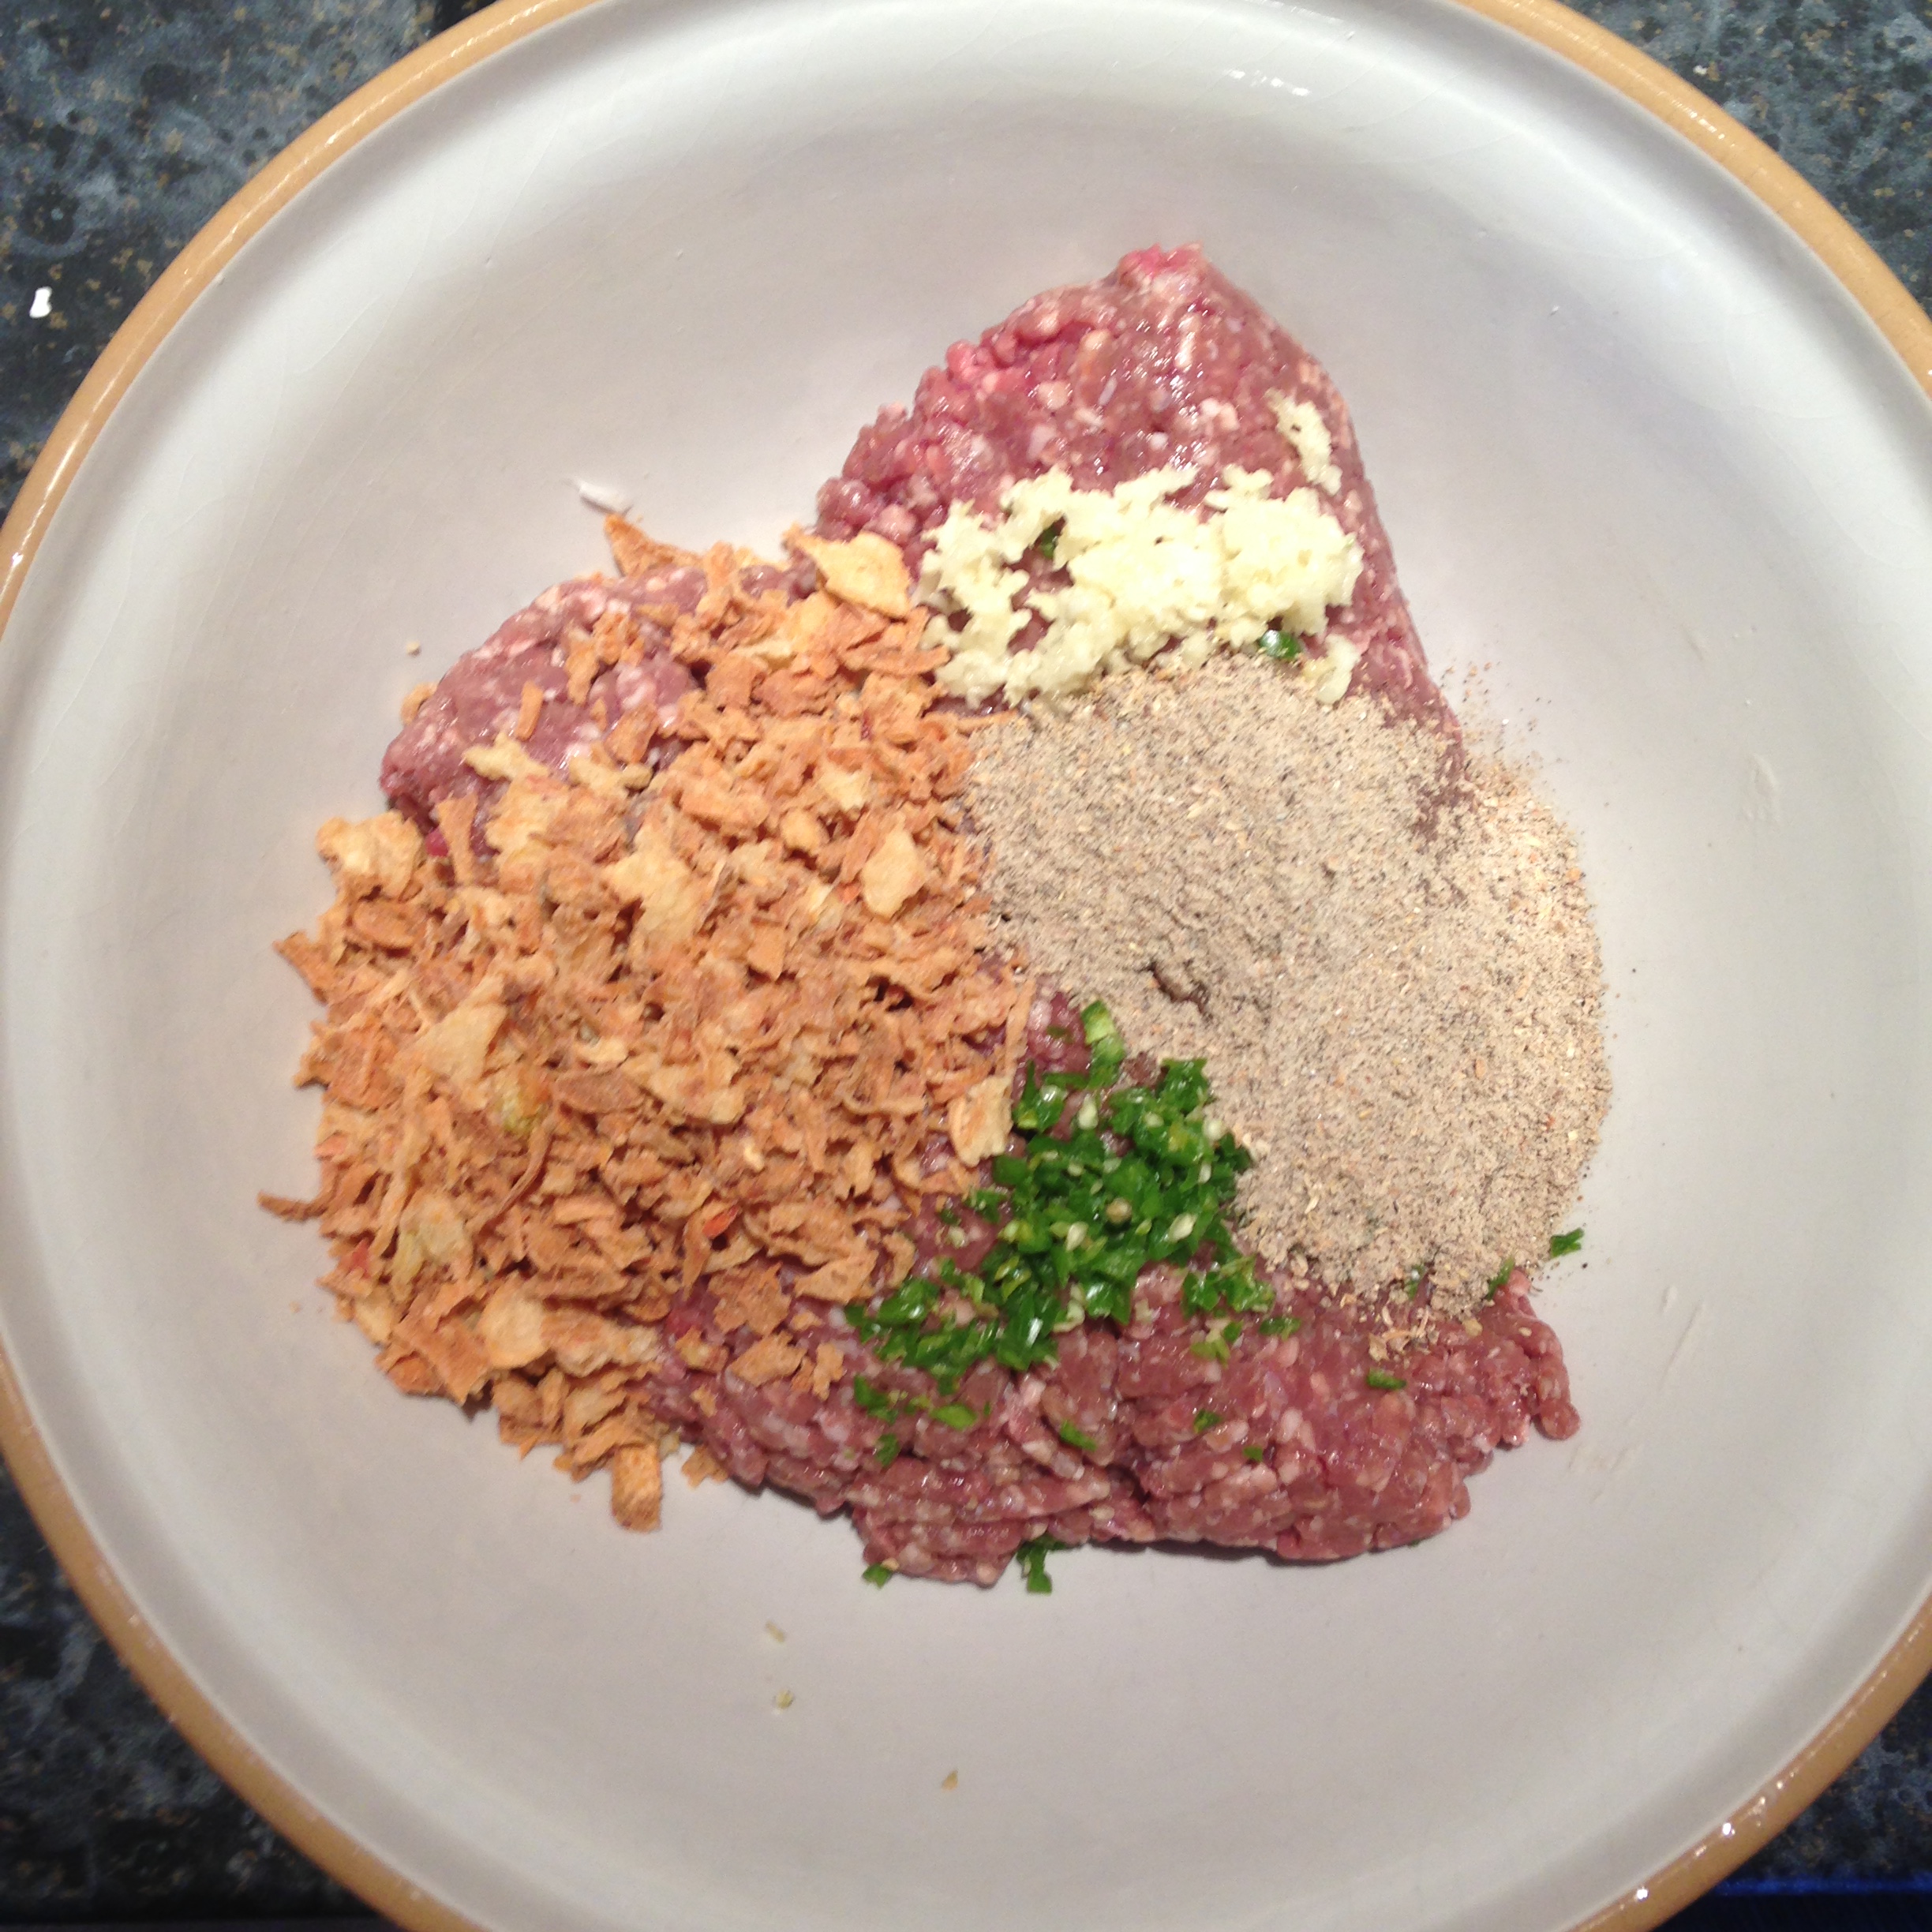
1kg lamb mince
Add fresh green chilli, fried onions, crushed garlic and spice mix
Roll to walnut sized meatballs
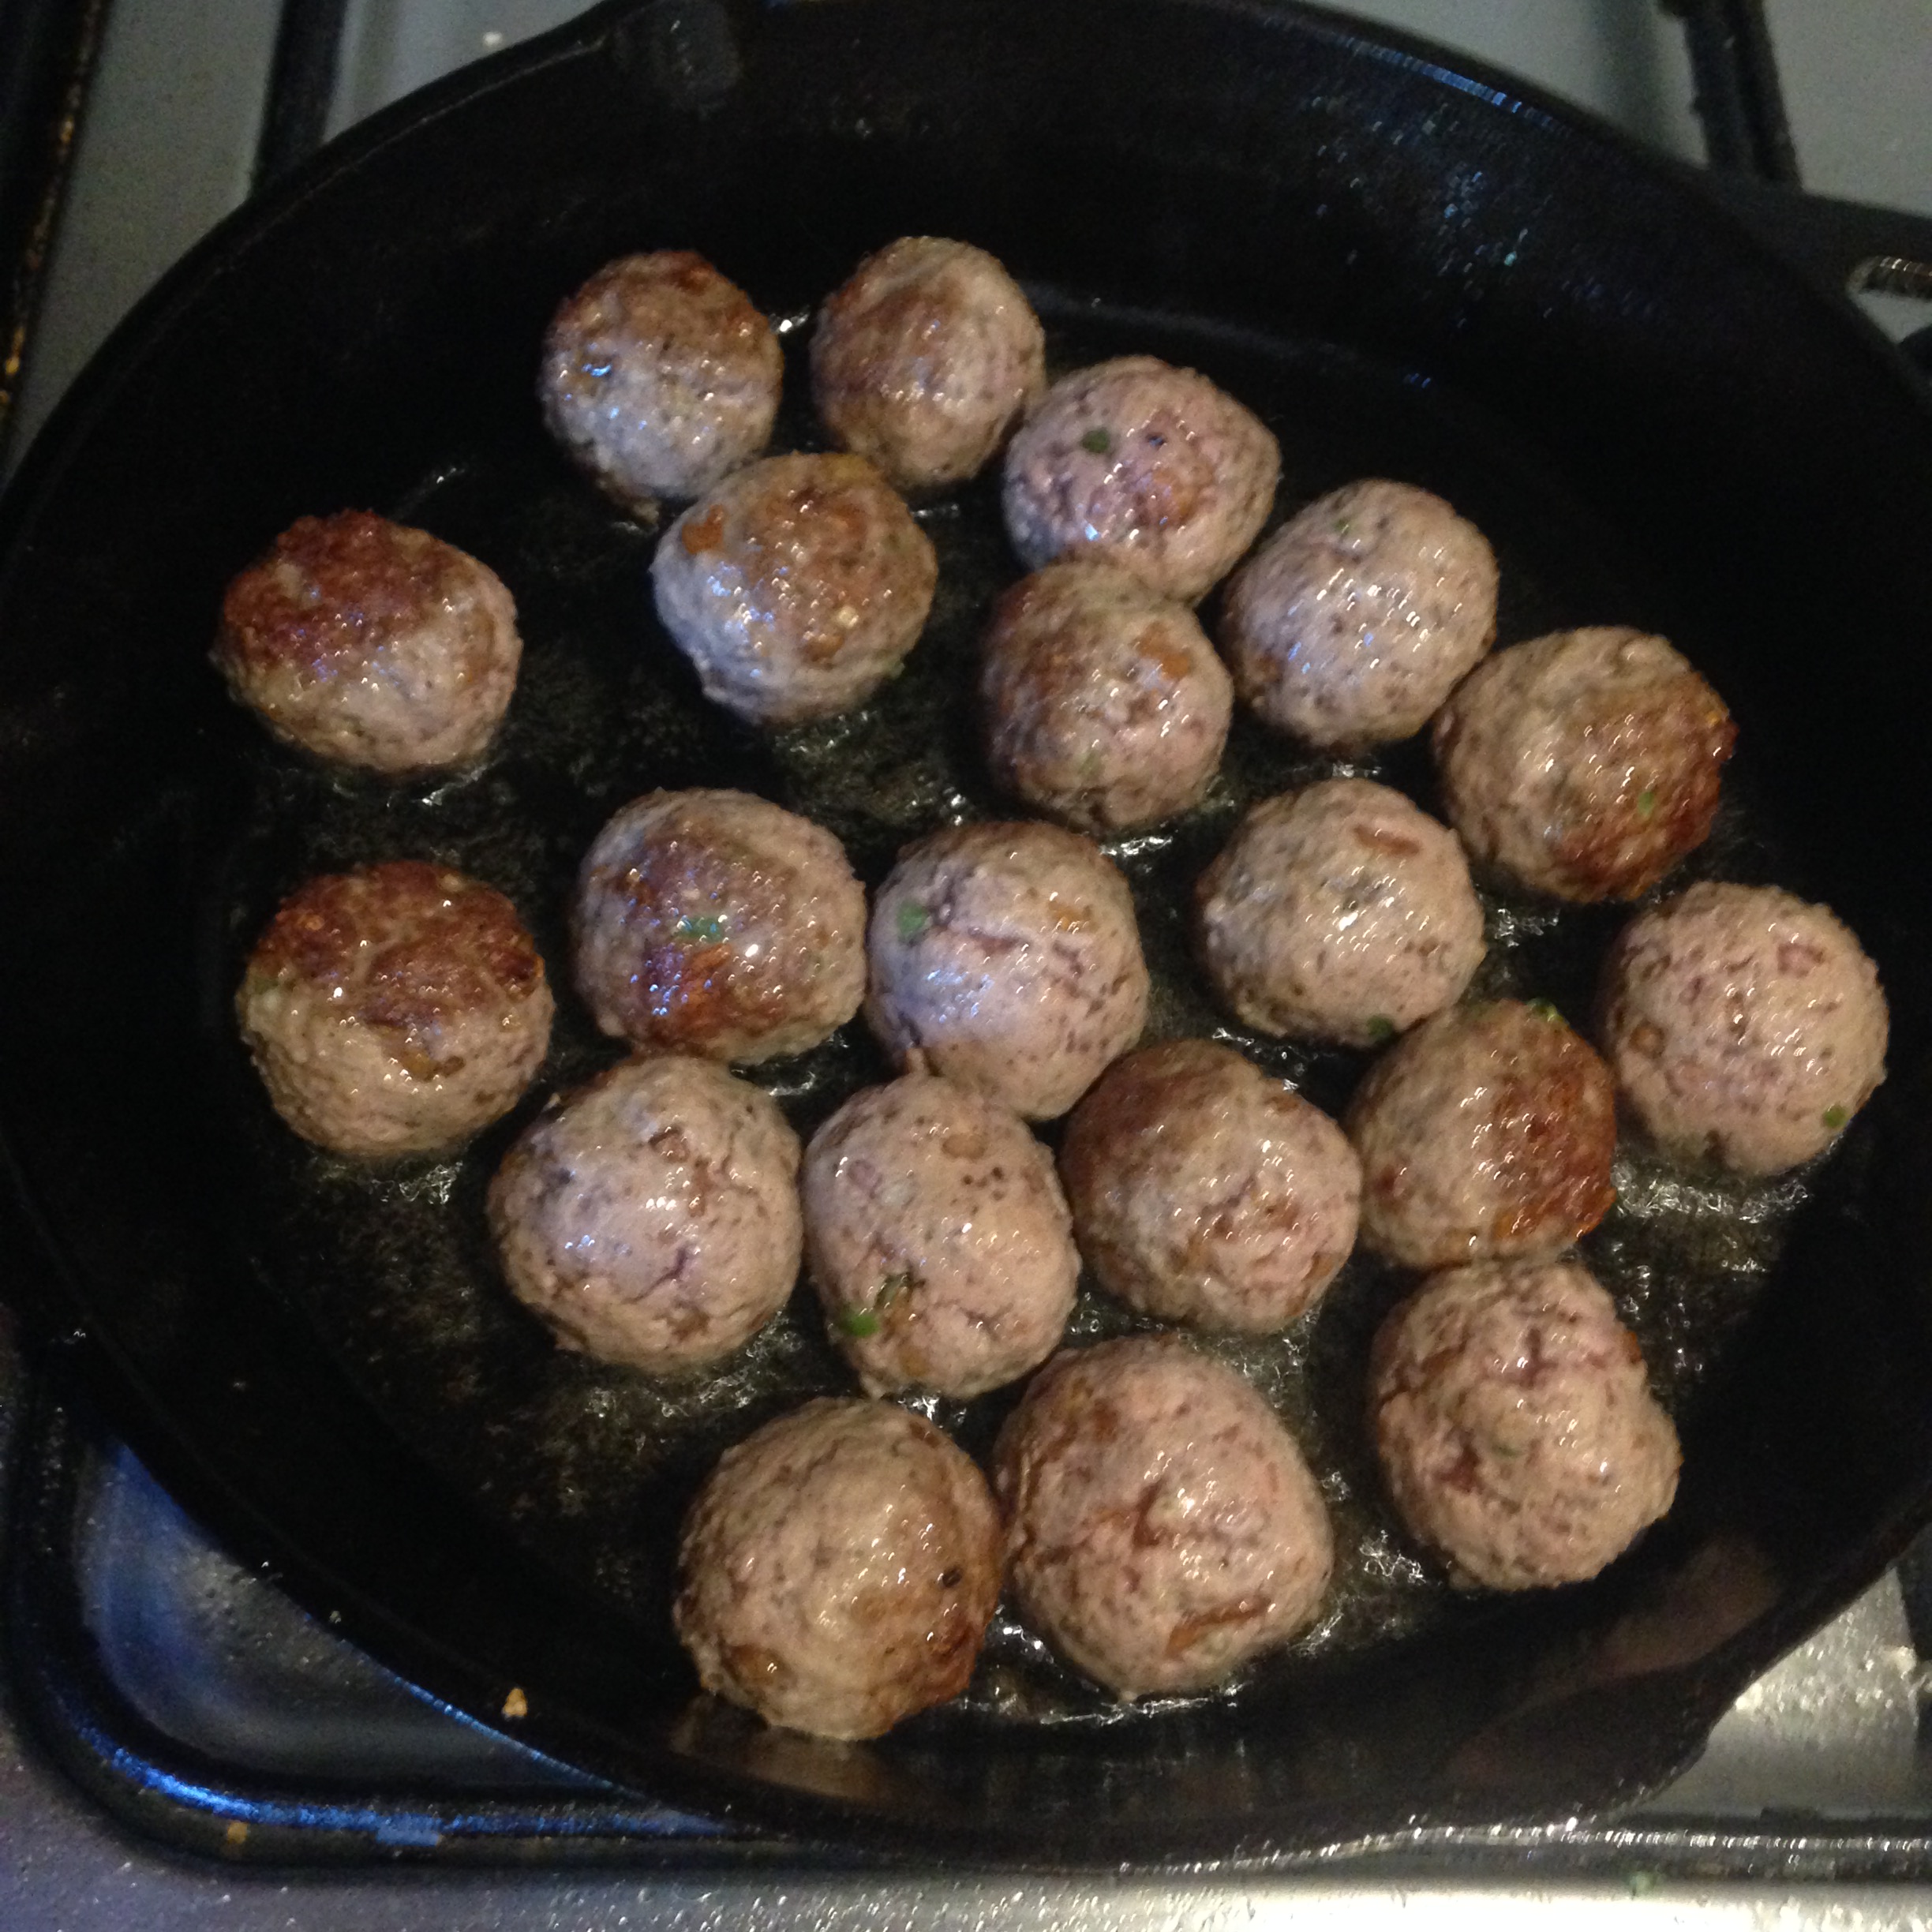
FRY
Spicy lamb meatballs
Grind up the spices with the salt, add to the mince, along with the garlic, green chilli and the fried onions. Smoosh the mince together and shape into walnut sized meatballs. Fry until golden brown.
It’s always worth doing a little taste test by frying a mini patty. This will give you a chance to taste the seasoning and heat levels before frying the whole batch of meatballs. And gives you an excuse to eat the meatballs before anyone else!
For the Sauce:
Whole spices: 3 bay leaves, 2 black cardamom pods, 4 green cardamom pods, 1 cinnamon stick
3 onions, sliced
2 red chillies, mild. Our’s come from Watt’s Farm, via Ocado. Seeds and all.
Tomato paste
Ginger root
Fresh turmeric
1 tablespoon fenugreek seeds
2 tablespoons corainder seeds
1 tablespoon black peppercorns
3 allspice berries
3 tablespoons garam masala
Chilli flakes/powder to taste. We used our Birdhouse blend from 2019.
2 cans coconut milk
4 hardboiled eggs (honestly, don’t knock it until you’ve tried it)
Grind the spices with salt
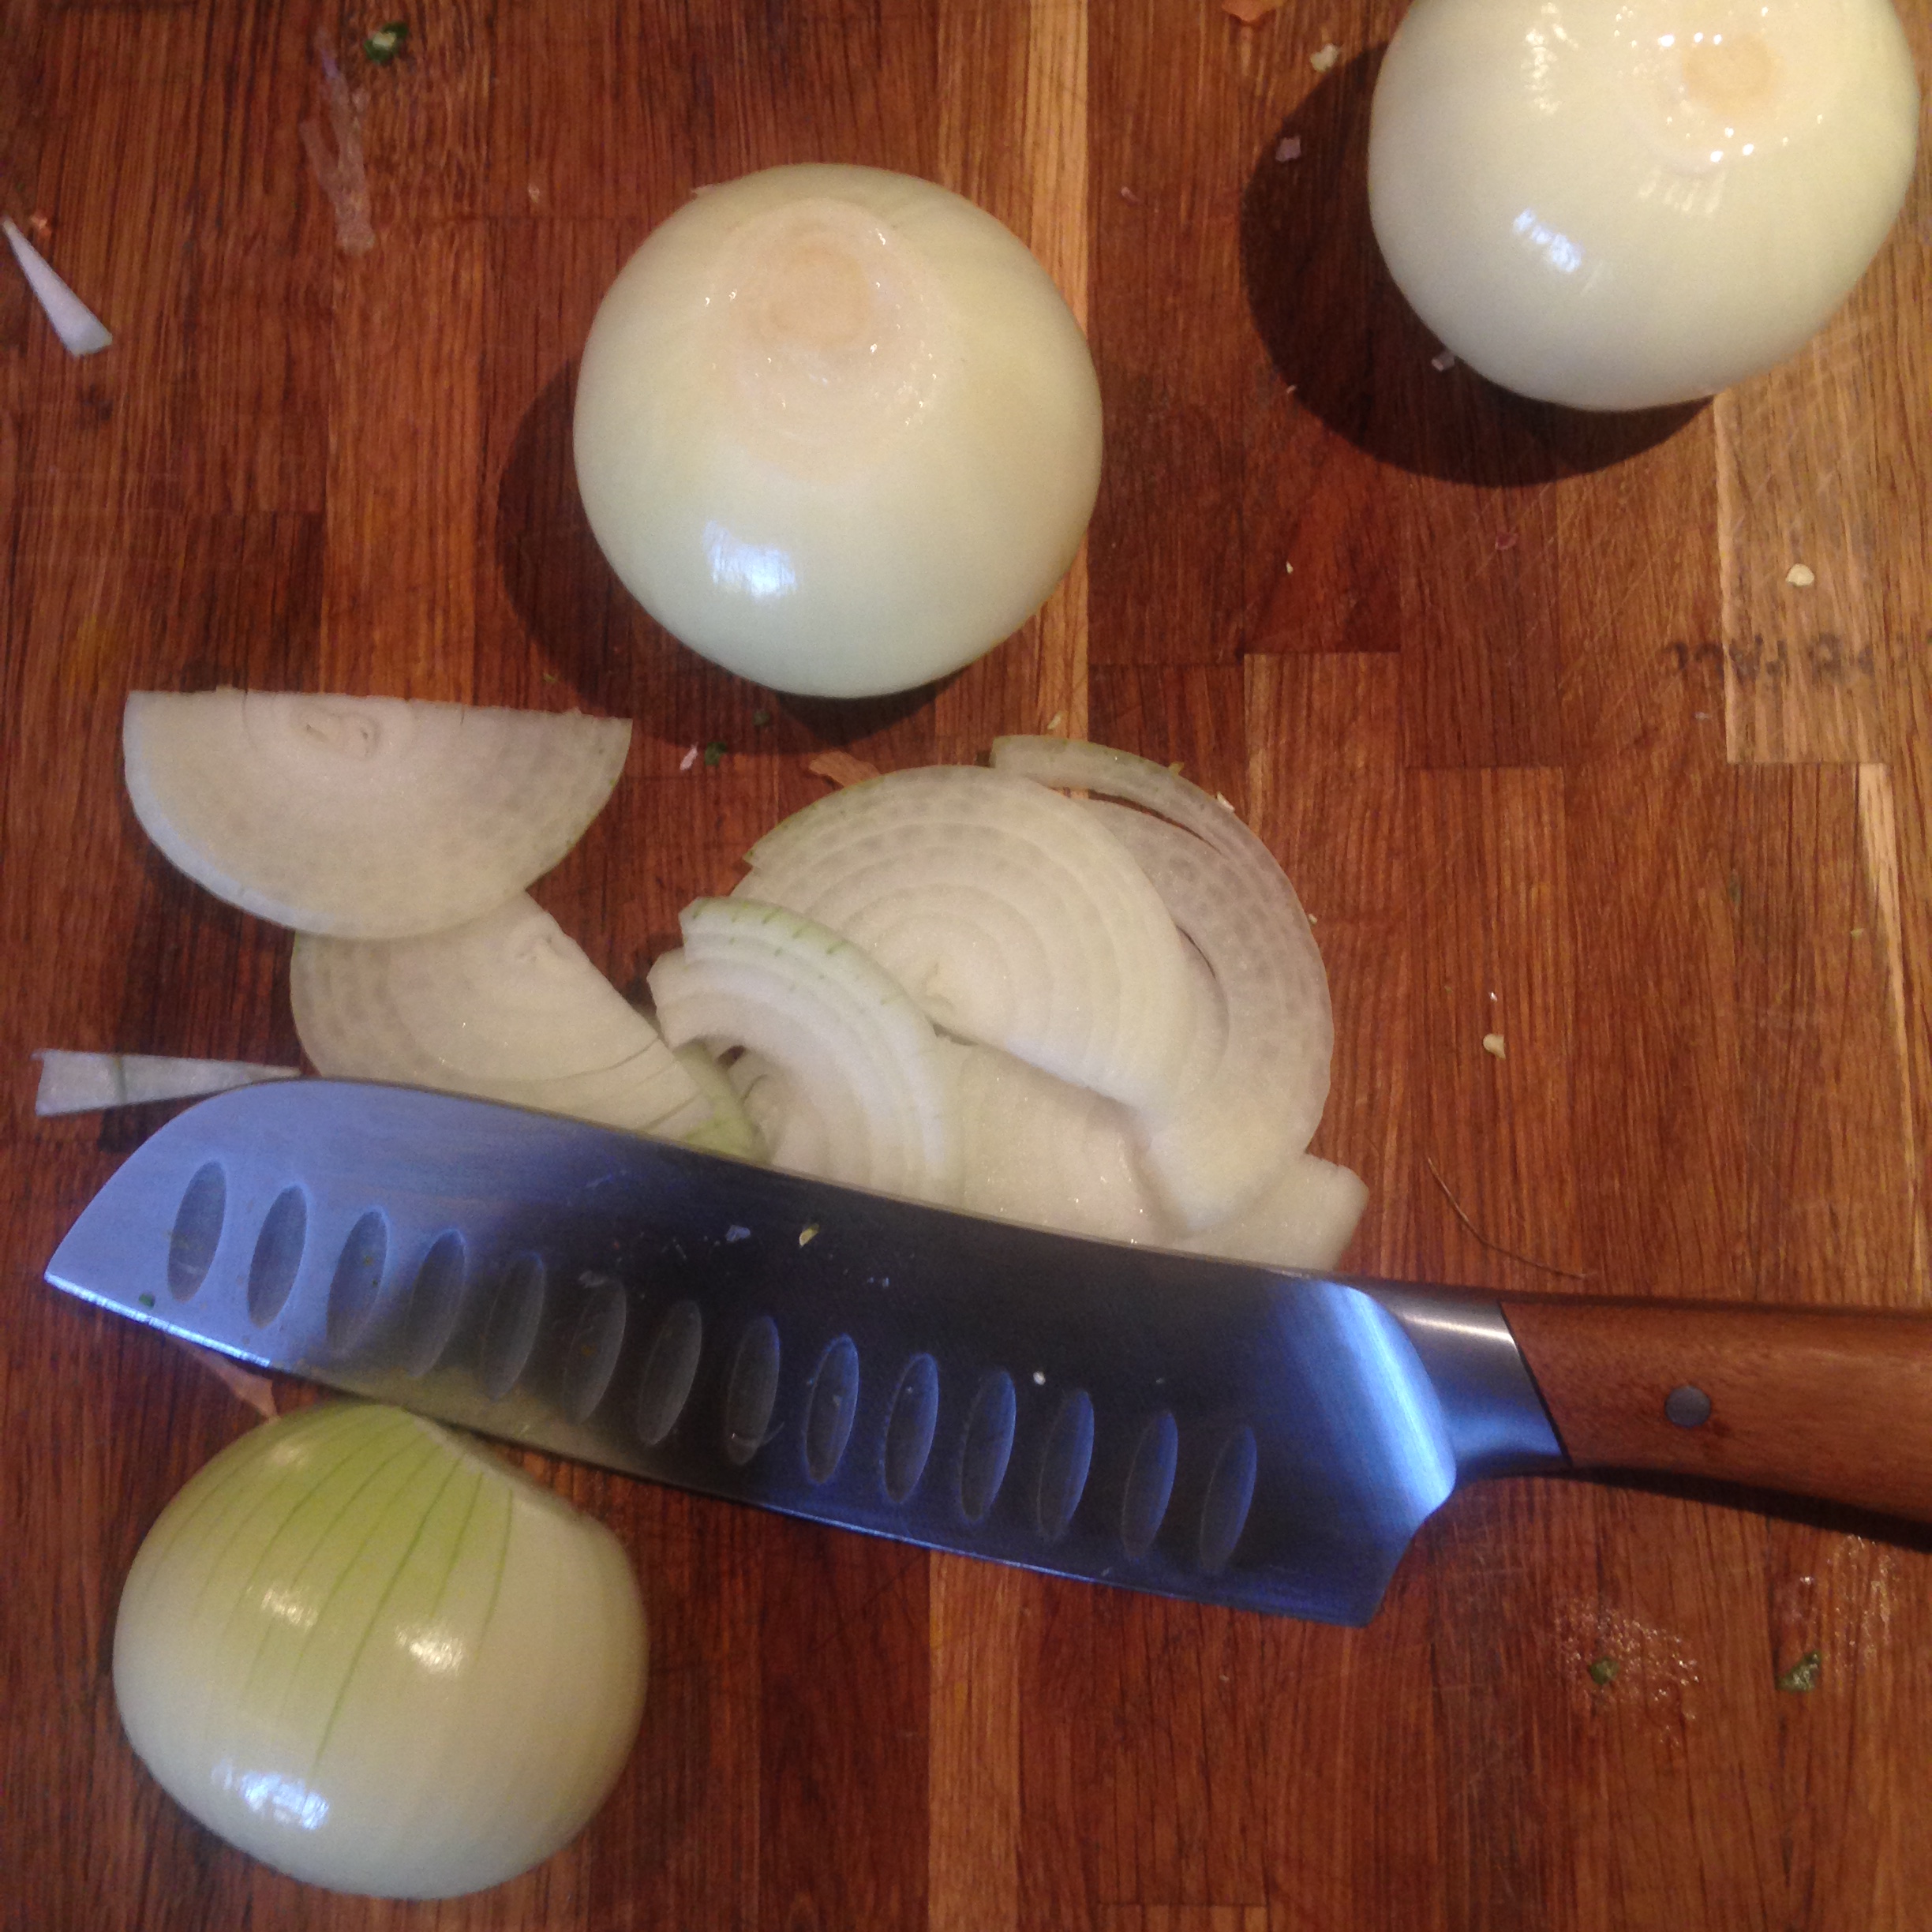
Finely slice onions
Garlic, ginger, red chillies and tomato paste
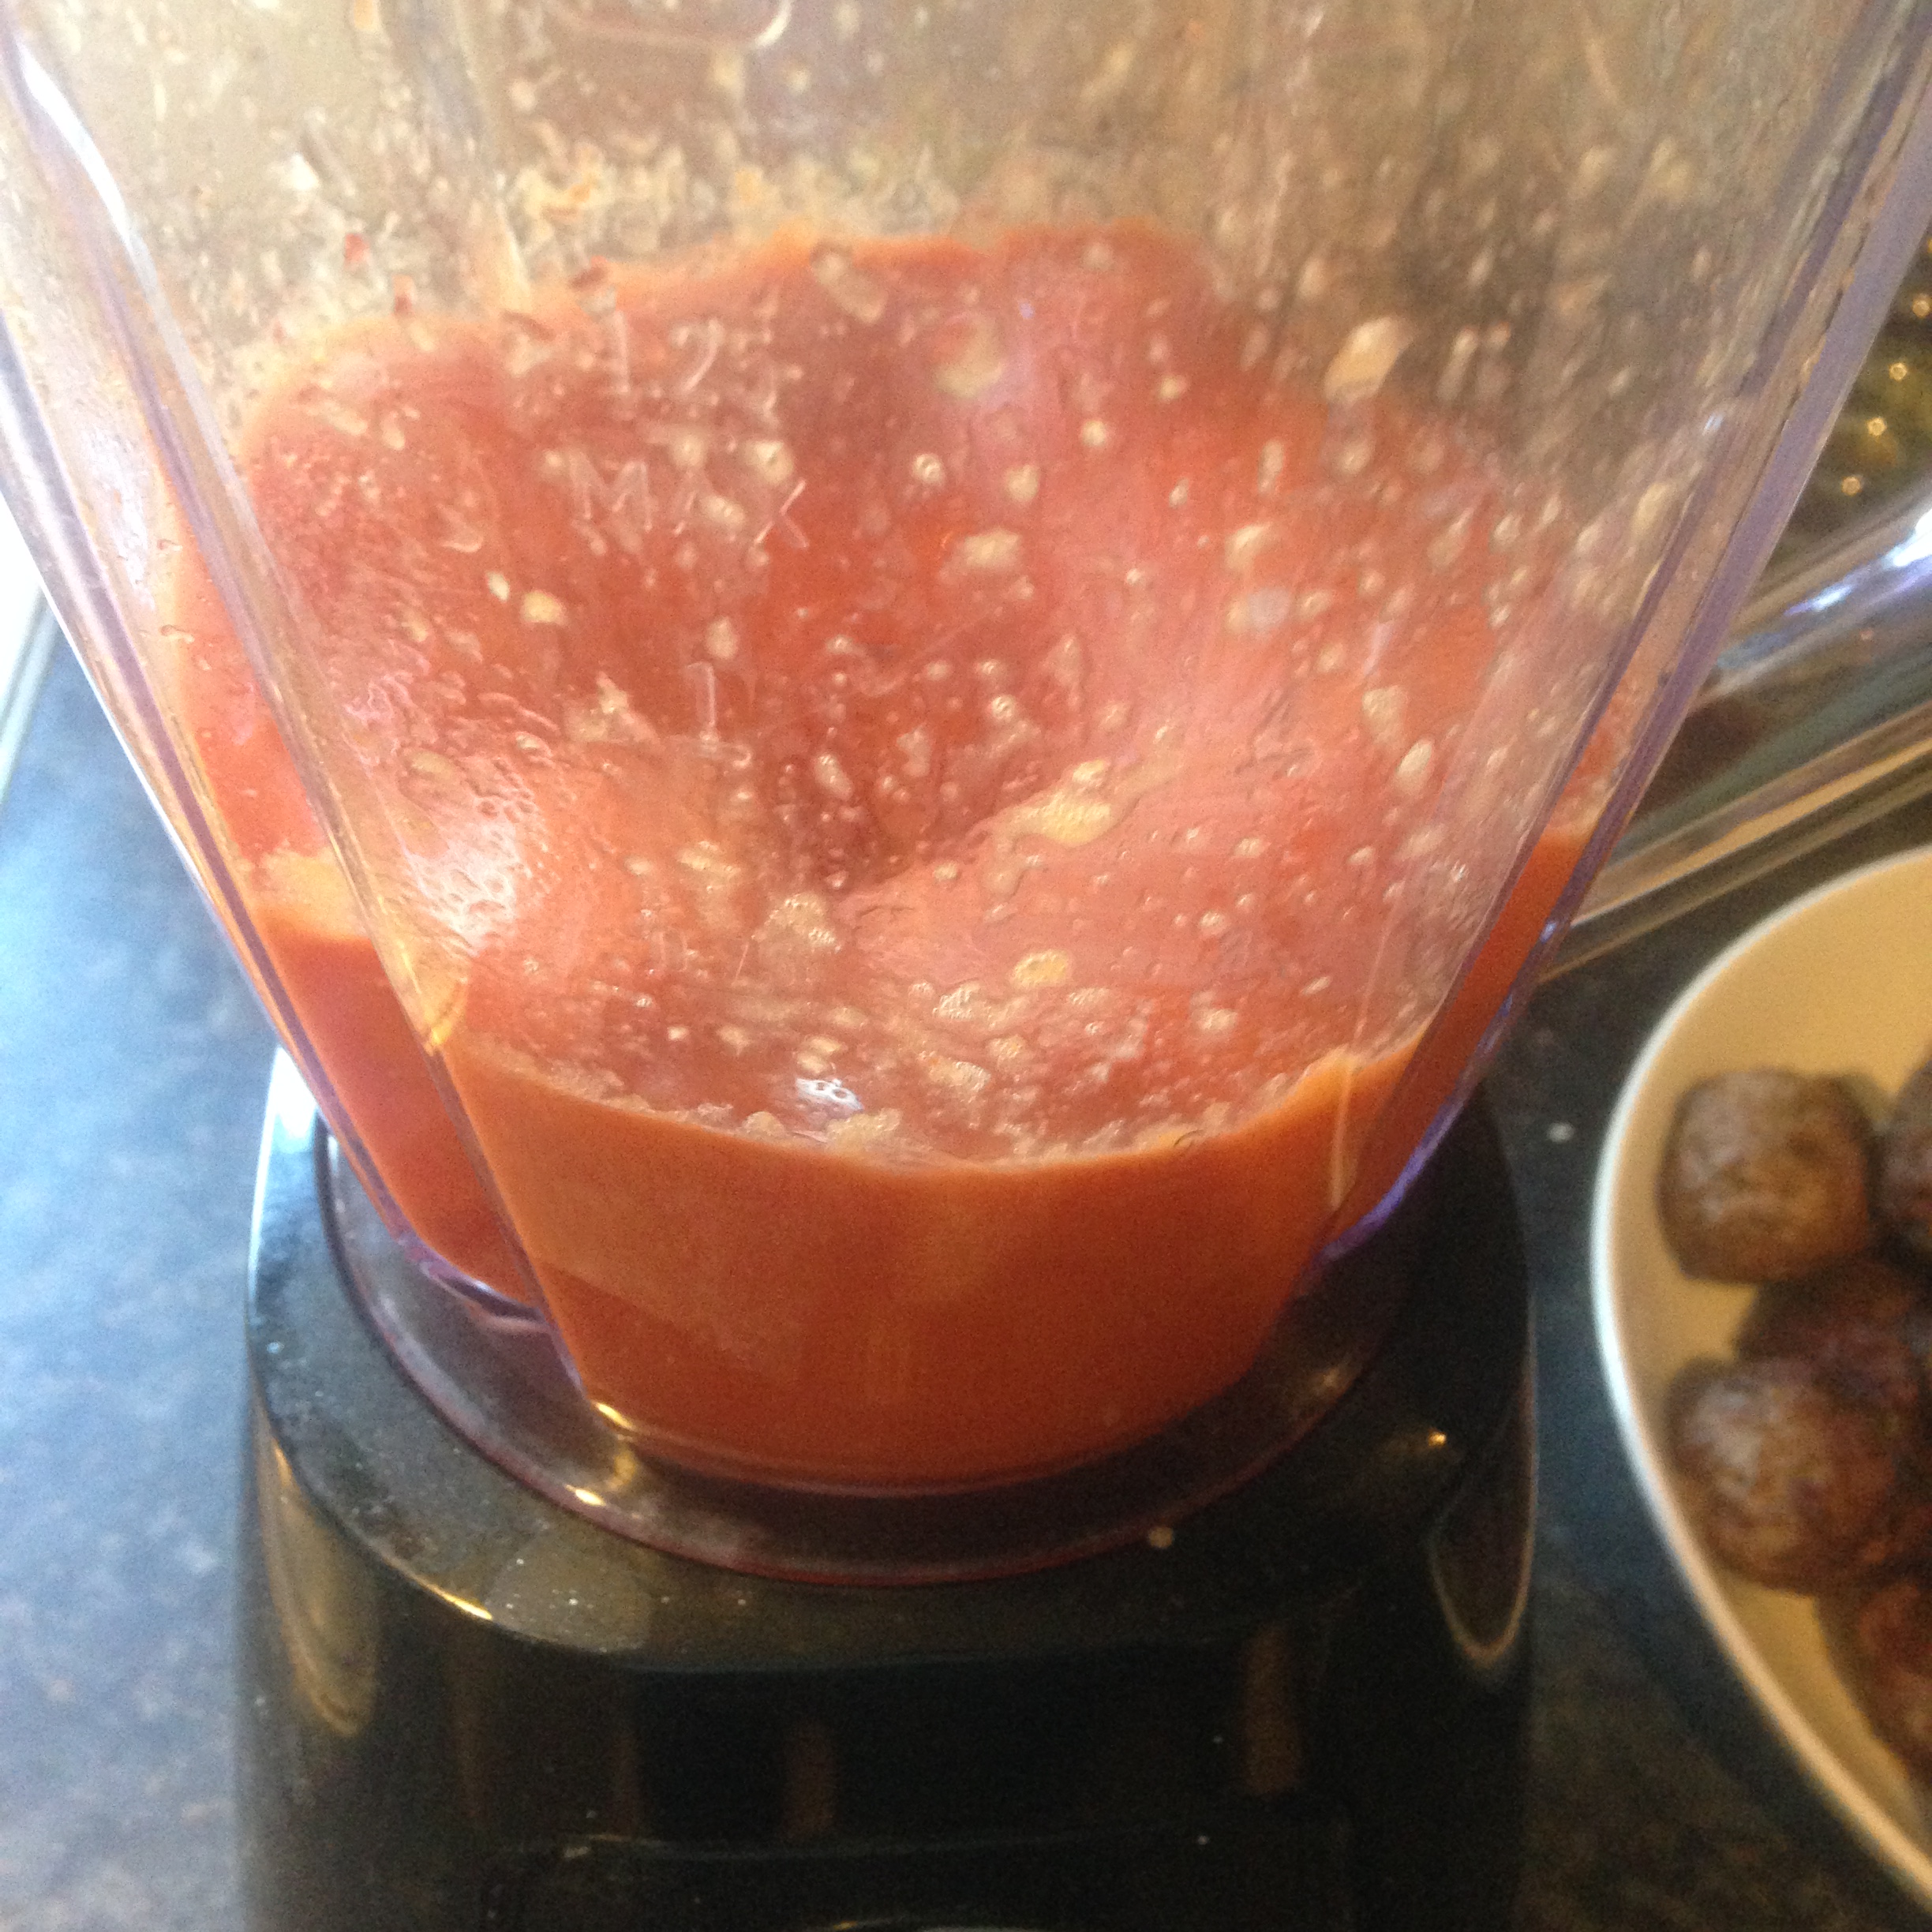
Blend ingredients
Add water to make a paste
Blitz until smooth
Fry onions and whole spices
Add spice mix and ginger/garlic blend
Add coconut milk
Meatball sauce
Grind the seed spices: fenugreek, coranider, appsice and black pepper. Add the garam masala. Blend the ginger, garlic, tomato paste and turmeric with water until it is a smooth paste. Fry the onions in a little sunflower oil. Add the whole spices and then the spice grind. Fry off until the aromatic oils are released. Add the ginger/garlic/tomato blend. Add now the coconut milk. Cook until it had reduced to about half.
Or just plop everything in a pan until it is a brown, thick amalgam.
Still with us? Here we go for another round. We promise you’ll have a scrummy dinner at the end of this epic journey.
For the final dish:
Add the meatballs to the sauce
Add hard boiled eggs if you like that sort of thing.
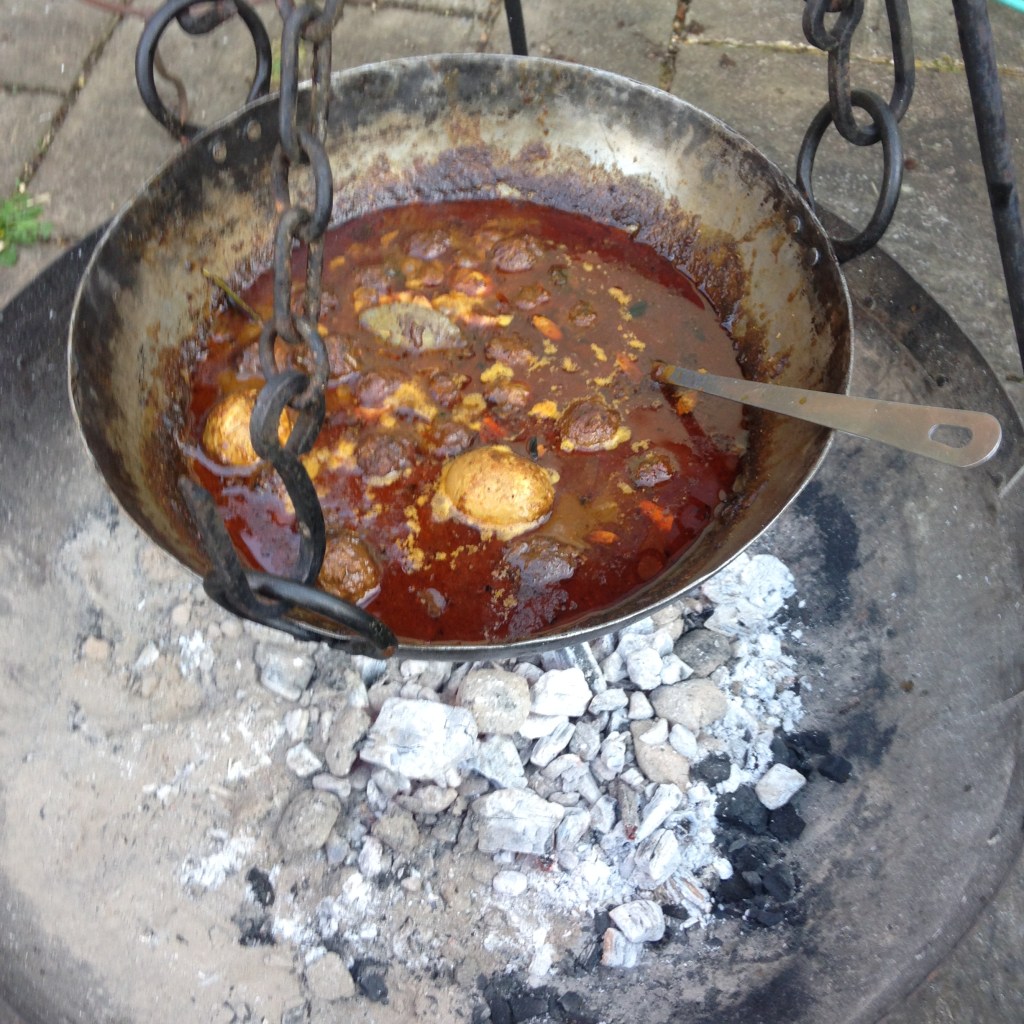
Bubble away until it is all thick and unctuous. We’re cooking on a kadai but this stage could happen on the hob or in an oven.
Add precooked meatballs
Sneak in an egg or four
Simmer until thick
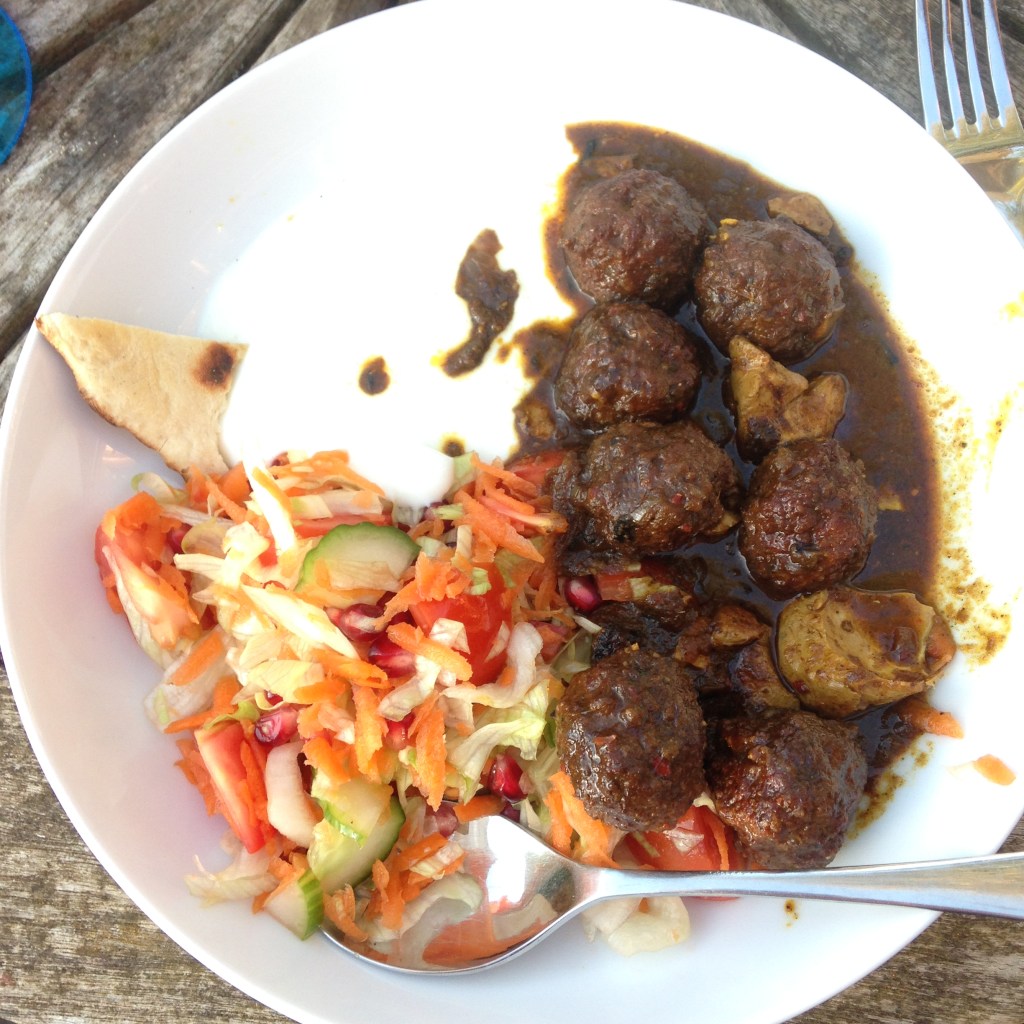
And now the dish is ready. Meatballs are served with homemade bread, chopped salad and plain yoghurt.
Done
Served with salad and yoghurt
Dinner is served
Is it worth it? Totally. Cooking is a tonic for the soul. Feed yourselves and your family well and all is well.
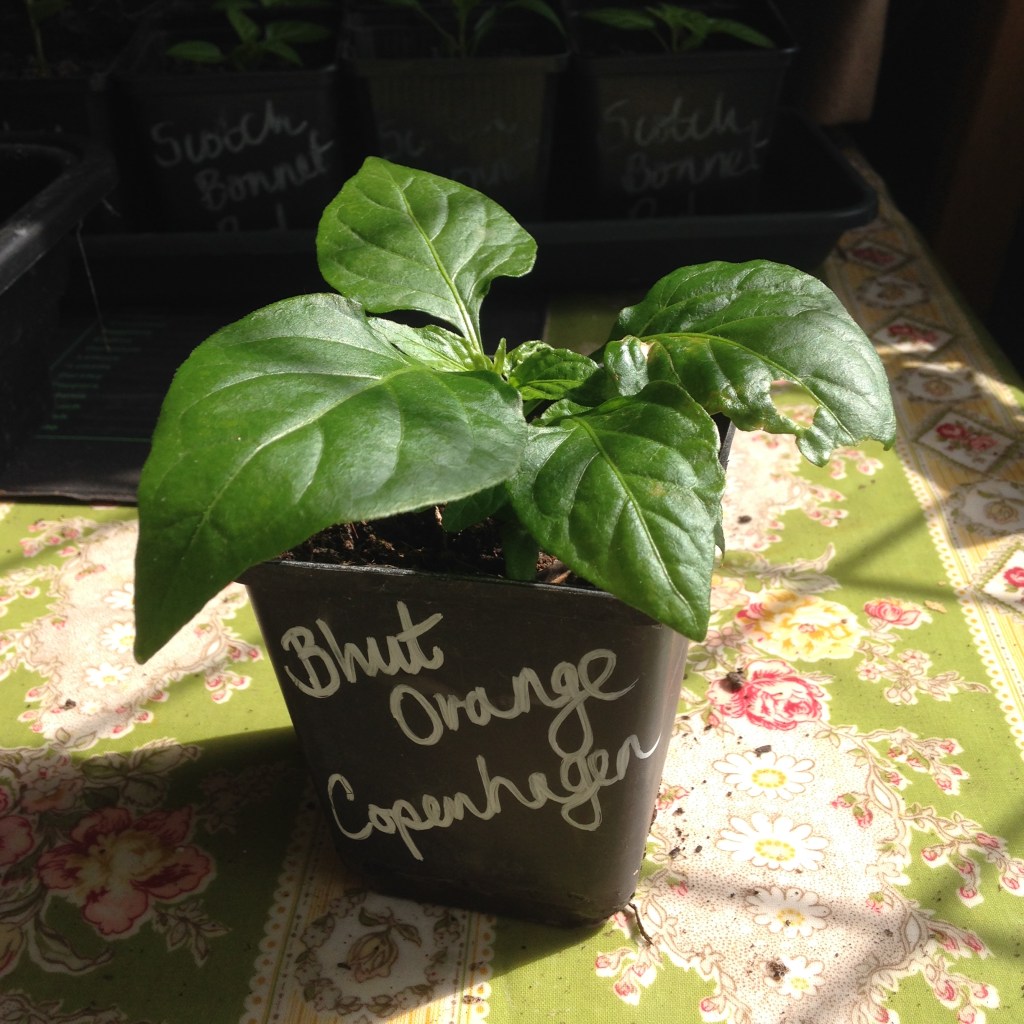
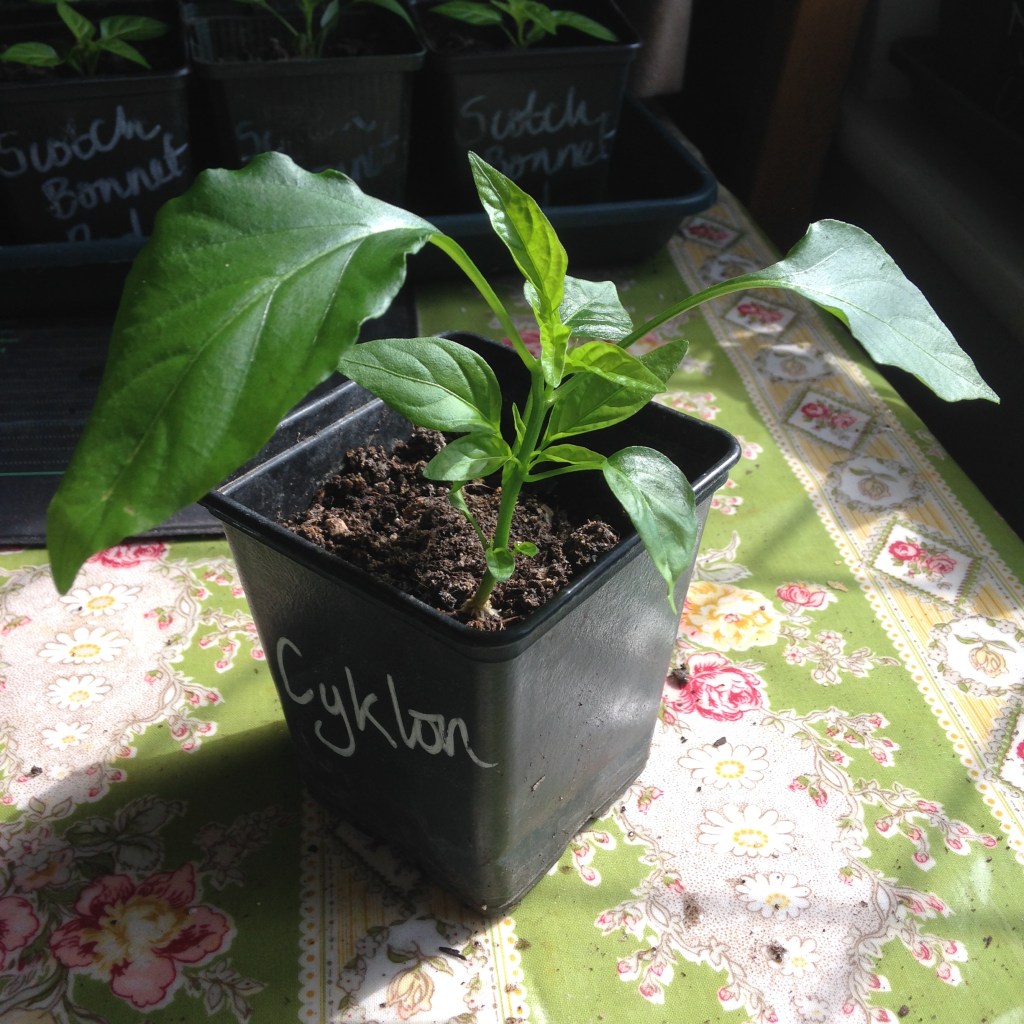
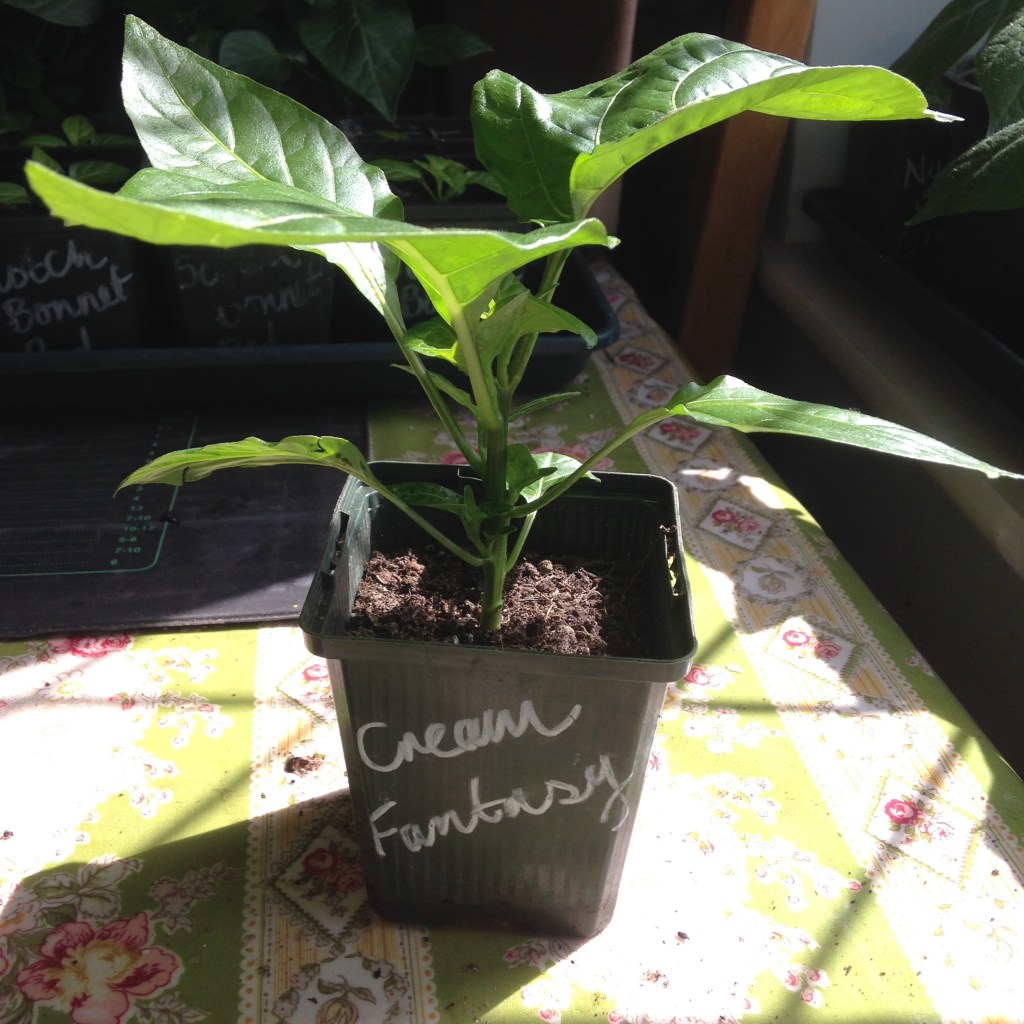
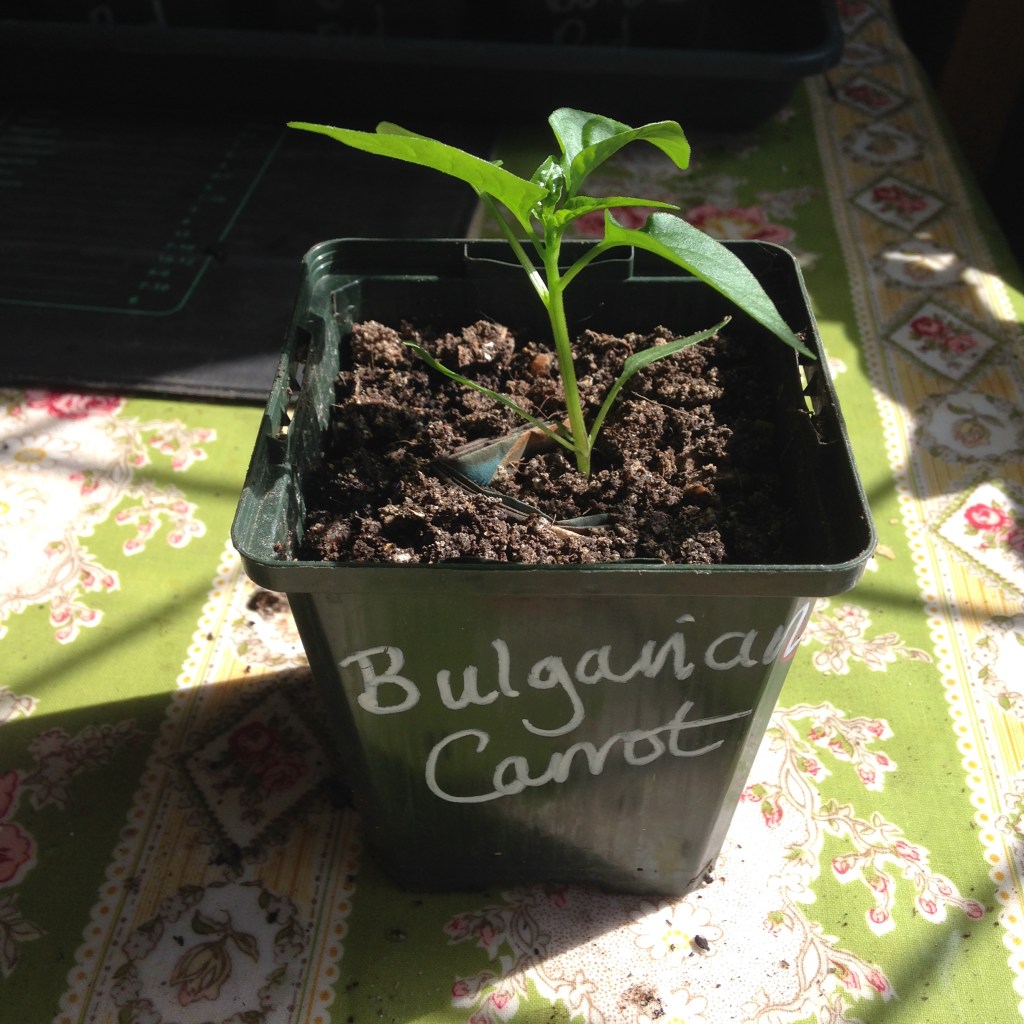
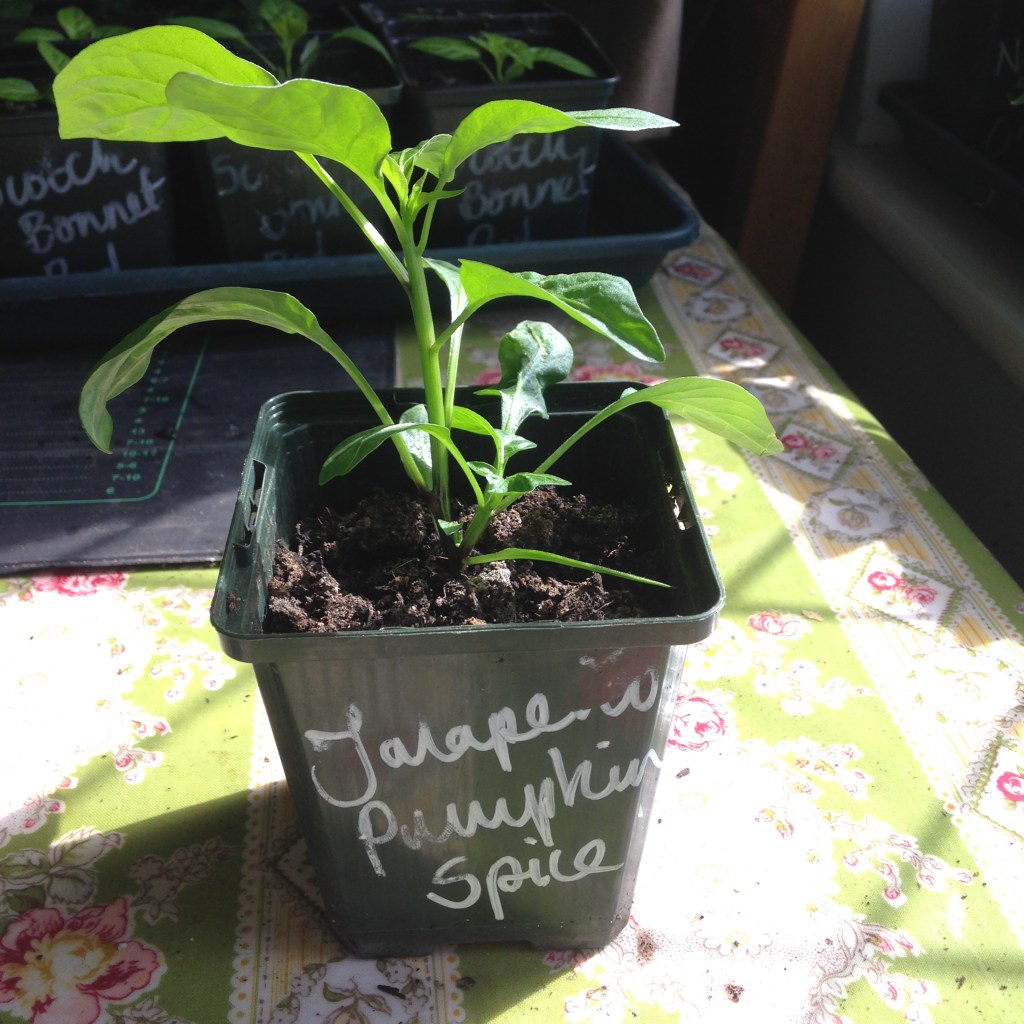
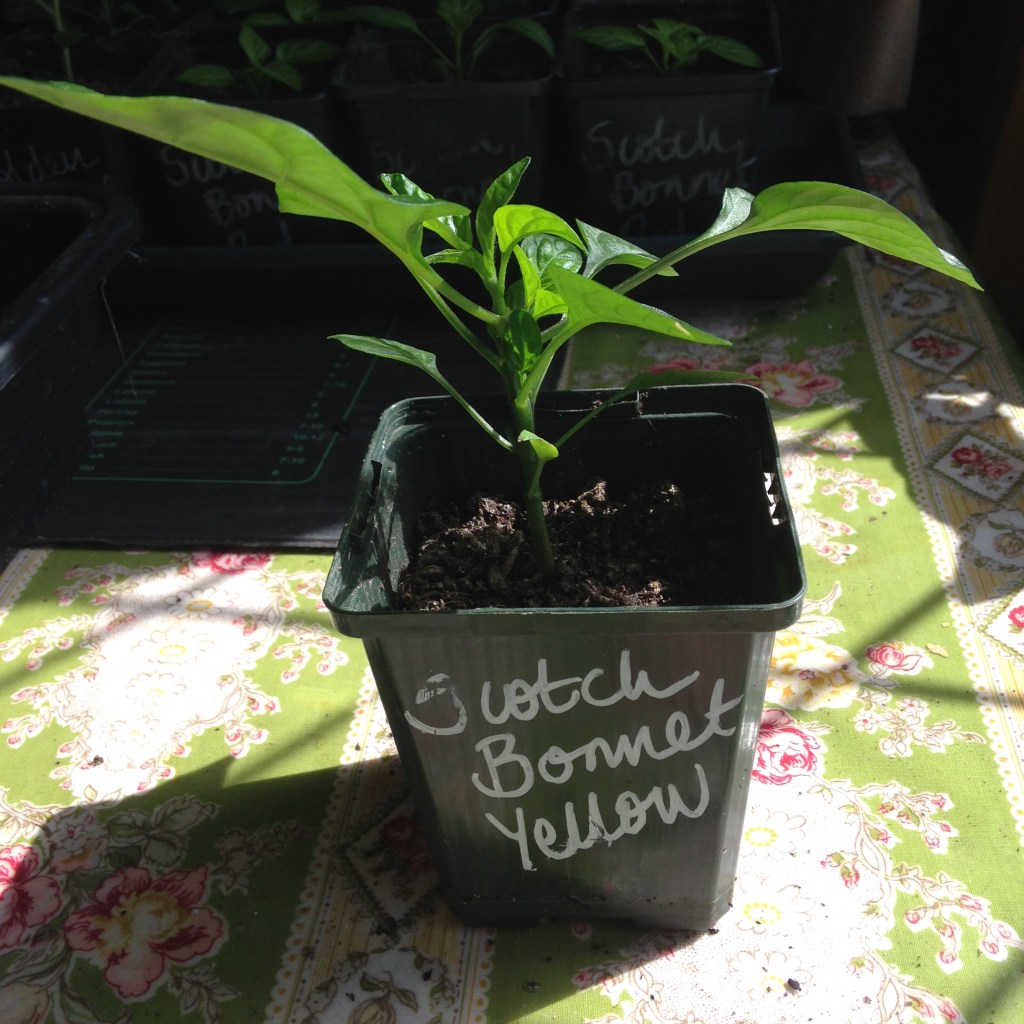
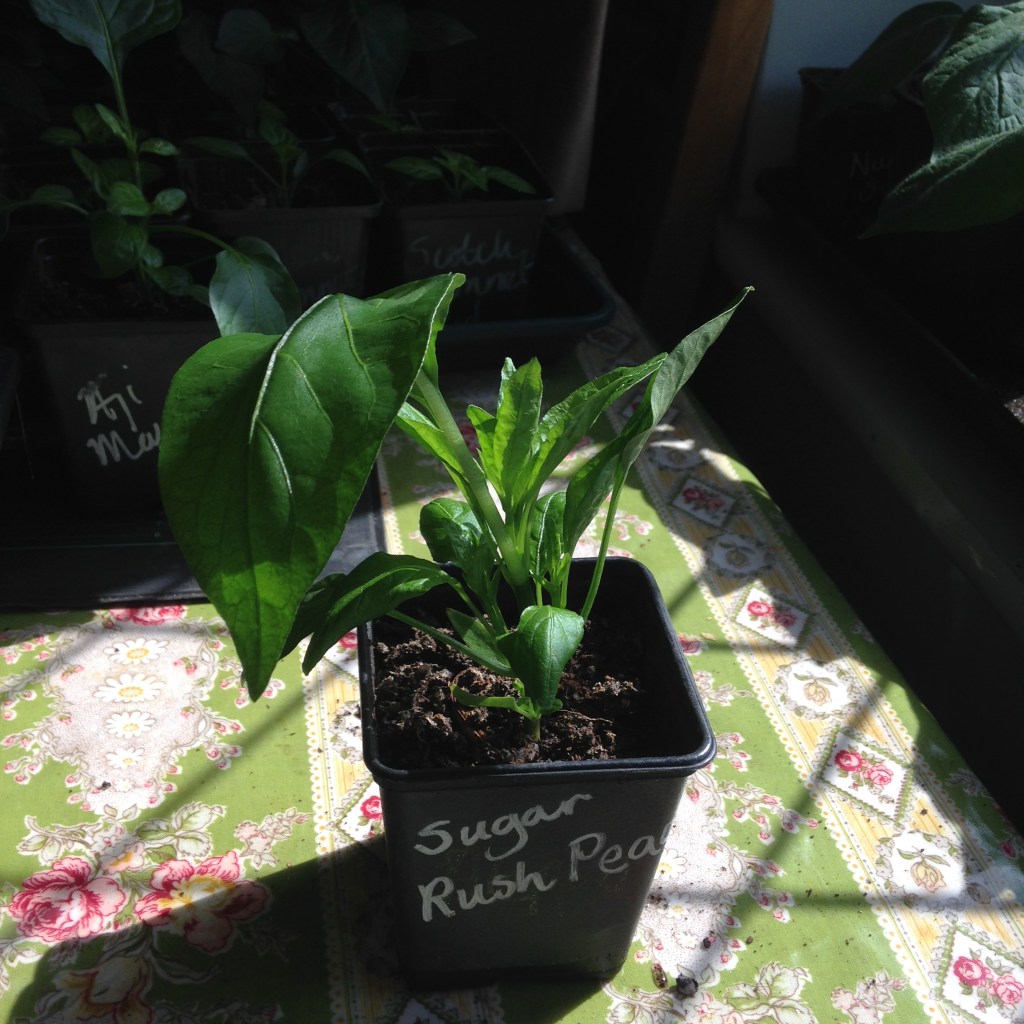
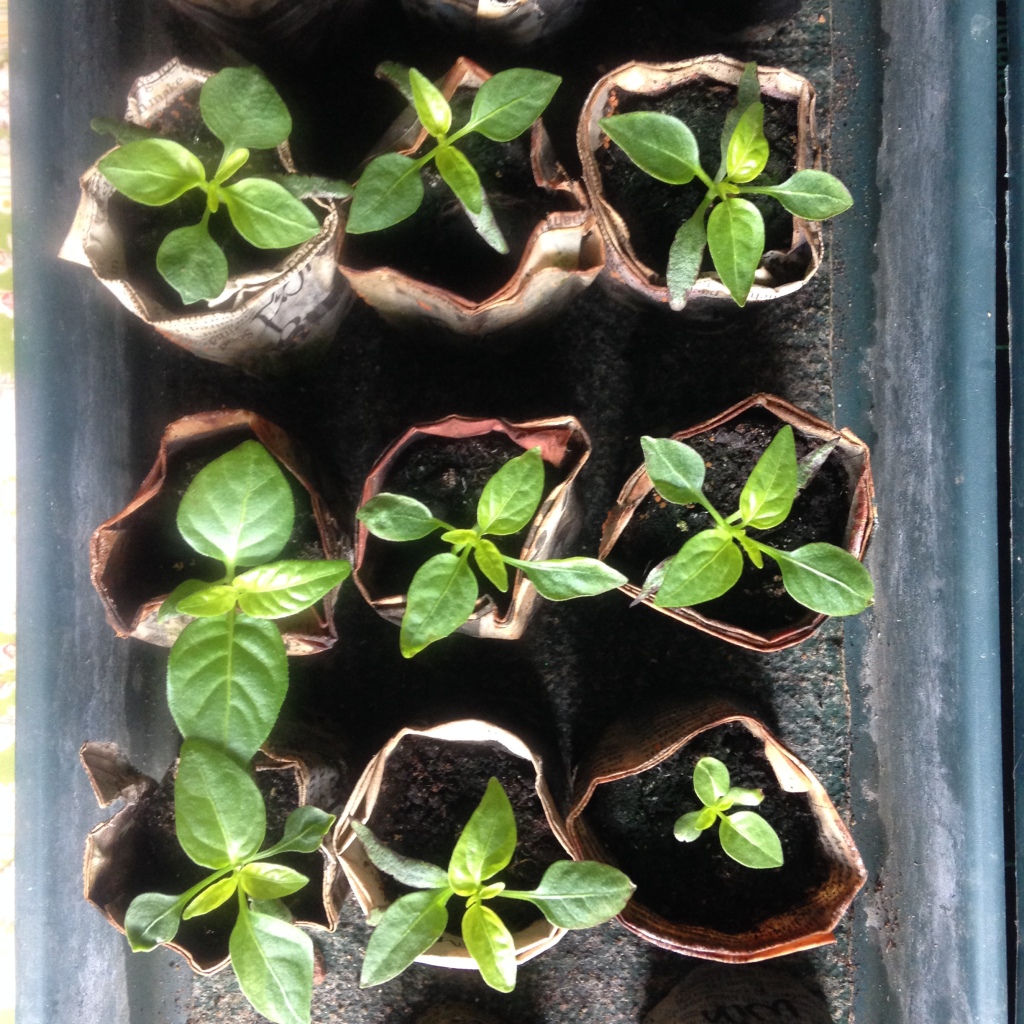
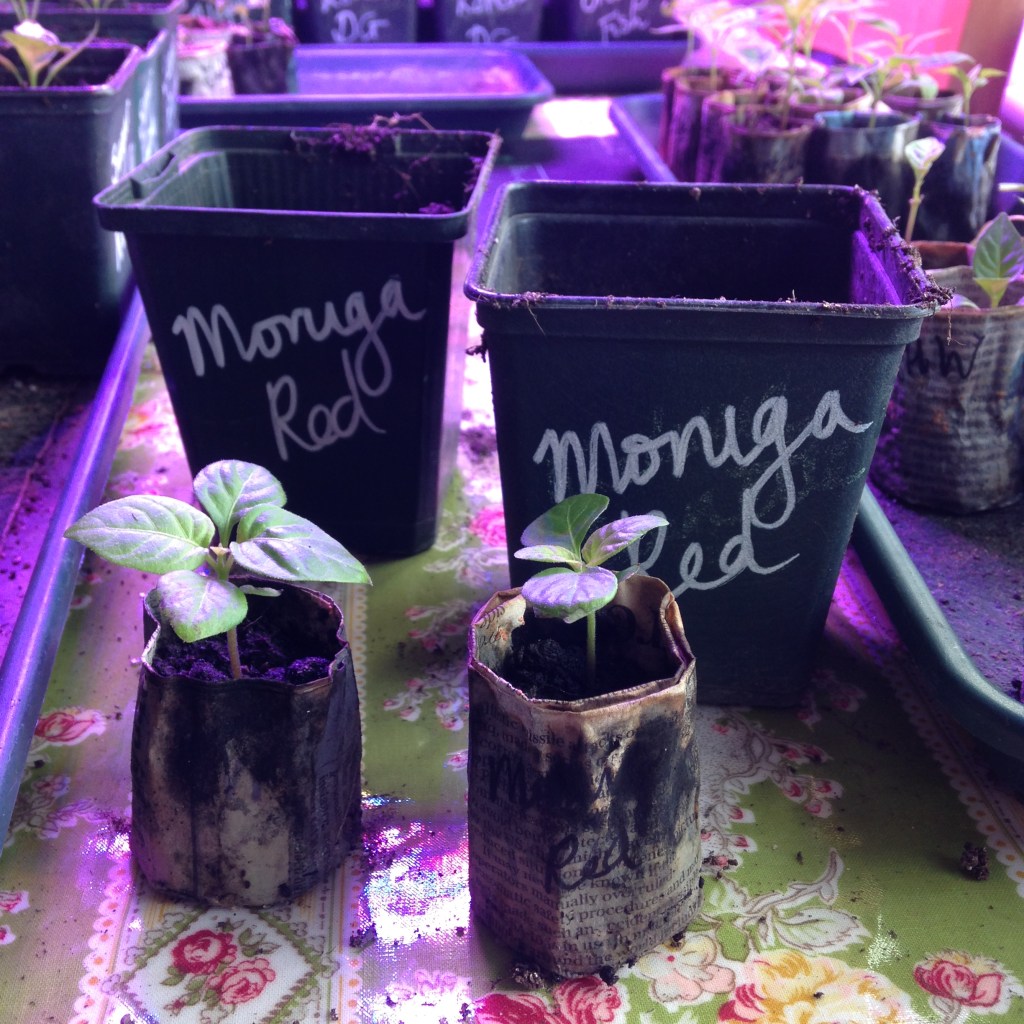
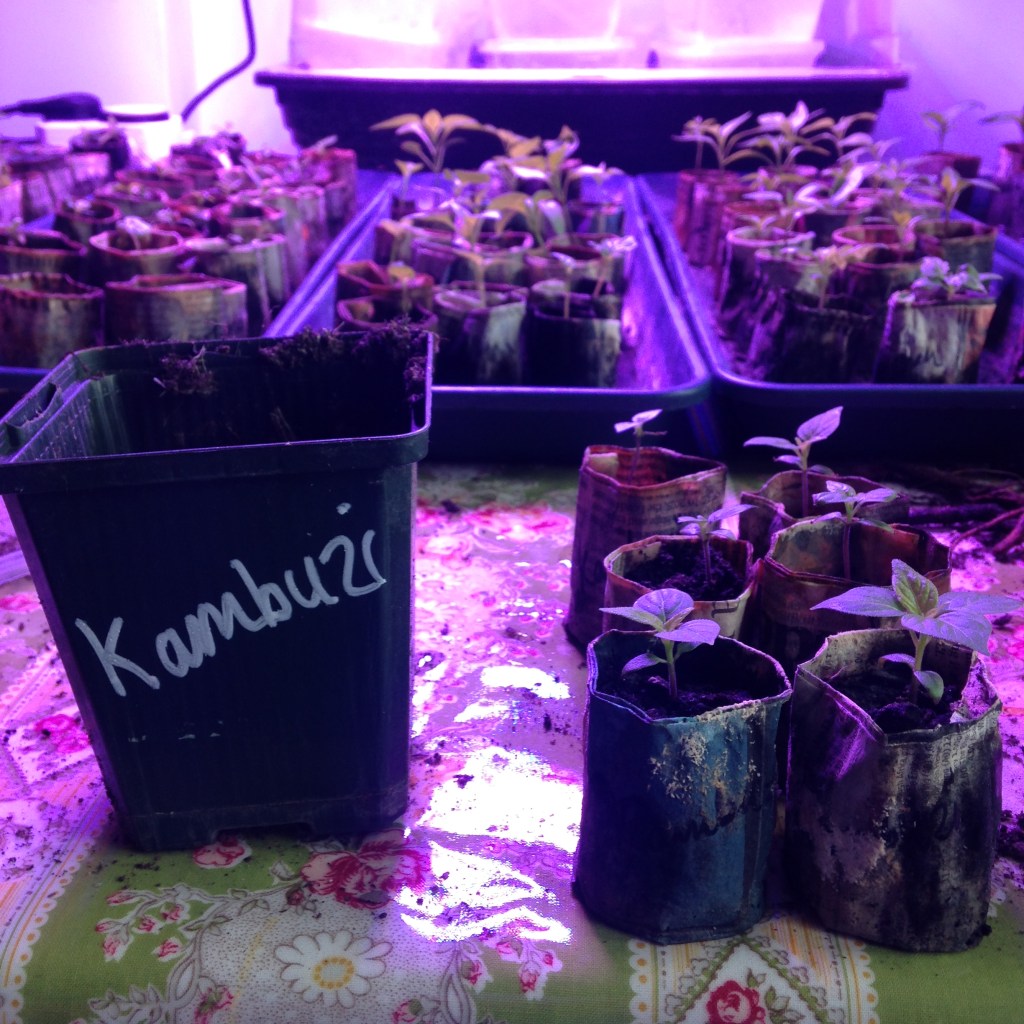
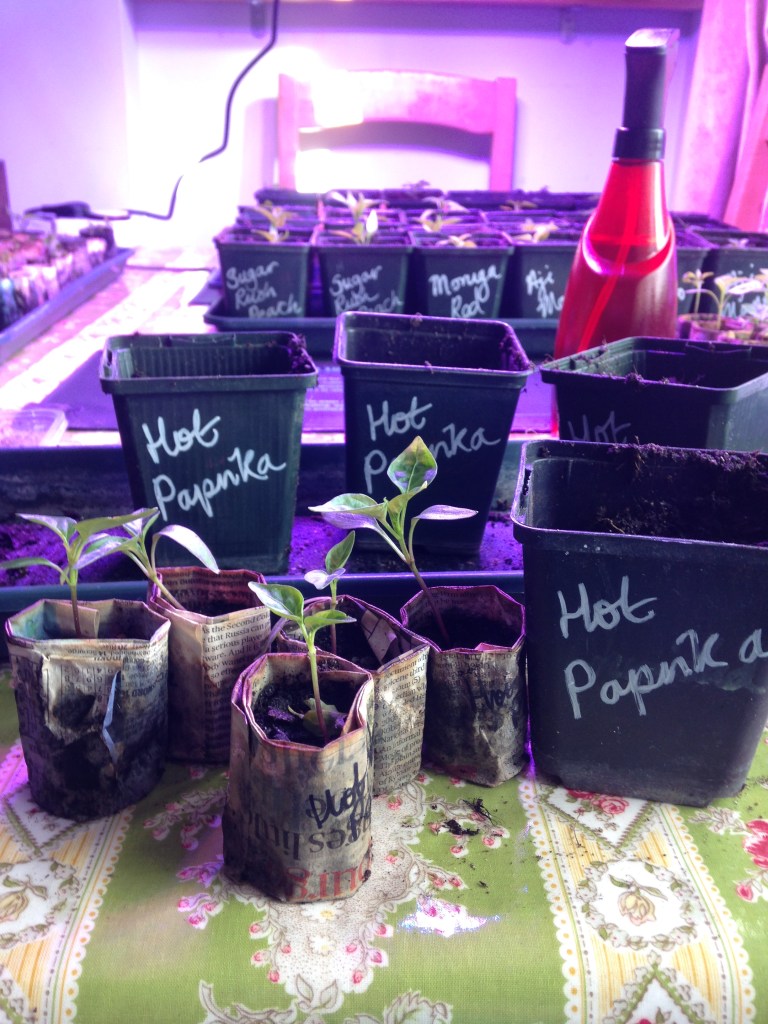
It was March 28th when the Big Snip occurred. The tops of the seedlings were unceremoniously chopped off and they have been nursing their wounds ever since. All in the hope that new side shoots would appear and make bushier, sturdier and more productive plants.
That was two weeks ago…what do the plants look like now?
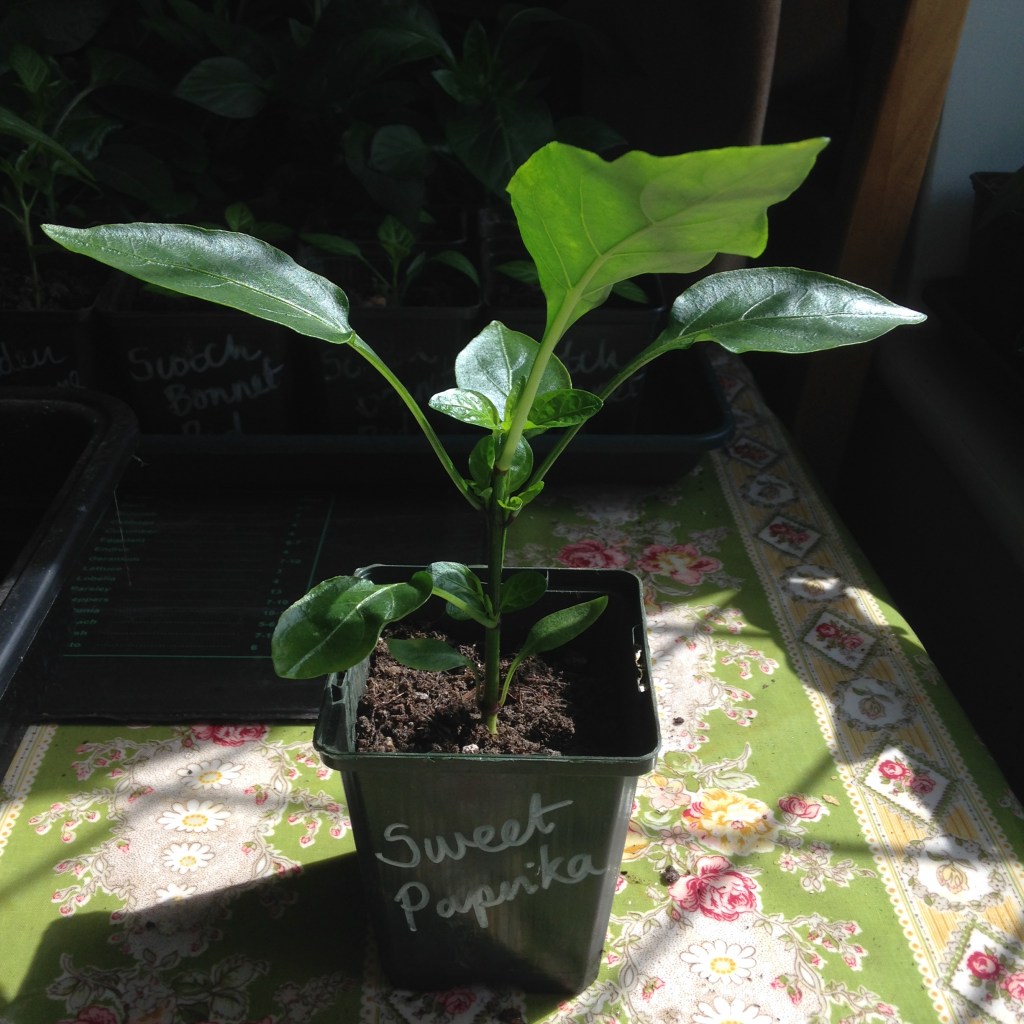
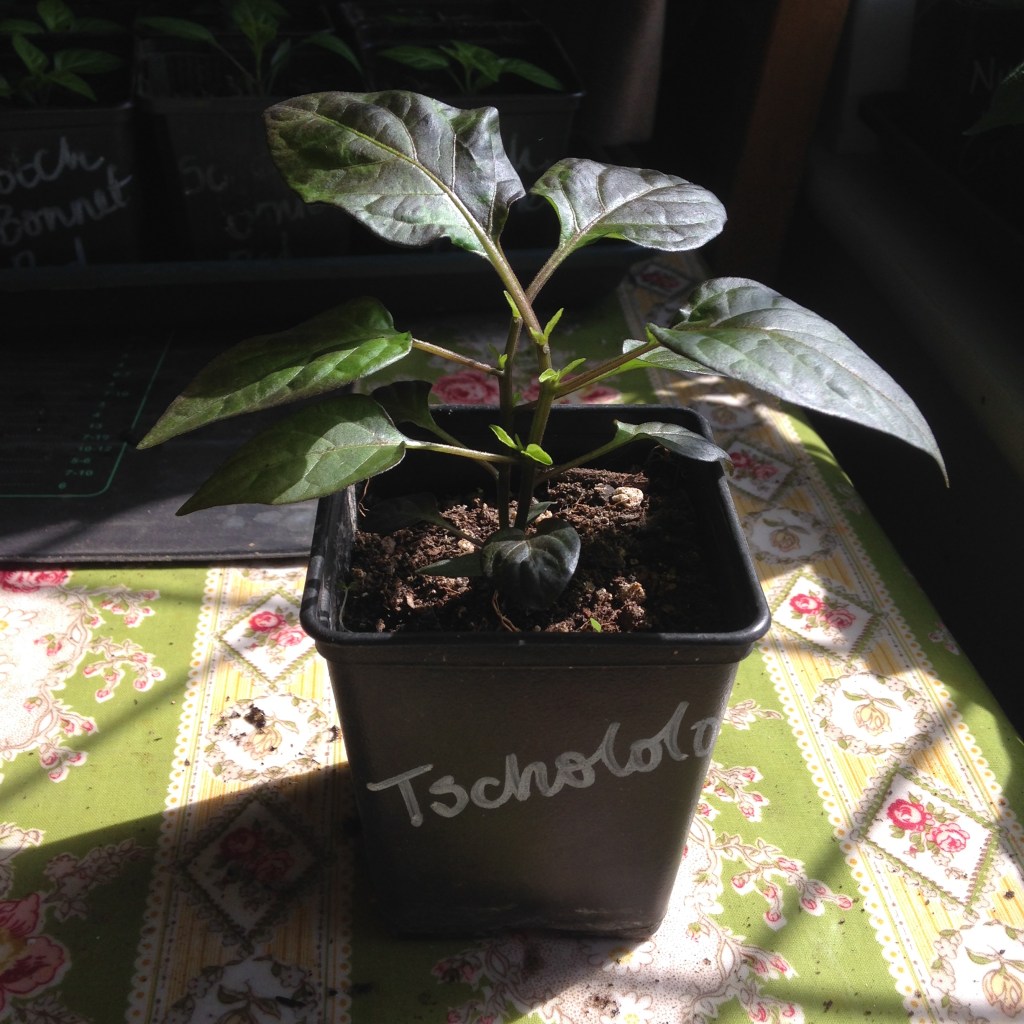
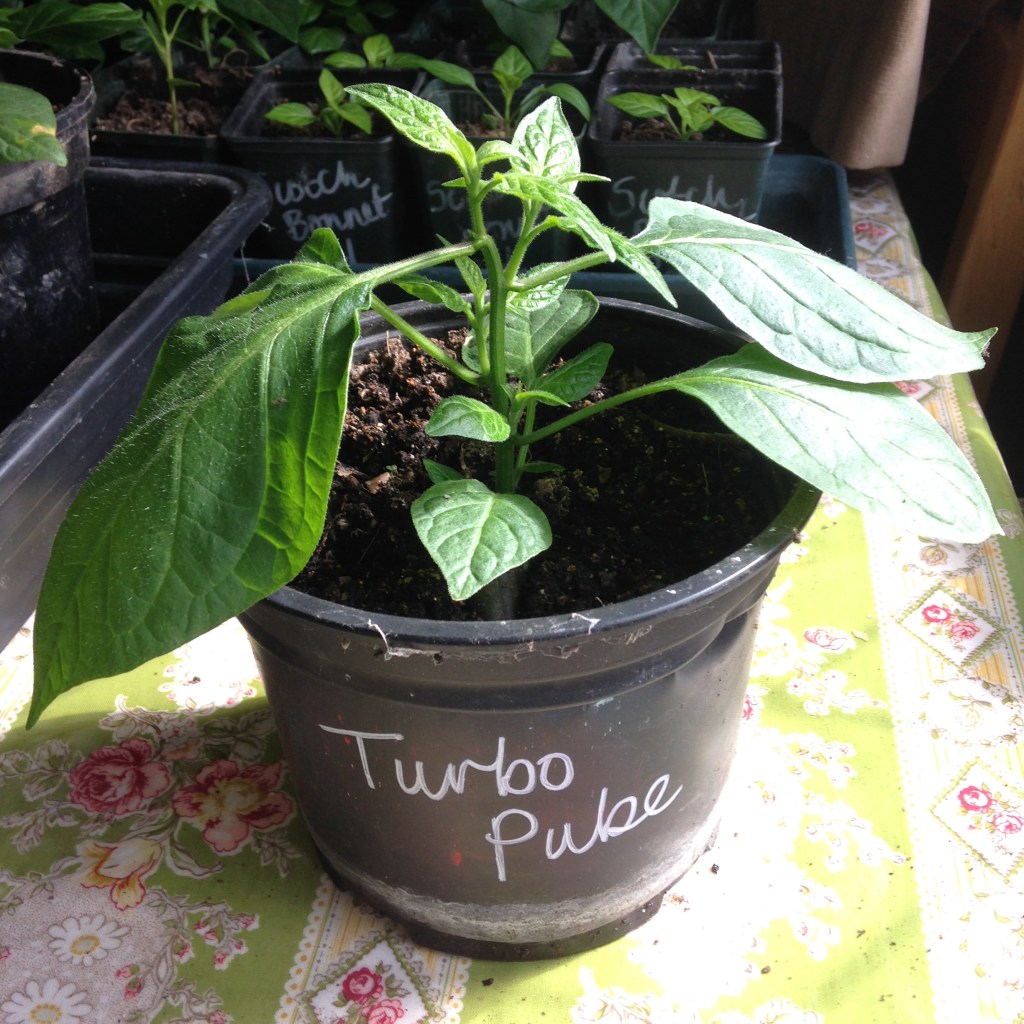
Here they are, in all their glory: tight plants with side shoots a plenty. A bit awkward, in the teenage phase if you will, but their small leaves will soon catch up with their big leaves and all will be bushy and well.
2020 selection of chilli plants two weeks after they have been topped
What’s next?
The plants need to have a good space around each of them. They are currently wedged together on windowsill trays and under a grow light in our study. Not ideal. There are now some critical issues:
Shortage of compost: many plants need potting on but compost is in short supply. We are reusing last year’s spent compost, mixed with extra perlite and garden compost. No grit this year as it is too expensive and difficult to get hold of.
Over crowding: by not potting on yet we have larger plants in smaller pots, with less gap between each plant. Light, air flow and good space is what each plant needs to grow to its full size potential. All those new side shoots will grow leggy if they are over crowded.
Pot bound root ball: yet again roots are starting to be seen from the bottom of pots. If they are not potted on the roots poking out will wither and the ones inside will become pot bound.
Space indoors is running out: an entire room has been taken over by chillies. This is not practical anymore.
Solutions are coming.
A 900L bag of compost is on the way (there are also tomatoes, squashes, cucumbers, beans to consider you know). A 3m x 2m poly tunnel is ordered, staging is being prepared. Perhaps within this week our plants will be heading out into the great outdoors (heated poly tunnel).
Do you want bushy chilli plants? Strong & sturdy, multi stemmed, eventually laden with fruit?
Early Red Primavera Habanero from 2019. Topped in April to encourage extra branching and more fruit. Ripe from in late July.
Well of course you do! But maybe your plant are not quite there yet. If not, then look no further than The Birdhouse Miracle Cure!
How do we achieve the ideal chilli plant?
Some plants are just born this way but others need more help. Some will just do their thing regardless of how you tend them but there is nothing wrong with encouraging them in the right direction.
By applying The not-yet-patented Birdhouse Miracle Cure – otherwise known as topping – we can encourage side shoots and bushy growth which lead to strong, multi stemmed, hopefully super fruity plants later on.
In addition to resulting in a good strong, bushy plant, topping will nip out any very early flower buds from the single growing shoot. These buds often drop and do not set fruit. Even plants that do set early fruit can be negatively affected and fail to produce any more flowers. Topping may well avoid flower abscission entirely.
Is there some sort of science that can convince me topping works?
Plants have hormones. These hormones make different parts of the plant act in certain ways. In this instance, we are messing around with the growth hormones, auxins and gibberellins.
These hormones work together in the top growth shoot of a chilli seedling, causing cell elongation and increased cell division resulting in a rapidly growing shoot.
By removing the lead growing shoot we are sending the hormone concentration out to other areas it can be effective, namely the leaf axils where buds can develop. The hope is that each axil will produce axillary buds that eventually turn into extra branches. Thus creating a bushy plant with many growing shoots rather than a single stem.
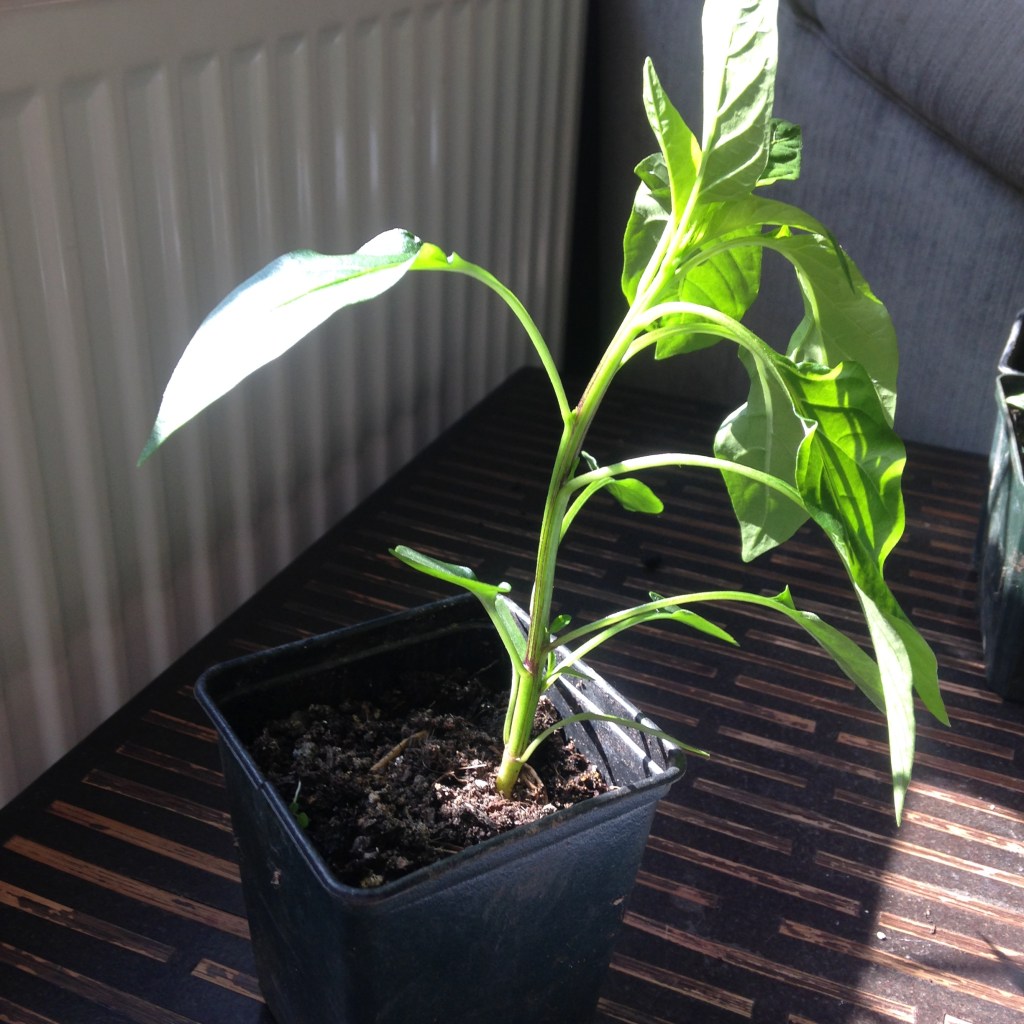
In previous years topping has largely been very successful. And so we repeat the process this year. However, what occasionally happens is that just one of the axils produces an axillary shoot and that in turn just becomes a new single lead shoot, rather than a larger number of new side shoots. Resulting in a lop sided and unstable plant. Not bushier, not extra flowers or fruit. Just top again!
Patience. Start by selecting appropriate candidates for treatment. Look for plants that are all or most of the following:
Oooh, perfect to whip its top off
Tall;
Leggy (not necessarily that same as tall) Leggy means ‘larger than desirable gaps between leafs sets’;
Single stemmed – best to treat them before they have split to the classic Y ;
No side shoots naturally forming;
Have 4 or more pairs of true leaves.
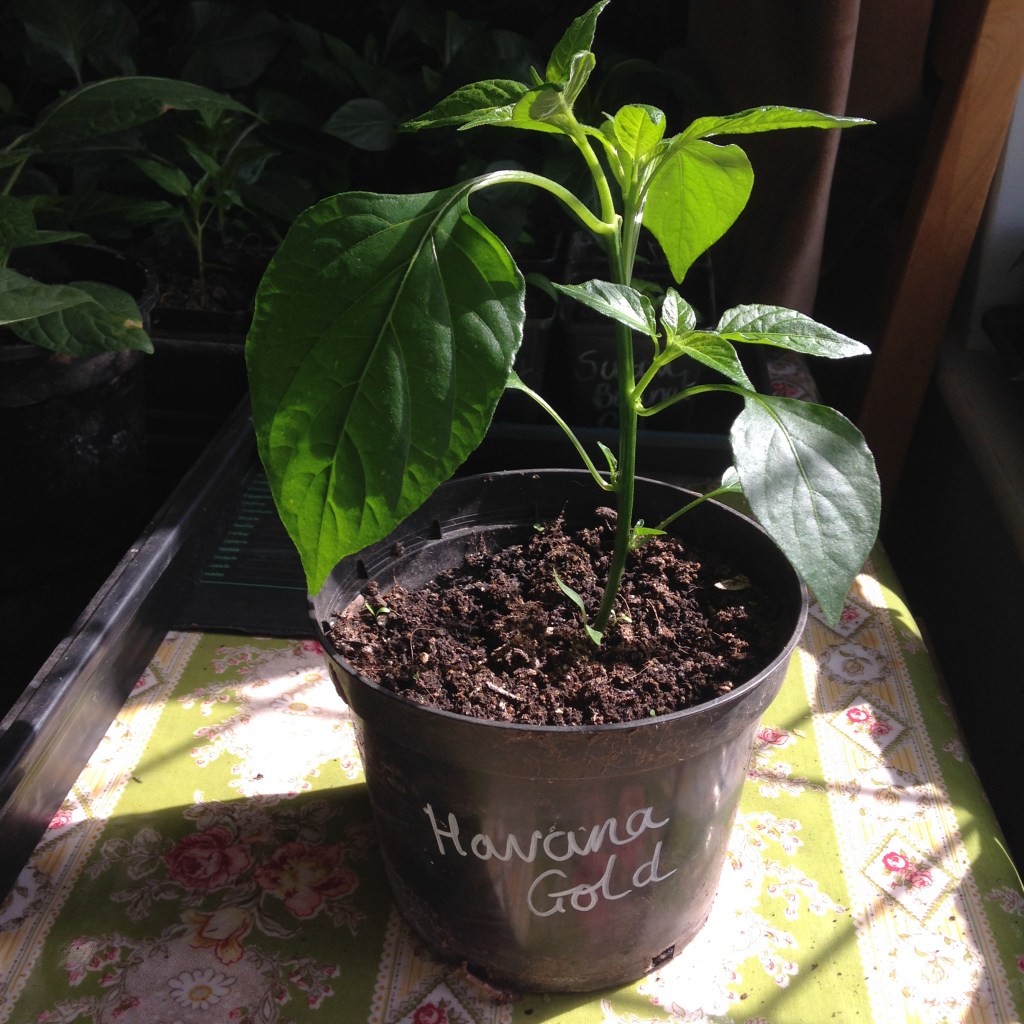
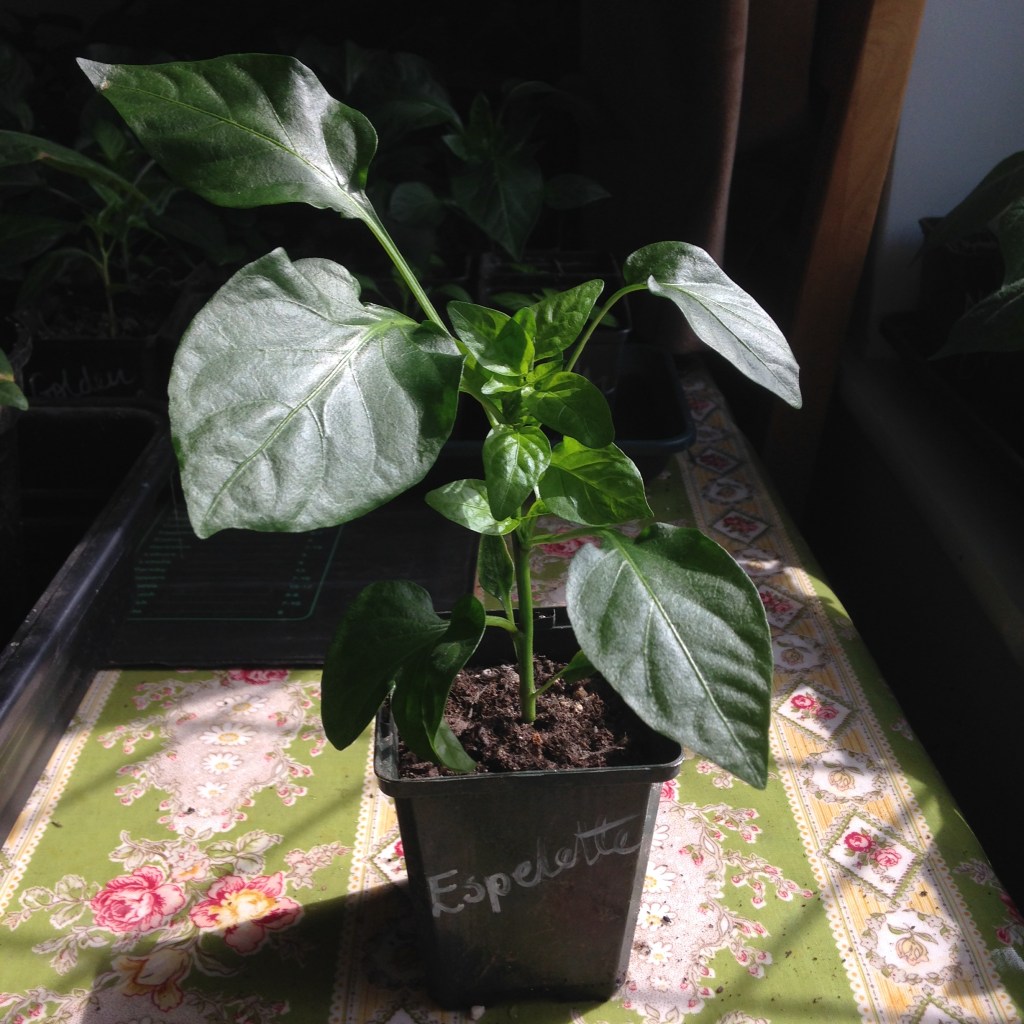
Annuum plants are often perfect for topping treatment at this stage in the season. They can take an early top and maybe even another in a couple of weeks. A second top may be necessary if one new axillary shoot becomes dominant.
Annuum chilli plants ready to top
Chinense types are usually a bit slower to grow to start with. They stay shorter too. Good results come from topping but make sure they have enough true leaves before attempting. Keeping in mind that Chinense take longer to produce ripe fruit you don’t want to top too late either.
Chinense type chilli plants ready to top
Baccatum are often sprawling, branched plants. An early top could help them to produce even more branches.
Baccatum chillies ready to top
Rocoto chillies have branched plants. Catch them before they split to the first Y and topping can help reduce the spindly nature of their initial growth.
Rocoto chilli plants ready to top
Come on now, how do we DO this thing?
OK, like this.
Put on your brave pants, this could get scary;
Gather the tools: clean, sharp scissors in one hand (we like embroidery scissors or tiny snips for bonsai work);
Take the selected victim in the other hand;
Carefully position the scissors to snip out the growing shoot, leaving behind at least four good true leaves.
And breathe out. Honestly, within a week, probably five days, new buds of side shoots will have appeared in the crooks of the remaining leaves.
Chop the top off
Are there any reasons not to treat the plants this way?
Topping will check the production of flower buds as the plant will concentrate on producing more growing spikes. Too late in the season and you risk not achieving fully grown and ripe chillies.
Some plants natural form side shoots, grow short and bushy, are covered in fruit anyway. No need to top. Let them get on with the job themselves.
Slow growing chillies – often Chinense types – do not need further excuses to take longer to flower and fruit. Consider if the extra fruit you might gain is worth the longer wait or even the risk of the first frosts arriving before your chillies are ripe!
Any cut is a possible introduction of infection to the plant. Ensure scissor are clean and each plant is checked for signs of disease.
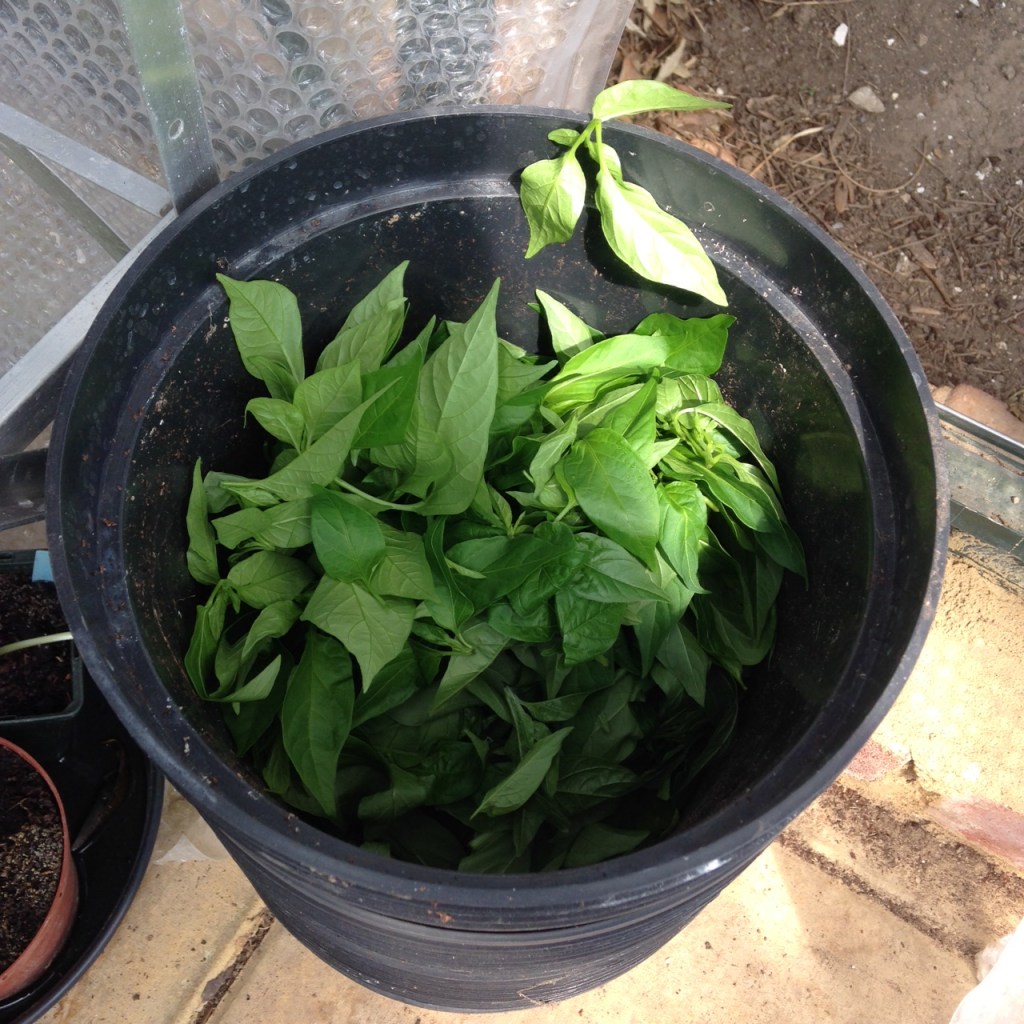
Discarded growth shoots
And there we have it, a seemingly crazy attack on our precious babies, all in aid of more hot pods at the end of the season.
Here we go again. The seeds have germinated, true leaves are growing. All seems well. And then, suddenly it dawned on us that these precious babies might need a bit more than a teeny tiny pot and seed compost. What next?
Reporting, ready to POT ON, Sir!
Have a look
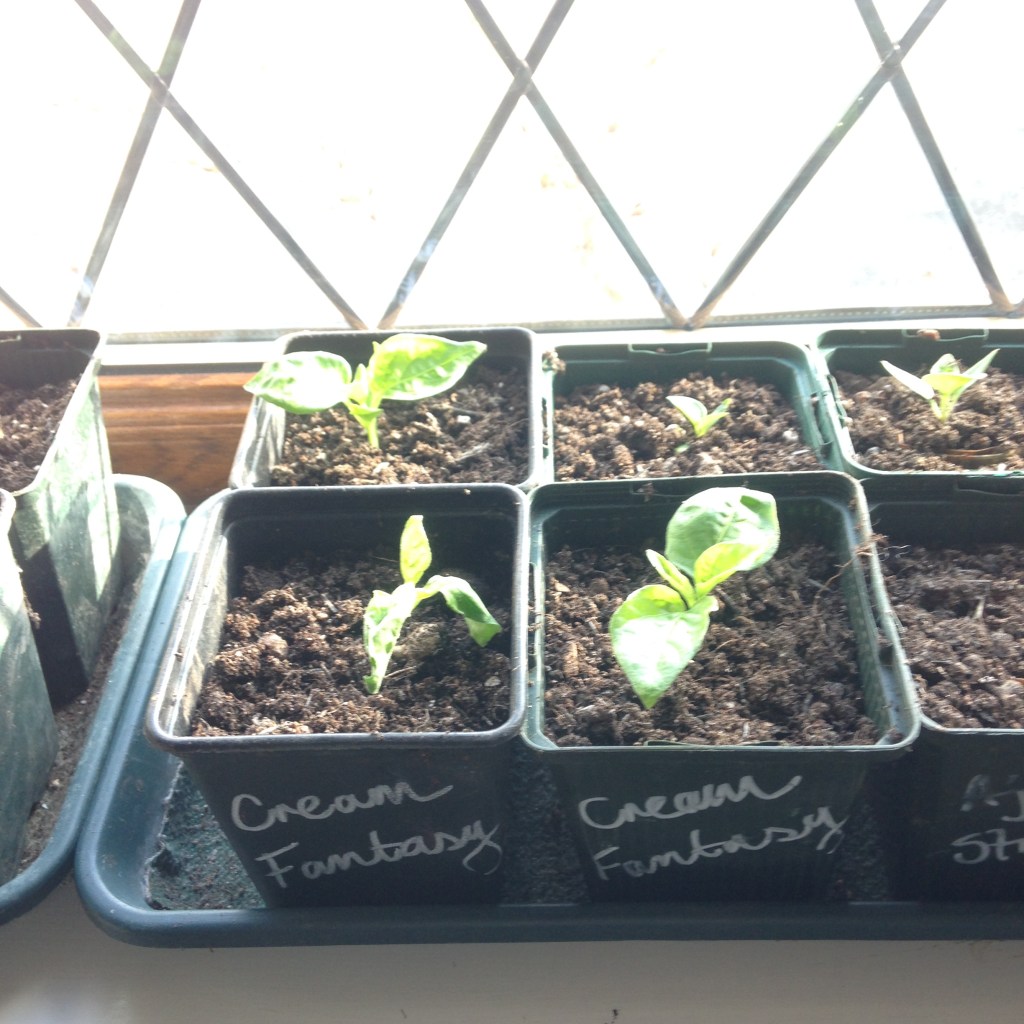
A seedling that is ready to pot on for the first time will be showing certain key signs:
It will actually be growing. Smaller leaves becoming bigger leaves. The plant will be getting taller. New leaves green up. Plants just sitting there, existing with two seed leaves, sulking, are not ready for a bigger pot yet.
The water is being used up quickly in the first pot. Another sign the plant is growing well and using what you give it.
Maybe a root or two are poking out of the bottom. Chillies like to be potted on incrementally. Not straight into a whopping great 20L pot. The surest sign they’re ready to move home is little white roots peeking out underneath.
Ready to be potted on. Leaves being produced and getting bigger, roots starting to show, needing water more often.
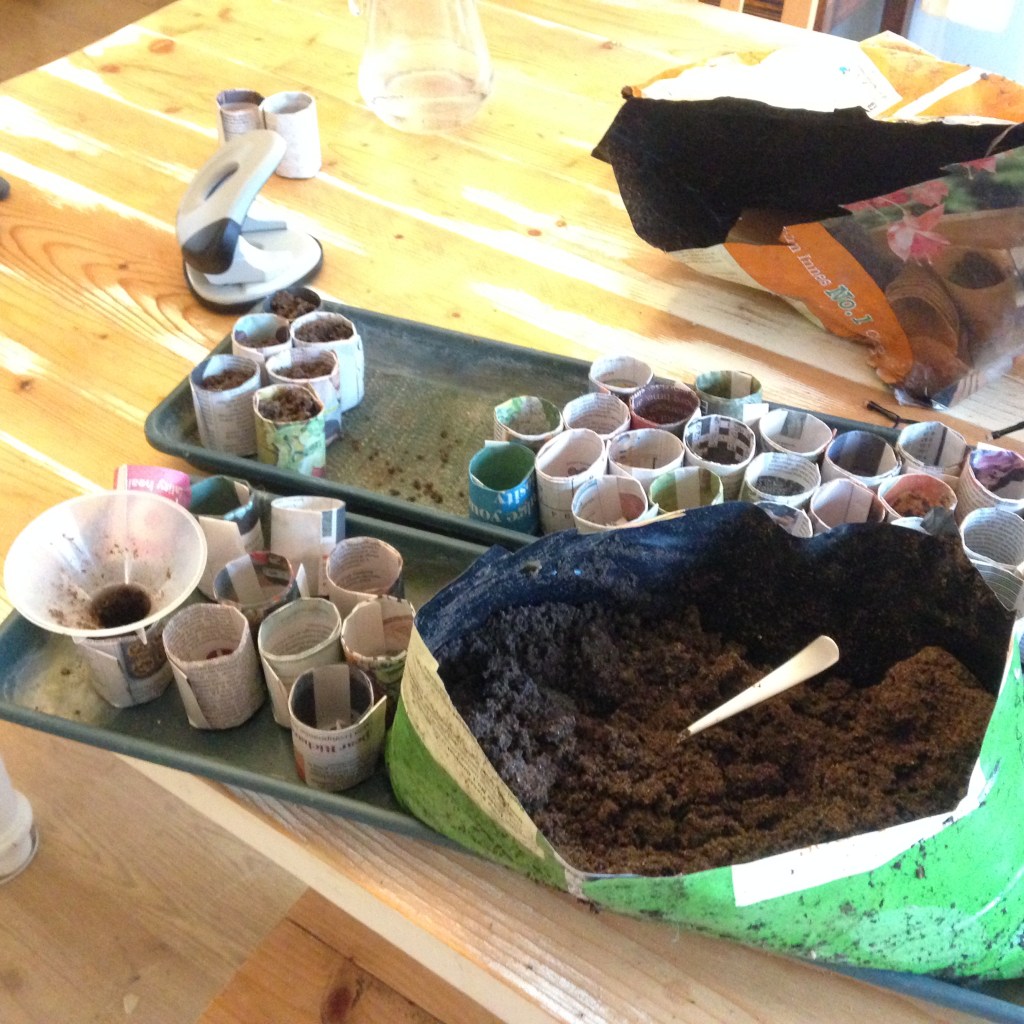
Get prepared
The seedlings will wait a couple of extra days whilst you prepare their new home. Get the next size pot in from the cold shed/garage/backdoor step/unheated greenhouse. Bring in any soil that is going to used and let it warm up. Prepare your work station, table coverings, labels, pens, dibber, watering can, chilli feed, trays, capillary matting. It’s like preparing for the arrival of a new baby. Get all the kit sorted in advance. We all have our preferences but make sure you’ve got all your fave tools to hand. We like a teaspoon and a chopstick at this stage.
Preparations for potting on. A fine selection of tools and soil nicely warming in the house.
Your pot of choice will depend on your preference and circumstance. We have been collecting and reusing 9cm square pots at this stage for some years now. These suit us for many reasons: they come to us via purchases at a favourite nursery (West Kington Nurseries name check)… friends and family give them to us…they fit together with no spaces… they fit well on the trays we use on our window sills in the Winter months… easy to stack and store… easy to keep clean… good to write on with chalk pens for labels… discourages roots from going round and round…durable and last for a number of years. Some of our pots are easily seven years old, if not older. Virtually family.
Pick a pot that works for you.
Ahh, but what type of soil?
A free draining soil mix will suit chilli babies
Much has been written about soil type. Lots of advice is out there. Last season we spent many hours researching, sourcing, combining, mixing and using a very special Birdhouse Mix. It all seemed very important at the time. You can read our 2019 soil post here:
But this year, we are doing things a little differently. We have saved and are reusing the Birdhouse Mix soil from pots last year. *Gasp* I hear you all draw breath. It is not the done thing according the the Wise Growing Elders. And it is certain that some of you will just plain disagree with our actions. No problem, we all garden our own way. However, in this day & age of recycle, reuse and reduce, it surely makes sense to reuse the soil we so lovingly created. So we are.
If we’re not convincing enough then why not listen to Alys Fowler, gardening extraordinaire.
So how to ensure the old compost is put to good use…and is actually good for our chillies?
Check the texture. Is it good and friable (best word EVER)? Rub through any clumps as if making pastry. The baby chilli roots need air around them and need to be able to push through the soil to spread out. Fluff the soil up nicely for them.
Check the content. Are there pests, seeds, twigs, berries, fungus, or other microbes that could cause harm to the new plants? If so, discard. Pick out any old roots. Our soil store is directly under a gargantuan Holm Oak tree. Great volumes of waxy leaves fall into the soil. They too have to be picked out. Grrr!
Check your intentions. Do you intend on feeding your plants? (Yes!) A liquid feed is perfect for reused compost. If not then you may need to add a general fertiliser or want to consider a more nutritious soil to start with.
Check any supplements. Some people add water retention beads. You may want to add grit, perlite or vermiculite (or cat litter, Alys). Good drainage is best for chillies. Our soil mix has plenty of grit, sand and perlite already so we just added a 10% of peat free multi-purpose compost, just to add bulk and a touch of all round nutrients for the next few weeks. We also add a layer of horticultural grit at the bottom of each pot to avoid the roots sitting in anything too wet.
Are we ready to pot now?
Potting on and on and on
And now you can pot on. This is how we do it:
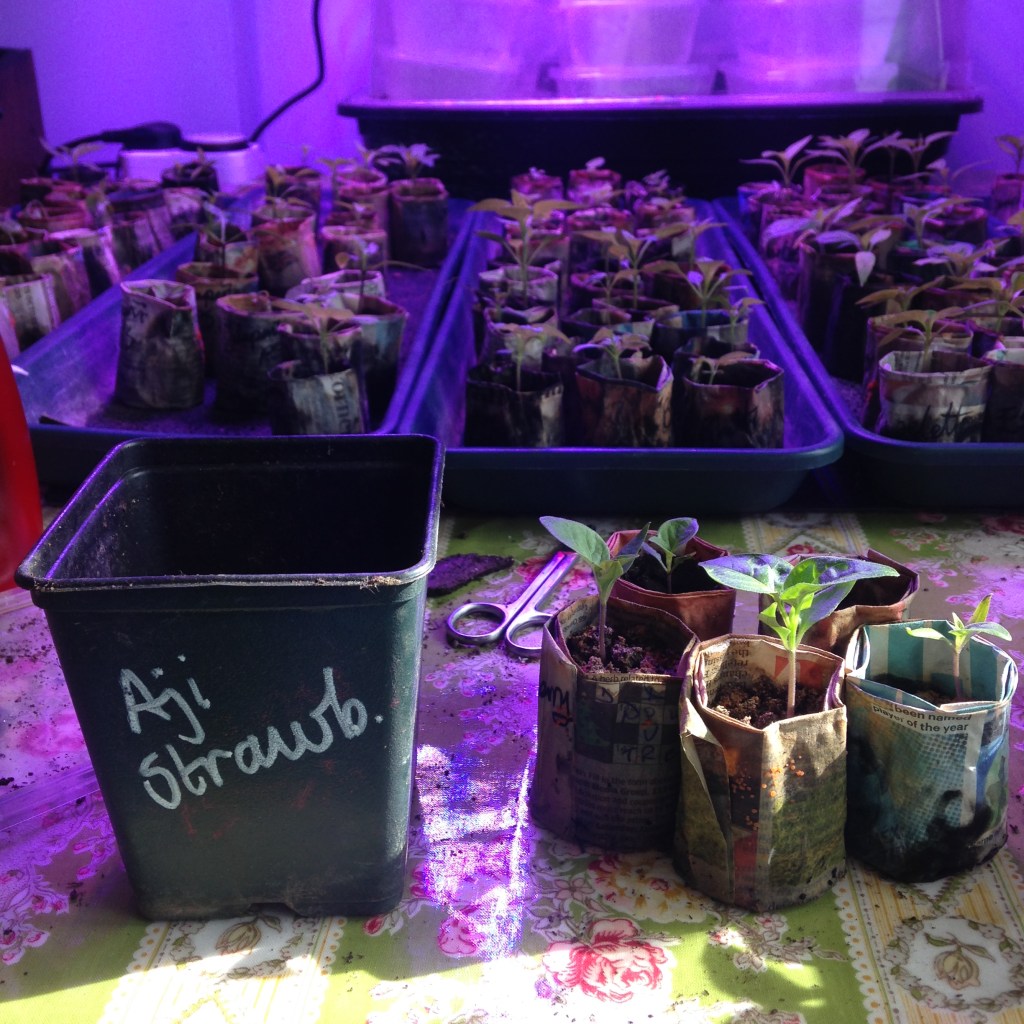
Select your first seedling, check which variety it is and label its new 9cm square pot. We use chalk pen.
Put a layer of horticultural grit in the bottom of the pot, followed by a layer of lightly damp, warmed soil.
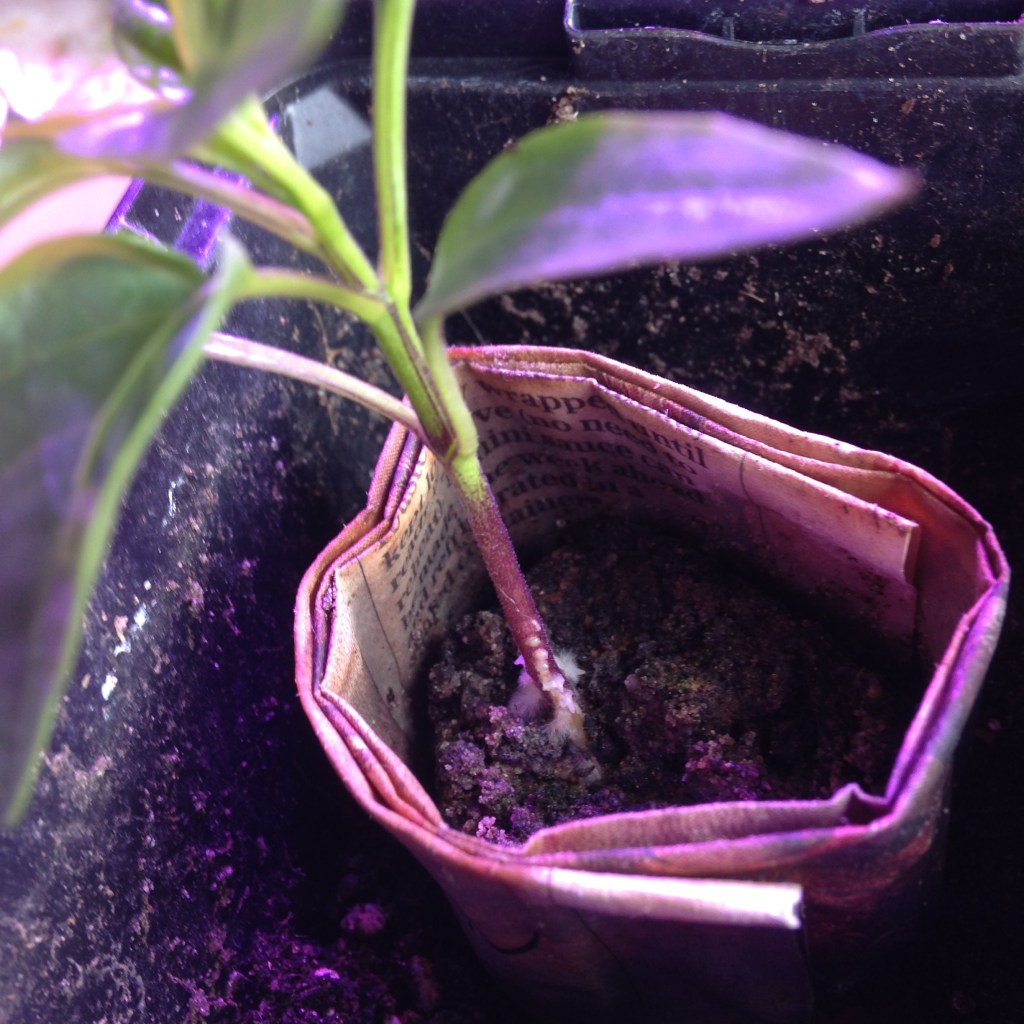
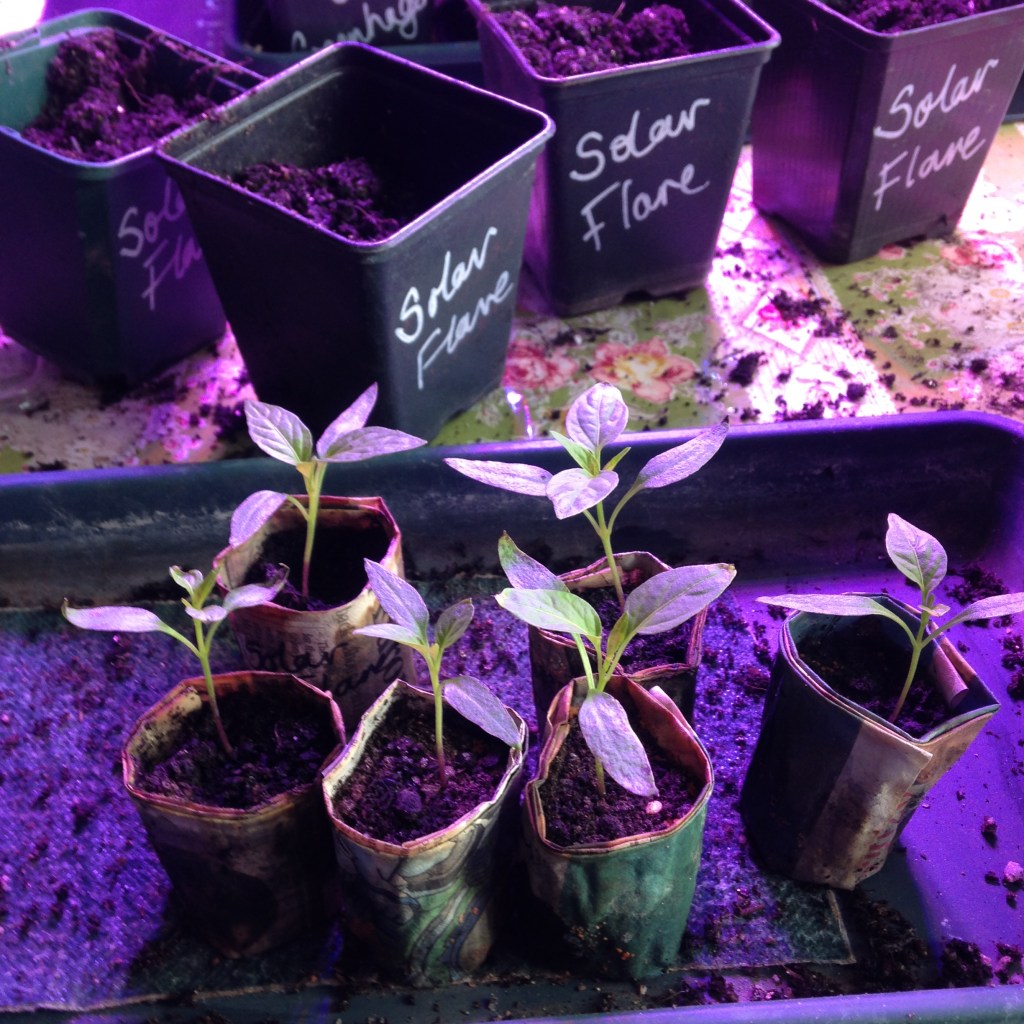
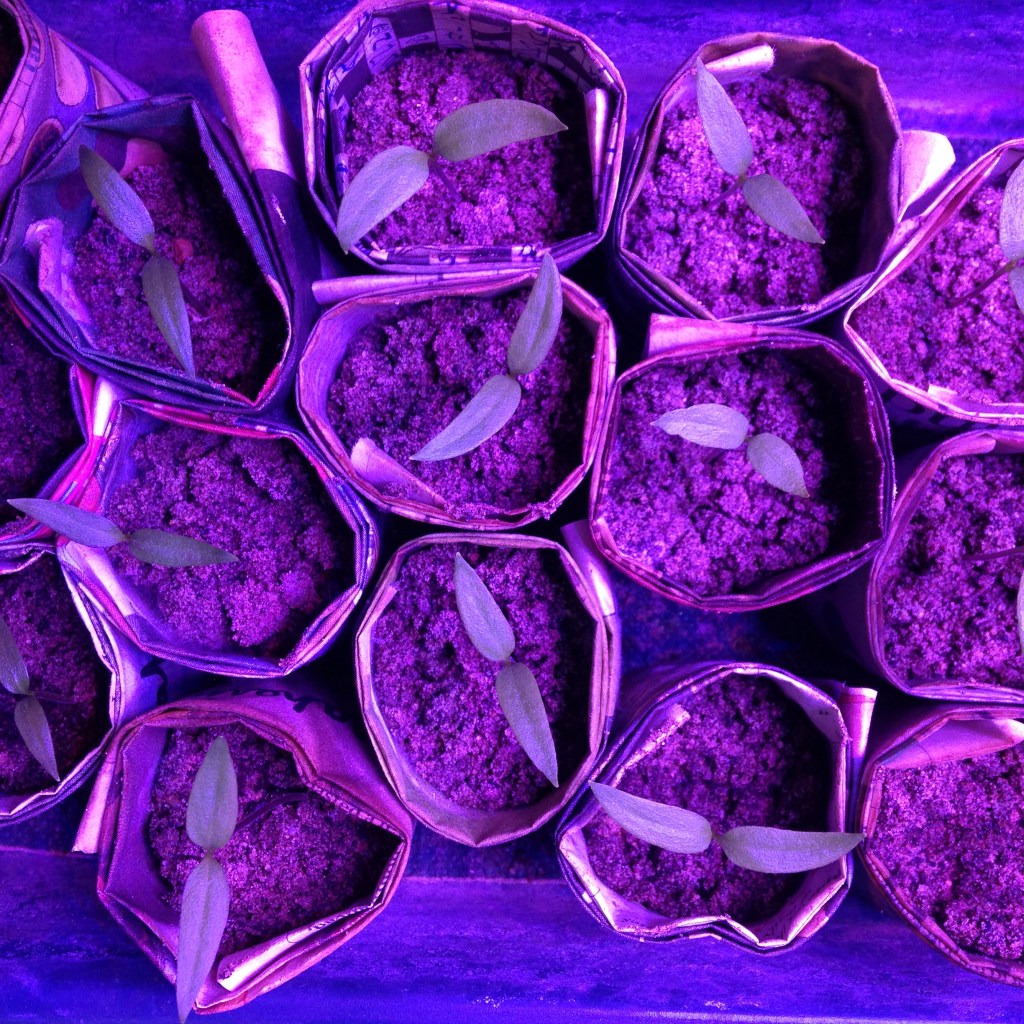
Our seedlings are in newspaper pots. Then can just be popped on top of the soil layer.
Back fill around the pot. If the seedling is leggy then top the soil up until just under the seed leaves. Gently not to damage the stem as that could cause weakness later on.
Pick up the pot and gently knock it on a surface to settle down the soil without compacting it. Top up if need be.
Place the pot on a tray lined with capillary matting.
Water with a weak feed. Warm water, from the base.
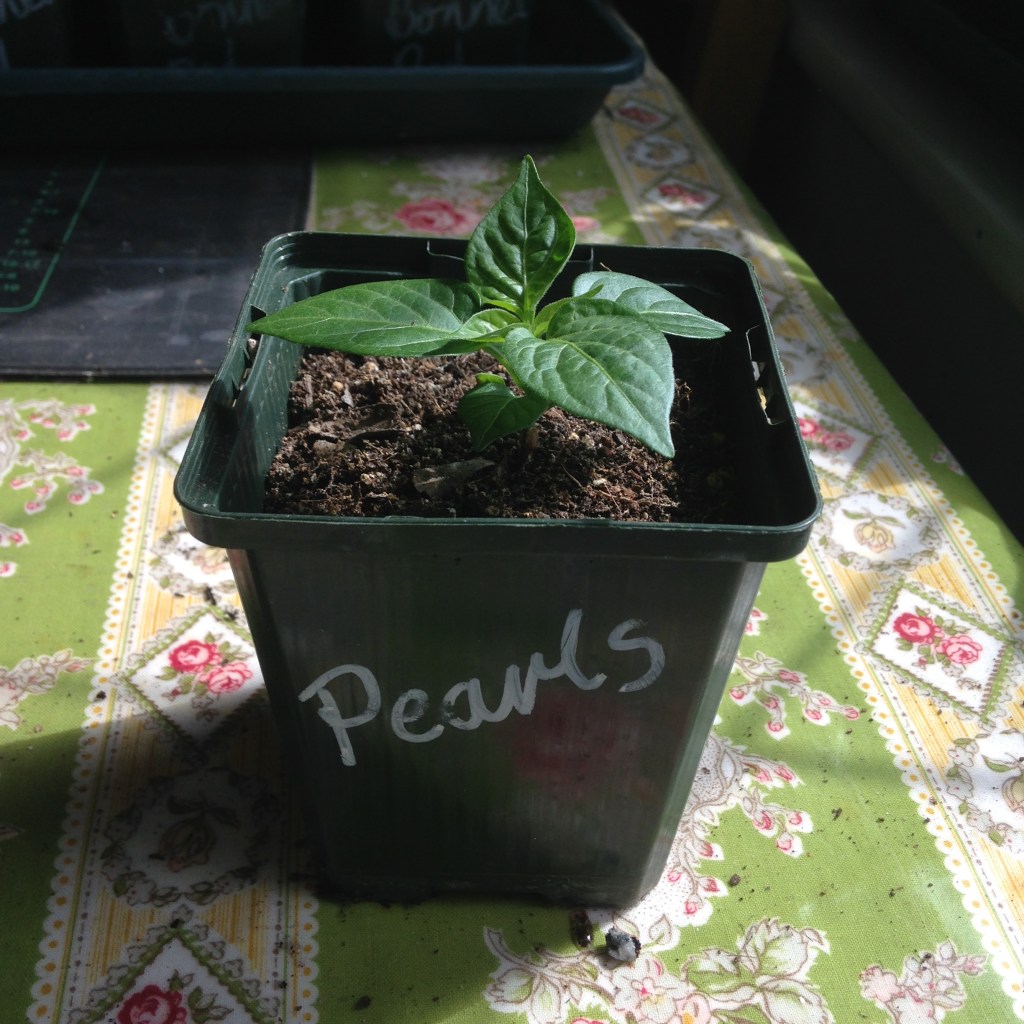
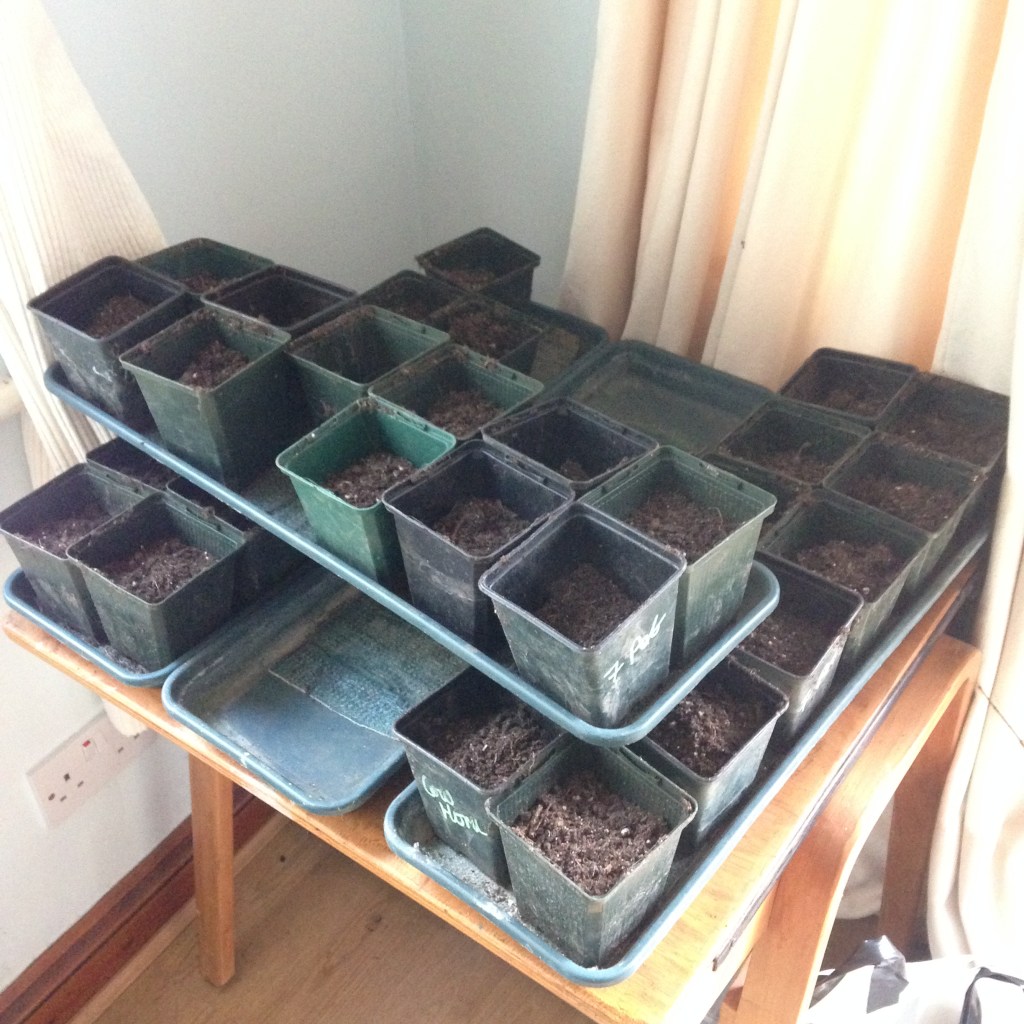
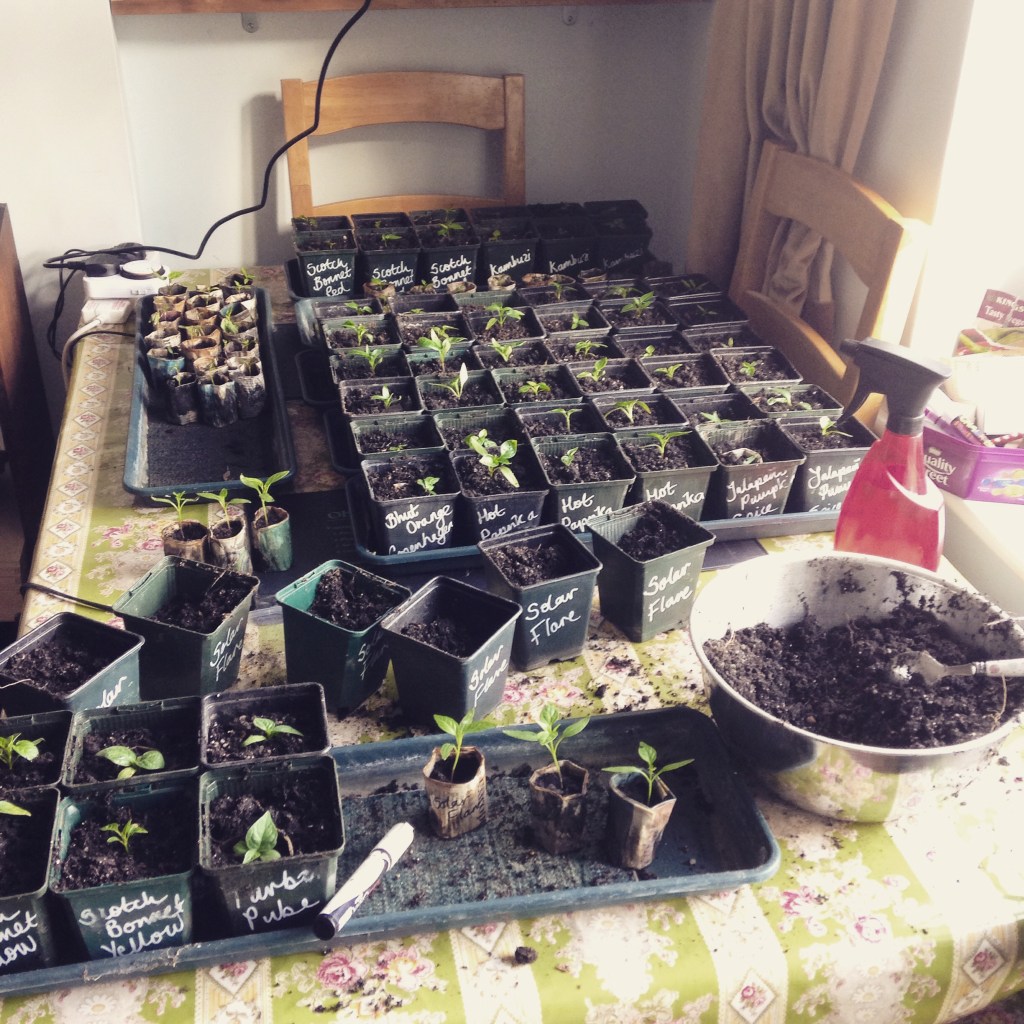
Presenting the Class of 2020 in their new pots
The Class of 2020
Of course a chilli head’s work is never done. Here are the rest of the Class of 2020. Chinense on the right, gradually putting on bulk. On the left are the late germinators. Mostly Annuums so they should be fine. All too little for new pots yet.
We’ve got a light! Just one mind you… but it may multiply. Let’s see if it makes a difference to last year’s au naturel efforts. We have the Phlizon 1200W LED Full Spectrum grow light. Father Christmas did a lot of research and selected this magnificent glowing product. Good work Saint Nick!
Phlizon 1200W is currently strung up with a Heath Robinson style pulley & rope system between bookcase and curtain rail. Dangling 24 inches from the seed leaves of the chilli babies, it gently whirrs in the corner of the room and the seedlings gaze lovingly up at it.
The Dove from Above: Phlizon 1200W,
Why do we need lights?
When us chilli growin’ Brits want to make full use of the heat and light of our limited Summer months, we have to start planting way back in January – especially with those tricky Chinense types. The UK climate certainly presents some challenges when starting this early. Long, dark nights and cold, grey days are certainly not the perfect environment for chillies.
To replicate what a chilli likes, we use a number of techniques that hopefully give our plants a good start in life. One of these techniques is to use a grow light: replacing or supplementing the seemingly absent sun with an artificial source of light. This instantly deals with the lack of daylight hours in a drab Hampshire Winter.
It’s not just replacing like for like either, an artificial sun can be much, much more. You can tailor the wavelength range of lights to suit the particular phase of growing your plants are in. Briefly, green plants (including chillies) need a range of solar radiation (light) of wavelength 450-700nm to grow to their potential. This is known as Photosynthetically Active Radiation (PAR) and happens to correspond to the spectrum the human eye can register.
Photosynthetically Active Radiation (PAR) range that stimulates plant growth corresponds with the spectrum visible to the human eye
For early growth and strong roots the plants need a wavelength range of 450-495nm. This is the blue light range. Imagine a chilli plant in the wild, early in the growing season (Spring and early Summer) sunlight is naturally more in this range.
Later on, during the flowering and fruiting stage at the end of Summer, early Autumn, sunlight has a more red tone, 680-750nm. We can replicate this by switching to the BLOOM light range. Red tones increase flowering and photosynthesis rate.
When producing chilli plants under artificial light we can replicate and enhance what Mother Nature tells us to do.
What types of lights are available?
Fluorescent lighting
This is a good cheap start-up option. Bulbs are readily available in stores and online. The bulbs and units are relatively small and can be fitted well into grow tents. They don’t get super hot and so no need for fans or large distances between light and plants.
High Intensity Discharge lights: Metal Halides (blue spectrum) and High Pressure Sodium (red light)
These are a serious bit of kit. Probably a bit too full on for a home grower like us but something to aspire to if things scale up.
The lights produce a significant amount of heat, which can be a good thing for chillies but will also come with additional tasks and risks. Extra watering, fanning to keep cooler air circulating and greater space to keep the light further away from the young plants are all necessary. The results can be damaging if you get this type of lighting wrong.
So we opted for LEDs…
OK, not cheap to buy a unit but cheap to run. Yes, you have to wade through vast quantities of overseas sellers and their Amazon reviews but once installed they are simple to use, safe for beginners and not too bulky. Better for the environment with low electricity required to run them, long bulb life and minimal heat output.
The Phlizon 1200W is a full spectrum unit which has a VEG switch (to turn on blue and white lights), a BLOOM switch (red and white) and both switches can be used together. Not sure if we will end up using the BLOOM phase light option as the plants will be in the greenhouse by then. Mr Birdhouse is hoping to use the blue phase for his tomatoes, squashes and cucumbers so the chillies may never experience the rosy glow of the red bloom light. Perhaps separate lights for each phase would have been better?
How much light?
We’ve covered why we use additional lighting and what types of lighting are available. Now to think about how much light is required.
Chillies originated in places where there are longer hours of daylight. Perhaps they still remember this and will grow rapidly if this is replicated? 12-16 hours of light seems to be a pretty good amount. Too much of a good thing can be bad for them though so remember to switch the lights off. Keep to your routine and they will reward you with strong growth. A plug timer will help with this (next month’s purchase). A ratio of 16:8 hours on:off seems to be just about right for our growing chillies.
Having soaked our chilli seeds in tea; chitted them on warm, damp kitchen paper until they germinated; and sung sweetly to them… it is now time to plant them in some actual soil and let them do their thing.
Soaking, warming and germinating chilli seeds
The beginning of the new year is a cold, dark and lonely time for a seedling in the UK. We look after our chilli babies the best we can to stop them being affected by the January Blues.
So what exactly do we do?
Paper pots
Careful preparation is the name of the game. We make newspaper pots using a wooden pot maker. Each germinated seed gets popped into a warmed paper pot for the next stage of its journey
These pots are perfect for us because…
they are free,
made from recycled materials,
can be potted directly into a bigger pot, with minimal root disturbance
can be composted at the end of the season
No labelling mix-ups, just write on the outside of the pot.
Ok, so they take time to make and are a little flimsy. They can dry out quickly, especially on a heated surface or in direct sunlight but we love them and they work for us.
Paper pot production goes into overdrive as we attempt to keep up with the number of seeds that are germinating. 50 is our goal today, must get rolling!
The pots are simple to make and use discarded newspapers
Seed compost
The seedlings need very little to start of with as they are still being fed from the endosperm (food stash from within the seed). Use a dedicated seed compost as it is low nutrients, good drainage, small particles. All good for little roots trying to develop.
A couple of teaspoons of seed compost fill each pot. Don’t forget to write the variety on the outside BEFORE you water
Warmth
Gently warm the paper pots filled with seed compost BEFORE the seedlings are put in the soil. This means there is no shock to the system and they should continue to grow as if nothing has changed.
We place our pots on plastic windowsill trays. Lined with capillary matting. These tray conveniently rest on top of our radiators. Soil stays warm. Chillies LOVE it!
In addition to keeping the pots warm we use warm water when giving the seedlings a drink. Water from the base every few days. Careful not to overwater as waterlogged soil can check growth. Keep an eye on the outside pots as they will dry out quicker than the inner ones.
Warming nicely
Light
Make sure the seedlings get as much natural light as possible. We started in January last year, grew under only natural light and had a pretty amazing harvest. We just had to rotate a lot. The light keeps the plants from getting too leggy in the early days. Consider a set of grow lights. We are about to embark on this journey with our first set of lights: The Phlizon 1200W. More will be said about this at a later date.
Feed
After a week or so, once the seed leaves are unfurled and looking a good strong green, we start to feed a weak solution of Chilli Focus. Not too much, or the roots can burn, just enough to keep the wolves at bay. 5mls to litre of warm water should do it.
Start to feed after each seedling has
And there you have it, a simple but tested way of looking after your precious babies at this early stage of the game.