Having soaked our chilli seeds in tea; chitted them on warm, damp kitchen paper until they germinated; and sung sweetly to them… it is now time to plant them in some actual soil and let them do their thing.


The beginning of the new year is a cold, dark and lonely time for a seedling in the UK. We look after our chilli babies the best we can to stop them being affected by the January Blues.
So what exactly do we do?
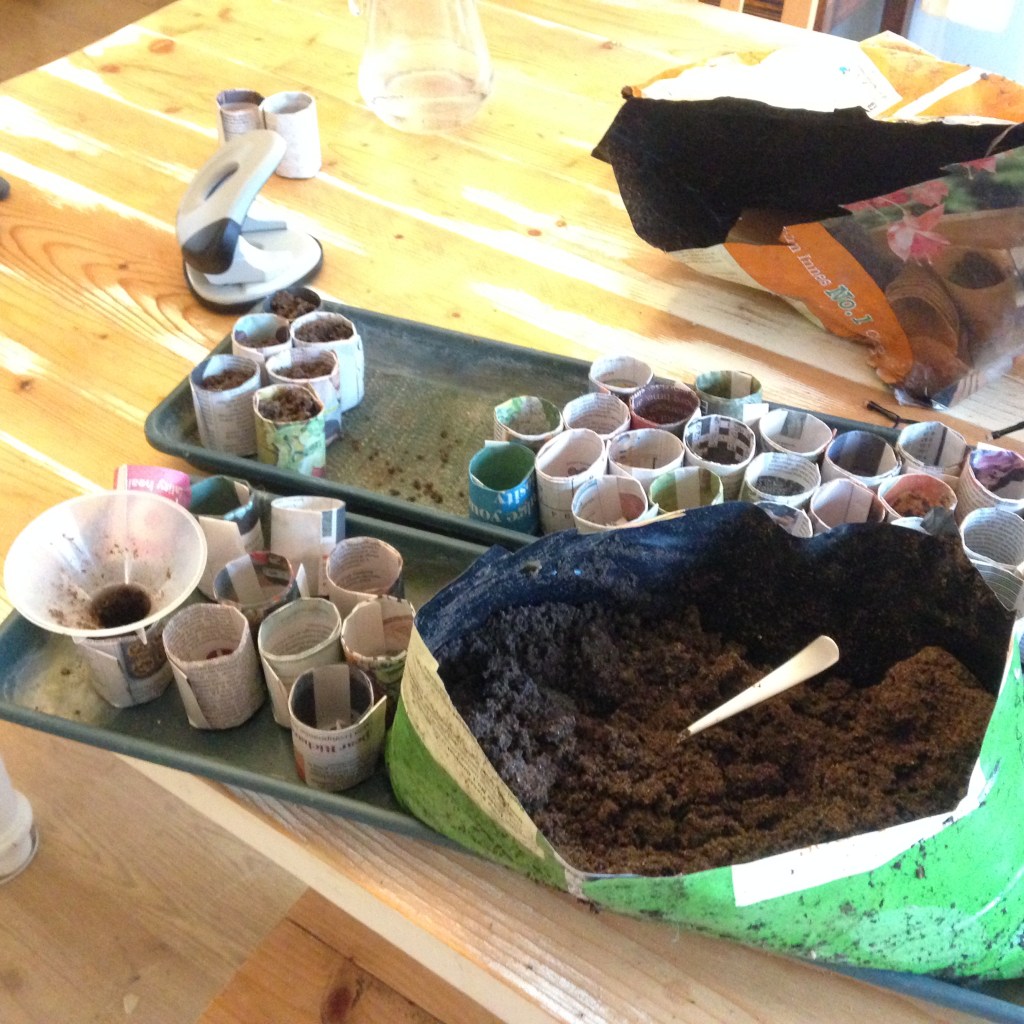
Paper pots
Careful preparation is the name of the game. We make newspaper pots using a wooden pot maker. Each germinated seed gets popped into a warmed paper pot for the next stage of its journey
These pots are perfect for us because…
- they are free,
- made from recycled materials,
- can be potted directly into a bigger pot, with minimal root disturbance
- can be composted at the end of the season
- No labelling mix-ups, just write on the outside of the pot.
Ok, so they take time to make and are a little flimsy. They can dry out quickly, especially on a heated surface or in direct sunlight but we love them and they work for us.
Paper pot production goes into overdrive as we attempt to keep up with the number of seeds that are germinating. 50 is our goal today, must get rolling!


Seed compost
The seedlings need very little to start of with as they are still being fed from the endosperm (food stash from within the seed). Use a dedicated seed compost as it is low nutrients, good drainage, small particles. All good for little roots trying to develop.
Warmth
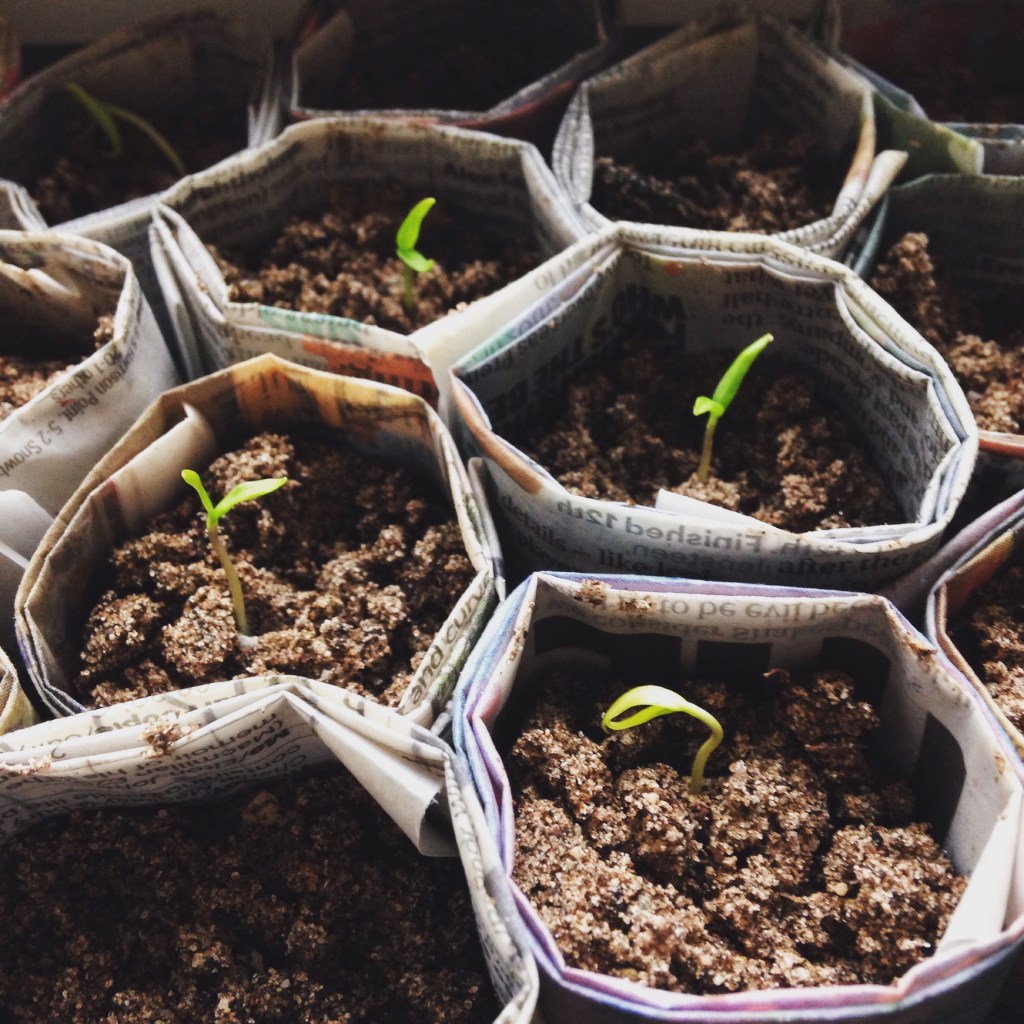
Gently warm the paper pots filled with seed compost BEFORE the seedlings are put in the soil. This means there is no shock to the system and they should continue to grow as if nothing has changed.
We place our pots on plastic windowsill trays. Lined with capillary matting. These tray conveniently rest on top of our radiators. Soil stays warm. Chillies LOVE it!
In addition to keeping the pots warm we use warm water when giving the seedlings a drink. Water from the base every few days. Careful not to overwater as waterlogged soil can check growth. Keep an eye on the outside pots as they will dry out quicker than the inner ones.

Light
Make sure the seedlings get as much natural light as possible. We started in January last year, grew under only natural light and had a pretty amazing harvest. We just had to rotate a lot. The light keeps the plants from getting too leggy in the early days. Consider a set of grow lights. We are about to embark on this journey with our first set of lights: The Phlizon 1200W. More will be said about this at a later date.
Feed
After a week or so, once the seed leaves are unfurled and looking a good strong green, we start to feed a weak solution of Chilli Focus. Not too much, or the roots can burn, just enough to keep the wolves at bay. 5mls to litre of warm water should do it.
And there you have it, a simple but tested way of looking after your precious babies at this early stage of the game.

So my Chillies have sprouted roots but no leaves as yet. Do I leave them in their containers in the airing cupboard until they do, plant them now below soil level & wait for leaves to appear? Any help appreciated
LikeLike
Hi Kaye,
Glad to hear you’ve got some good germination going on. A couple of pointers from us:
1) Once you’ve achieved germination, you need to introduce light to encourage growth. Hiding in the dark – although nice and warm – is not going to help. So they may slow down a bit in the cooler air but you need to take them out and place them in light spot on a window sill or such to keep the plants growing.
2) Transplanting the seedlings depends on what medium you’ve got them in currently. If the seeds have been chitting on matting, leaving them in there can mean that the roots grow into the matting making them difficult to transplant. It’s not impossible – you can carefully cut around the matting to avoid disturbing the roots – then plant into their soil pots. However if they’re already in soil in their current containers, I’d say leave them in situ until true leaves have formed before potting on.
Hope that helps.
The Birdhouse
LikeLike
Thanks for your response. Germination going well and my husband has made me a light box with fluorescent bulbs on chains so we can move them up or down. Very excited to trial it to stop the annual ‘leggy’ specimens of previous years! Appreciate your help.
Kind regards
Kaye
LikeLike