It was March 28th when the Big Snip occurred. The tops of the seedlings were unceremoniously chopped off and they have been nursing their wounds ever since. All in the hope that new side shoots would appear and make bushier, sturdier and more productive plants.
That was two weeks ago…what do the plants look like now?
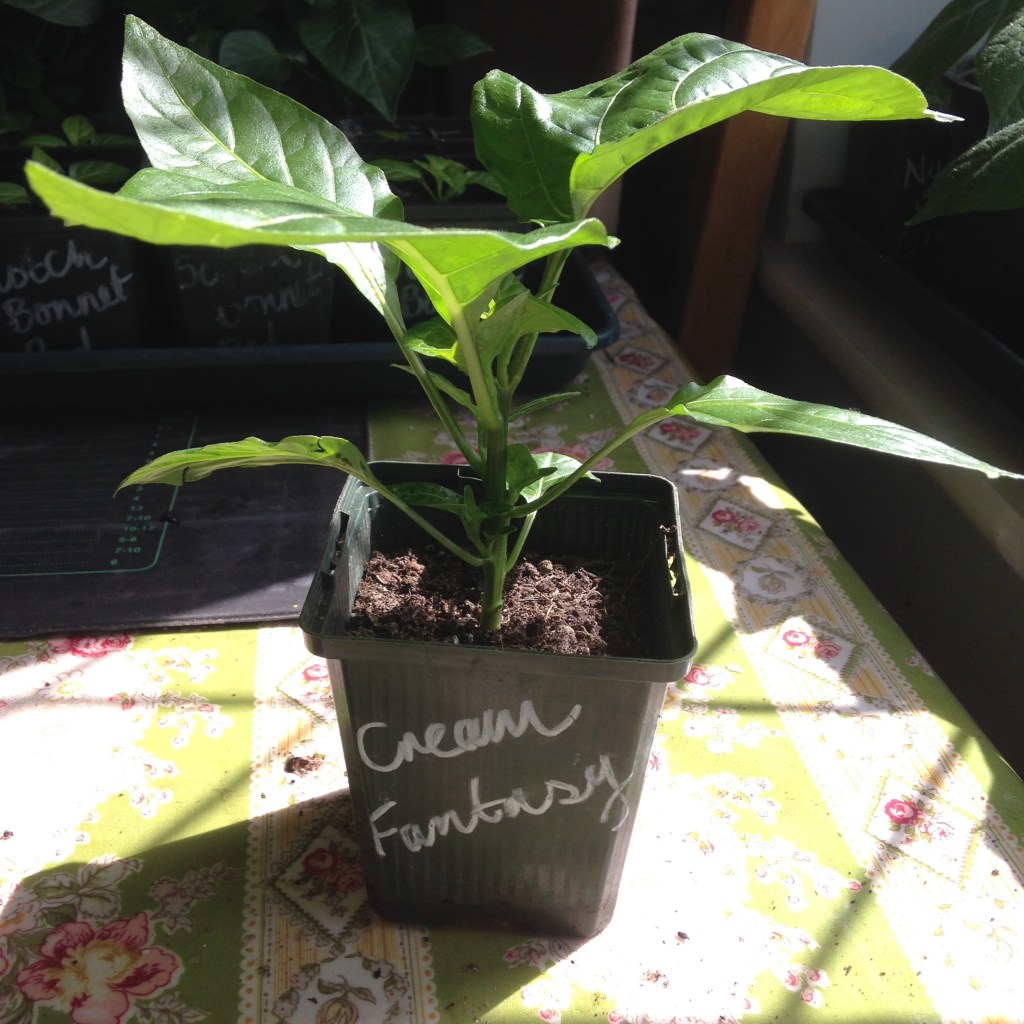
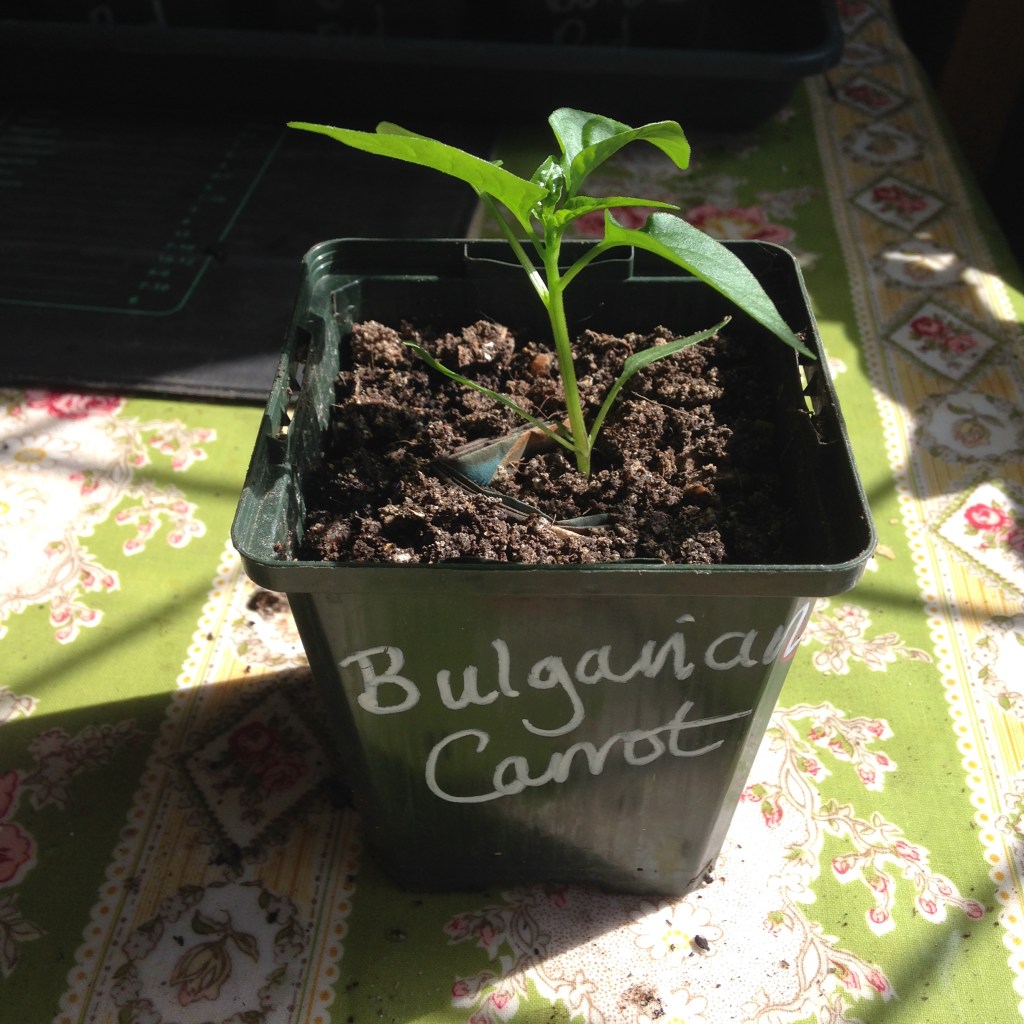
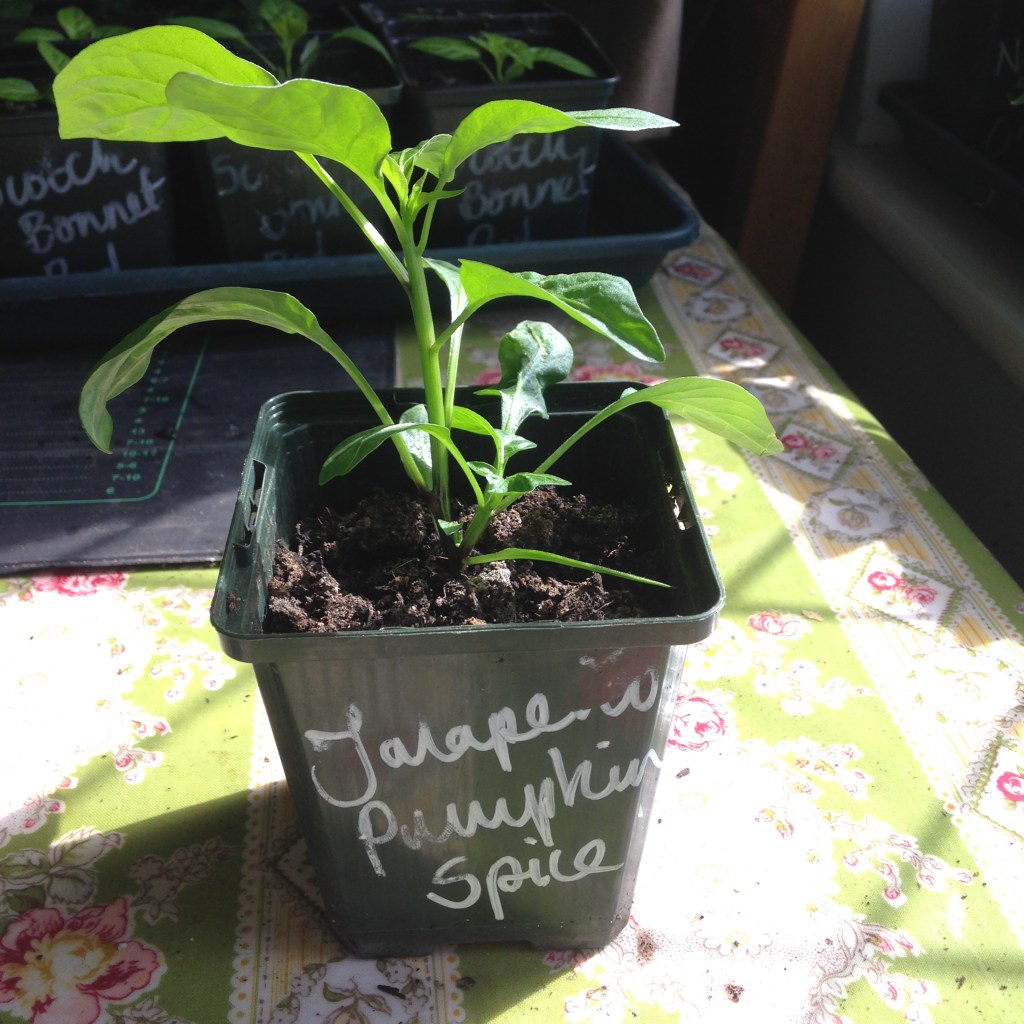
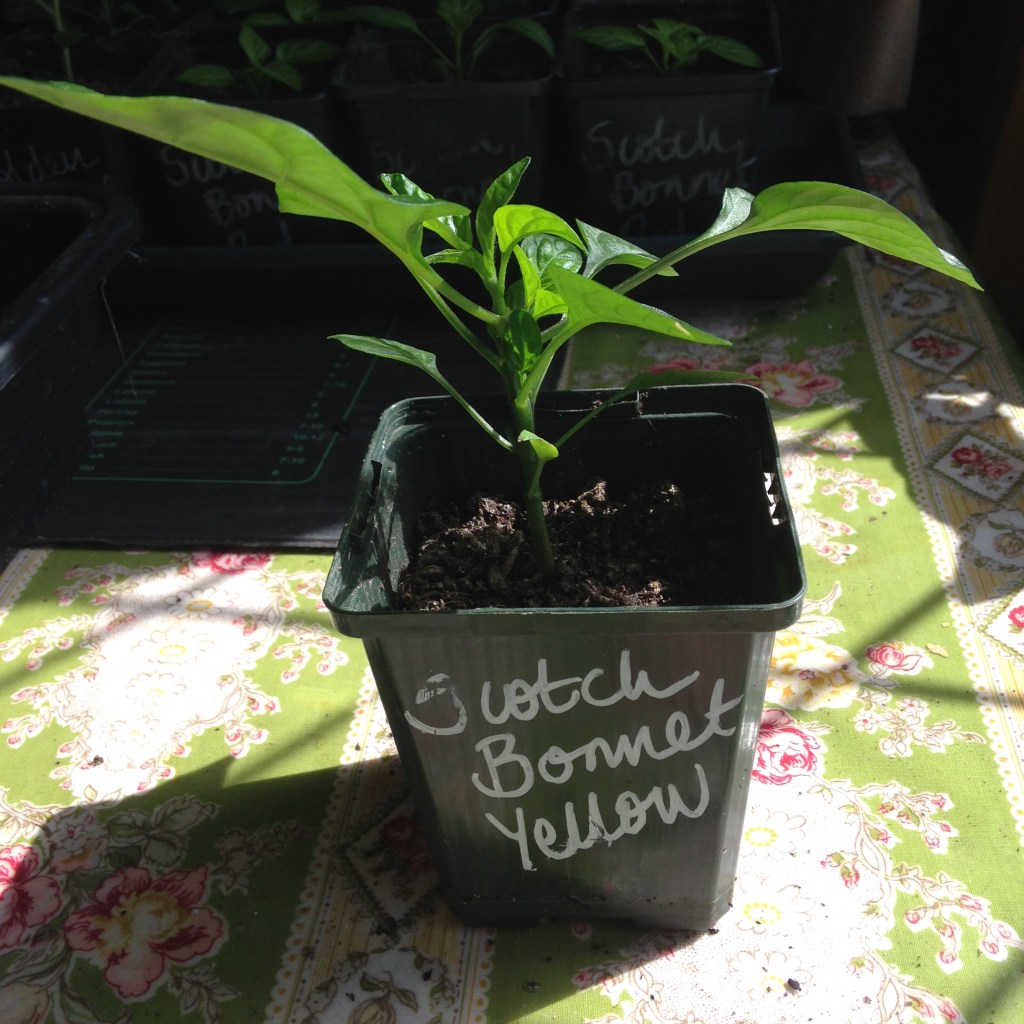
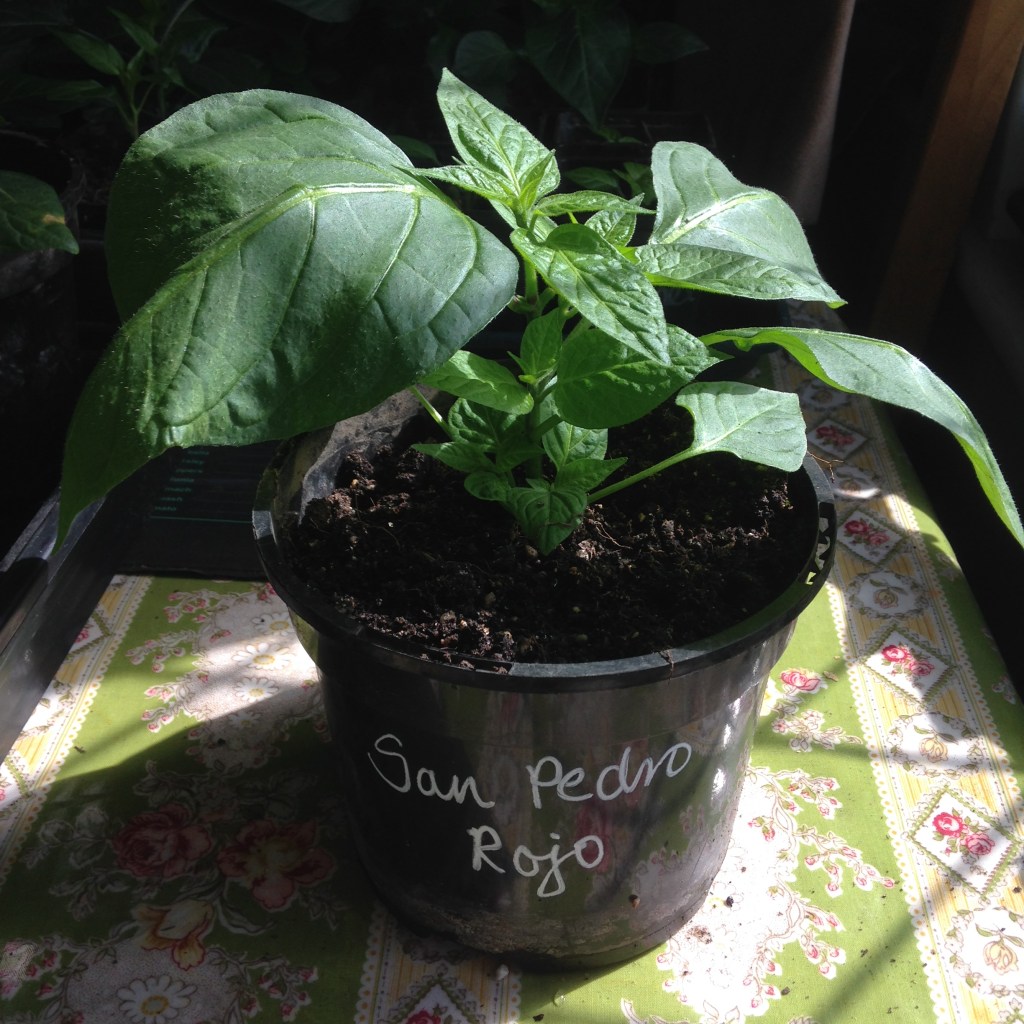
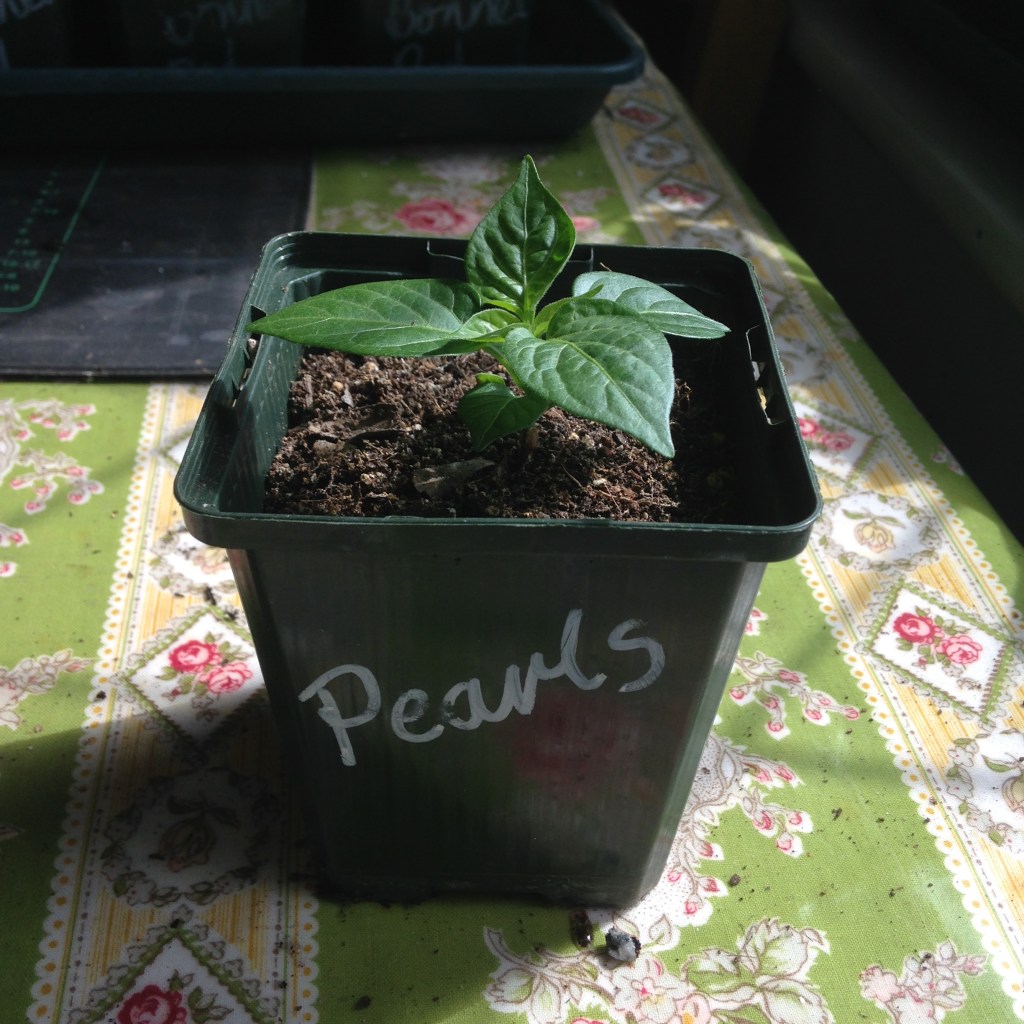
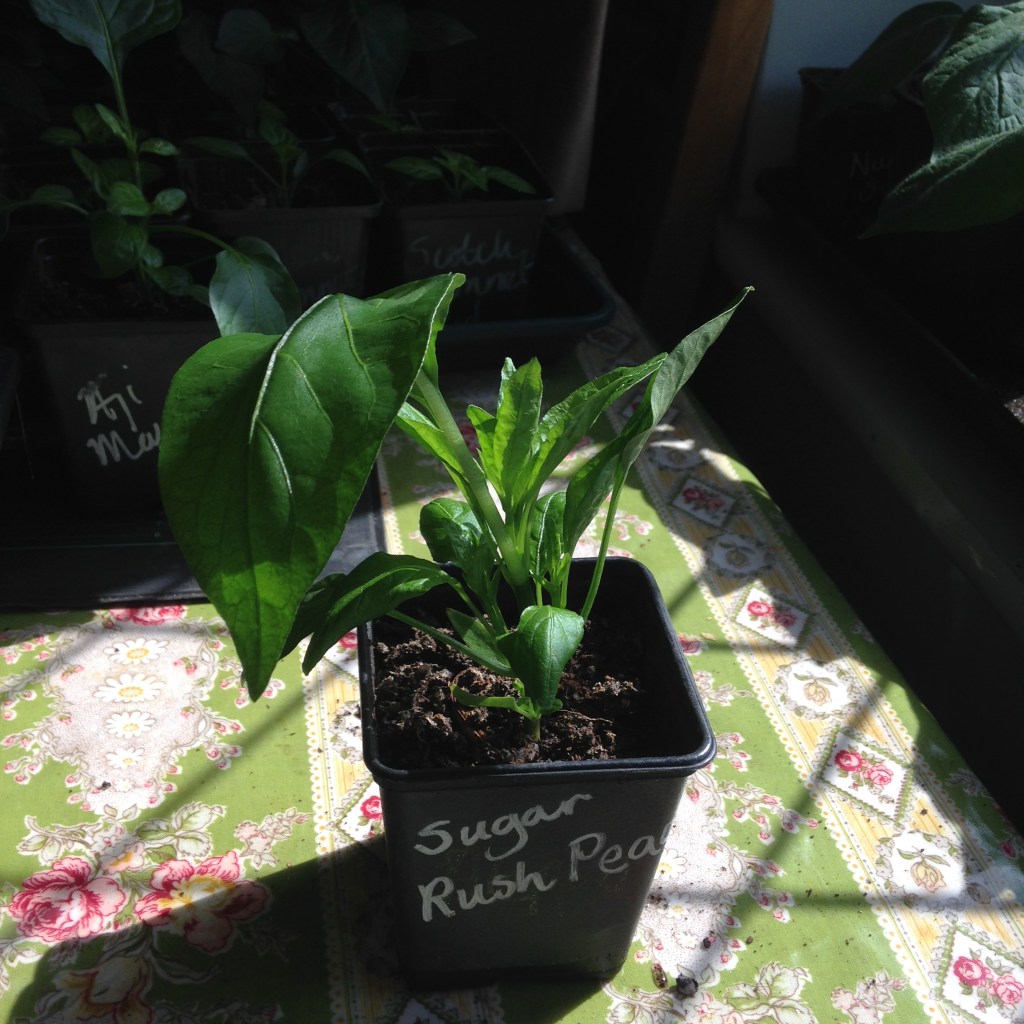
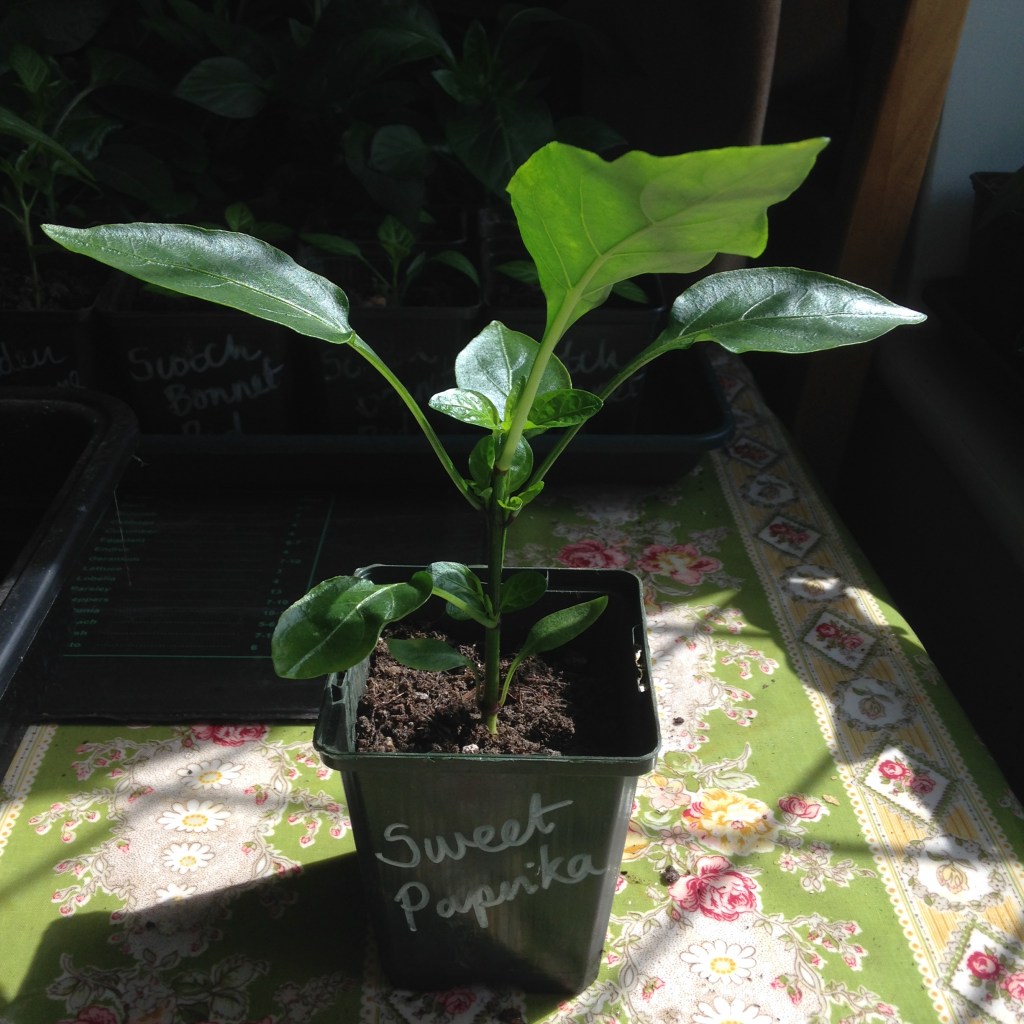
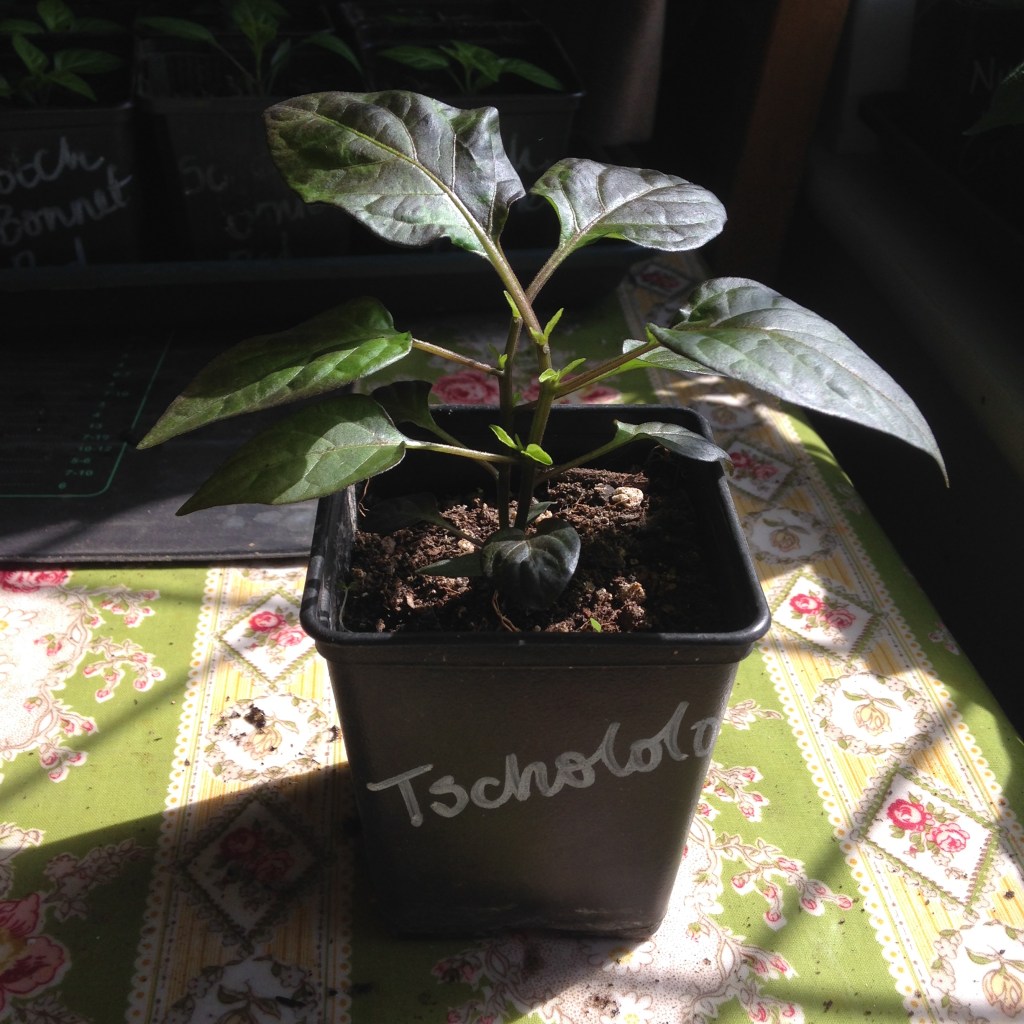
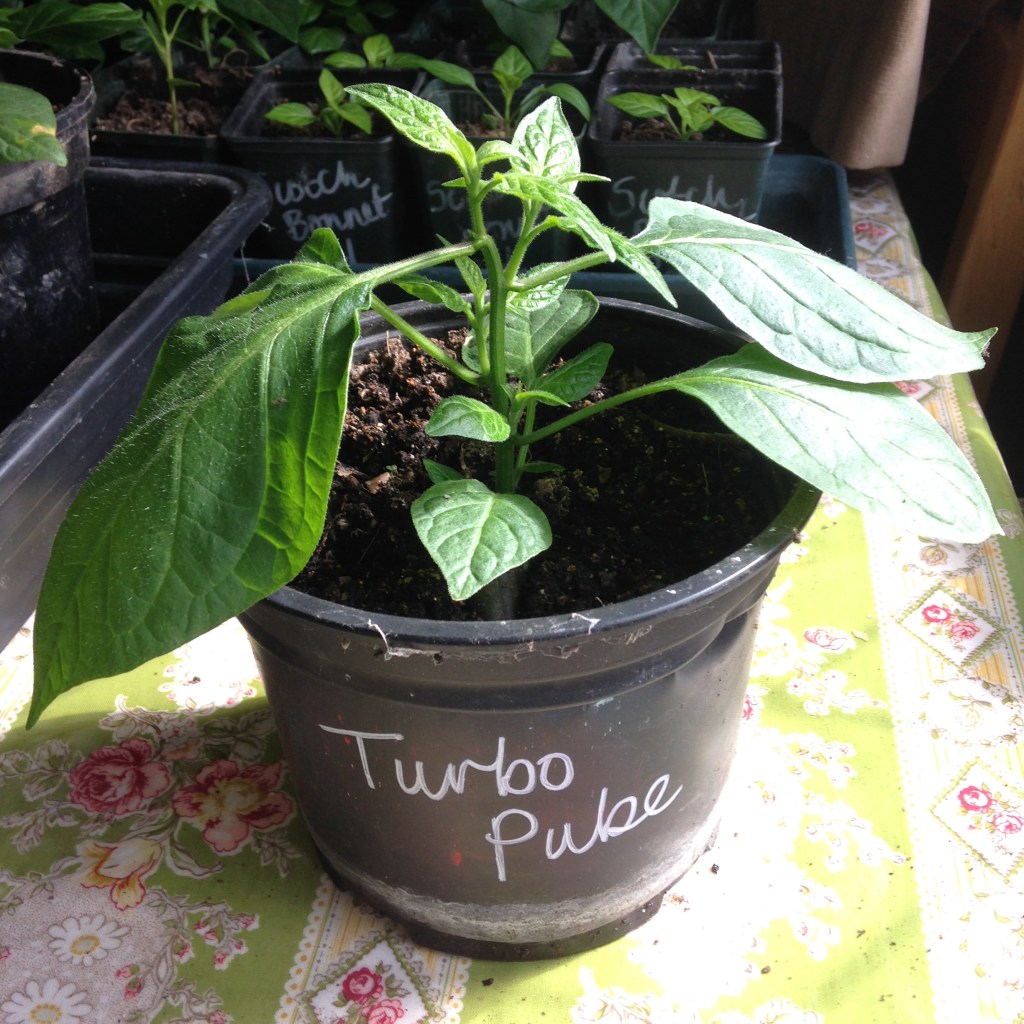
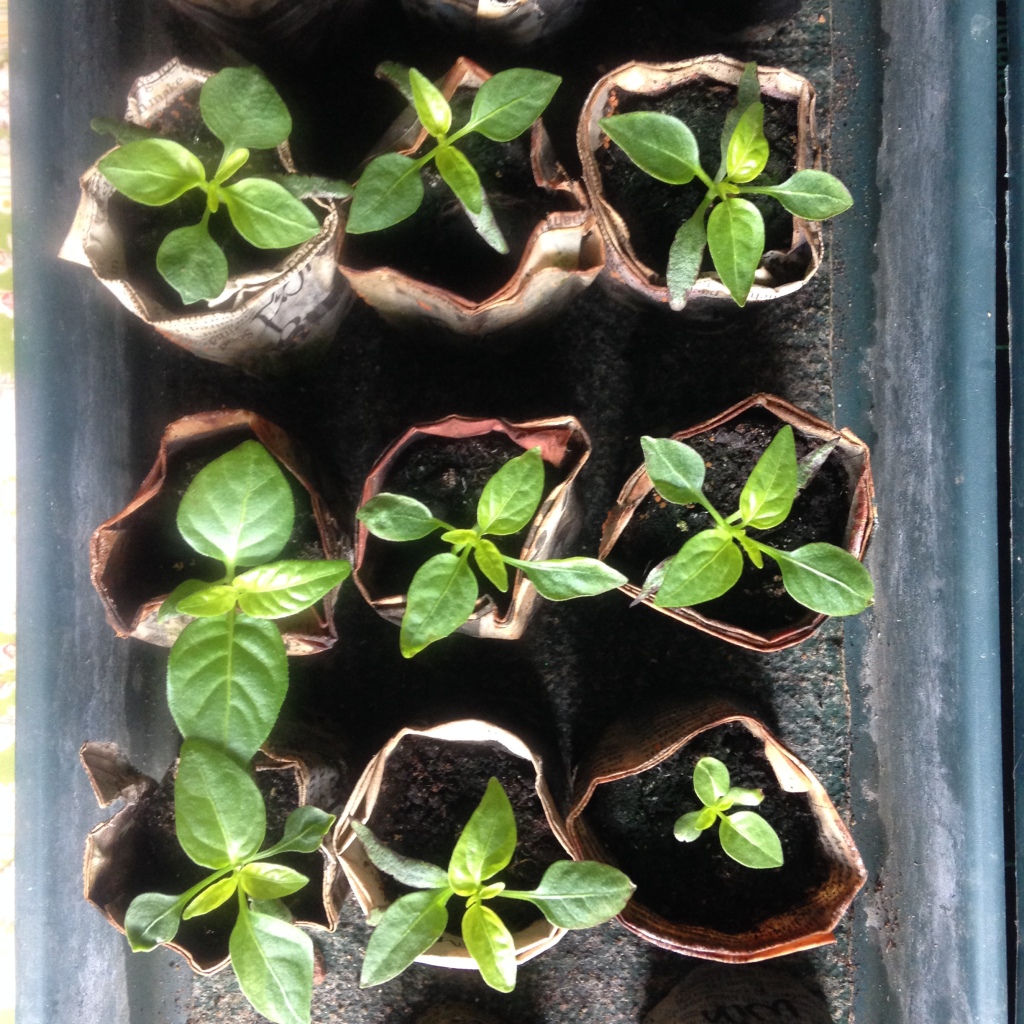
Here they are, in all their glory: tight plants with side shoots a plenty. A bit awkward, in the teenage phase if you will, but their small leaves will soon catch up with their big leaves and all will be bushy and well.
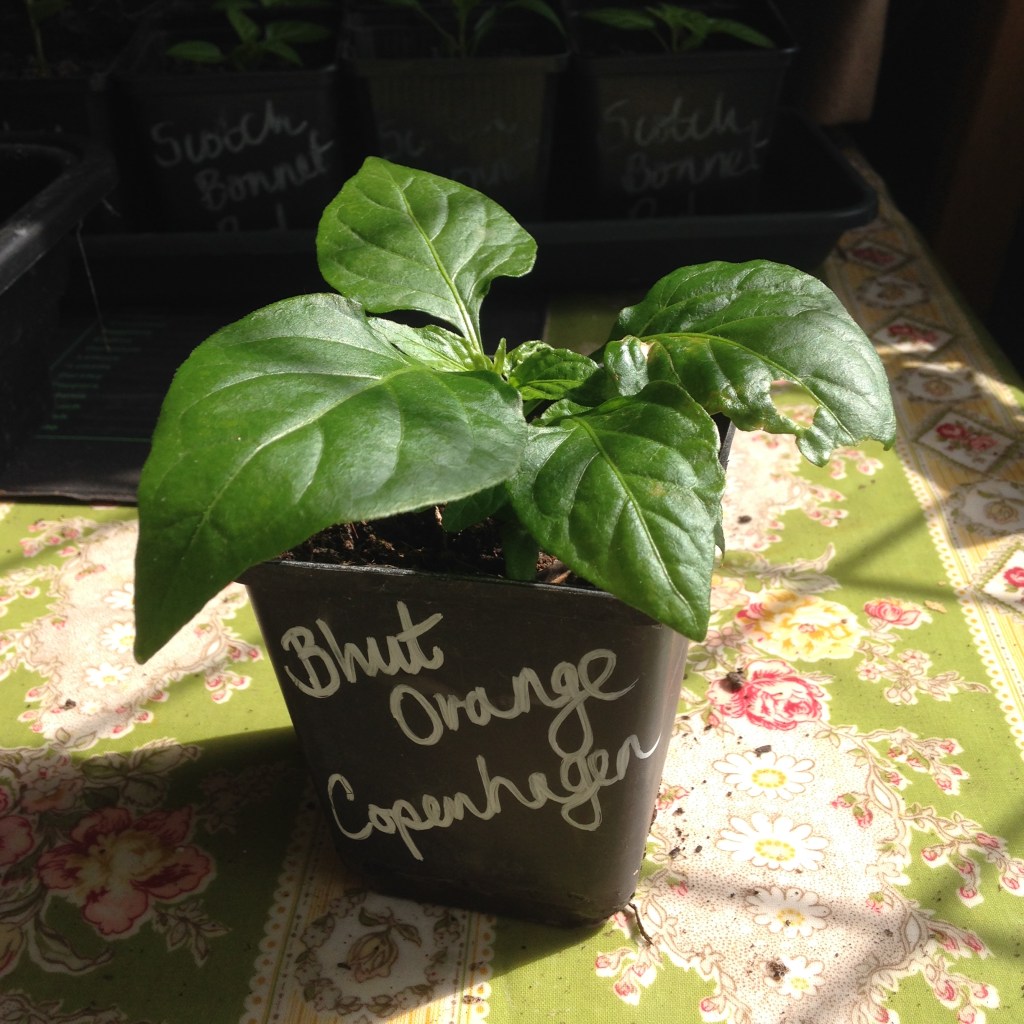
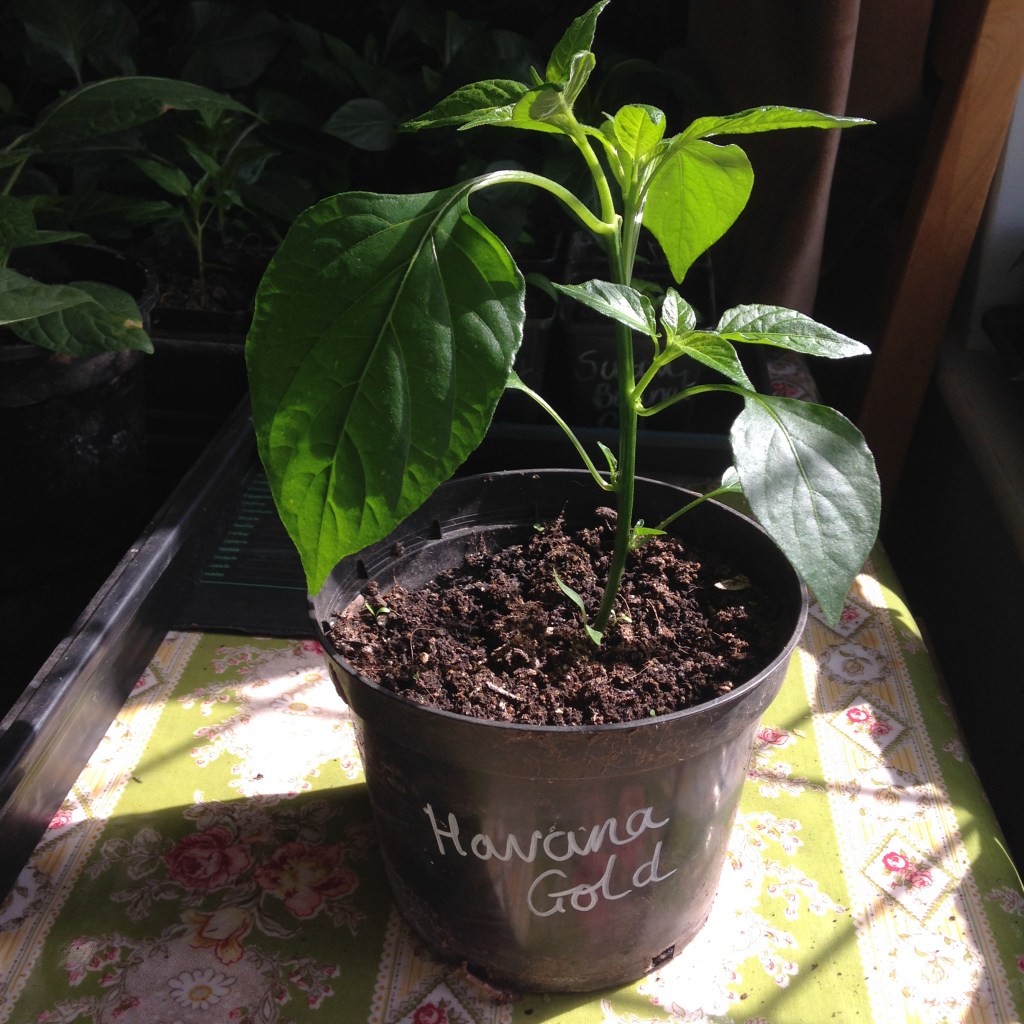
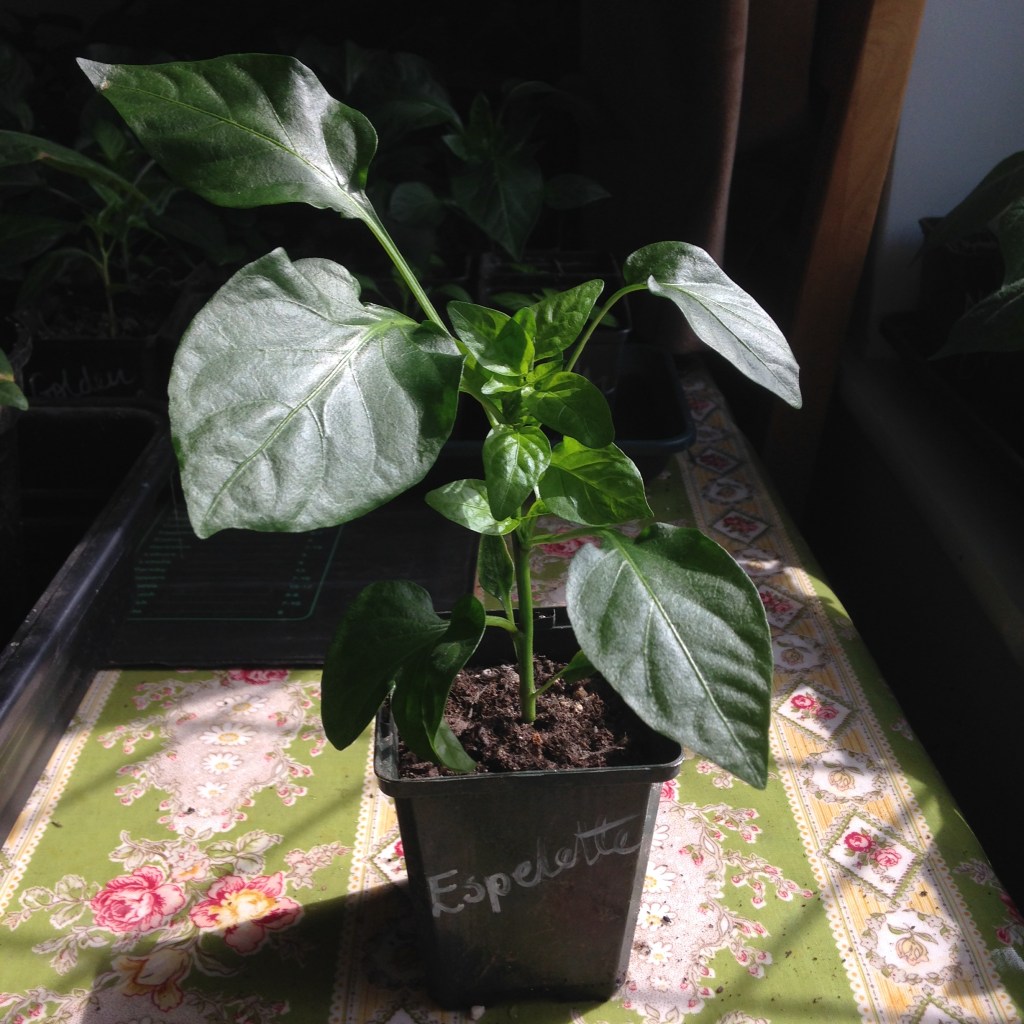
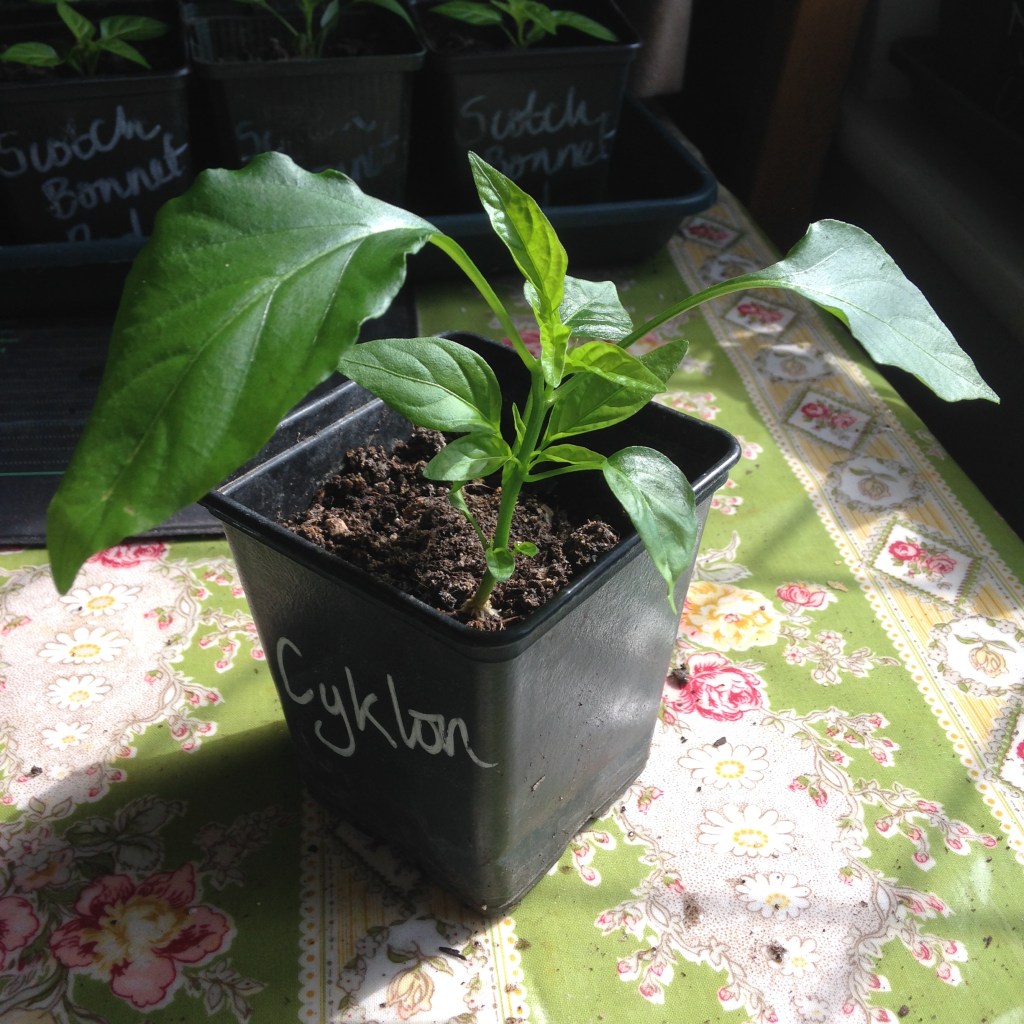
2020 selection of chilli plants two weeks after they have been topped
What’s next?
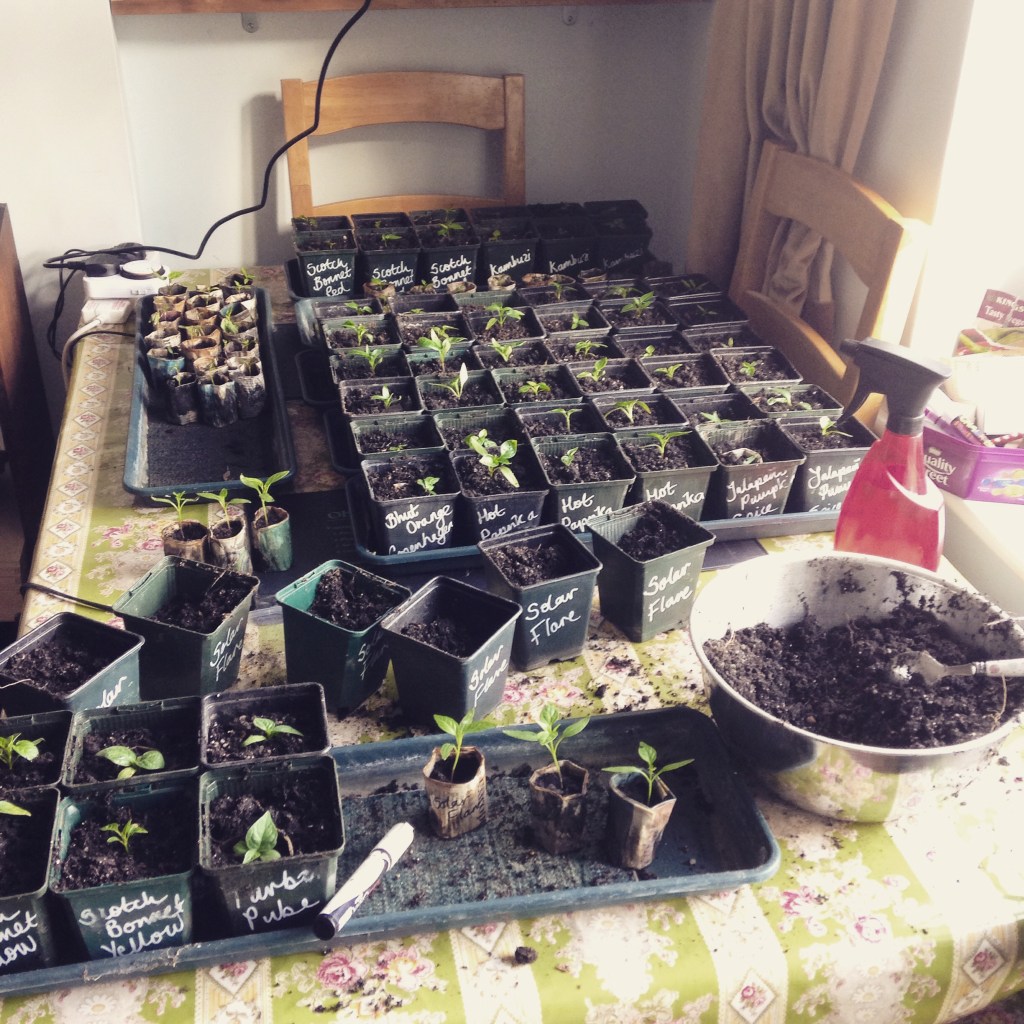
The plants need to have a good space around each of them. They are currently wedged together on windowsill trays and under a grow light in our study. Not ideal. There are now some critical issues:
Shortage of compost: many plants need potting on but compost is in short supply. We are reusing last year’s spent compost, mixed with extra perlite and garden compost. No grit this year as it is too expensive and difficult to get hold of.
Over crowding: by not potting on yet we have larger plants in smaller pots, with less gap between each plant. Light, air flow and good space is what each plant needs to grow to its full size potential. All those new side shoots will grow leggy if they are over crowded.
Pot bound root ball: yet again roots are starting to be seen from the bottom of pots. If they are not potted on the roots poking out will wither and the ones inside will become pot bound.
Space indoors is running out: an entire room has been taken over by chillies. This is not practical anymore.
Solutions are coming.
A 900L bag of compost is on the way (there are also tomatoes, squashes, cucumbers, beans to consider you know). A 3m x 2m poly tunnel is ordered, staging is being prepared. Perhaps within this week our plants will be heading out into the great outdoors (heated poly tunnel).
Do you want bushy chilli plants? Strong & sturdy, multi stemmed, eventually laden with fruit?
Early Red Primavera Habanero from 2019. Topped in April to encourage extra branching and more fruit. Ripe from in late July.
Well of course you do! But maybe your plant are not quite there yet. If not, then look no further than The Birdhouse Miracle Cure!
How do we achieve the ideal chilli plant?
Some plants are just born this way but others need more help. Some will just do their thing regardless of how you tend them but there is nothing wrong with encouraging them in the right direction.
By applying The not-yet-patented Birdhouse Miracle Cure – otherwise known as topping – we can encourage side shoots and bushy growth which lead to strong, multi stemmed, hopefully super fruity plants later on.
In addition to resulting in a good strong, bushy plant, topping will nip out any very early flower buds from the single growing shoot. These buds often drop and do not set fruit. Even plants that do set early fruit can be negatively affected and fail to produce any more flowers. Topping may well avoid flower abscission entirely.
Is there some sort of science that can convince me topping works?
Plants have hormones. These hormones make different parts of the plant act in certain ways. In this instance, we are messing around with the growth hormones, auxins and gibberellins.
These hormones work together in the top growth shoot of a chilli seedling, causing cell elongation and increased cell division resulting in a rapidly growing shoot.
By removing the lead growing shoot we are sending the hormone concentration out to other areas it can be effective, namely the leaf axils where buds can develop. The hope is that each axil will produce axillary buds that eventually turn into extra branches. Thus creating a bushy plant with many growing shoots rather than a single stem.
In previous years topping has largely been very successful. And so we repeat the process this year. However, what occasionally happens is that just one of the axils produces an axillary shoot and that in turn just becomes a new single lead shoot, rather than a larger number of new side shoots. Resulting in a lop sided and unstable plant. Not bushier, not extra flowers or fruit. Just top again!
Patience. Start by selecting appropriate candidates for treatment. Look for plants that are all or most of the following:
Oooh, perfect to whip its top off
Tall;
Leggy (not necessarily that same as tall) Leggy means ‘larger than desirable gaps between leafs sets’;
Single stemmed – best to treat them before they have split to the classic Y ;
No side shoots naturally forming;
Have 4 or more pairs of true leaves.
Annuum plants are often perfect for topping treatment at this stage in the season. They can take an early top and maybe even another in a couple of weeks. A second top may be necessary if one new axillary shoot becomes dominant.
Annuum chilli plants ready to top
Chinense types are usually a bit slower to grow to start with. They stay shorter too. Good results come from topping but make sure they have enough true leaves before attempting. Keeping in mind that Chinense take longer to produce ripe fruit you don’t want to top too late either.
Chinense type chilli plants ready to top
Baccatum are often sprawling, branched plants. An early top could help them to produce even more branches.
Baccatum chillies ready to top
Rocoto chillies have branched plants. Catch them before they split to the first Y and topping can help reduce the spindly nature of their initial growth.
Rocoto chilli plants ready to top
Come on now, how do we DO this thing?
OK, like this.
Put on your brave pants, this could get scary;
Gather the tools: clean, sharp scissors in one hand (we like embroidery scissors or tiny snips for bonsai work);
Take the selected victim in the other hand;
Carefully position the scissors to snip out the growing shoot, leaving behind at least four good true leaves.
And breathe out. Honestly, within a week, probably five days, new buds of side shoots will have appeared in the crooks of the remaining leaves.
Chop the top off
Are there any reasons not to treat the plants this way?
Topping will check the production of flower buds as the plant will concentrate on producing more growing spikes. Too late in the season and you risk not achieving fully grown and ripe chillies.
Some plants natural form side shoots, grow short and bushy, are covered in fruit anyway. No need to top. Let them get on with the job themselves.
Slow growing chillies – often Chinense types – do not need further excuses to take longer to flower and fruit. Consider if the extra fruit you might gain is worth the longer wait or even the risk of the first frosts arriving before your chillies are ripe!
Any cut is a possible introduction of infection to the plant. Ensure scissor are clean and each plant is checked for signs of disease.
Discarded growth shoots
And there we have it, a seemingly crazy attack on our precious babies, all in aid of more hot pods at the end of the season.
Here we go again. The seeds have germinated, true leaves are growing. All seems well. And then, suddenly it dawned on us that these precious babies might need a bit more than a teeny tiny pot and seed compost. What next?
Reporting, ready to POT ON, Sir!
Have a look
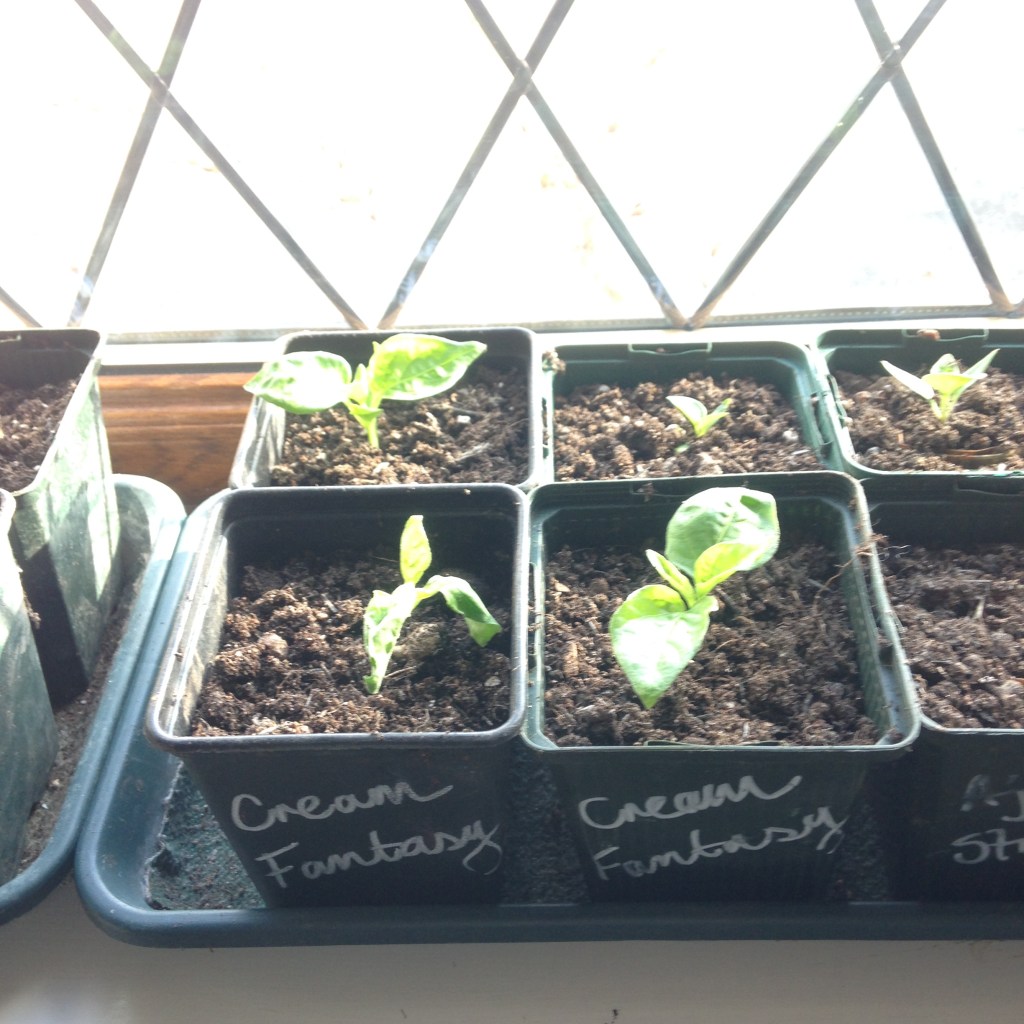
A seedling that is ready to pot on for the first time will be showing certain key signs:
It will actually be growing. Smaller leaves becoming bigger leaves. The plant will be getting taller. New leaves green up. Plants just sitting there, existing with two seed leaves, sulking, are not ready for a bigger pot yet.
The water is being used up quickly in the first pot. Another sign the plant is growing well and using what you give it.
Maybe a root or two are poking out of the bottom. Chillies like to be potted on incrementally. Not straight into a whopping great 20L pot. The surest sign they’re ready to move home is little white roots peeking out underneath.
Ready to be potted on. Leaves being produced and getting bigger, roots starting to show, needing water more often.
Get prepared
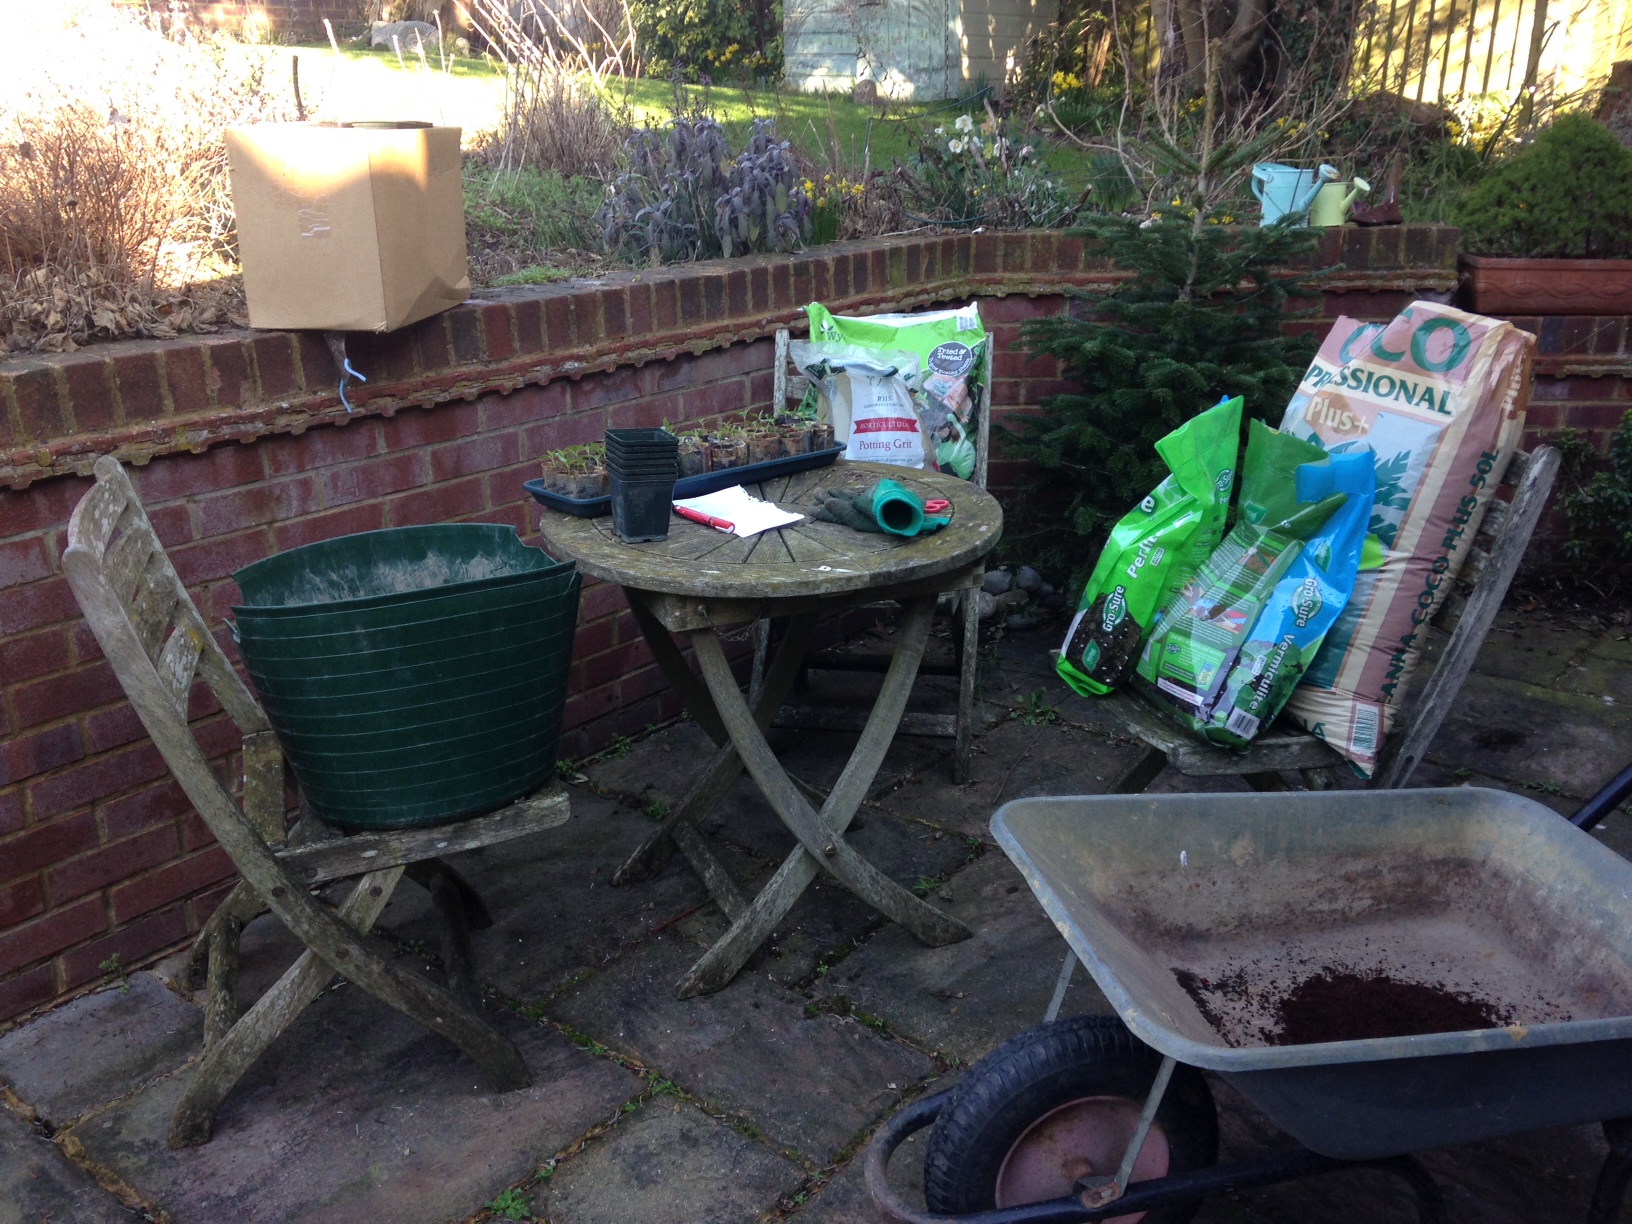
The seedlings will wait a couple of extra days whilst you prepare their new home. Get the next size pot in from the cold shed/garage/backdoor step/unheated greenhouse. Bring in any soil that is going to used and let it warm up. Prepare your work station, table coverings, labels, pens, dibber, watering can, chilli feed, trays, capillary matting. It’s like preparing for the arrival of a new baby. Get all the kit sorted in advance. We all have our preferences but make sure you’ve got all your fave tools to hand. We like a teaspoon and a chopstick at this stage.
Preparations for potting on. A fine selection of tools and soil nicely warming in the house.
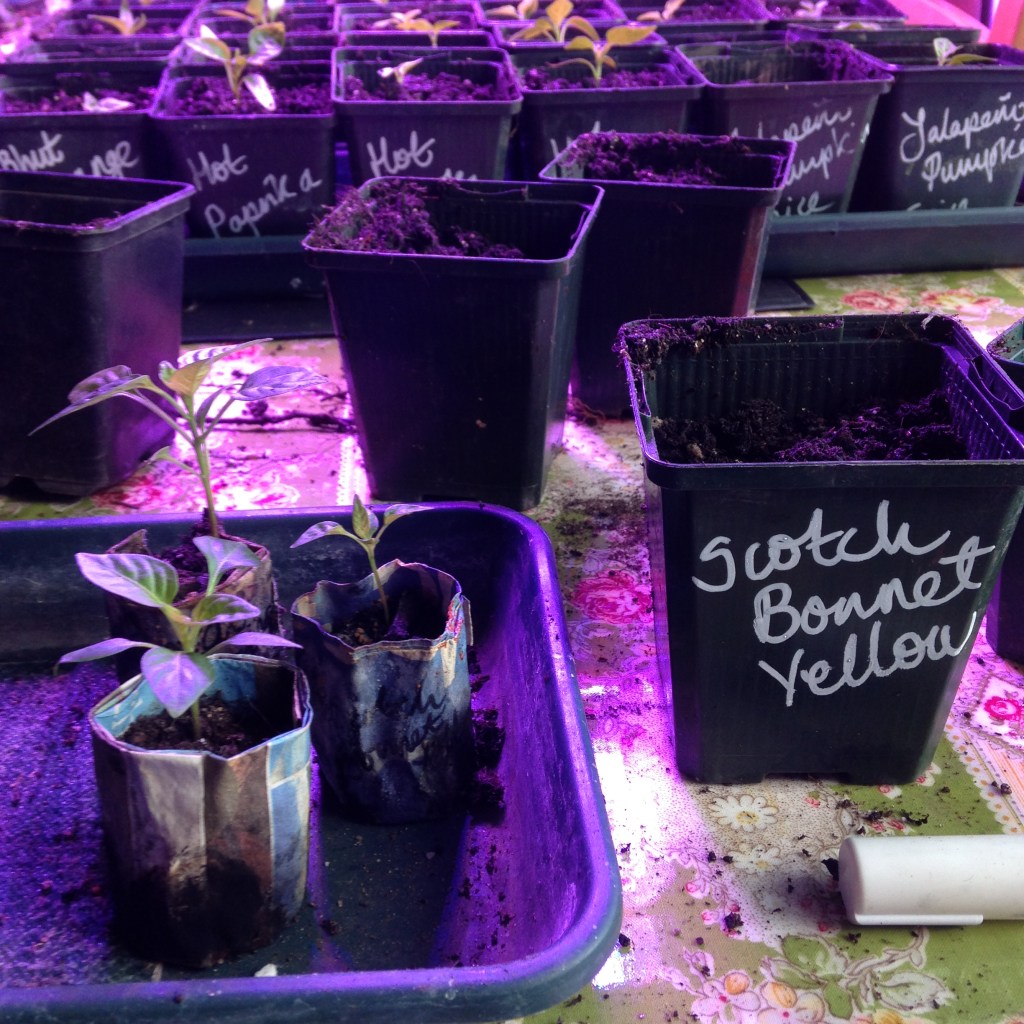
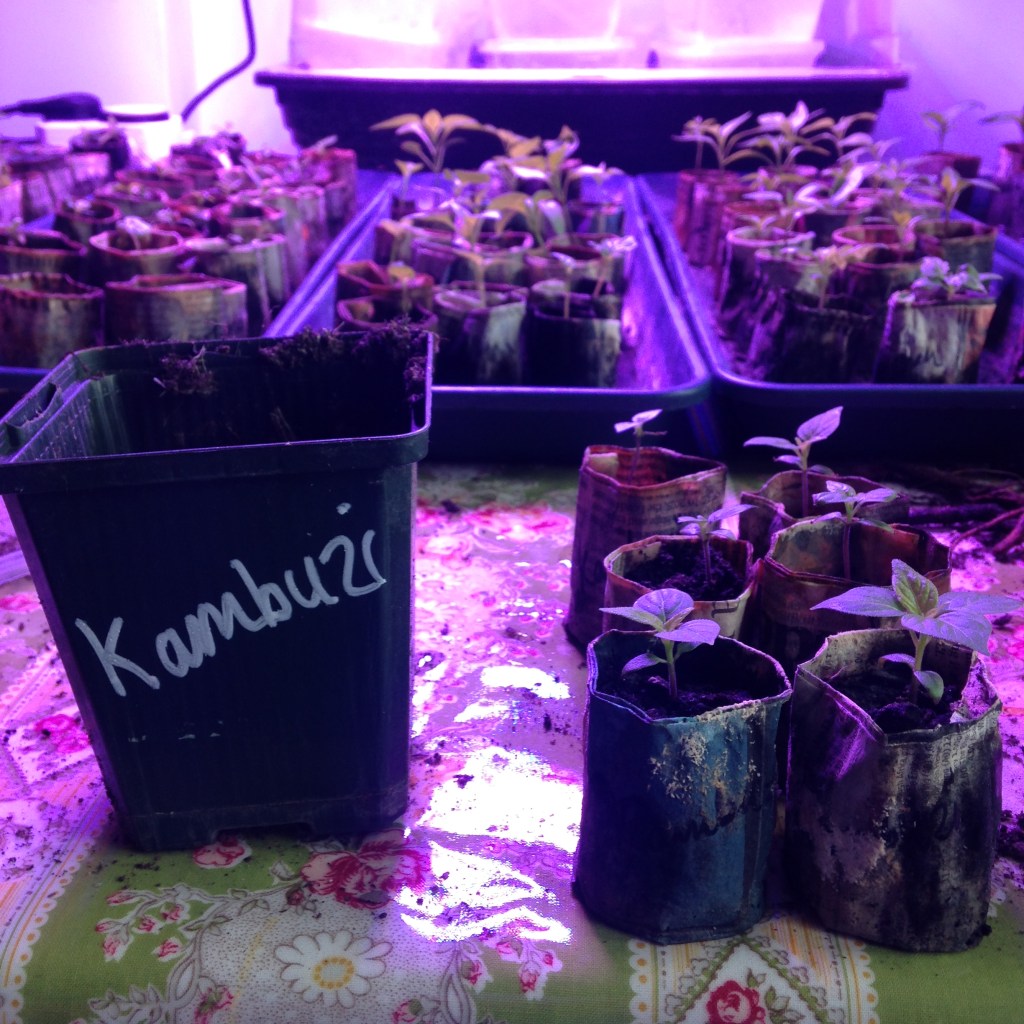
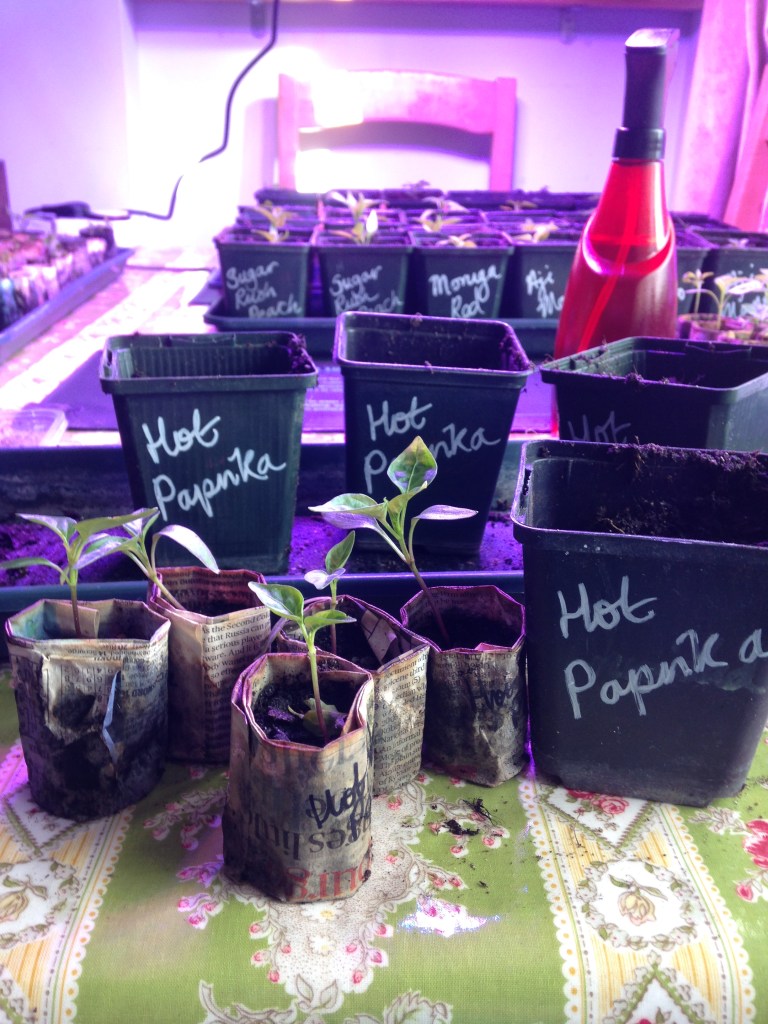
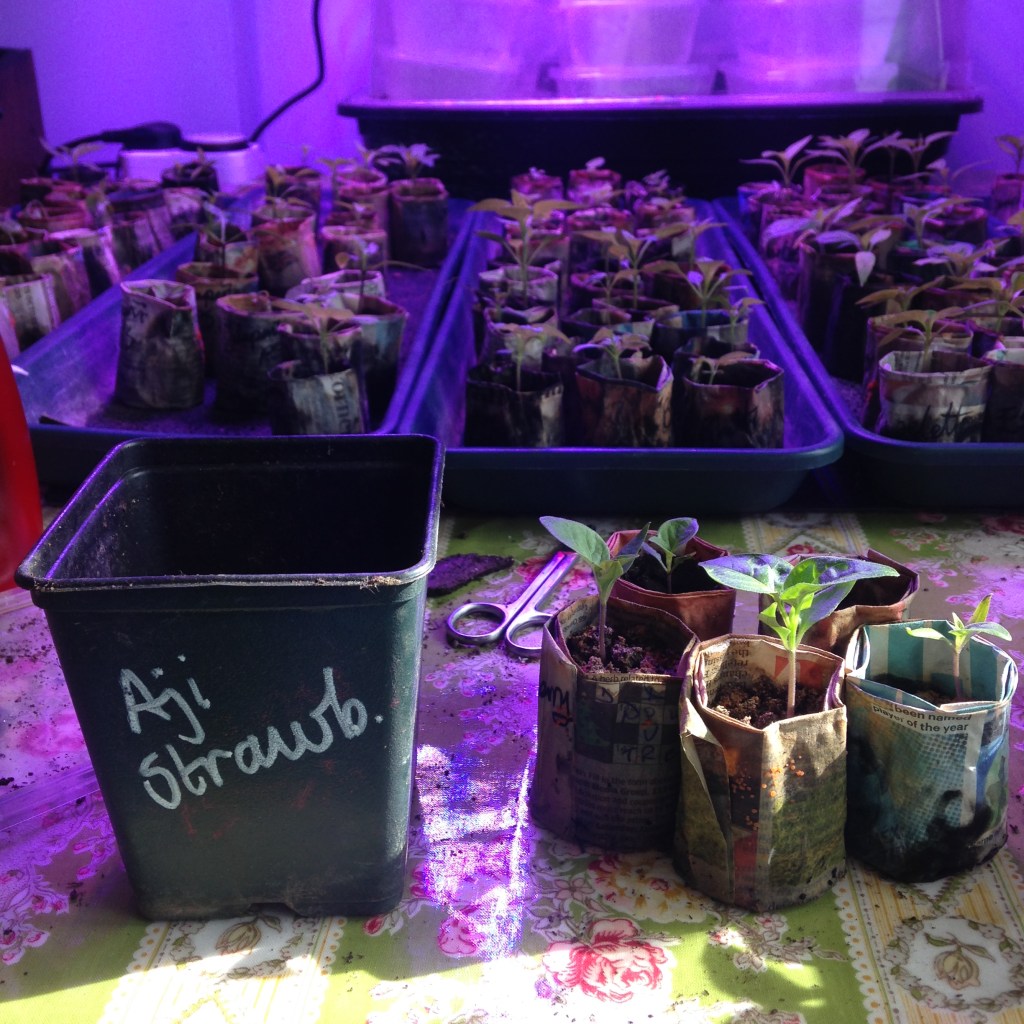
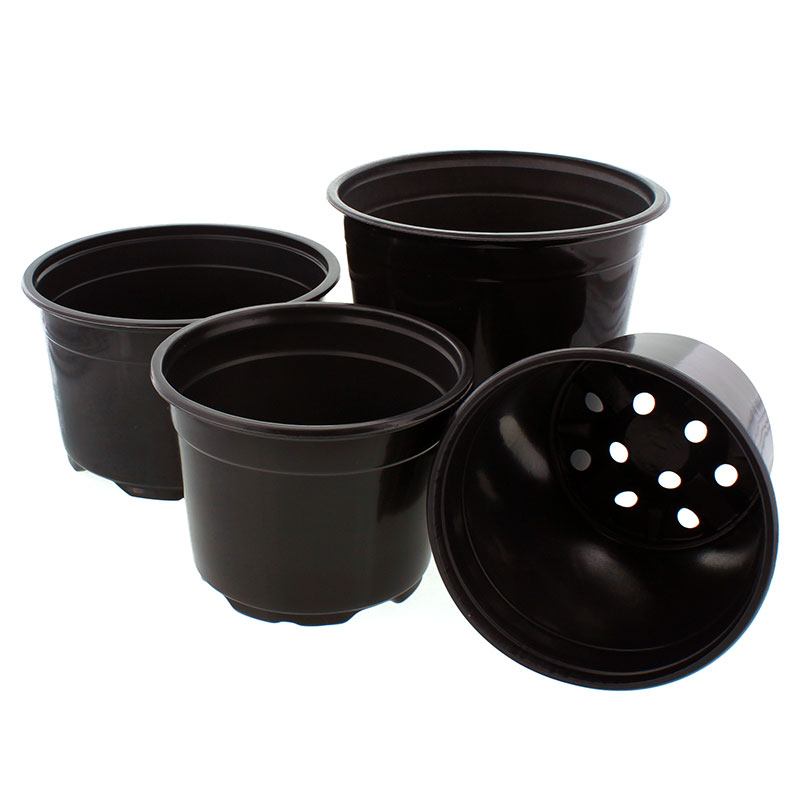
Your pot of choice will depend on your preference and circumstance. We have been collecting and reusing 9cm square pots at this stage for some years now. These suit us for many reasons: they come to us via purchases at a favourite nursery (West Kington Nurseries name check)… friends and family give them to us…they fit together with no spaces… they fit well on the trays we use on our window sills in the Winter months… easy to stack and store… easy to keep clean… good to write on with chalk pens for labels… discourages roots from going round and round…durable and last for a number of years. Some of our pots are easily seven years old, if not older. Virtually family.
Pick a pot that works for you.
Ahh, but what type of soil?
A free draining soil mix will suit chilli babies
Much has been written about soil type. Lots of advice is out there. Last season we spent many hours researching, sourcing, combining, mixing and using a very special Birdhouse Mix. It all seemed very important at the time. You can read our 2019 soil post here:
But this year, we are doing things a little differently. We have saved and are reusing the Birdhouse Mix soil from pots last year. *Gasp* I hear you all draw breath. It is not the done thing according the the Wise Growing Elders. And it is certain that some of you will just plain disagree with our actions. No problem, we all garden our own way. However, in this day & age of recycle, reuse and reduce, it surely makes sense to reuse the soil we so lovingly created. So we are.
If we’re not convincing enough then why not listen to Alys Fowler, gardening extraordinaire.
So how to ensure the old compost is put to good use…and is actually good for our chillies?
Check the texture. Is it good and friable (best word EVER)? Rub through any clumps as if making pastry. The baby chilli roots need air around them and need to be able to push through the soil to spread out. Fluff the soil up nicely for them.
Check the content. Are there pests, seeds, twigs, berries, fungus, or other microbes that could cause harm to the new plants? If so, discard. Pick out any old roots. Our soil store is directly under a gargantuan Holm Oak tree. Great volumes of waxy leaves fall into the soil. They too have to be picked out. Grrr!
Check your intentions. Do you intend on feeding your plants? (Yes!) A liquid feed is perfect for reused compost. If not then you may need to add a general fertiliser or want to consider a more nutritious soil to start with.
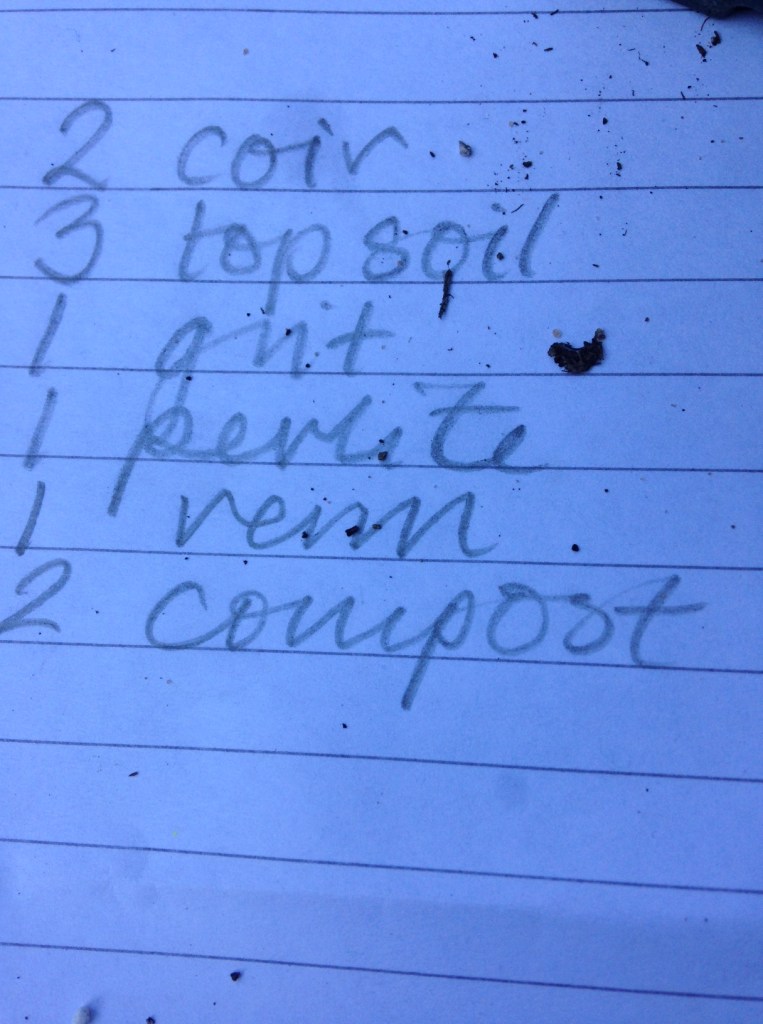
Check any supplements. Some people add water retention beads. You may want to add grit, perlite or vermiculite (or cat litter, Alys). Good drainage is best for chillies. Our soil mix has plenty of grit, sand and perlite already so we just added a 10% of peat free multi-purpose compost, just to add bulk and a touch of all round nutrients for the next few weeks. We also add a layer of horticultural grit at the bottom of each pot to avoid the roots sitting in anything too wet.
Are we ready to pot now?
Potting on and on and on
And now you can pot on. This is how we do it:
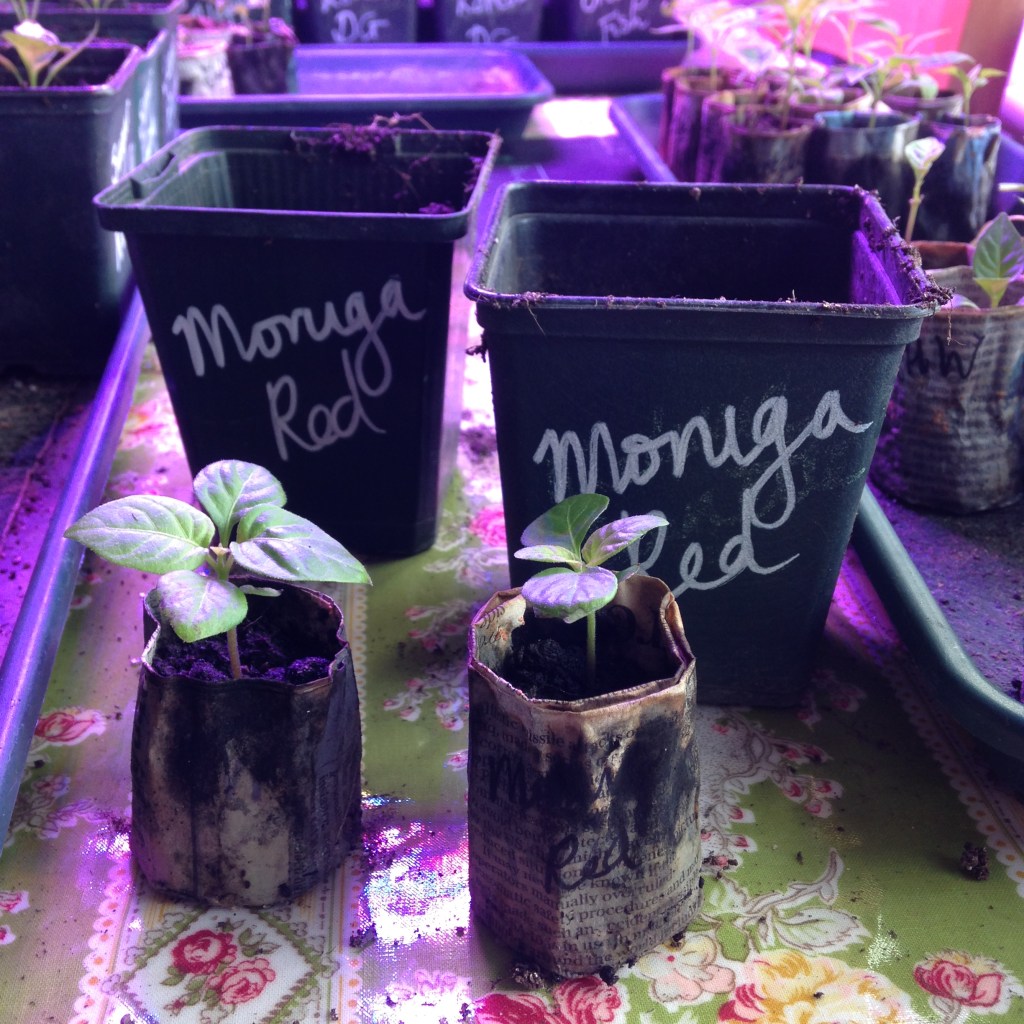
Select your first seedling, check which variety it is and label its new 9cm square pot. We use chalk pen.
Put a layer of horticultural grit in the bottom of the pot, followed by a layer of lightly damp, warmed soil.
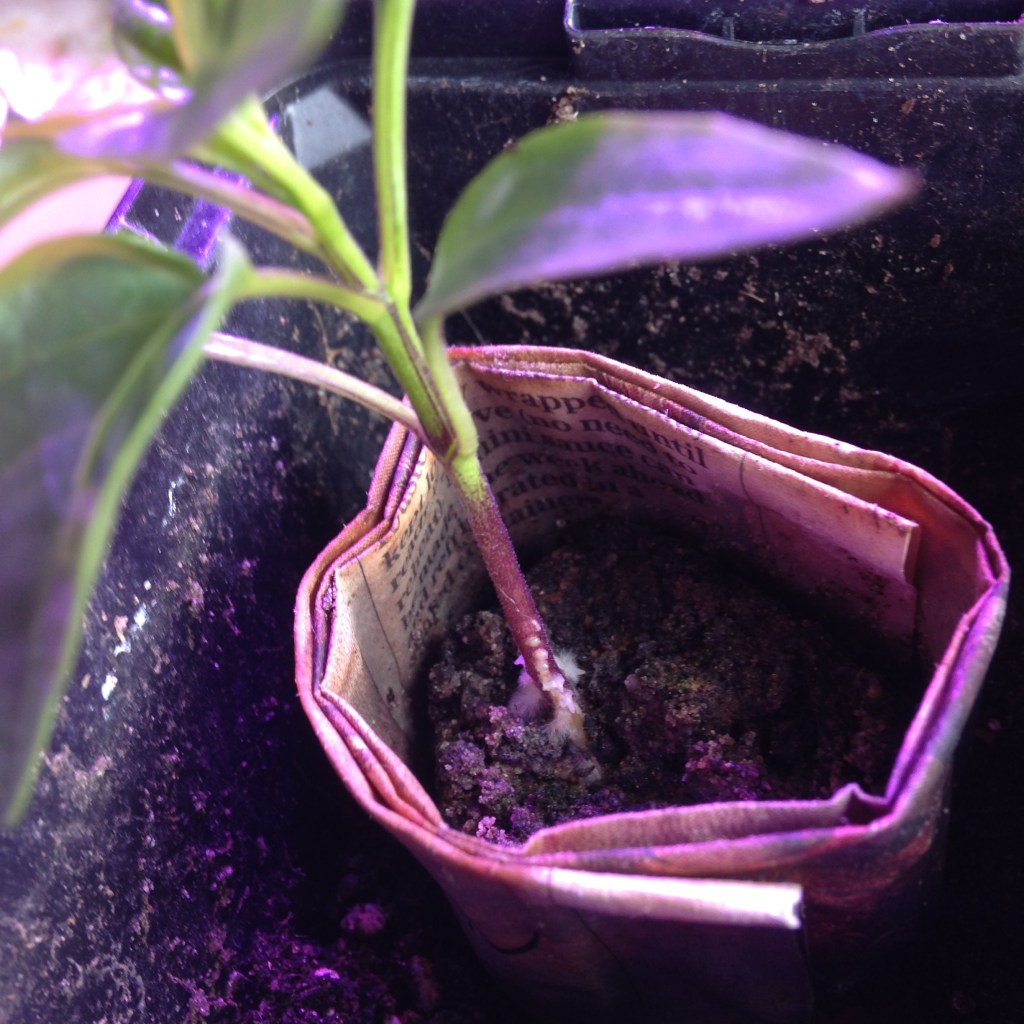
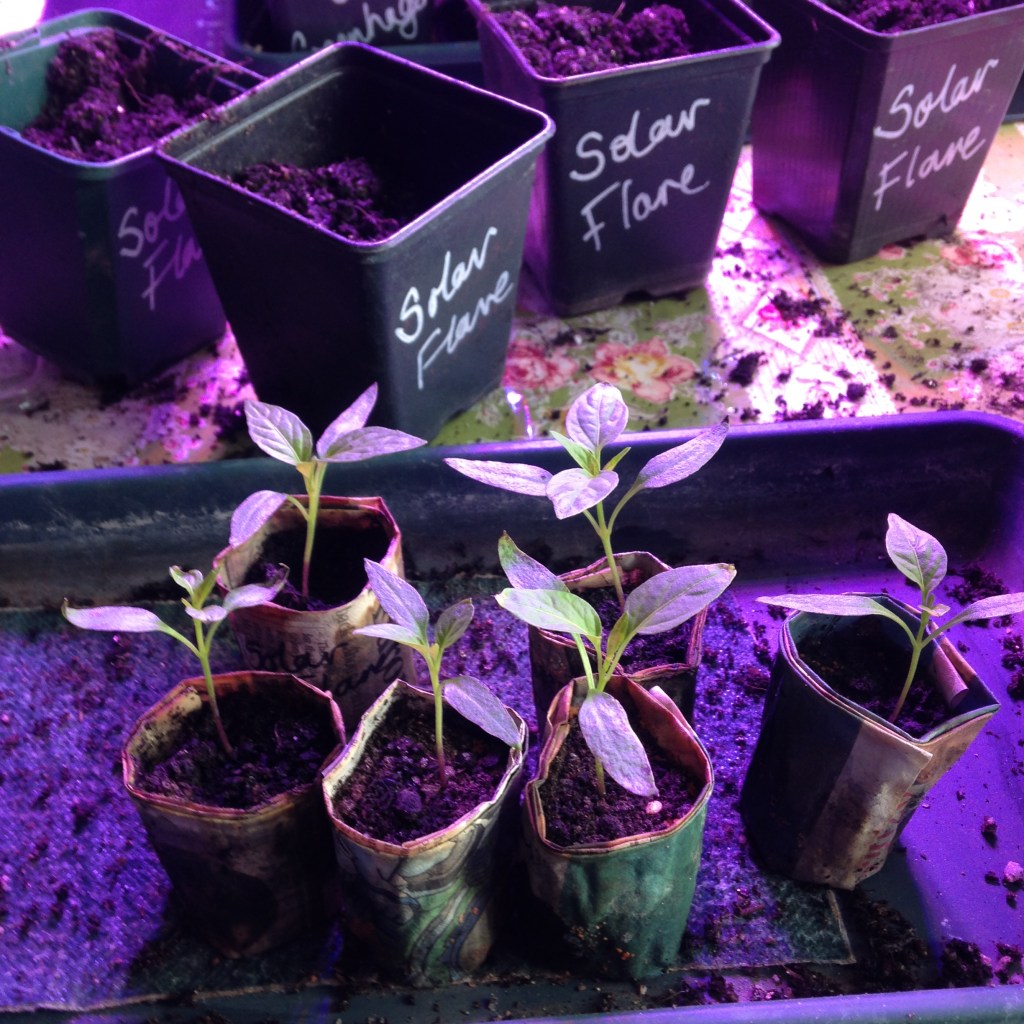
Our seedlings are in newspaper pots. Then can just be popped on top of the soil layer.
Back fill around the pot. If the seedling is leggy then top the soil up until just under the seed leaves. Gently not to damage the stem as that could cause weakness later on.
Pick up the pot and gently knock it on a surface to settle down the soil without compacting it. Top up if need be.
Place the pot on a tray lined with capillary matting.
Water with a weak feed. Warm water, from the base.
Presenting the Class of 2020 in their new pots
The Class of 2020
Of course a chilli head’s work is never done. Here are the rest of the Class of 2020. Chinense on the right, gradually putting on bulk. On the left are the late germinators. Mostly Annuums so they should be fine. All too little for new pots yet.
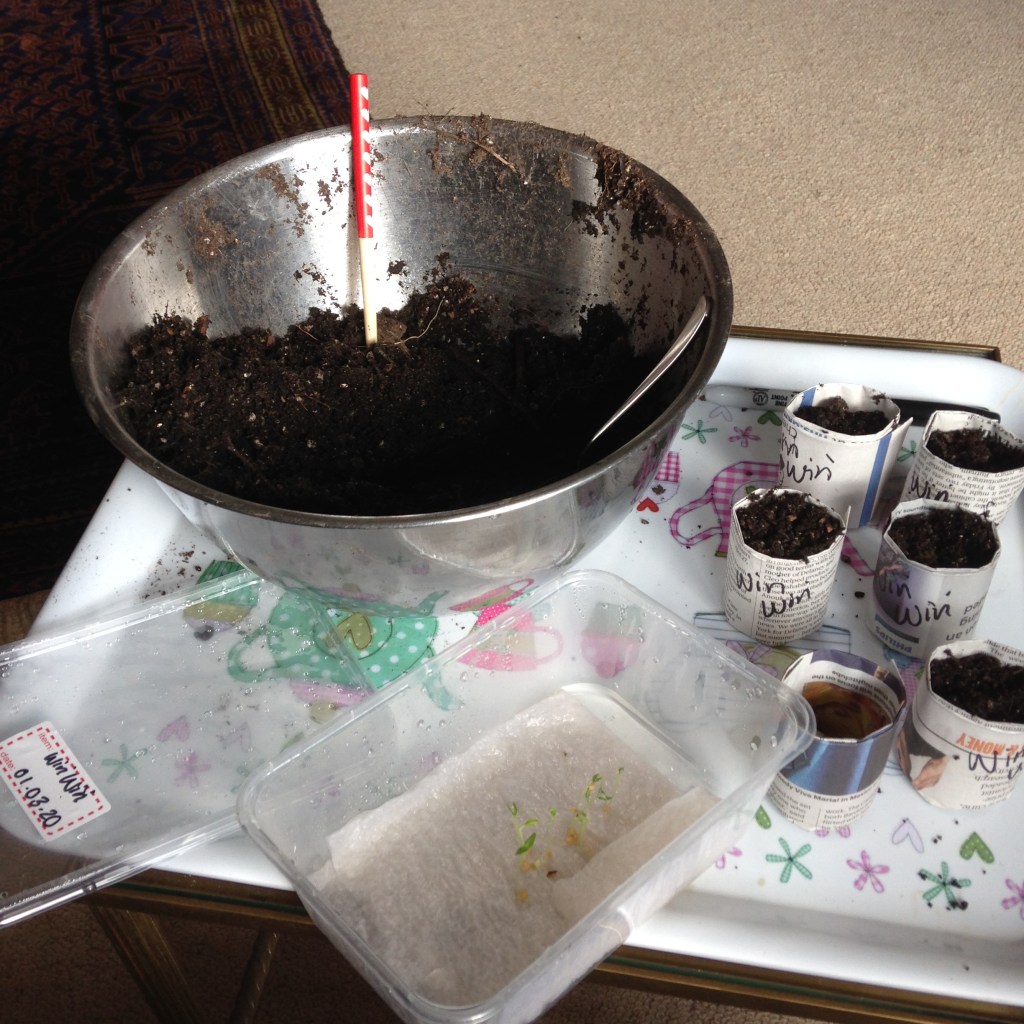
Having soaked our chilli seeds in tea; chitted them on warm, damp kitchen paper until they germinated; and sung sweetly to them… it is now time to plant them in some actual soil and let them do their thing.
Soaking, warming and germinating chilli seeds
The beginning of the new year is a cold, dark and lonely time for a seedling in the UK. We look after our chilli babies the best we can to stop them being affected by the January Blues.
So what exactly do we do?
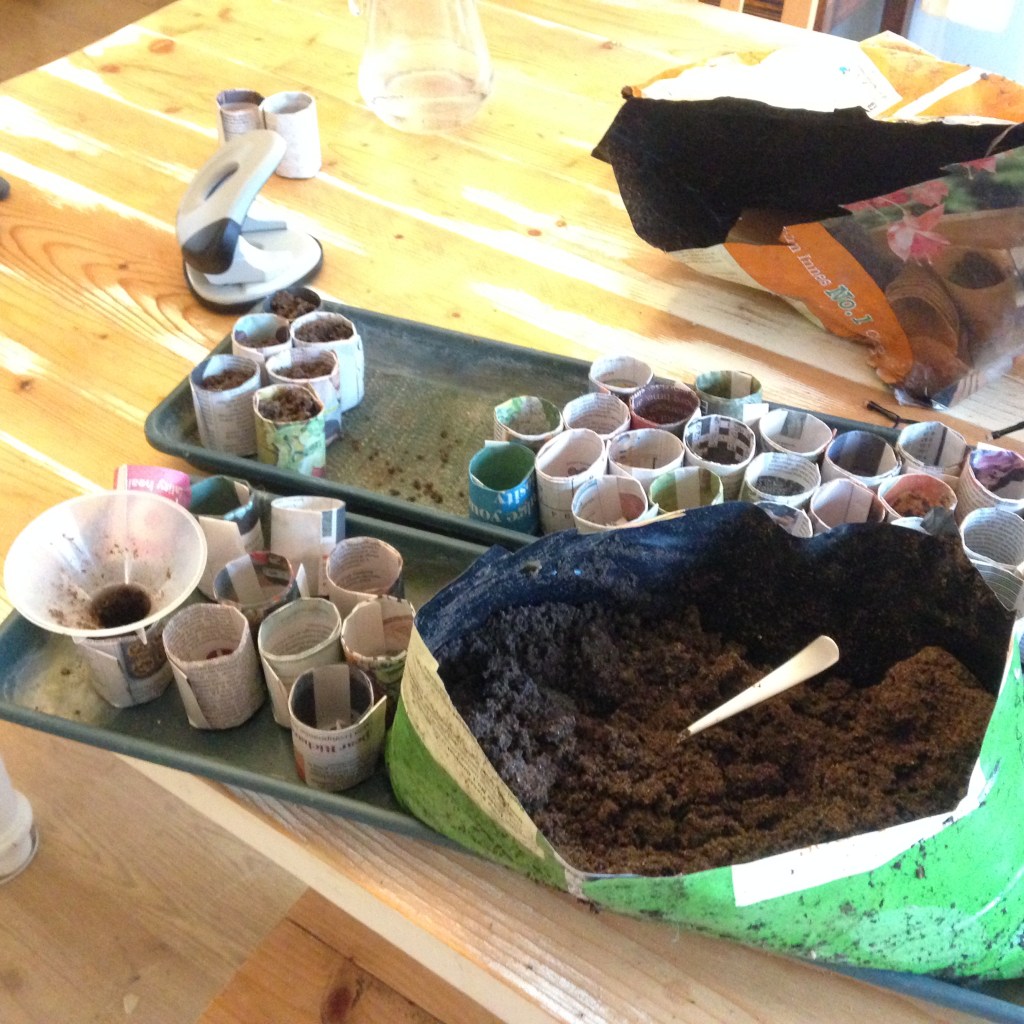
Paper pots
Careful preparation is the name of the game. We make newspaper pots using a wooden pot maker. Each germinated seed gets popped into a warmed paper pot for the next stage of its journey
These pots are perfect for us because…
they are free,
made from recycled materials,
can be potted directly into a bigger pot, with minimal root disturbance
can be composted at the end of the season
No labelling mix-ups, just write on the outside of the pot.
Ok, so they take time to make and are a little flimsy. They can dry out quickly, especially on a heated surface or in direct sunlight but we love them and they work for us.
Paper pot production goes into overdrive as we attempt to keep up with the number of seeds that are germinating. 50 is our goal today, must get rolling!
The pots are simple to make and use discarded newspapers
Seed compost
The seedlings need very little to start of with as they are still being fed from the endosperm (food stash from within the seed). Use a dedicated seed compost as it is low nutrients, good drainage, small particles. All good for little roots trying to develop.
A couple of teaspoons of seed compost fill each pot. Don’t forget to write the variety on the outside BEFORE you water
Warmth
Gently warm the paper pots filled with seed compost BEFORE the seedlings are put in the soil. This means there is no shock to the system and they should continue to grow as if nothing has changed.
We place our pots on plastic windowsill trays. Lined with capillary matting. These tray conveniently rest on top of our radiators. Soil stays warm. Chillies LOVE it!
In addition to keeping the pots warm we use warm water when giving the seedlings a drink. Water from the base every few days. Careful not to overwater as waterlogged soil can check growth. Keep an eye on the outside pots as they will dry out quicker than the inner ones.
Warming nicely
Light
Make sure the seedlings get as much natural light as possible. We started in January last year, grew under only natural light and had a pretty amazing harvest. We just had to rotate a lot. The light keeps the plants from getting too leggy in the early days. Consider a set of grow lights. We are about to embark on this journey with our first set of lights: The Phlizon 1200W. More will be said about this at a later date.
Feed
After a week or so, once the seed leaves are unfurled and looking a good strong green, we start to feed a weak solution of Chilli Focus. Not too much, or the roots can burn, just enough to keep the wolves at bay. 5mls to litre of warm water should do it.
Start to feed after each seedling has
And there you have it, a simple but tested way of looking after your precious babies at this early stage of the game.
It’s that time of year where the sun is lovely & warm and the nights are not too chilly. We’re racing towards longest day: action stations everyone.
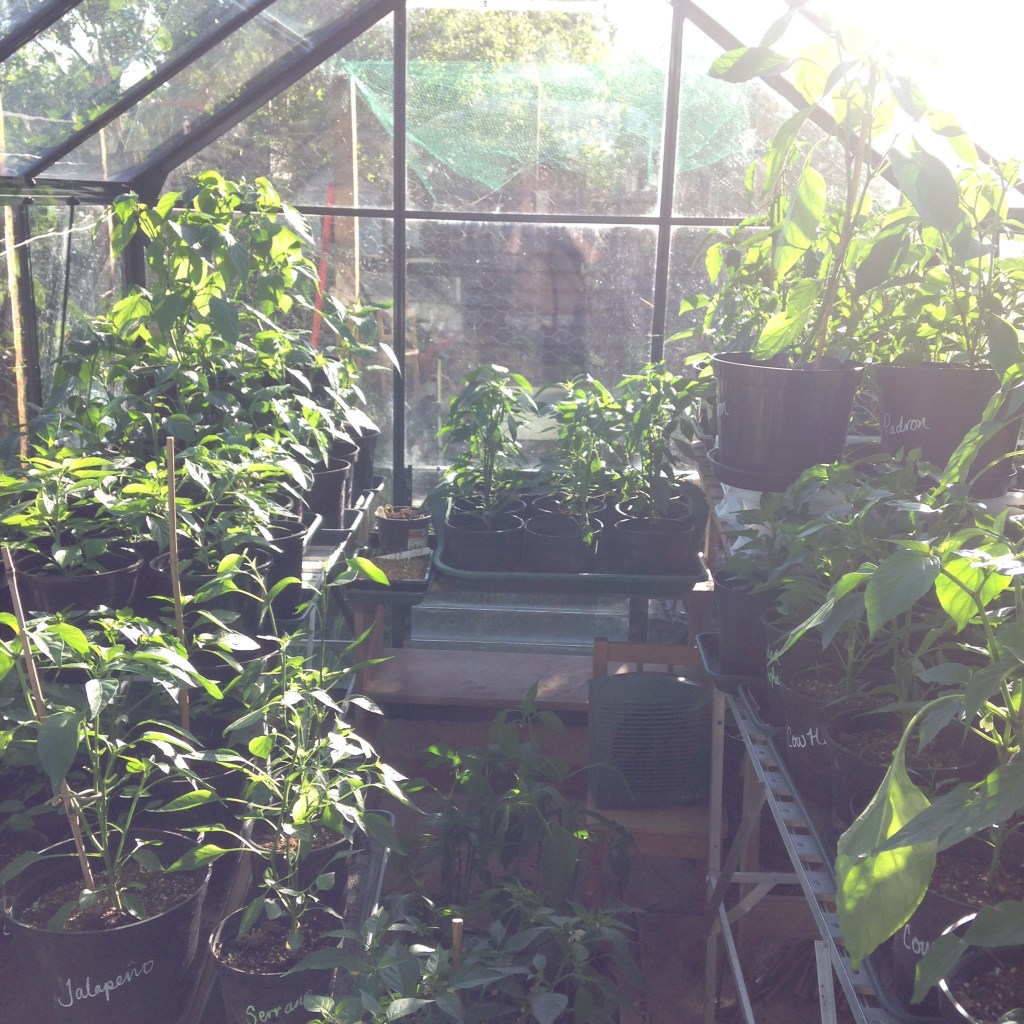
The Birdhouse greenhouse is brimming with leafy specimen. No longer a cocooned sanctuary from the Night King but a claustrophobic bubble isolating the chilli babies from the real world. Time for the babies to grow UP and for the bubble wrap to come DOWN. It has served its insulating purpose well but now it is shading a little too much; stopping the auto ventilation window doing its thing; trapping pollinators and taking up precious ceiling height. Roll it up for next year.
Suddenly, the whole space is flooded with clear light. Wonderful.
Bubble wrap before
And after
All clear
The light issue continues…
A quick stock take reveals that we are seriously running out of space. How this has happened is beyond us but it seems to be a phenomenon known well to Chilliheads across the land. Each season we go through a number of cullings. Precious plants are sorted into ‘keepers’ and ‘the rest’. And yet, despite this harsh practice, there still seem to be more pots than ever before.
We sorted at chitting/germination point. Some seeds just didn’t look right and didn’t get potted up into wee paper pots. The compost heap was the destination for these leggy seedlings. The next couple of rounds of sorting happened at potting on stages. Weedy plants, non-thrivers or just varieties where we had too many plants were all thinned out.
The thinnings will populate our local school Summer Fete’s plant stall. They have been potted into non-conformist pots that we do not wish to keep for re-use; kept outside in temperatures of nearly zero; unceremoniously plonked into multi-purpose compost and barely kept alive on a lean diet of fresh air and rain water. They are, however, tall and flowering away, so all is good. They should sell well!
And now, we should be at the point where the perfect number of plants has been achieved. And how many do we have? 110 to be exact. We couldn’t possibly manage with less that that number of plants.
110 plants and counting
But hang on a mo, there STILL doesn’t seem to be space for them all in the greenhouse. We are having to utilise the floor for trays of plants. This is not ideal as the light levels are lower down there. Rotation of plants is tricky but absolutely necessary. On top of the overcrowding issue, lots are yet to go into their final (bigger) resting pots. So after all that sorting there are still too many plants.
Family, neighbours and friends beware, you will have to adopt some chilli babies…Momma’s about to get mean.
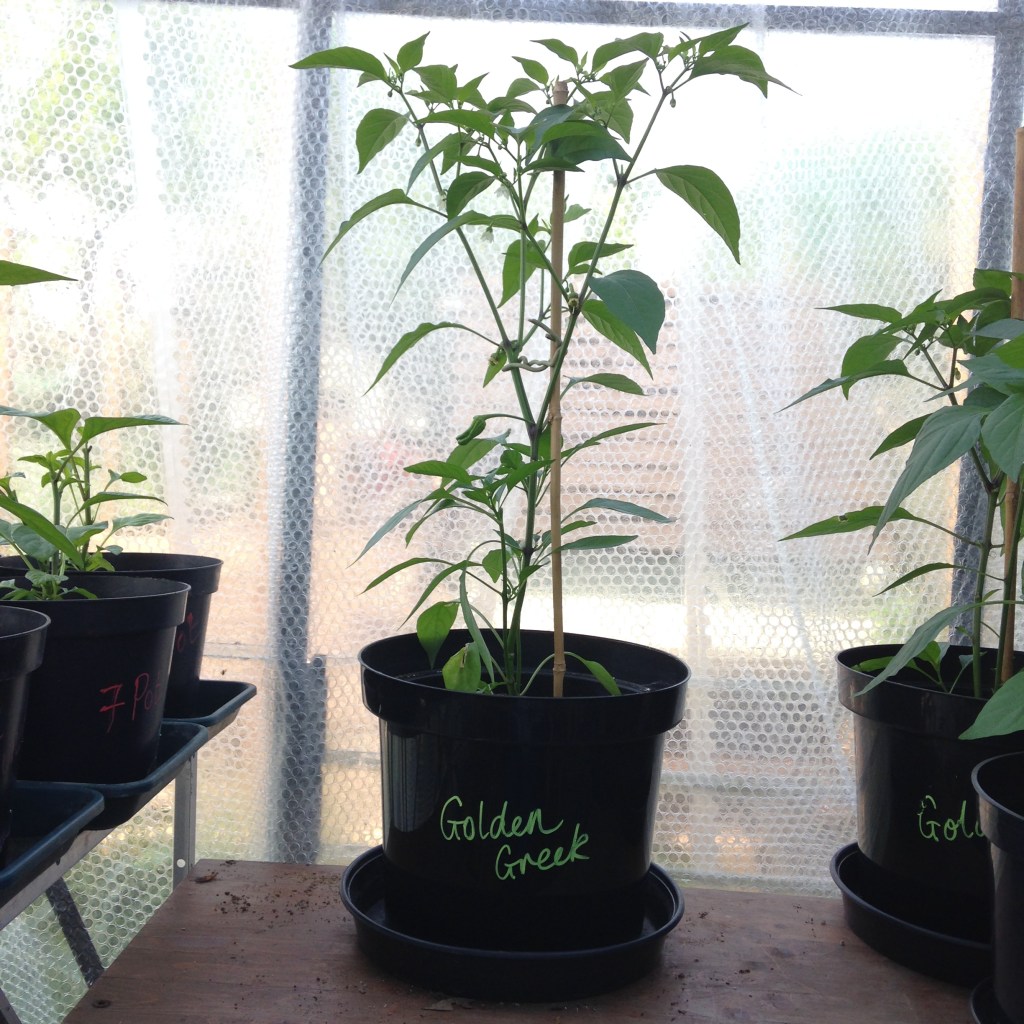
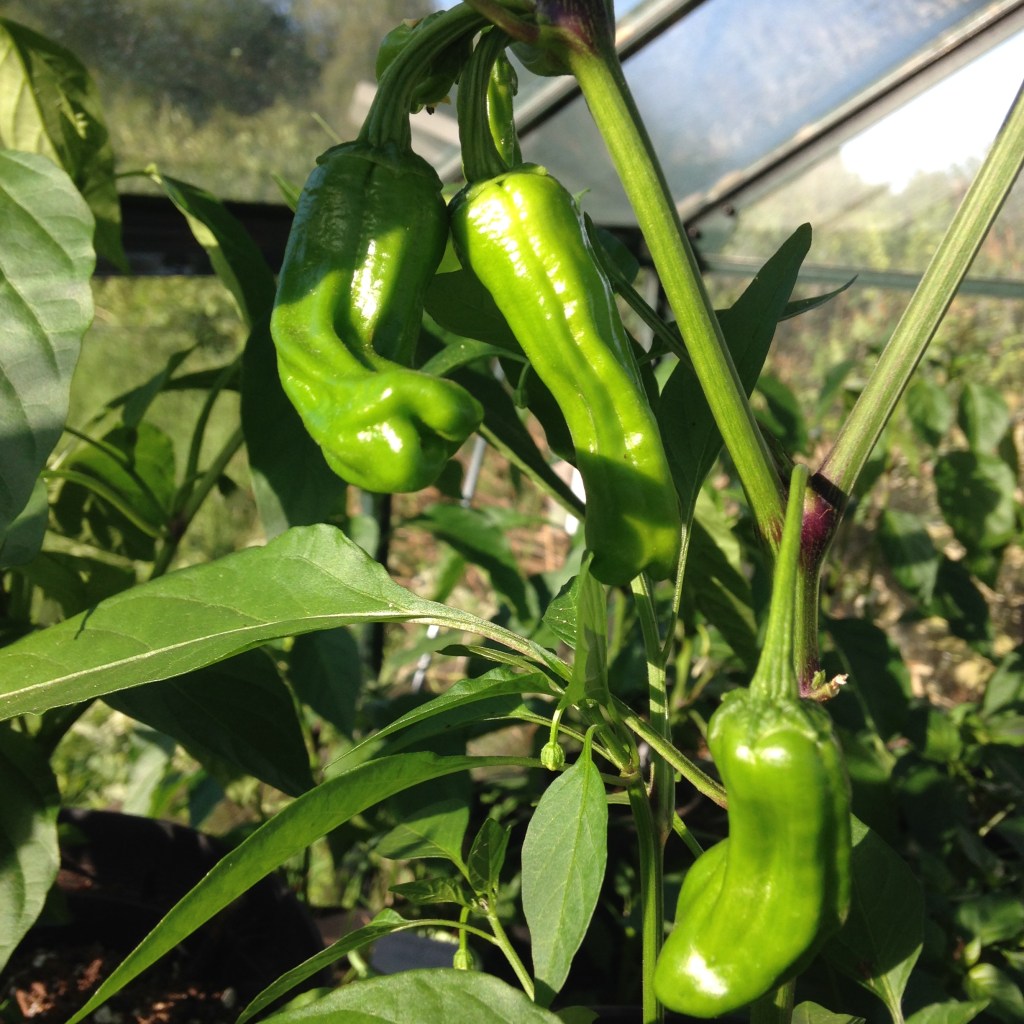
Meanwhile, in happier news, some of the bigger, earlier fruiters are just getting on with their thing. Golden Greek Pepperoncini is smothered with flower and fruit. Oh, and the roots are out the bottom again. Time to reach for the soldering iron and make some holes in the bottom of those flower buckets because potting on is in the diary for the weekend AGAIN.
Different varieties of chilli like topping in different degrees. Some just don’t seem to understand what to do and others get it right first time.
A good example of a slow learner is Poblano. At the initial topping, Poblano was topped carefully to leave four true leaves. All seemed well. However, each of the plants has grown just one (or maybe two) new branch from the leaf node. This has then become the main growing stem again. It’s like the Auxin only made it down as far as that node and stopped there. Result: minimal branching, one main growing point AGAIN.
Topped Poblano, falling back into its old habits: one growth spike, minimal branching.
The best in class when it comes to branching out has got to be the Chinense group. Again, they were topped to leave four true leaves. This was difficult as they were tightly packed. Every single node has sprouted a new branch. Result: lush, dense plants with plenty of growing branches to bear lots of fruit.
Just look at all those new shoots. The Chinenses may be slow to grow but when they do it is ALL GOOD.
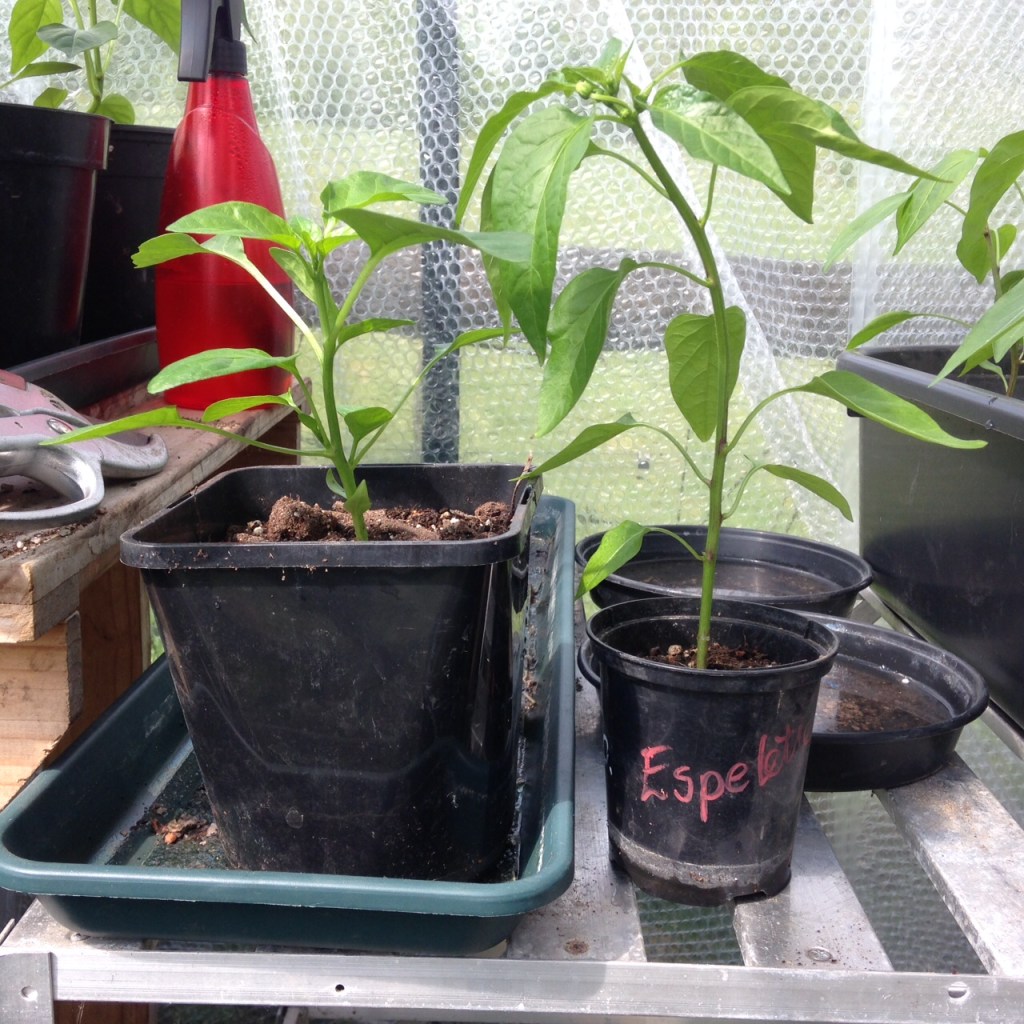
Espelette seems to know what to do with itself once its top has been whipped off. The difference is obvious looking at plants that have and haven’t been topped. Well done Espelette. We salute you.
Left: topped plant with branching at every leaf node. Right: taller plant, no branching, beginning to show a Y at the top. Flower buds.
Overall, topping HAS resulted in the chilli plants growing extra branches, lower down, before they form the Y. It has delayed flower formation and therefore flower drop or fruit developing too soon. Sometimes chillies forget to produce more flowers if they have an early fruit or two.
The Demon Scissor Snipper has been back. A second topping has occurred. Any plant that had not yet formed a Y has had its new branches topped too. Mwwwhhhhhaaaaarrr!
Why? In aid of even bushier plants, with more flowers, less chance of branch snapping and plants that topple over. And of course, many more chillies!
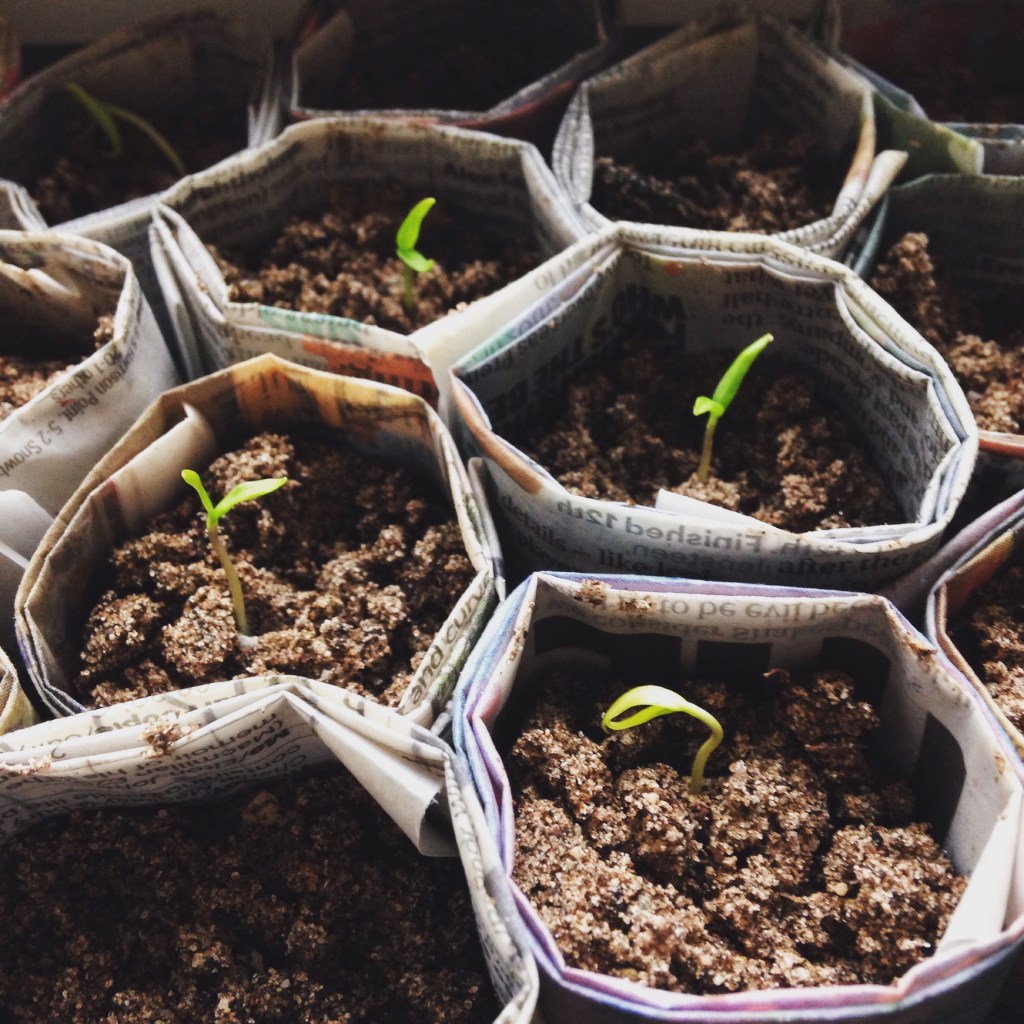
A lot has happened since things kicked off this year. Our seeds were hot housed in the steamy propagator in the hope that germination would be quicker, more consistent and we would be a bit more successful with the chinense types. And things have indeed gone well. Hundreds of seeds germinated, hundreds of paper pots were made and now it is time to pot on the strongest of the plants to a more substantial home.
Germinated chilli seeds in their forever paper pots. Some seedlings just showing their leaves
How do we know it is time to pot on?
The seedlings are starting to show roots through the bottom of their paper pots. Many have two or more sets of leaves. The sun is shining in the UK and is forecast to be so for at least a couple more days. Perfect for a bit of window sunbathing to help the chillies settle in to their new pots. All good signs.
Seedlings ready to pot on
Using the specially formulated potting compost mix, the plants are tucked into 9cm square black pots. A layer of grit is put in the bottom and the paper pots are not removed, just buried within the new pot. Minimal root disturbance and the plants hopefully don’t feel swamped by the new pot.
Hey presto, 151 seedlings are potted on, fed and watered and basking in the sun.
It’s time to give these little chilli seedlings a bit of what they fancy. They have been potted on into seed compost and are settling in admirably. The seed leaves are opening, they are a good green colour and generally they look healthy. The seed compost has no nutrients in it though.
Seven day old seedlings looking healthy after moving into their newspaper pots.
In the future we’d like to have a go at producing a homemade, maybe organic, specialist chilli feed. Using local ingredients. Perhaps with a seaweed enrichment? But not just yet.
Seemingly THE recommended chilli food is Chilli Focus. Containing ‘A precise formulation for optimal performance of chillies and peppers in pots, grow bags or the open ground.’ We used it all last season and the chilli plants and crop were spectacular. It turns out that Chilli Focus is ‘Made with care in the UK’, and ‘enriched with organic complex plant acids and pure concentrated extracts of kelp’ and comes in a 5 litre bottle, ‘enough for 1,000 litres of feed’.
With added Kelp extract
Err, sounds pretty good to us. Homemade fertiliser can wait for further research on a rainy (or snowy, check the forecast!) day.
The seedlings have been given a gentle dilute feed of 5mls per litre. This will be given once a week for now. Once the plants start to flower it will increase to 10mls per litre and then twice weekly when they set fruit.
Despite lack of posts, chillies did grow at The Birdhouse. Actually they grew in the greenhouse at The Birdhouse. So big and so strong they were bursting out all over the place. Neighbours, friends and family and indeed actual strangers were gifted copious bags of multicoloured, mega Scovilled goodies.
We spent the Summer tasting, cooking, preserving, researching, stalking and fermenting chillies. Hits of the season were the Jalapeños. Wow, what a flavour and a heat that everyone can enjoy. The plants were tall (the height of our small greenhouse really), prolific, early too.
Big Bomb were also pretty darn good. Loads of fruit, great colour, sweet heat and plenty of chillies on each plants. Easy to prepare. The plants were a manageable size. Quite upright and strong. Surplus chillies were pickled to be stuffed at our leisure, like homemade Peppadews.
The surprise hit was the Scotch Bonnet. Only four plants germinated. Not promising. They sulked at every stage of the growing process. Hid at the back of the greenhouse for a month. But then, once they got going, they were truly excellent. Stunning shiny scarlet baubles, wonderfully fruity flavour and vast quantities of crisp chillies. Hot hot hot. Made a phenomenal hot pepper sauce with them. Nom. We cooked up a a similar sauce with Aji Lemon and Bulgarian Carrot too. One red, one orange and one zingy lemon yellow. Definitely worth the effort.
And so to this year. What will 2019 bring to The Birdhouse? Here come the New Year Resolutions…
Start the growing process a little earlier. Order seeds asap and then chit. Don’t give up on seeds that take longer than a few days to germinate. Some can take WEEKS! Consistent temperature, good air circulation and perhaps a bit of scarification on the hotter seeds as they were the harder to kick start.
New varieties this year to include milder chillies, ones that are noted for their individual flavour and types suited to cooler climes. As well as a few faves. Don’t waste time on tiny chillies, pretty chillies, chillies that are mind blowingly hot.
Make sure the height of the staging in the greenhouse is not too high. Chilli plants were generally much taller than expected and so were squashed up against the roof. Any chillies growing outside need structure to support them.
Don’t be afraid to give plants away. Too many plants lead to pests and diseases spreading quickly.
Sort a watering technique/system that works simply. Especially during the Summer hols when we are away. Maybe ventilation too. Oh, and an adequate heater for the early months.
And there we have it. Izzy whizzy, let’s get bizzy.
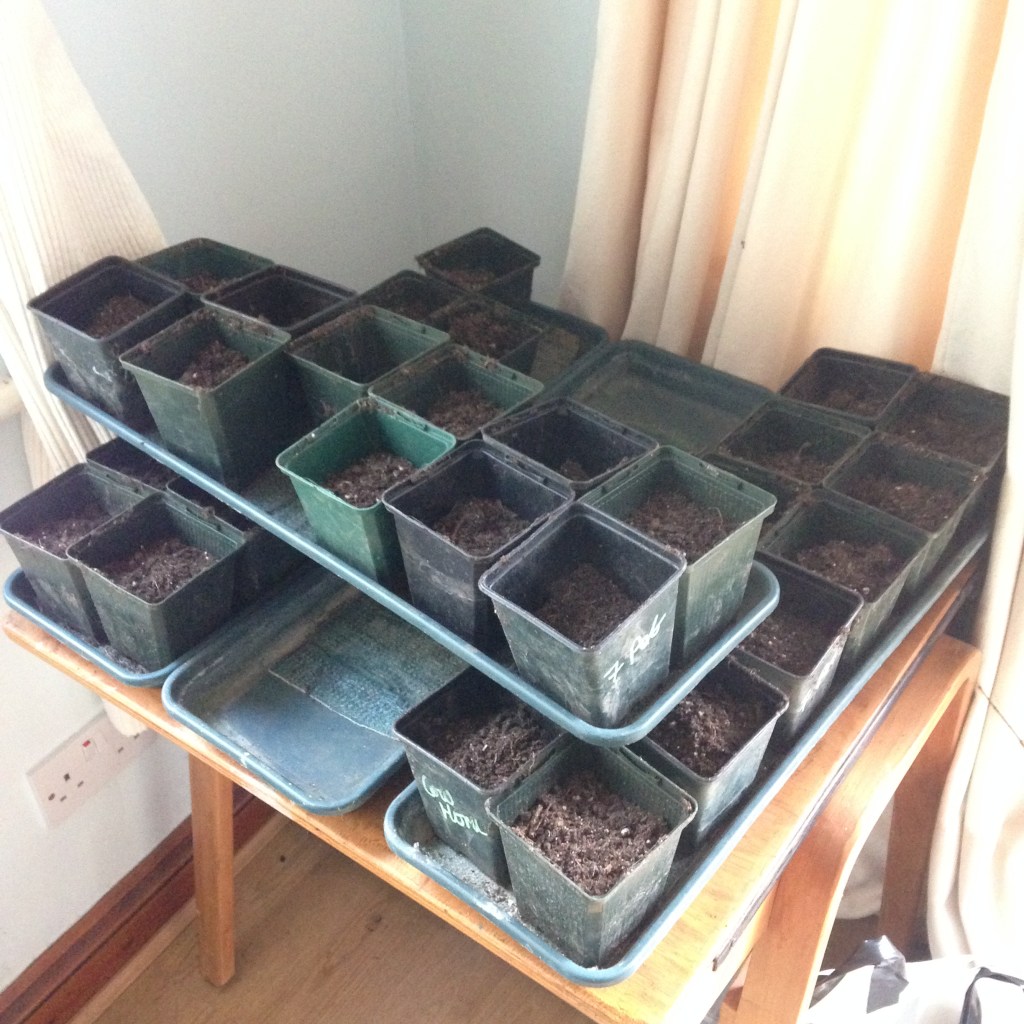
Discussion around the arrangements for the plants when they are in their final growing pots. It seems that potting on into pots of increasing size is recommended. Not just dumping a teeny tiny seedling into a 30cm pot and leaving it to get on with things.
Our seedlings are currently in 6cm peat free fibre pots. These will then be planted straight in to 9cm square plastic pots. We already have a million of these so it makes sense to reuse them. They also fit neatly onto the windowsill trays we have. The next pot sizes are more difficult. In the interest in reducing plastic use we will be comparing non-plastic solutions with a bulk buy of large plastic pots to use every year.
First thoughts bring terracotta to mind. It seems a lovely, old fashioned option, reminisce of Peter Rabbit and friends. However, our greenhouse staging is super wobbly aluminium trestle style benches. The staging might not be able to take the weight of 20 30cm terracotta pots filled with compost, chilli plant and watered every day. What about grow bags? Or potato sacks? Or troughs? And does each type of chilli need such a large pot? More research need.
Research ensues.
We settle on secondhand, black plastic pots. Eek, not so PC these days but still very much out there in the market place. This is with a view to the pots being used year on year. Single use plastics are out of here. Reusing what already exists and cannot be recycled Hardwearing, easy to clean, uniform size and shape, good drainage but with excellent water retention qualities. One issue we have found with the fibre pots is that the water just evaporated right out of the sides of the pots, especially in the sun.
20L pots found on ebay, being sold on from a plant nursery. Not purchased yet as we are visiting a nursery at the weekend. They may have pots to spare…or may not. Worth waiting to see. The chillies can hang out in the smaller pots for a few more days, no peeking roots out of the bottoms yet.