Capsicum pubescens

Capsicum pubescens is a late entry to the heated propagator. Whilst using the last of our homegrown Rocoto chillies it was impossible to just throw the seeds away. So, they were introduced to the chitting pod. Having sworn we would get going earlier with the seeds this year, to allow the longest growing period possible, a quick diary check reveals that these seeds are starting off at pretty much the same time as last year. So much for planning.

Alberto Locato Rocoto

Four days later the roots have emerged. Much quicker than the chinense types and almost as quick as the speedy annuums.

chitted-rocoto-chillies
Chitted Rocoto seeds

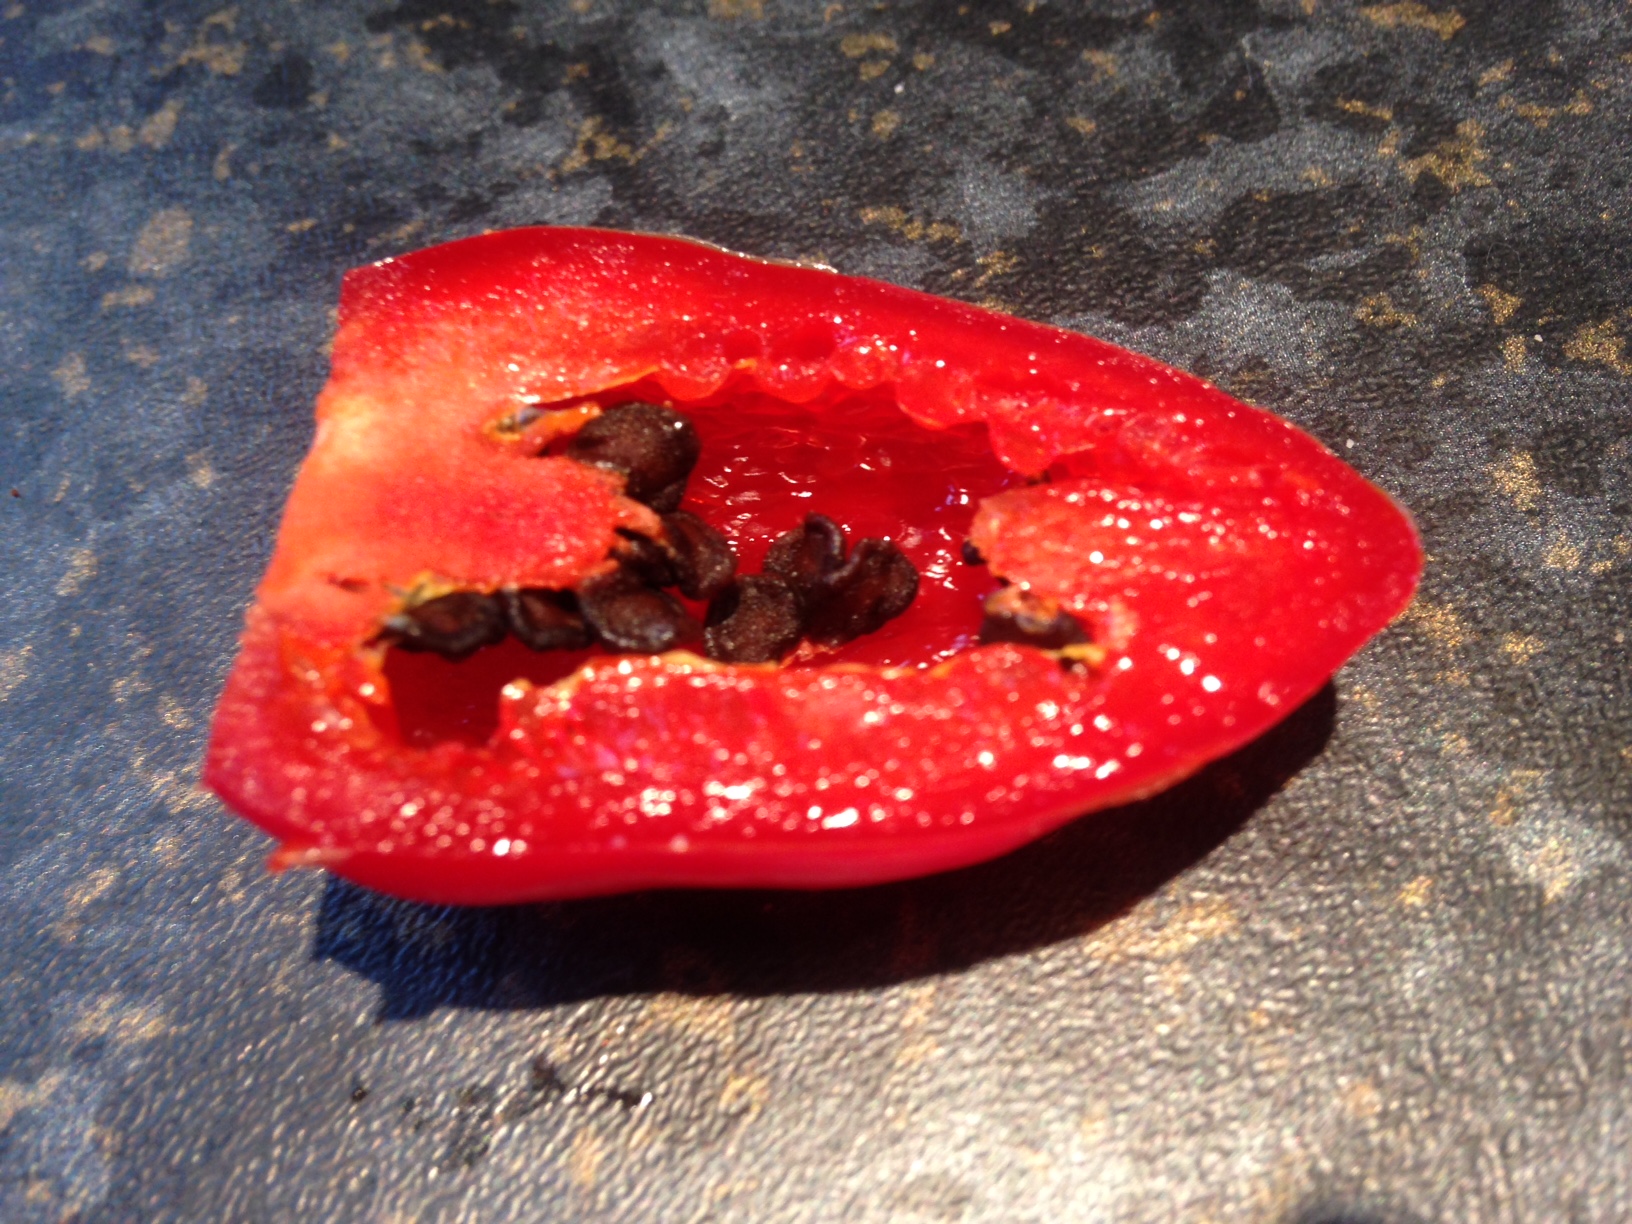
And why did we bother with these seeds? Well, it turns out we’ve got a bit of a crush on these squishy fellas. There are far less varieties of Capsicum pubescens available on the market and you would certainly never see them in a UK food store to buy. The chilli fruit are all pretty similar with thick walls, juicy flesh and matt black seeds. With a round shape: some are a little more apple shaped, others lemony and some occasionally cheeked like bell peppers. Heat levels are medium to hot and they have a punchy fresh fruit flavour. They come in a range of -green-yellow-red but not purple or white. So far.

Capsicum pubescens are the smaller group of the five domesticated species of chilli. They are further away from others genetically. They trace back to pre-Incan times in Peru. In fact it is thought that the chilli remains found in the Guitarrero caves 10,000 years ago was a pubescens type. Historically significant as the chilli in question was found alongside evidence of campfires, grinding stones and human bones. It seems chillies were considered pretty valuable food stuffs. Not much has changed in 10,000 years then.

At The Birdhouse, we only grew one plant of this type last year: the high shine red Alberto Rocoto Locato. Gifted to us by my mother. It was easy to spot in the greenhouse as the plant grew differently to the others. For one, it had tiny white hairs on its leaves. Secondly, once it had got going, it split into two branches about 30cm up. It then sprawled out sideways and needed support from other plants. It snapped easily if knocked. It had bright violet flowers, with dusty white stamen. The chillies were late to set and took a long time to ripen to glossy red, maybe a 100 days or more. It matured about sometime similar to the Scotch Bonnets and they supposedly take 120 days. The plant was prolific despite being in a smallish 2.5 L pot. Whilst it was fed well it could probably have done with more root space.

Striking purple flowers

A quick bit of research tells us that these chillies are a fan of cooler nights, although still happy basking during the day. They are far more tolerant to lower temperatures generally. Although not frost tolerant. This bodes well for a UK climate and the need for a longish growing season. They are also long lived perennials, living up to 15 years. They can be climbers or tree formations. I think we might have a few Winter inmates this year. Let the pubescens journey begin.

Sweet Chillies for Valentine’s Day

We have four rocoto (Capsicum pubescens) chillies left from our bumper Autumn harvest. Surprisingly as they are such juicy chillies, the rocoto have stored very well indeed in the top of the fridge door. It seems like a special recipe is in order. How to preserve them and make those precious last chillies count? Today is Valentine’s Day so let’s go crazy!

How about candied chillies? With the intention of adding them to some knock-your-socks off florentines.

Sounds like a plan…

Heat a 50:50 mix of white sugar and water to form a sugar syrup. Add a few extra flavourings to enhance the fruity floral flavours of the rocoto: rose essence and scrapes of tangerine zest. Next, add the sliced, deseeded chillies and bubble away.

The house fills with the aromatic scent of rose and tangerine. Then I add the chillies and begin to choke. The capsaicin explodes into the air and hits the back of my throat, ticket tickle cough, tickle tickle cough.

And yet, sniffing the vapours rising from the saucepan is irresistible. Mmm, warming and aromatic.

As the candy mixture thickens it’s time to get ready to take the chillies out. Place a sheet of greaseproof paper and find a long pronged fork for fishing. There is a fair amount of caramel left in the pan so a handful of pistachios are thrown in to make a last minute chilli nut brittle. Why not?

The caramel brittle is too hot to taste. By the time it has cooled down I find out it is also hot-spicy. Rocoto are fierce and have a long burn. Excellent flavour with the tangerine peel and pistachio though. Must remember that when I make the florentines.

All that remains is to put the matt black seeds in the germinator because it would just be rude not to.

Hot Chilli Glazed Ham

Hmm, first question of the day, what to do with the final jar of last year’s marmalade? Next question…can I use it with chilli?

Well, bake a ham is the simple answer.

So what will we need?

Flavour the boiling liquor with ingredients that will compliment the glaze
  • a ham, a good smokey fella. We always go big when cooking a ham as it lasts for ages, freezes well and goes with pretty much anything you want.
  • For the boiling pot: dried casabel, whole onion, couple of tangerines, fresh bay leaf, fresh thyme sprigs, a few garlic cloves, an apple, jalapeƱos, allspice berries and peppercorns. Do not stress too much peeling or prepping this as it will all be discarded.
  • For the glaze: marmalade, mustard of your choice, black onion seeds, fresh red fruit chilli, we used a rocoto.
Simmer for 20 mins per 500g
  1. Soak the ham overnight as the salt levels could be high. Discard the water.
  2. Put the ham in a big old pot, add enough water to cover and bring to the boil. Discard the water and start again. More salt management.
  3. Add more water, the liquor flavourings: and bring to the boil again.
  4. Reduce the heat until gently simmering. Cook for 20 mins per 500g.
  5. Remove the ham and let it sit for 20 mins. This just lets it cool down a bit and then it is easier to handle. The remaining stock will make a wonderful pea and ham soup.
  6. Prepare the glaze by mixing the ingredients together. Quantities really depend on the size of your ham.
  7. Carefully slice away the skin. Leave the fat and score in a diamond pattern.
  8. Gently apply the glaze, trying to get in between the criss cross lines.
  9. Bake in a 180 0 C oven for about 30 mins. Keep checking as the sugar in the marmalade could darken quickly.
  10. Take out the ham and try really hard not to eat it all in one go. One nibble won’t hurt though.