UK frosts are a damnable thing…dominating our lives for weeks on end, with never the same frost twice. Omnipresent during the darker months. No way a chilli plant is growing out there…not a snowball’s chance in Hell.
In early Spring, just when the birds are a-nesting, Jack Frost STILL manages to sneak up on you at the most unexpected times. You assume he’s gone, but then, BOO, there he is again! In the air, on the ground, feathered across the windows, wiping out blossom and melting soft new growth left, right and centre. He’s a real pain in the backside.
Luckily things start to change: the mercury creeping up the thermometer gives us a glimpse of light at the end of the tunnel. This cold WILL NOT last forever, we CAN do this.
Some nights are mild, then back to cool, then a few nights are colder. Watch out for the occasional late season sub zero arctic blaster though. No predictability leaves us doing the dance of a thousand plants, in and out we go. In the hope to harden off but not kill off.
Suddenly, ta-dah, there are no more frosts and all is forgotten (and forgiven). We go forward to salad days.
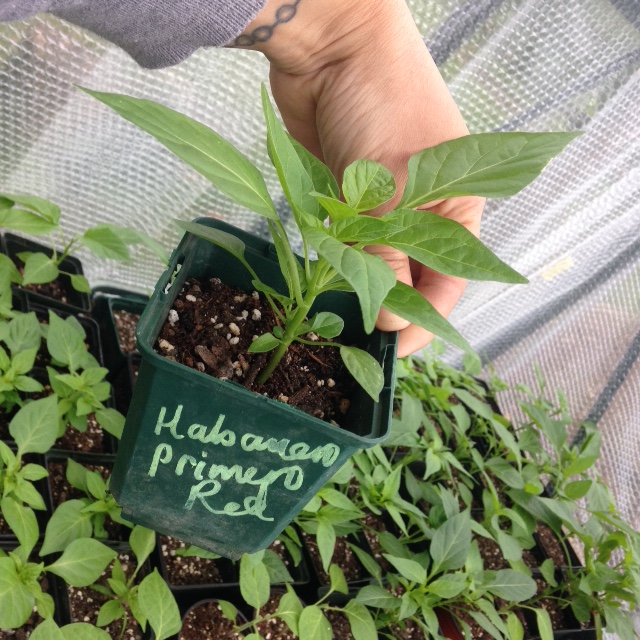
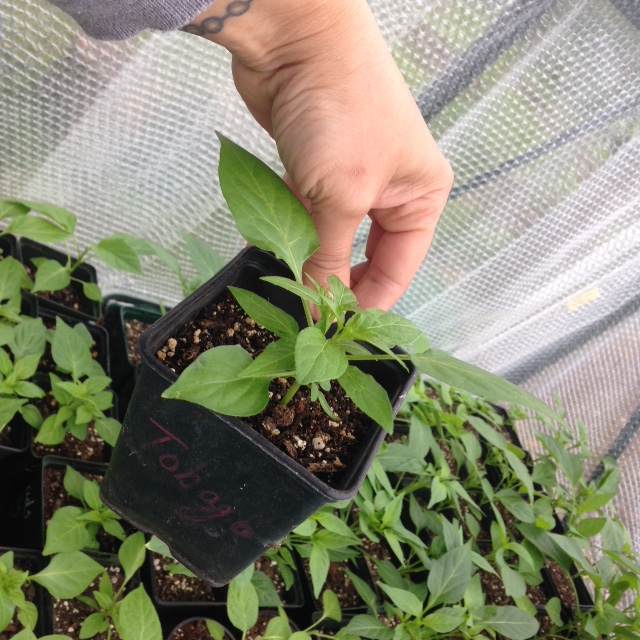
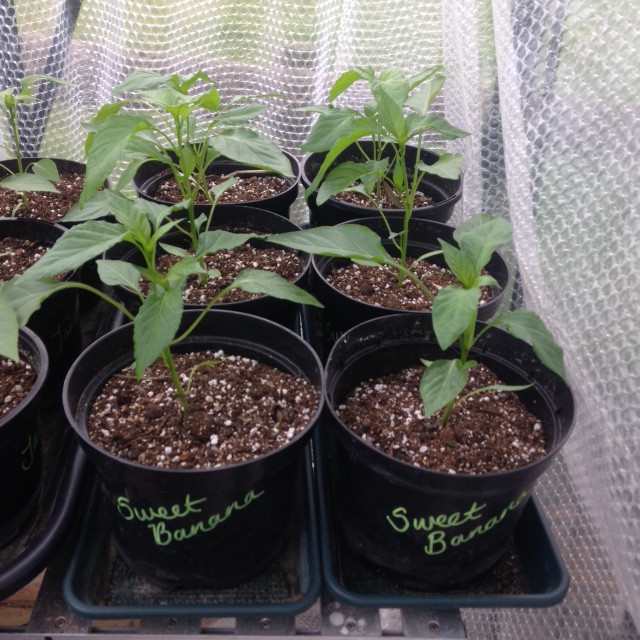
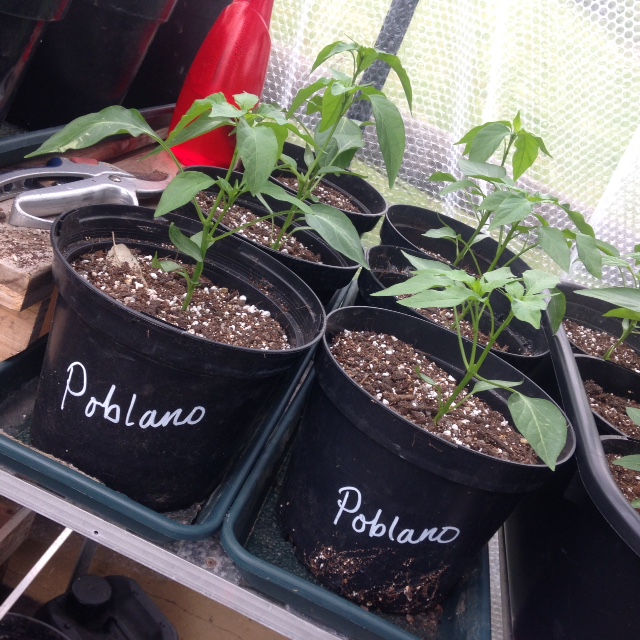
In our corner of Hampshire, the second week of May is scheduled as the last frost this year- pah, as if it is that easy to predict! Still, it does seem the worst is over and we can finally get on with the task of growing some chillies. And growing they are….
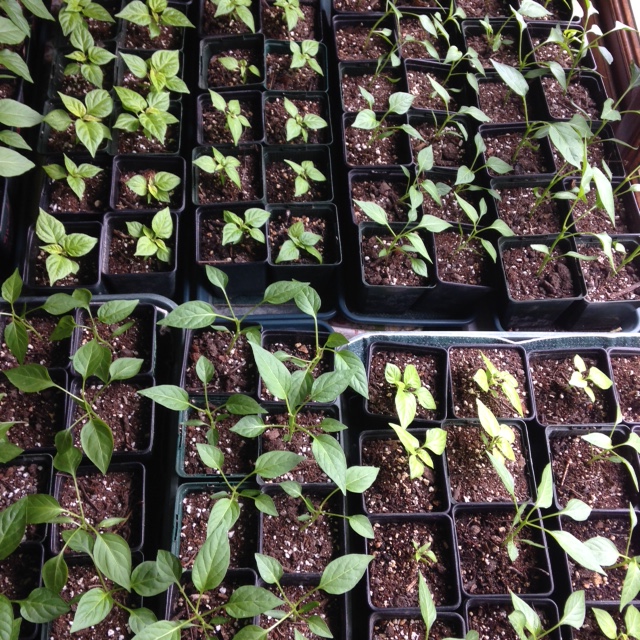
All plants are in the greenhouse or outside. Feeding and watering when the leaves look droopy. A twice daily check for aphids and an invitation to a ladybird or two over for dinner if any ‘phids are found.
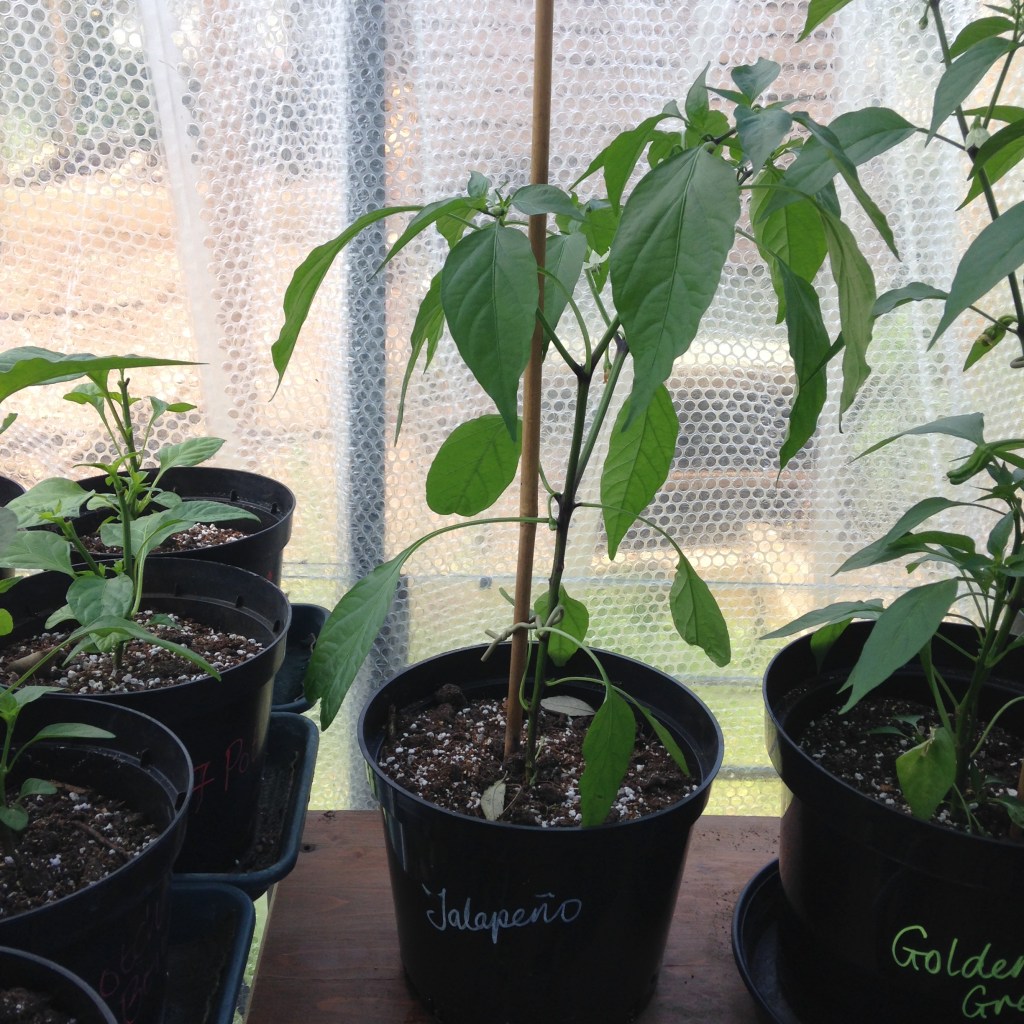
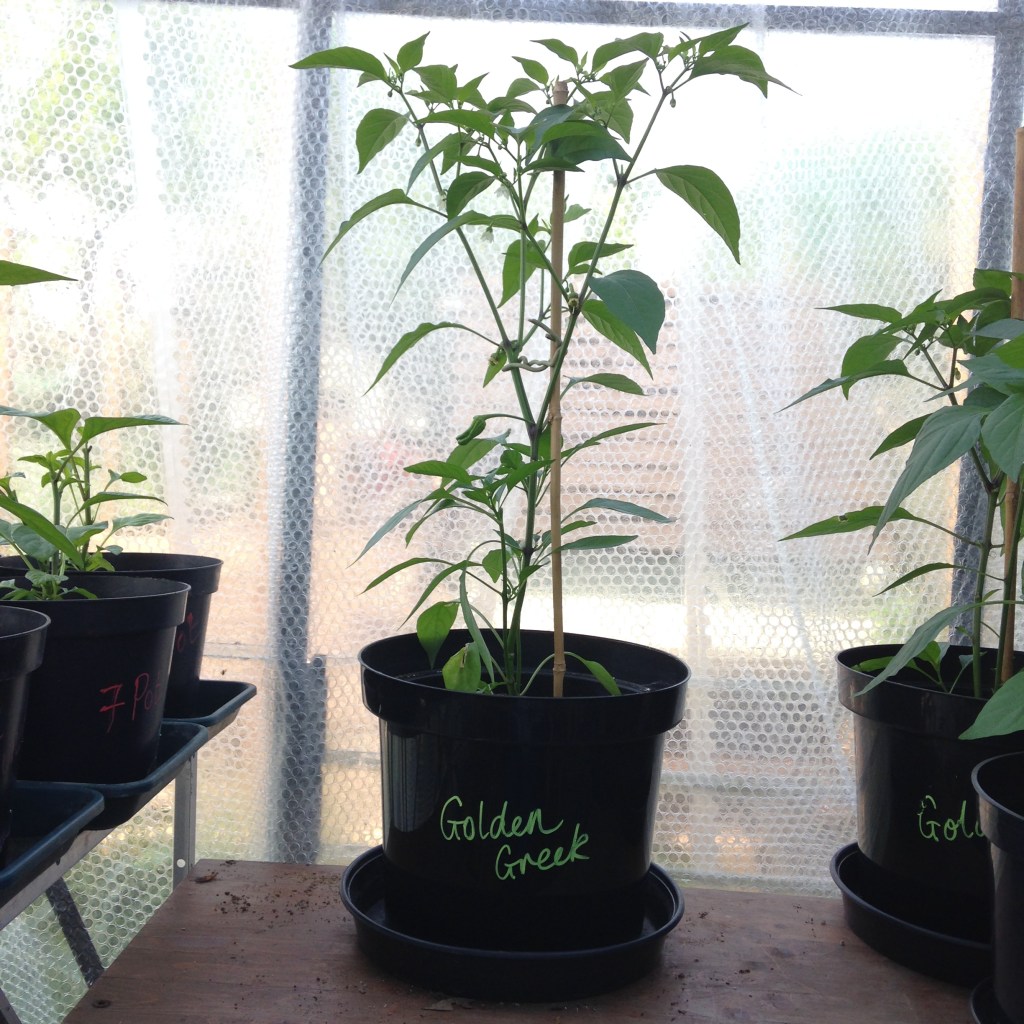
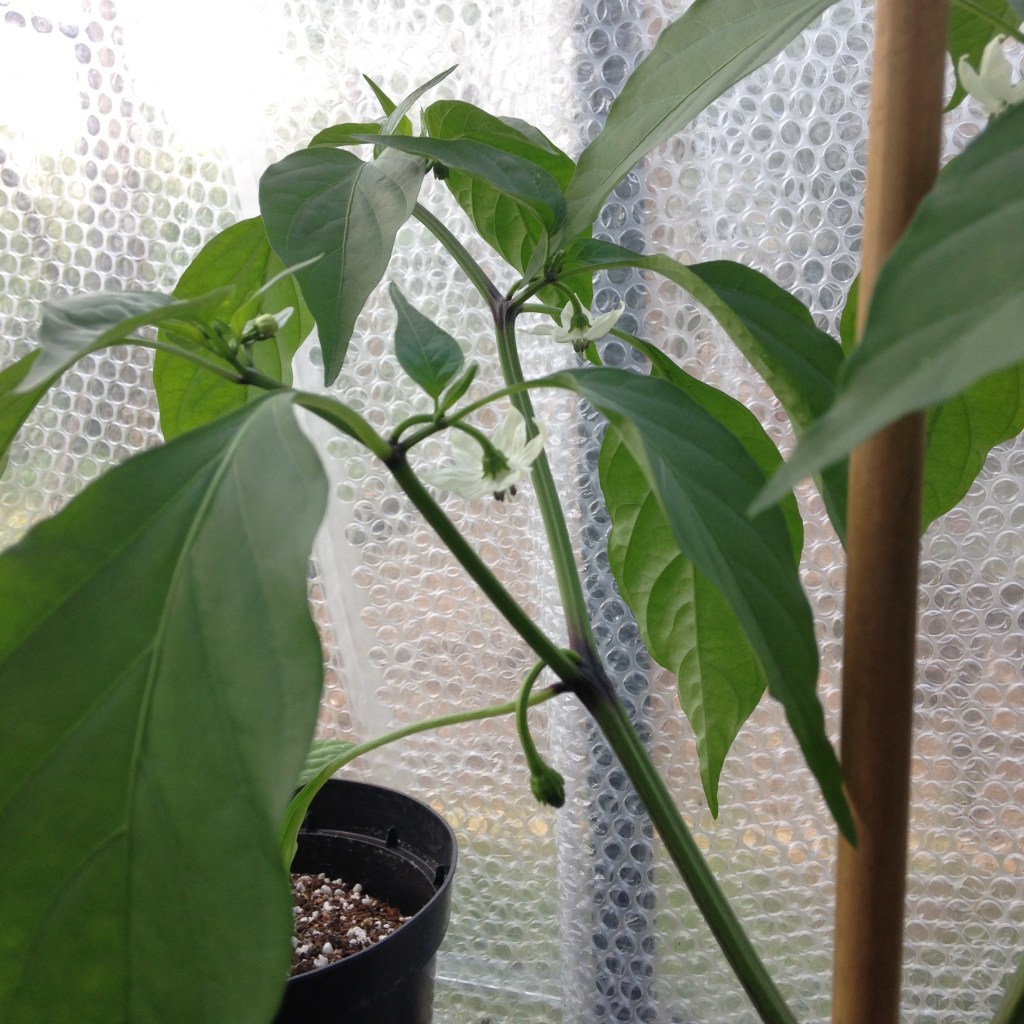
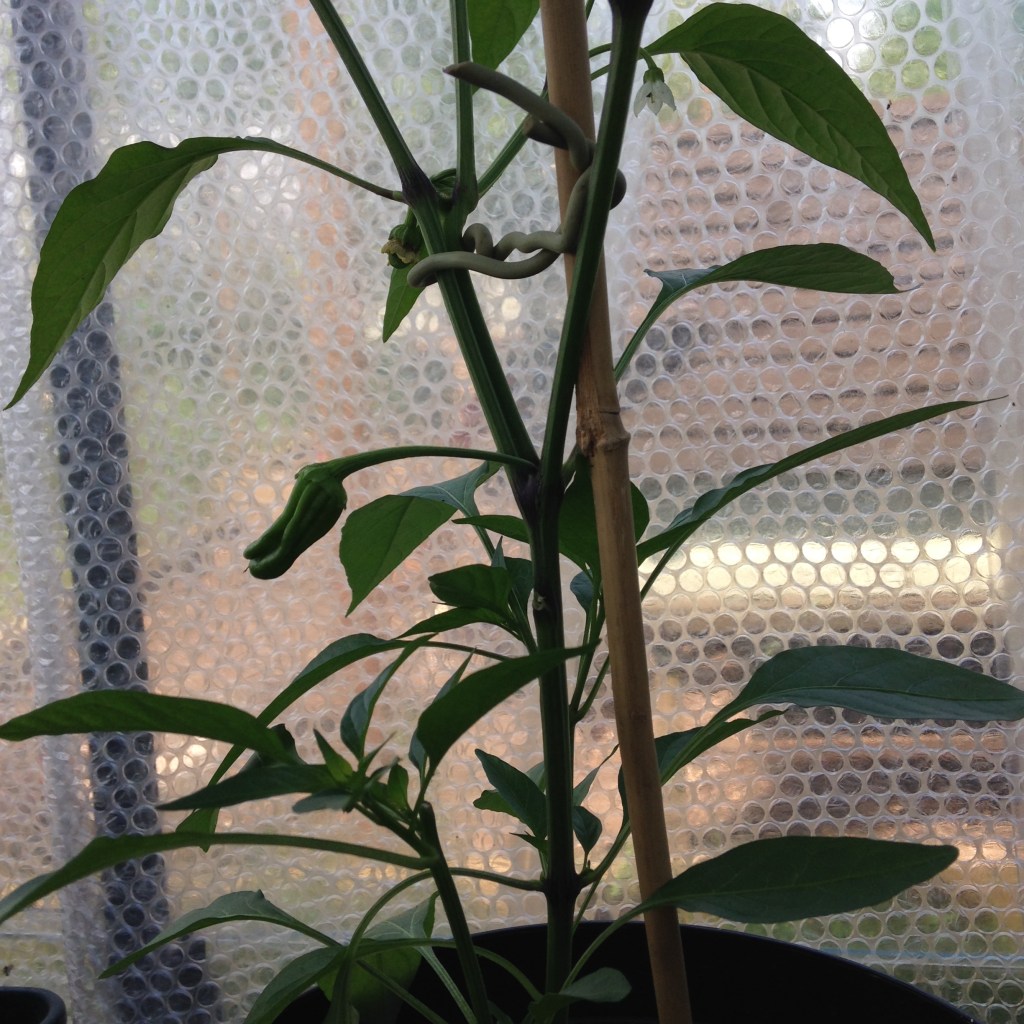
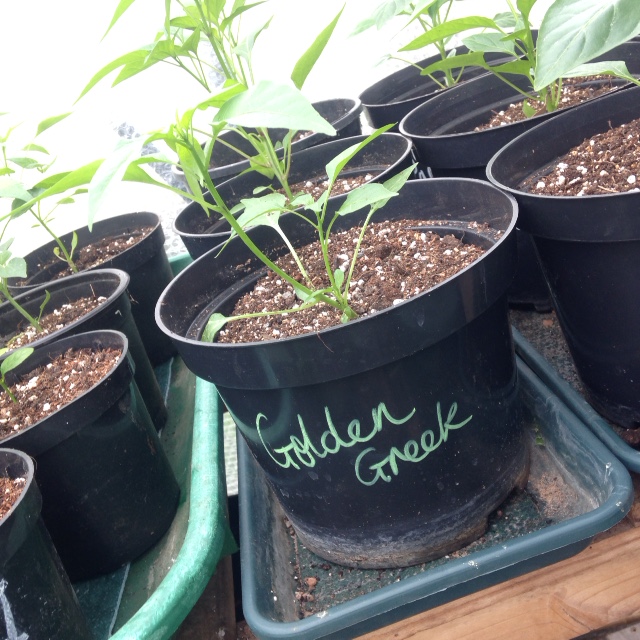
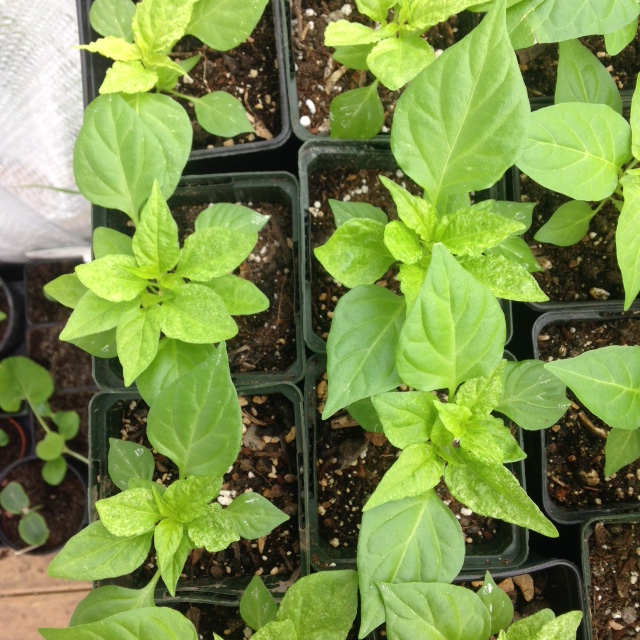
Buds aplenty, some flowers are open, a few chillies have set and most plants look pretty happy with life.
Jalapeno flowering away, and a very small chilli
Golden Greek Pepperoncini, first out of the blocks
Different varieties of chilli like topping in different degrees. Some just don’t seem to understand what to do and others get it right first time.
A good example of a slow learner is Poblano. At the initial topping, Poblano was topped carefully to leave four true leaves. All seemed well. However, each of the plants has grown just one (or maybe two) new branch from the leaf node. This has then become the main growing stem again. It’s like the Auxin only made it down as far as that node and stopped there. Result: minimal branching, one main growing point AGAIN.
Topped Poblano, falling back into its old habits: one growth spike, minimal branching.
The best in class when it comes to branching out has got to be the Chinense group. Again, they were topped to leave four true leaves. This was difficult as they were tightly packed. Every single node has sprouted a new branch. Result: lush, dense plants with plenty of growing branches to bear lots of fruit.
Just look at all those new shoots. The Chinenses may be slow to grow but when they do it is ALL GOOD.
Espelette seems to know what to do with itself once its top has been whipped off. The difference is obvious looking at plants that have and haven’t been topped. Well done Espelette. We salute you.
Left: topped plant with branching at every leaf node. Right: taller plant, no branching, beginning to show a Y at the top. Flower buds.
Overall, topping HAS resulted in the chilli plants growing extra branches, lower down, before they form the Y. It has delayed flower formation and therefore flower drop or fruit developing too soon. Sometimes chillies forget to produce more flowers if they have an early fruit or two.
The Demon Scissor Snipper has been back. A second topping has occurred. Any plant that had not yet formed a Y has had its new branches topped too. Mwwwhhhhhaaaaarrr!
Why? In aid of even bushier plants, with more flowers, less chance of branch snapping and plants that topple over. And of course, many more chillies!
The last few weeks have been busy. Spring has finally sprung in Hampshire. The garden is waking up and our Family and other Animals are demanding attention. The chillies have been quietly doing their thing on the window sill. After a sunshine-tastic Easter Bank Holiday it is time for a progress report.
Potting on…
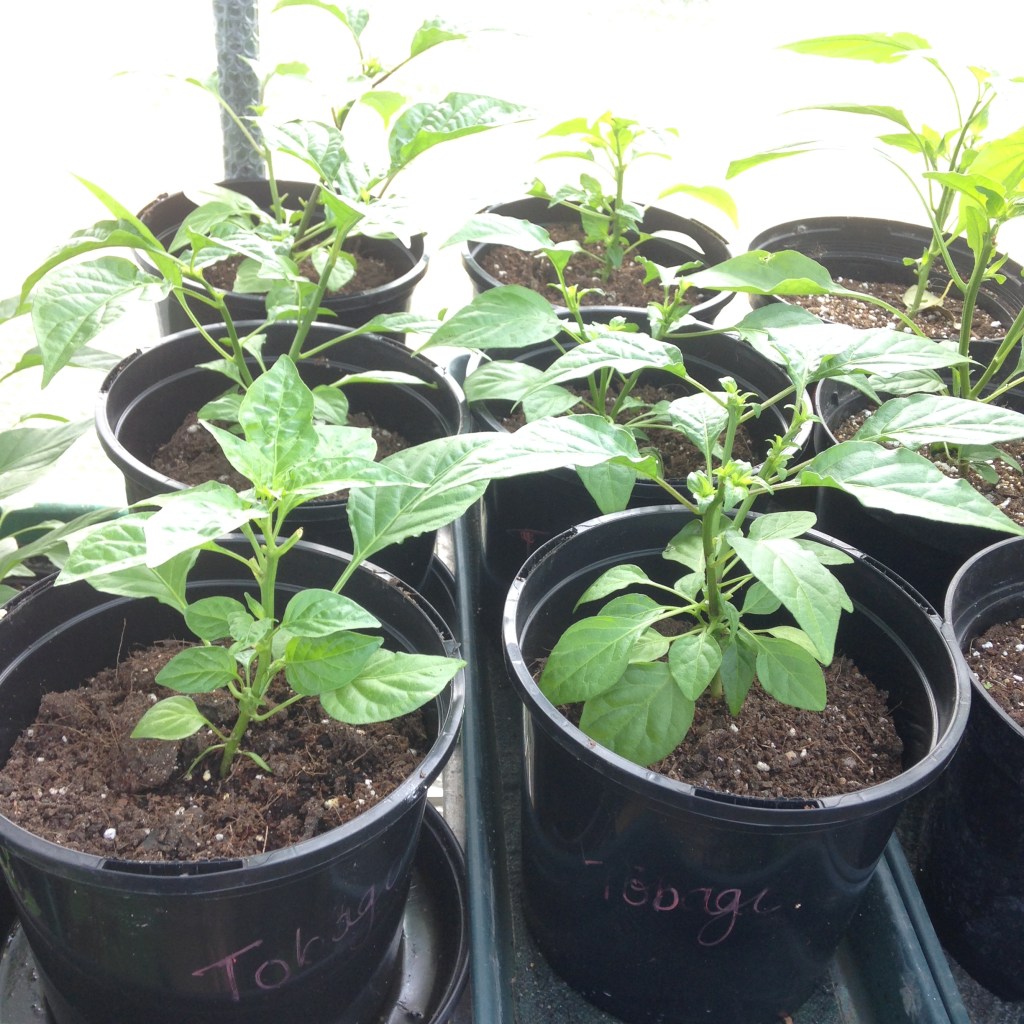
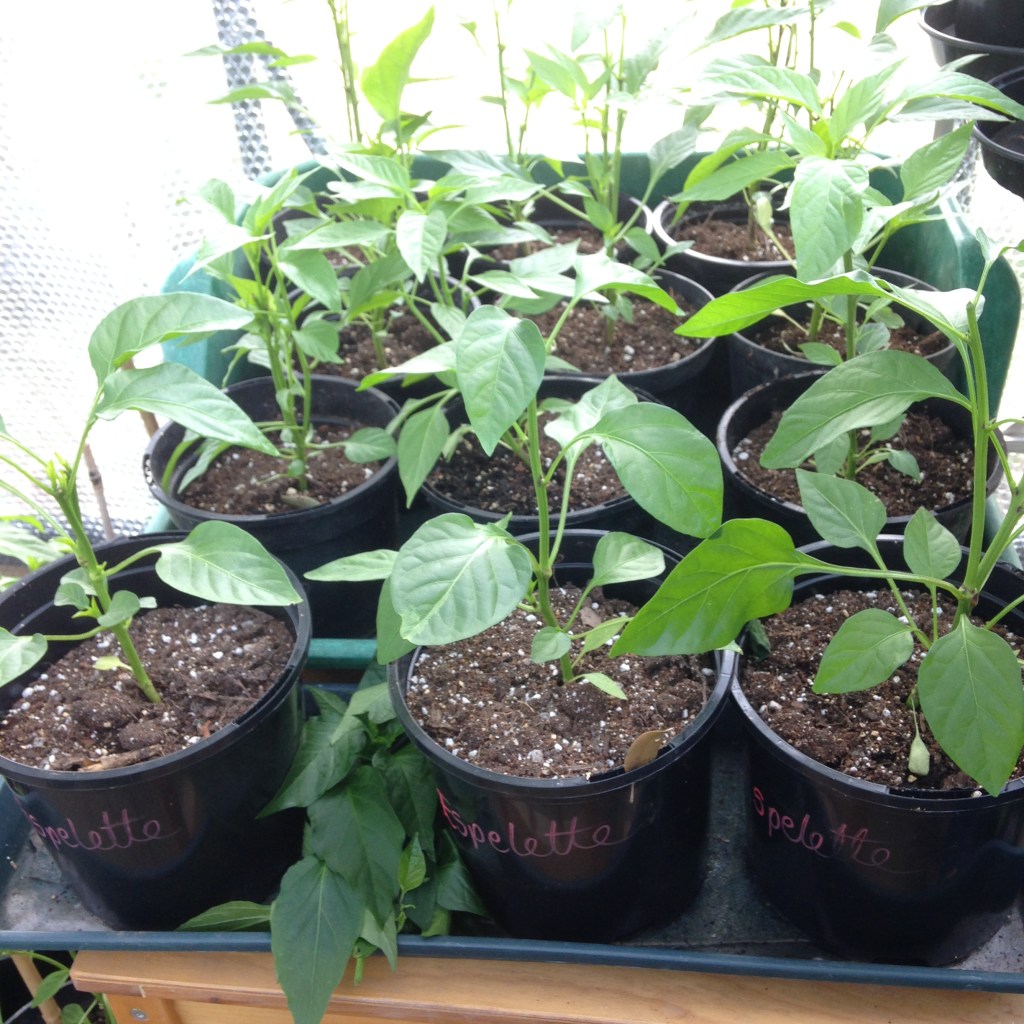
Roots were starting to appear at the bottom of the smaller pots. A sure sign it is time to pot on. Not too big too soon or the plants will spend all their time growing new roots to fill the massive pot and forget to grow up top.
The same mix of soil was used. Seemed to work well for the first round of pots so why change it? No need for staking any plants yet. This time last year the Jalapeños and Big Bombs were already needing a small stake to stop them flopping over. Topping has helped the plant stability.
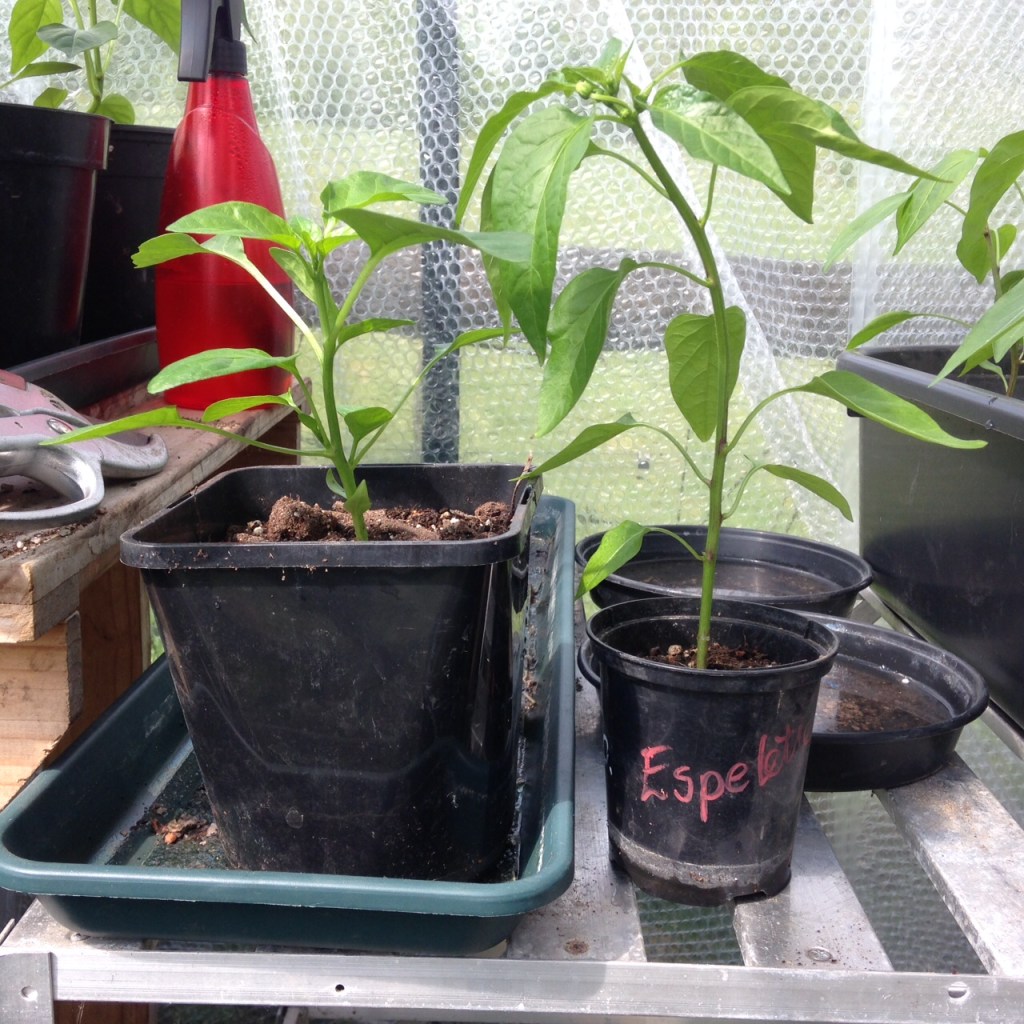
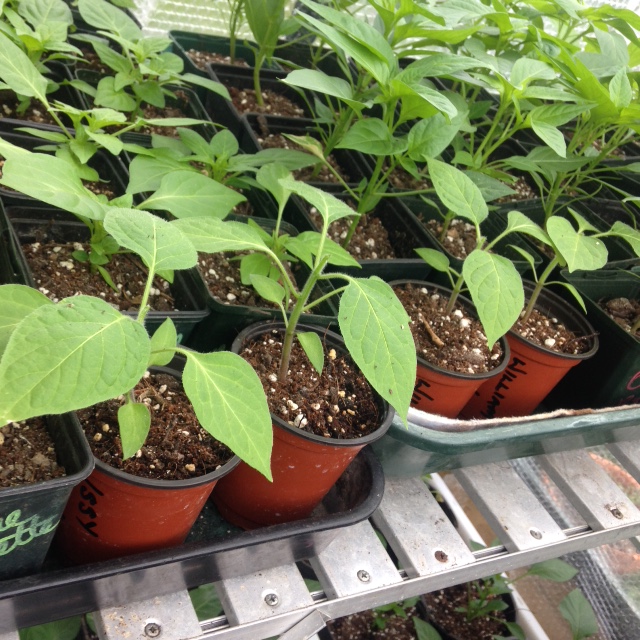
86 plants potted on. Very satisfying.
As a result of topping…
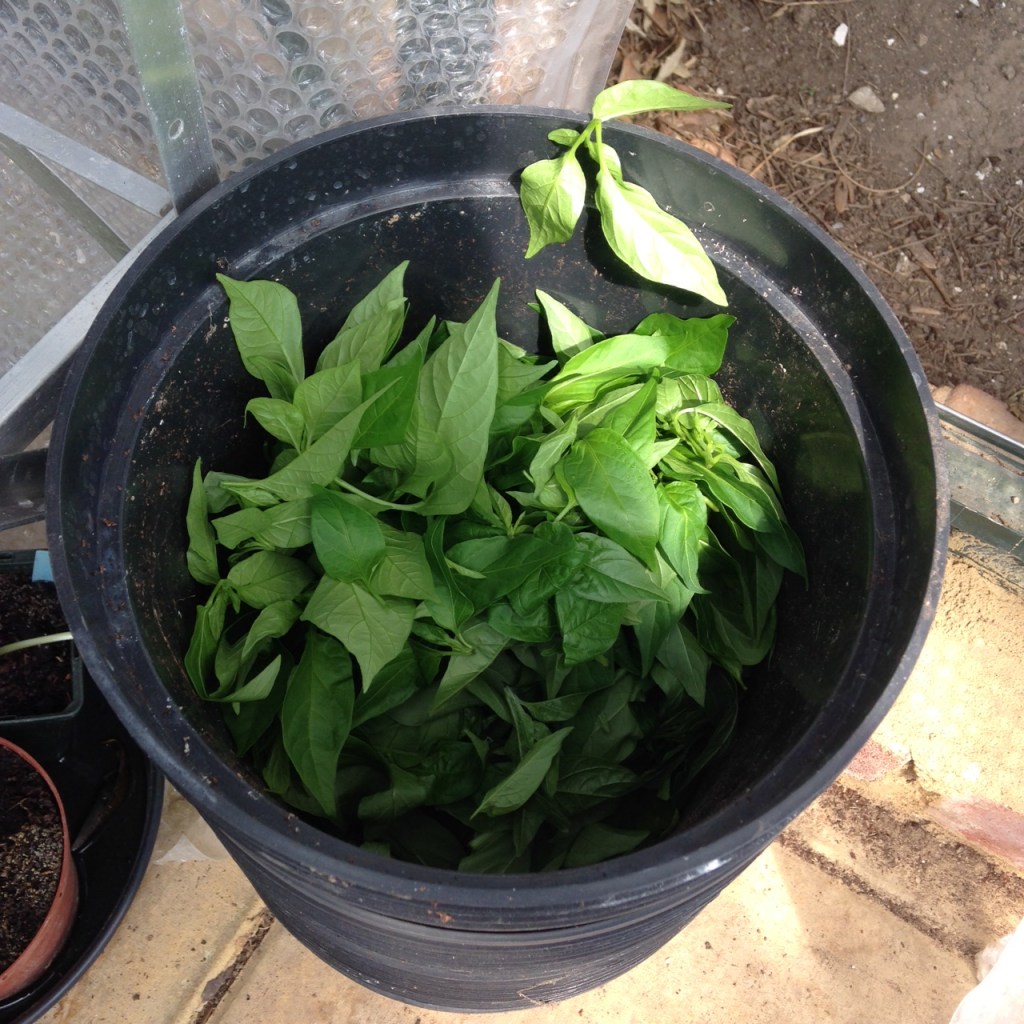
The plants have responded well to their growing tip being pinched out. Some plants were showing signs of branching anyway but others, less natural spreaders, have really bunched up and sent out side shoots galore. Excellent work. Although none of the topped plants have flower buds they all have many, many more growth points, rather than one leading spike.
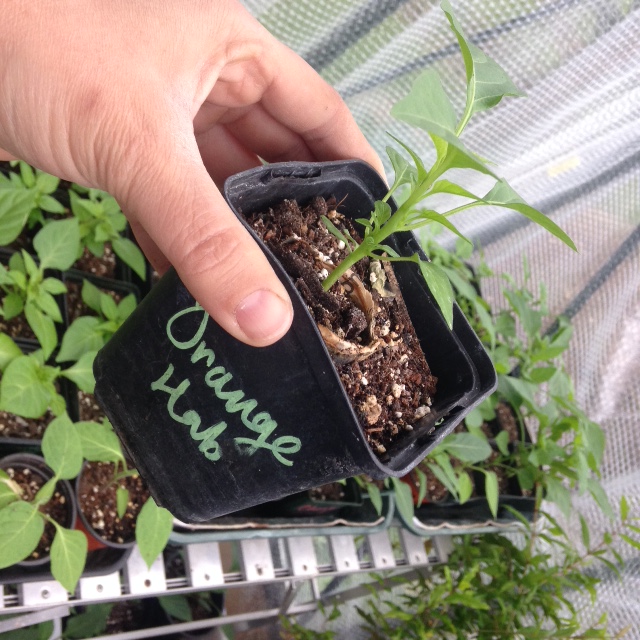
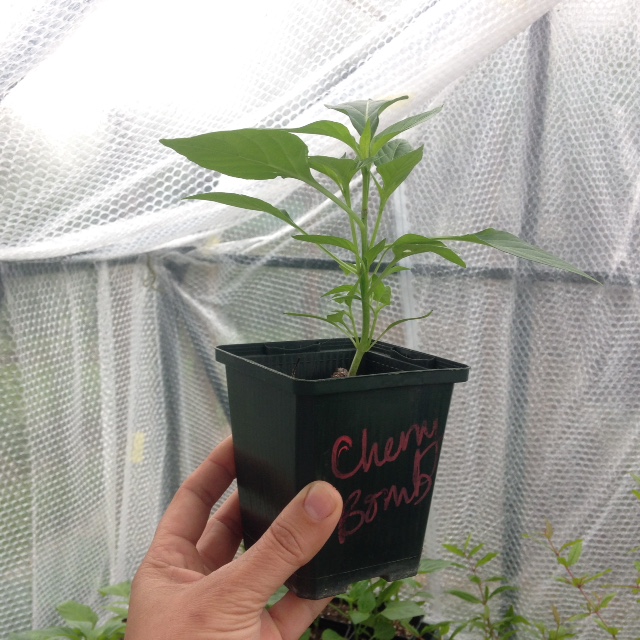
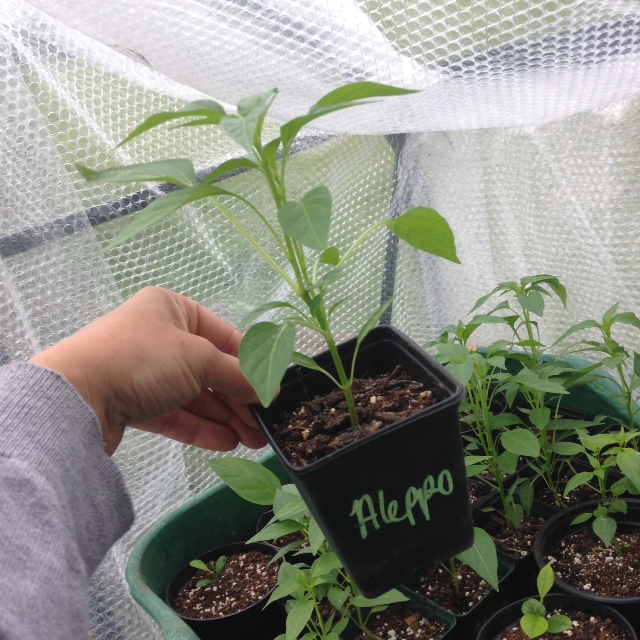
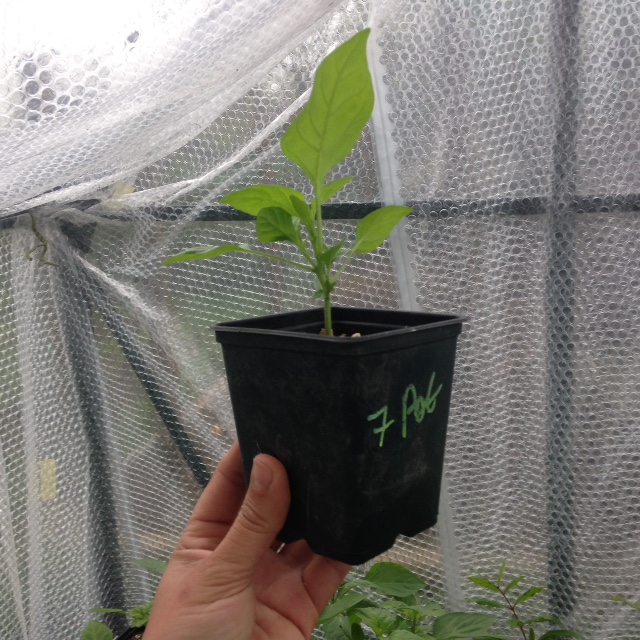
A comparison of topped and not topped plants show significant differences (significant to us, anyway) Topping has slowed flower development, created more leaves, bushier and shorter plants. The non-topped plants are destined to be sold at a Summer Fete. They are tall, flowering plants with big leaves. They should do well in their new homes.
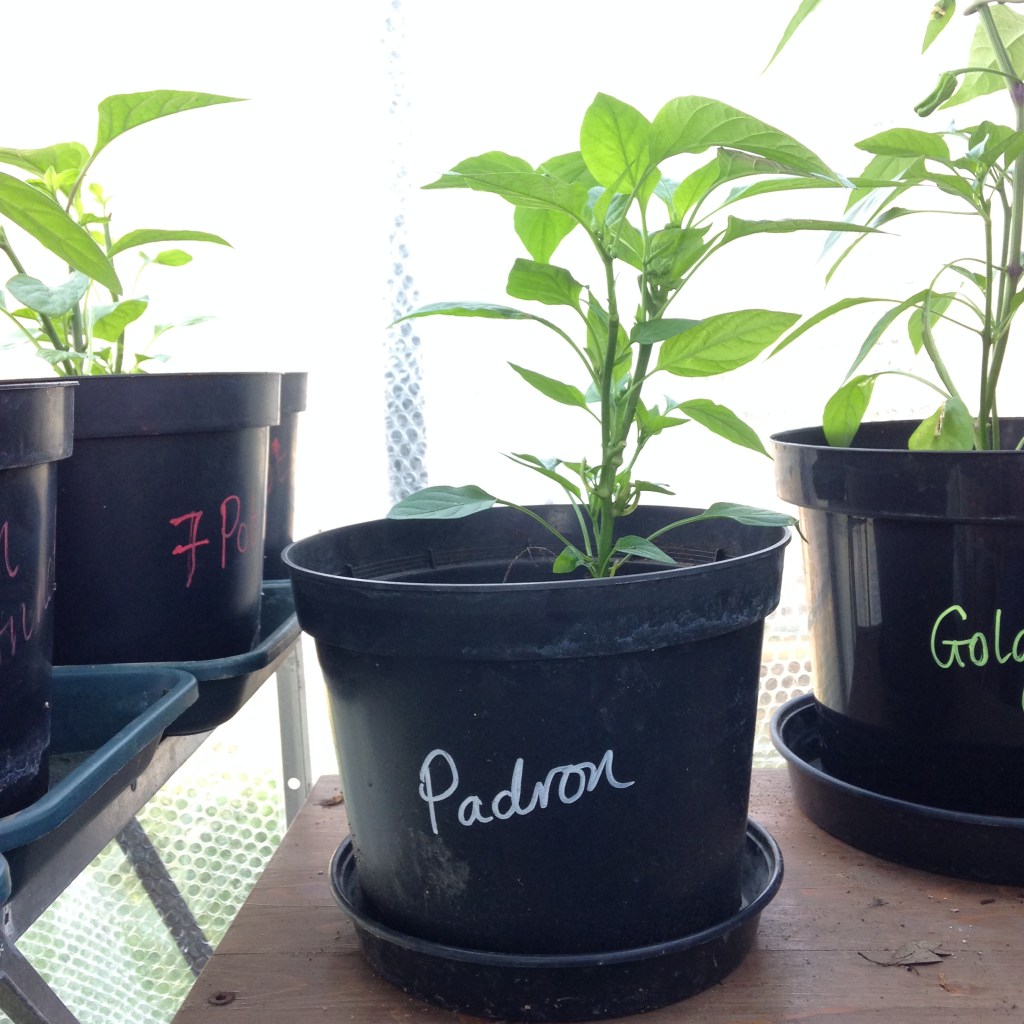
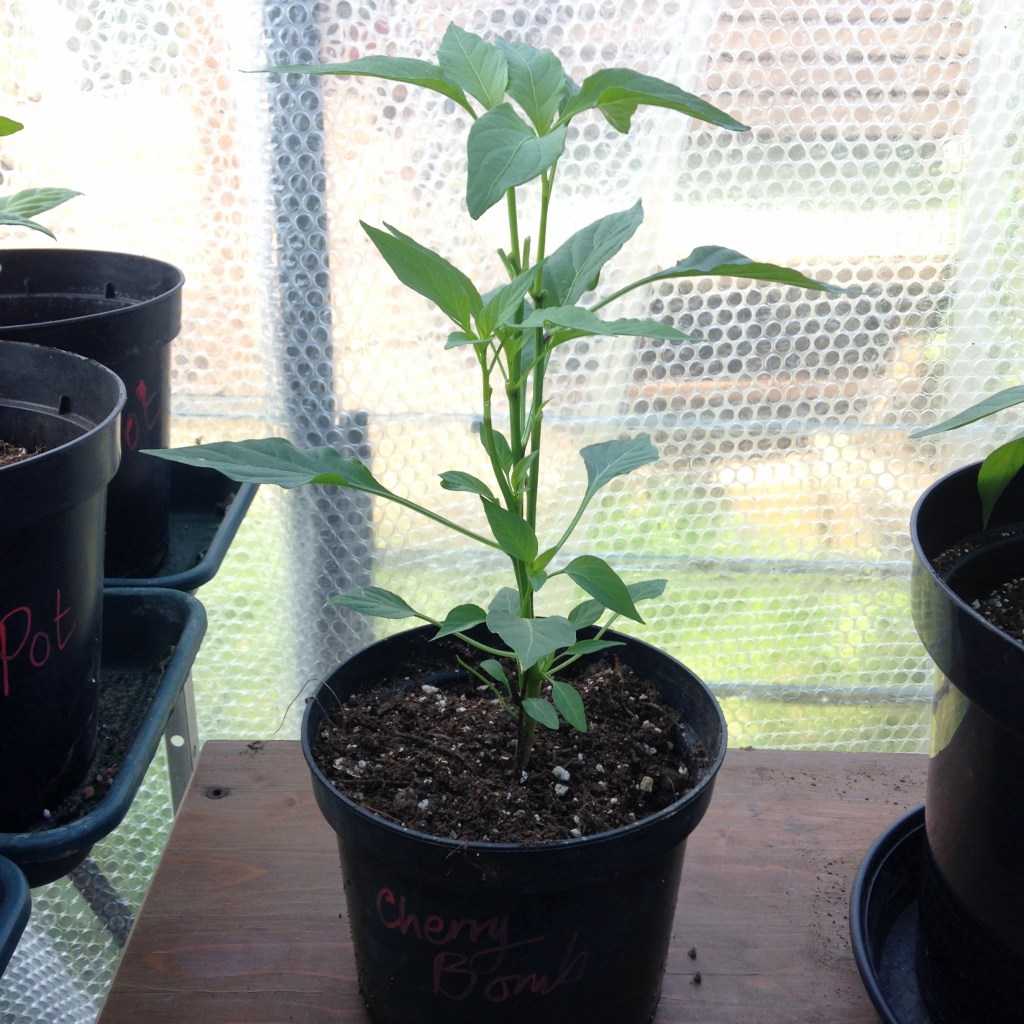
Not topped 7 Pot Bubblegum
Topped 7 Pot Bubblegum
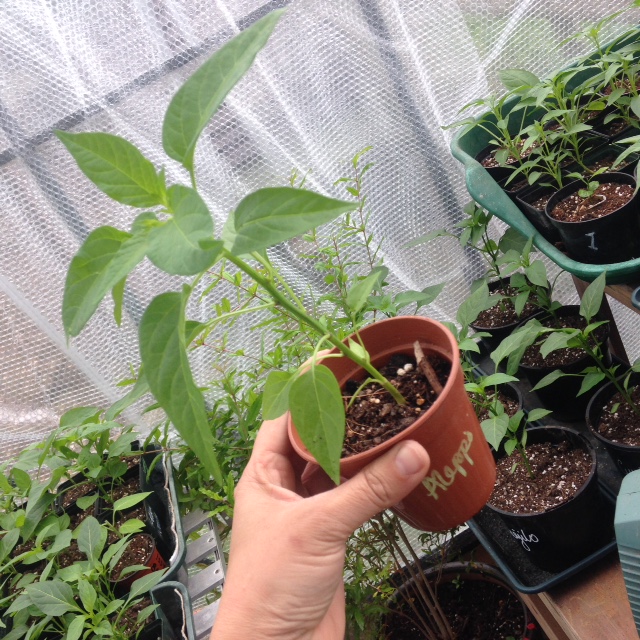
Not topped Aleppo, with flower buds
Topped Aleppo
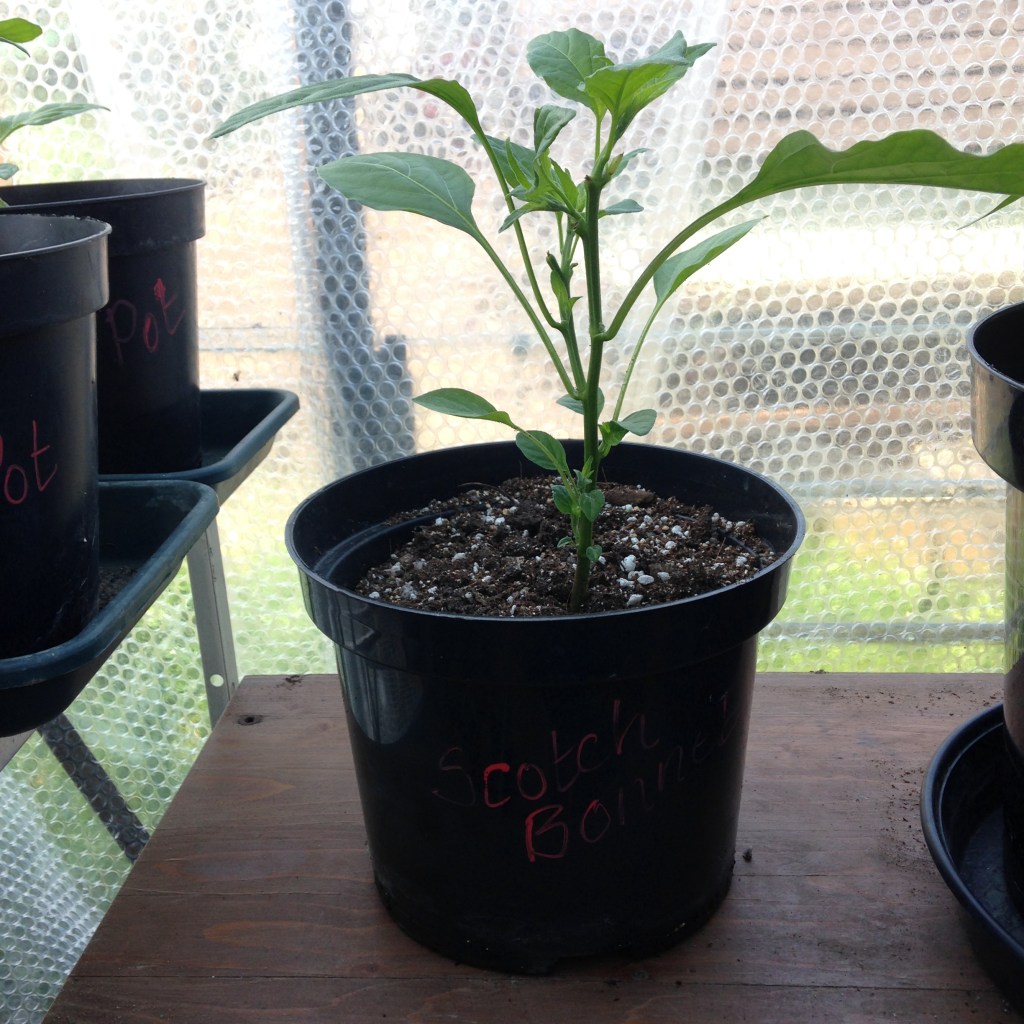
The late-to-be-sown Rocoto plants have just been topped. They are rapid growers and have a good number of true leaves. Snip snip snip. Time to bush out.
Last year the solo Rocoto plant we grew was a real pain in the greenhouse. Sprawling and brittle, it decided it needed other plants to support it. This made moving them around almost impossible. It was definitely worth the hassle (as is clear from the last minute seed planting) but there is nothing wrong with attempting to keep them more compact this year.
Rocoto chilli plants freshly topped.
Moving up to the greenhouse…
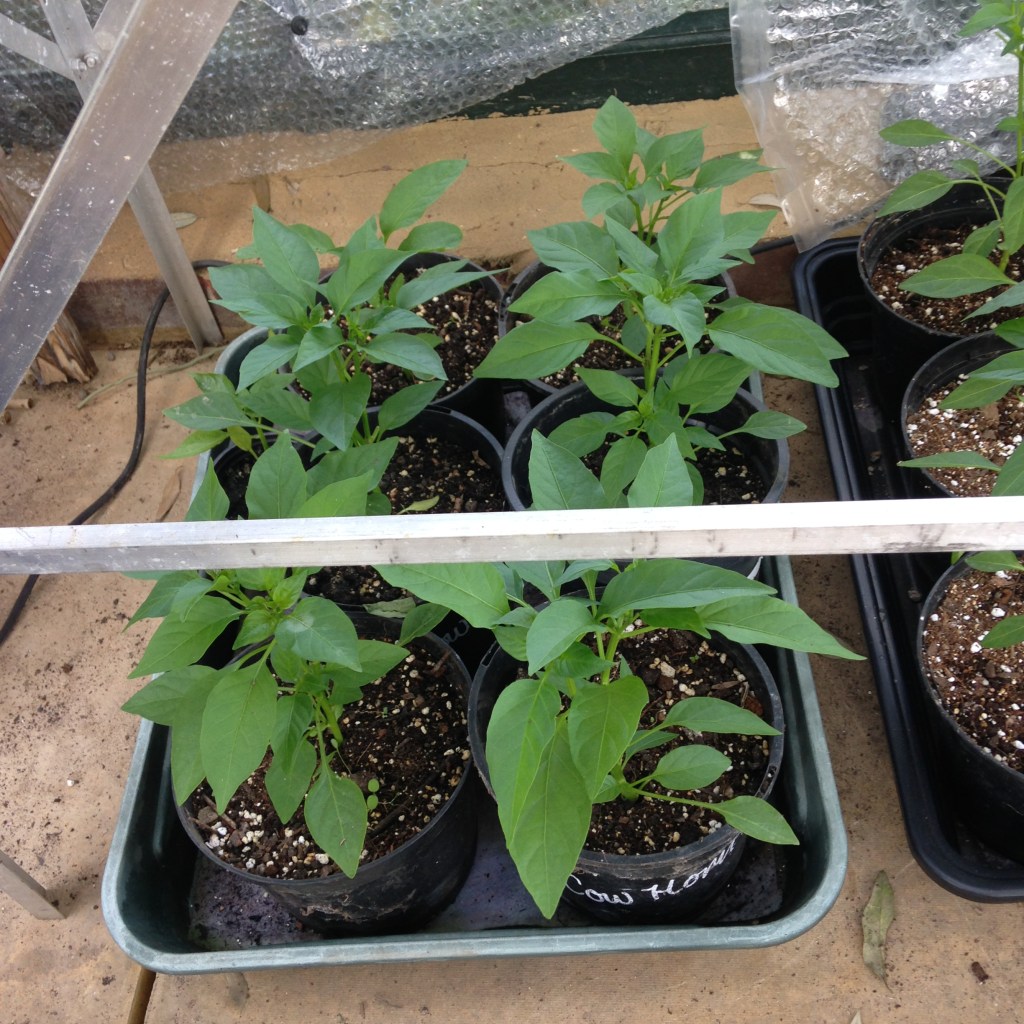
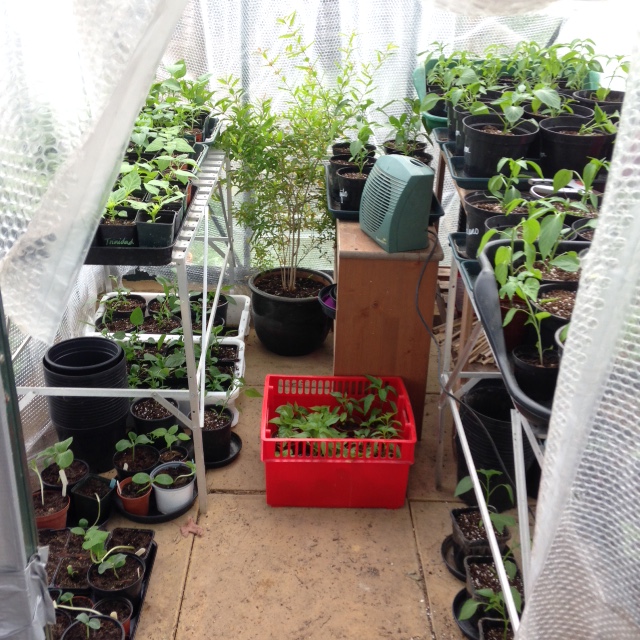
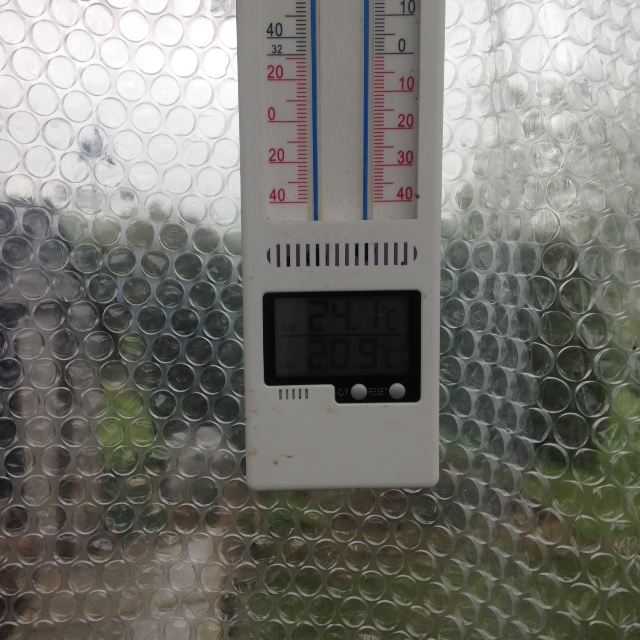
The plants been up in our heated, bubble wrapped greenhouse for nearly a week and the results are good. All round light, controlled temperature and gentle air flow has really allowed the plants to flourish. We’ve been trying to keep the temperature above 15 degrees at night, so far no problem, despite outdoor temperatures hovering around zero. Temperatures during the day are less than perfect. It can often be well over 35 degrees in there, with window and door open. We’ve attempted some strategic placing of the hotter types on the South side and the ones that are less tolerant of high temperatures on the North side or somewhat under the shelving. Generally all the plants have added a couple of extra sets of leaves and are looking tip top.
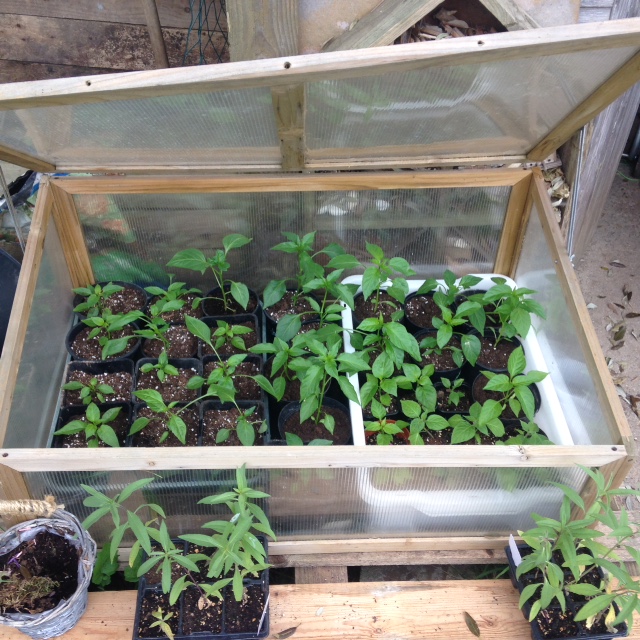
There are a selection of plants that will be gifted to friends and family. These are not necessarily going to be potted on or placed in prime location though, just kept ticking along. They will be left in their first pots or potted on into odds and sods pots. A good chance to clear out any unwanted pots. These are in the cold frame, covered over at night and will be fleeced if a cheeky frost makes a surprise appearance.
Potted on ready to sell at the school Summer Fete.
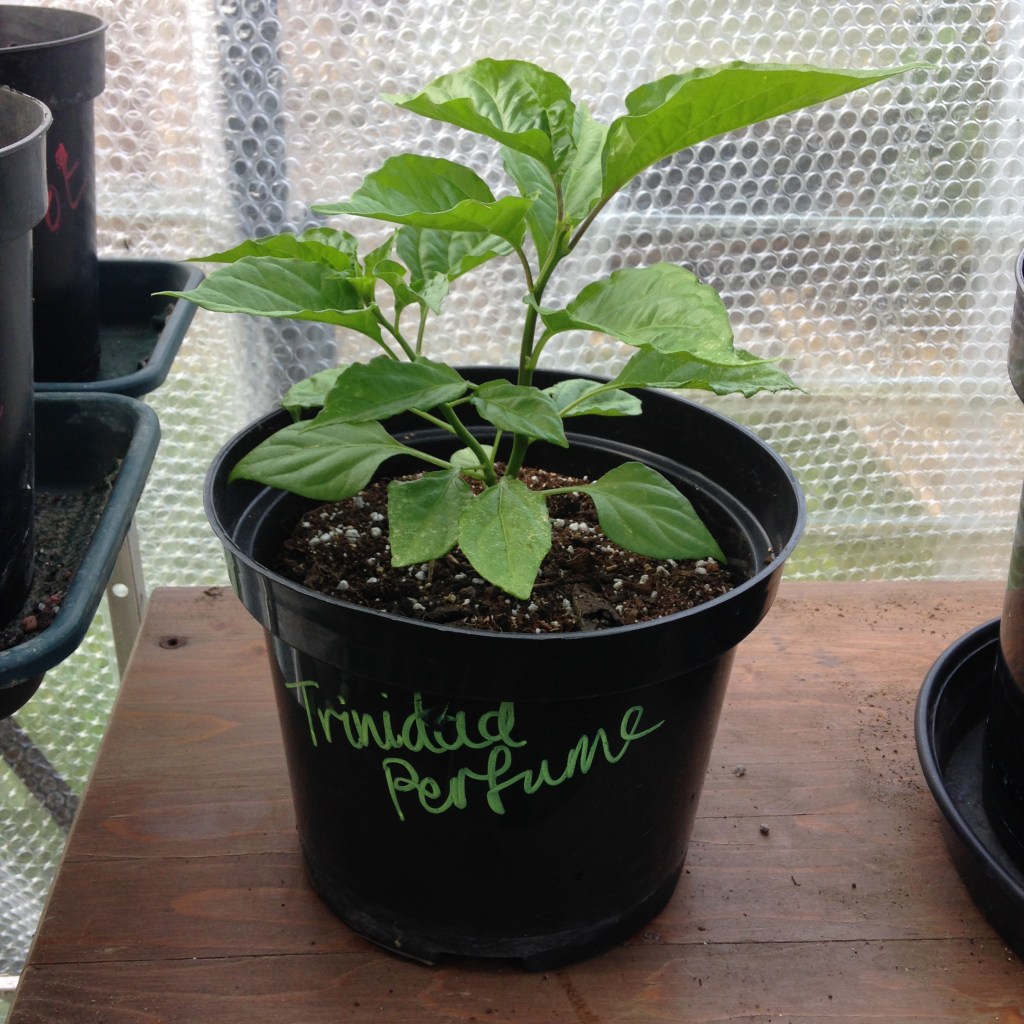
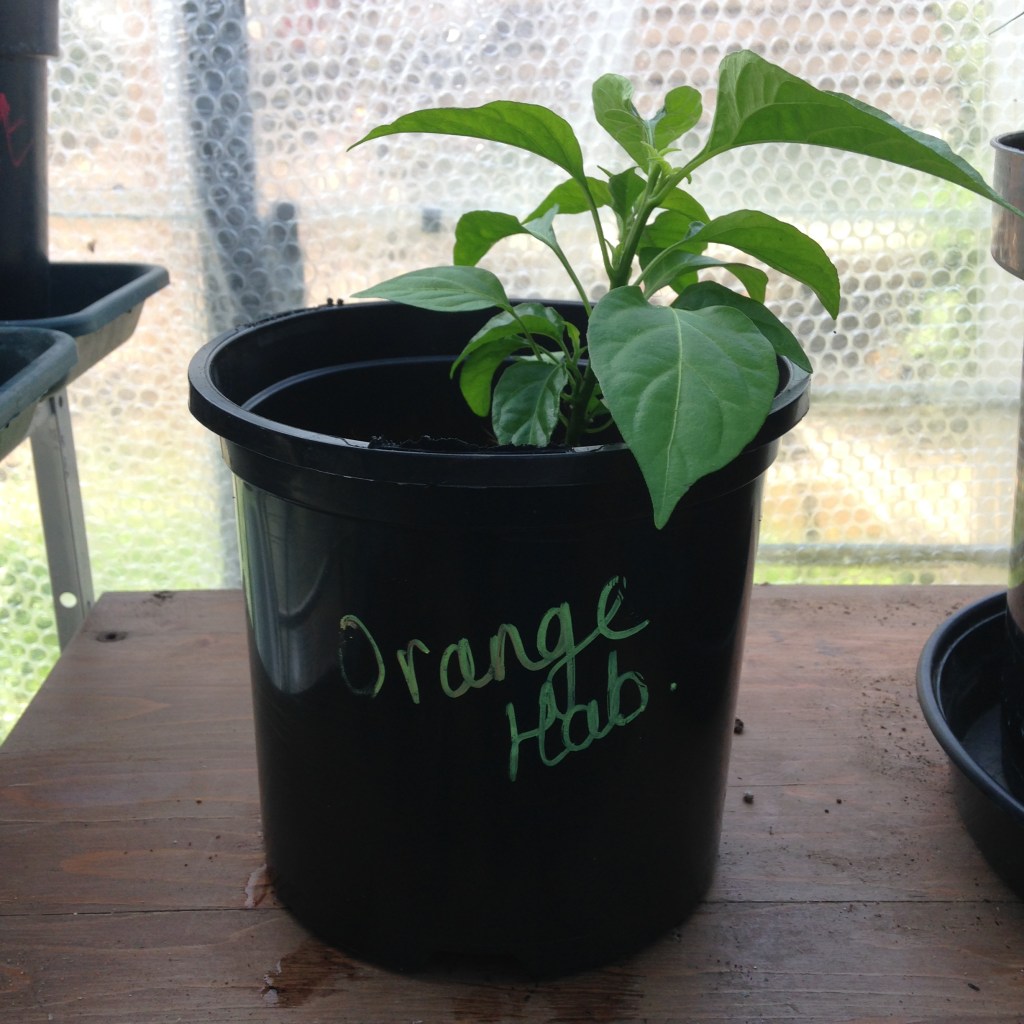
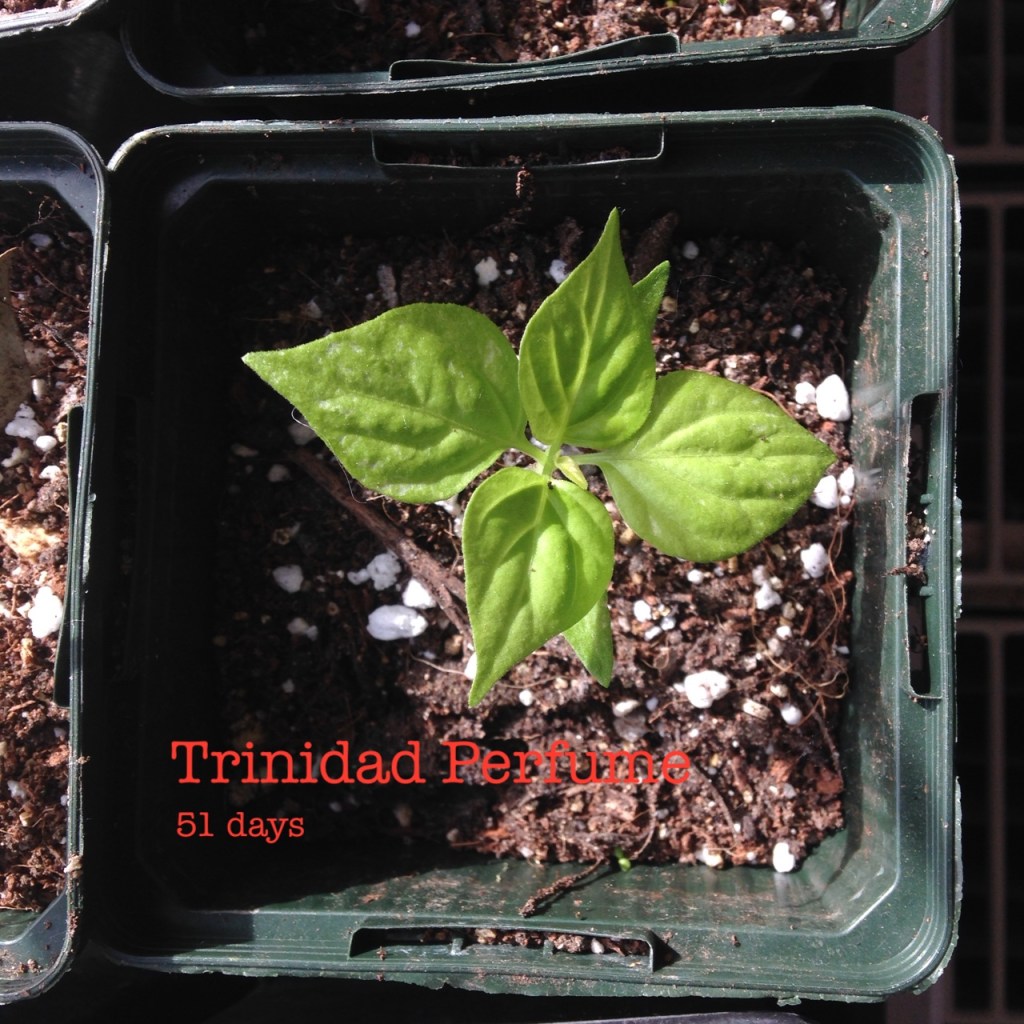
All the Trinidad Perfume plants are showing good growth but have odd looking central new leaves. Pale and crinkly. Investigations and results will follow.
Trinidad Perfume plants showing signs of nutrient deficiency. Time to investigate.
Time to consider the feeding regime again. Should we increase the Chilli Focus mix to 10mls per litre? Should we go to twice a week or stick with once a week? Is an Epsom Salt spray needed again? And what about banana tea?
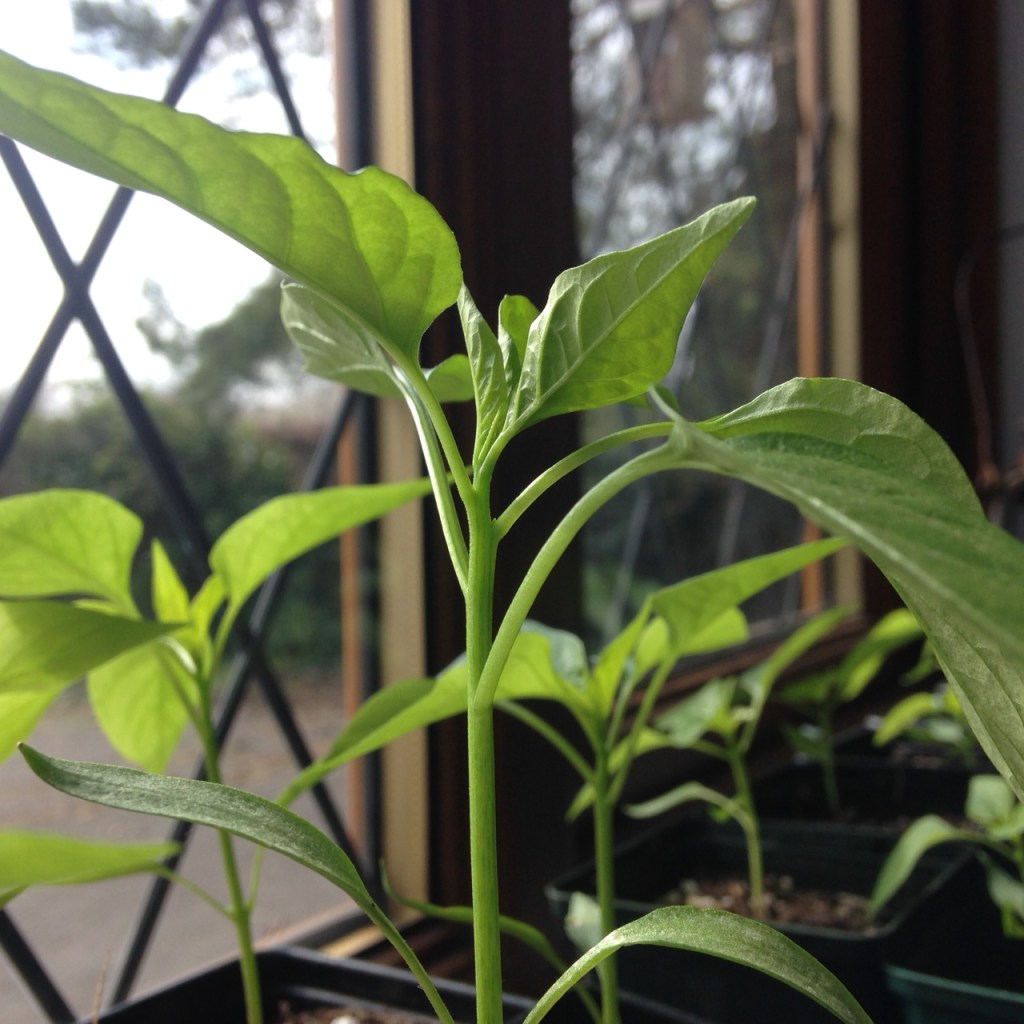
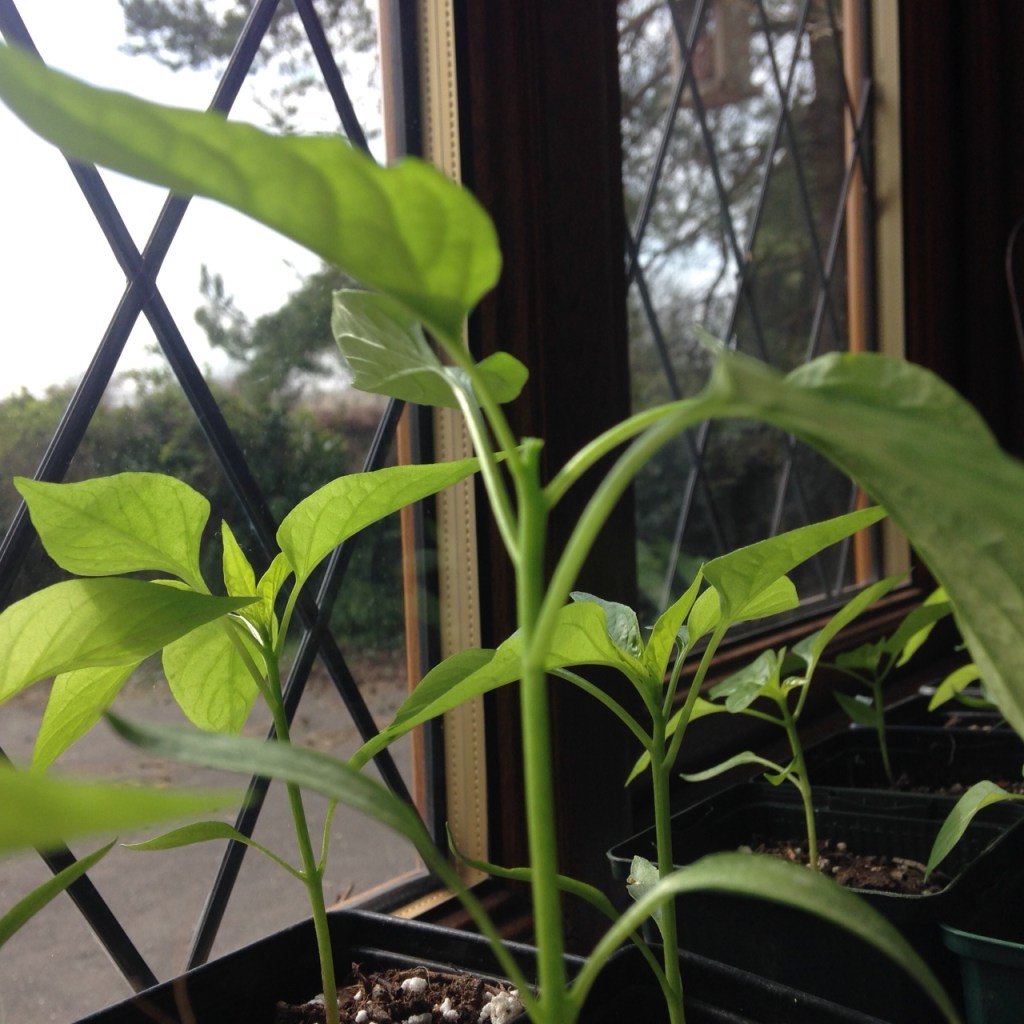
Our chilli plants are progressing nicely. Lighting has been au natural so they are not the deep, dark, dense green & glossy beasts that some people have lurking beneath their grow lights. Maybe Father Christmas will bring us lights this year, who knows. Until such time, we have our lovely honest plants that have germinated and grown in a UK Winter. As a result, they have slightly petite leaves, longer stem spaces between pairs of leaves and a grassier green colour.
It is time to top.
What does that mean?
You might call topping, pinching out, top pruning or even FIMming (Google that for an explanation). The Chelsea Chop works on the same idea too. They are all pretty much the same thing. Snipping off the growing shoot at the top of an immature chilli plant, before it has split to a Y or produce flower buds.
You can tell if the plants might benefit from a topping if they are leggy. Look at the space between each set of true leaves. Is it bigger than you would like? Does the plant bend a little too much? Are you worried you might snap the plant when you move it around? If yes to these questions then your plant is ready to take its top off.
Why? What are the benefits:
More fruit: the removal of the main apex growing shoot sends the key plant growth hormone, auxin, down the stem to encourage many more growing shoots to develop further down the plant. The result is more growing branches, more flowers and ultimately more fruit. Yay! Better order that chest freezer now.
More compact plants: naturally grown plants can be a little leggy at this time of the year. This can be dealt with in a few ways. When repotting they can be buried up to their seed leaves, encouraging more roots to grow and reducing the height of the plant. Topping also deals with a plant that is undesirably tall early in the season. Don’t be scared now, it will all work out fine.
More stable plants: another benefit to reducing the height of the plant and sending it out sideways will become apparent later the season. Some chilli plants (jalapeño, guajilo, padron to name a few) could reach up to 2 metres tall. By encouraging a bushy style plant you will avoid plants that can be blown over in the wind, or knocked over if they are dry. Single tall stems can be easily snapped, especially ones that have larger fruit. Multi stems not so much. All that hard work could end up for nothing. You might find there is less need for staking too.
Are there any negative effects?
Delayed flowers and fruit: so of course, by topping the lead growth shoot you are delaying the onset of flowers and fruit, essentially checking the plant. If you have a short growing season and are only interested in a smallish crop then go right ahead, let the chilli plant grow as it wants, with little interference, and you’ll be harvesting your chillies a week or two before us toppers. Although, you might find that those early flowers do not hang around to set fruit as the plant is too immature to support them.
Less side shoots: Hmm, maybe. If you have a chilli plant that likes to bush out and make side shoots all on its own then cutting off some of the plant will leave less leaf joins to sprout new shoots. Don’t top if you have all the space in the world. A side shoot variety (padron for example) will just get on with things itself. As long as you are prepared to stake and support as the fruit sets and enlarges.
Does this work for every type of chilli?
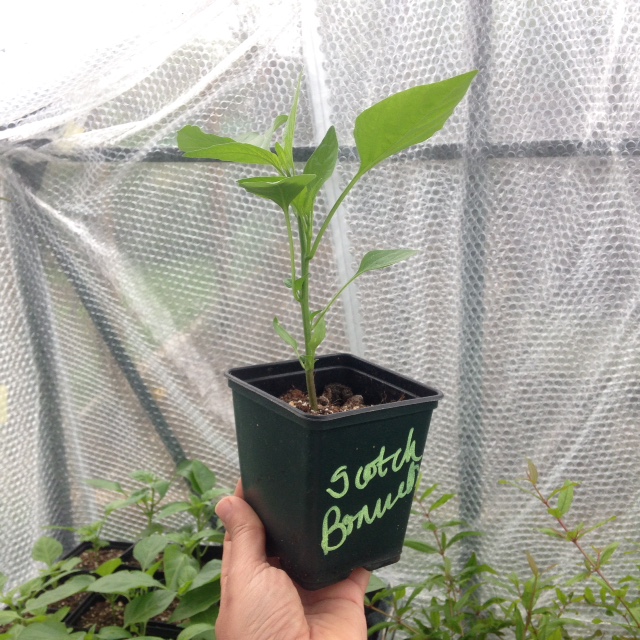
The topping principal totally works on any chilli. But, with naturally small, bushy plants, or plants that send out side shoots you might choose not to bother. Our Chinense types are half the height of the larger Annuums at the moment. No need to do anything with them just yet, maybe not at all. They take a lot longer to get on with things. Bactuum types are often spindly and branched anyway. Topping could help keep them more sturdy.
Well now, if you are a You Tube kinda chillihead then settle down to watch Veronica Flores explain all things topping. You’ll be rushing off for your tiny scissors in no time at all.
Wait until the plant has between 3-5 sets of true leaves.
Find a nice sharp pair of scissors.
Take a deep breath.
Snip out the main growing shoot. Leaving one or two pairs of true leaves, depending on how brave you are.
Sit back and watch the side shoots grow.
The side shoots can also be topped later on in the season if they are leggy.
Select your victim
Snip away the growing shoot
Wait for the branching side shoots to appear
Five days later and our plants are already showing sign of side shoots.
Do be warned: topping is addictive.
If you found this post useful then you may also like to read our:
A south facing windowsill in March is no longer enough for the chillies in our lives. The leaves are a little limey in colour (especially the chinense types) and some of the plants just a bit leggy (especially the jalapeño and poblano). Without rushing for LED lighting and pinching out the tops just yet what can be done?
The key questions are would they do better in a warmer place? How can they get the most natural light? Do they need feeding more?
A bit of background information to give you a better idea of what we’re dealing with.
First temperature…
The chilli seedlings are currently in the house. You would hope that the house is a good temperature for the chillies to thrive. Monitoring with a maximum and minimum thermometer reveals that during the day, in particular cloudy days, the temperature can drop to as low as 17 degrees. At night an overnight low of…the same. Our house is pretty consistent.
In comparison, the heated greenhouse temperature has been all over the place. Sometimes 13 degrees at night, sometimes down to 5 degrees. It was zero outside but still, rather chilly for chillies! Sometimes 35 during the day. We have the smaller chilli plants in the greenhouse already. Although they are growing, they are no where near as advanced as the house ones. This is really the only other location we could consider putting the house plants. Perhaps quite yet.
Ideal chilli growing temperature range is 27-31 degrees. Well that is a hell of a lot hotter than these little babies have been getting. Time to raise our game and temperature. Off to turn the central heating on and research heating cables.
Now light…
Our two south facing windowsills can take five trays of twelve plants each but we have fifteen trays. The trays are on rotation to allow a fair share of being closest to the window and are lined up on a big table as close to the light as possible. It is March and we receive 12 hours of sunlight on a good day. However, on a double drip rainy day it can be really dingy. Clearly not enough light for those at the back of the class.
And then feed…
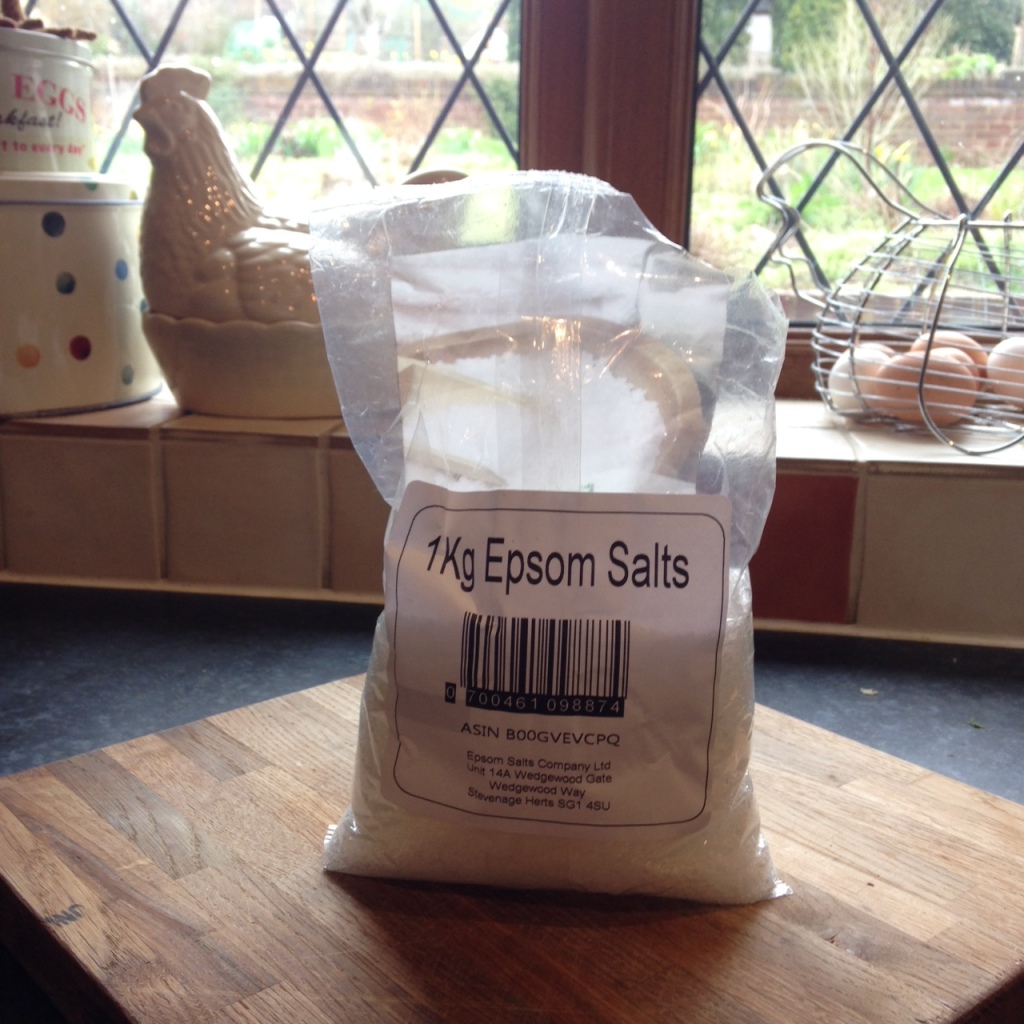
The plants are currently given a weak solution of Chilli Focus (5ml per litre) The bottle says they can be given 10mls per litre as the plants mature…perhaps it is time? Or maybe a nitrogen feed would be more suitable at this point and then switch back to the potash feed when flowers start to form. Or maybe Epsom salts might do the trick? Yes, a quick Google reveals that no harm can come from an Epsom salt spraying and a lot of good could be done.
Epsom salts are magnesium sulphate. Good for boosting chlorophyll production, uptake of nutrients and the ability to produce flowers and fruit. Best administered in a foliar spray it seems you can do no wrong with a misting of Espom Salts Wonder Spray (1 tsp per litre of warm water to aid dissolving).
The plan…
The weather is turning from deluge of rain & 50 mph winds to cold and clear with some night time frosts. Until those frosts have passed we will have to stick it out in the house. It’s just not warm enough in the greenhouse.
Keeping the central heating on in the house during the coldest days. The plants already come in off the window sills when the curtains are drawn.
Moving the taller anuum type chillies nearer the windows to avoid any further legginess. The others will still be in the light. Turn the plants to encourage strong stems.
An Espom salt spray will hopefully give a chlorophyll boost. Maybe that will compensate for the lack of prime window spots. We’ll continue with the Chilli Focus for now but…stop the press…a new click hole of banana compost has opened up. We get through a lot of bananas so this could be a good way to use the skins. We’ll report back.
Time for an update on the 20 varieties of chilli we have growing here at The Birdhouse in sunny and blustery Hampshire, England.
A quick reminder of the seedlings’ journey so far…
The seeds were soaked in tea and left to chit in a humid propagator. Once the seeds had rooted & shooted they were put into small newspaper pots. They were kept fed and watered until their roots peeked out the bottom of the pots. Potted on into 9cm square pots. No science behind the square pot choice. We just have lots of them. They fit & balance well on our windowsill trays. And there we are, the story so far.
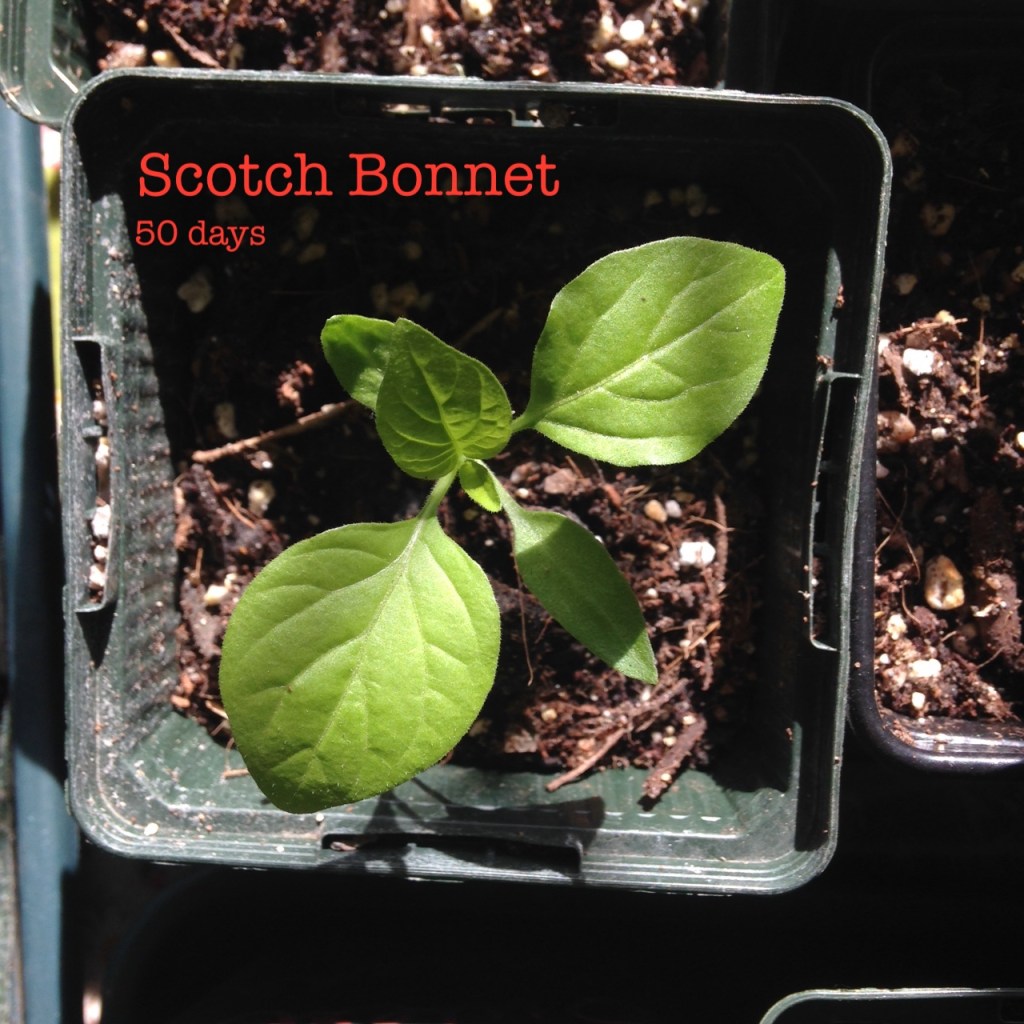
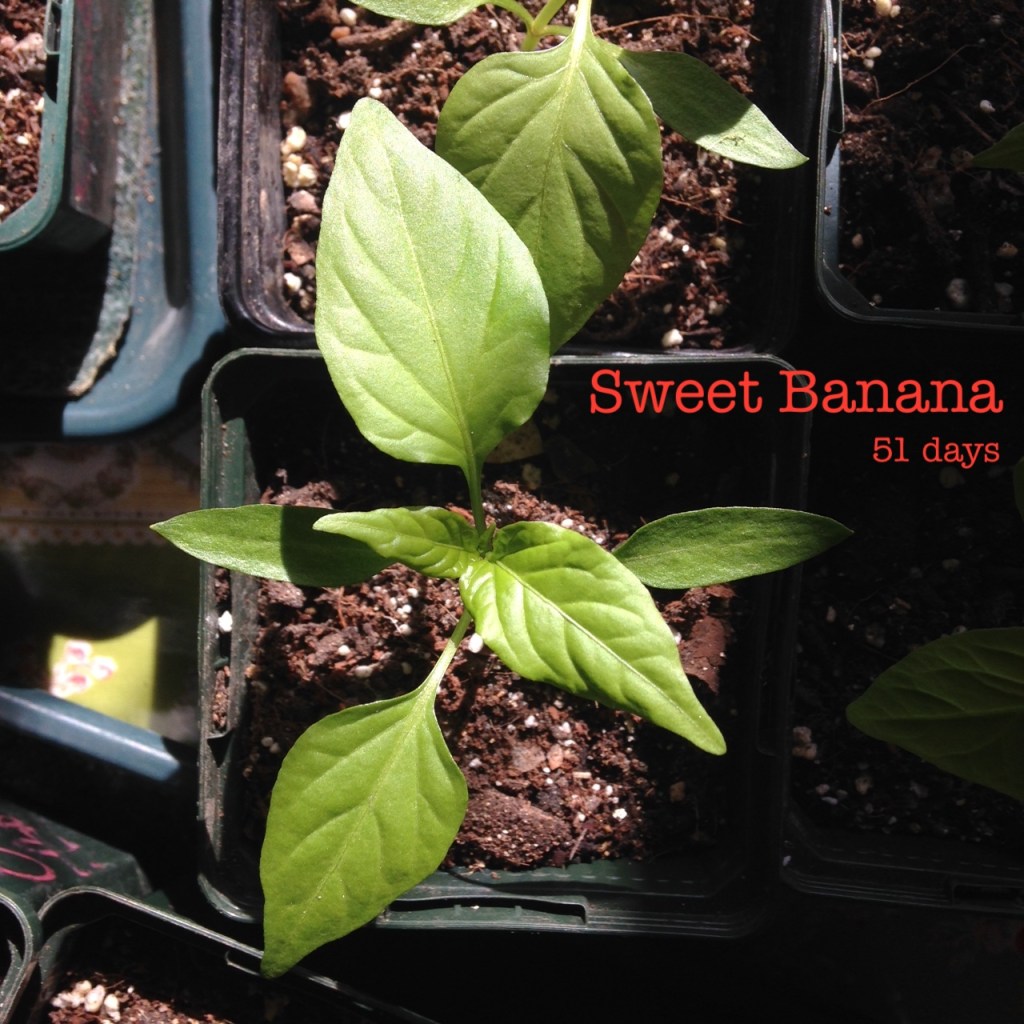
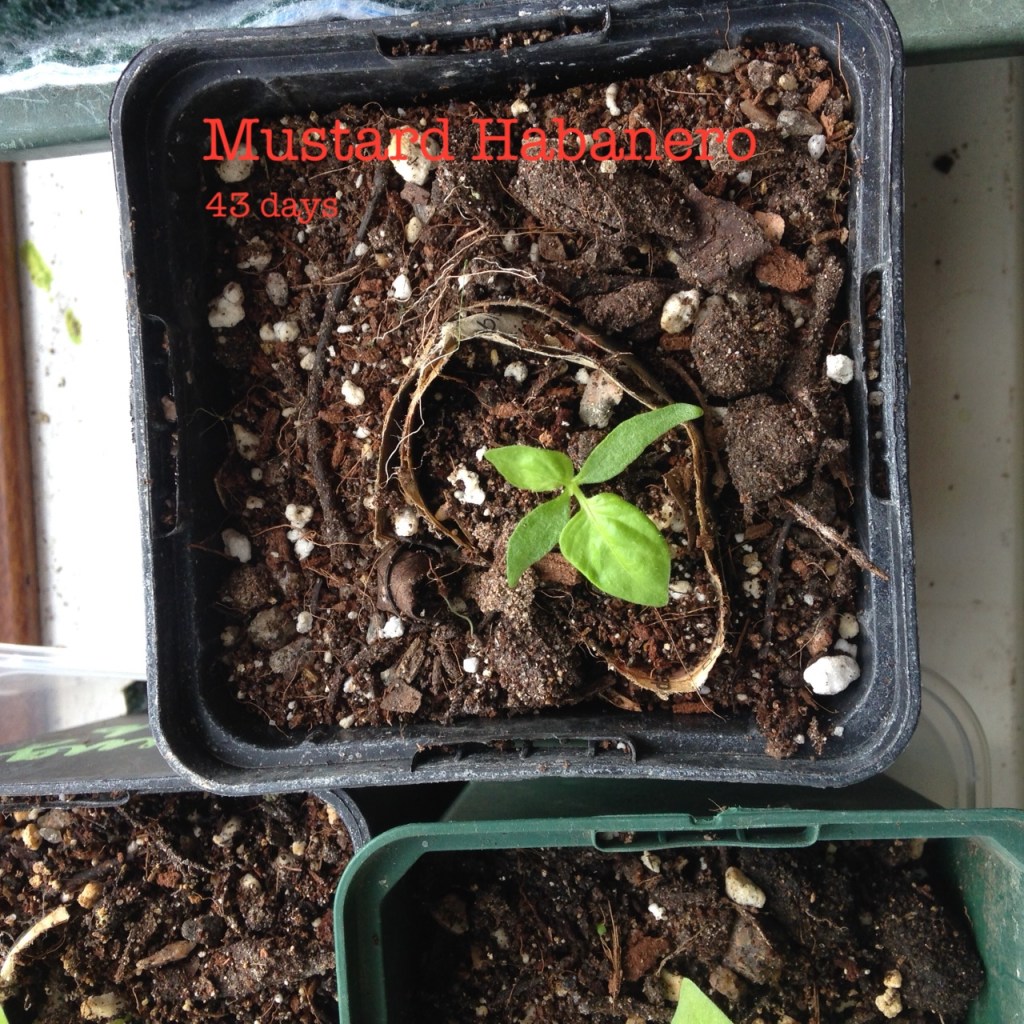
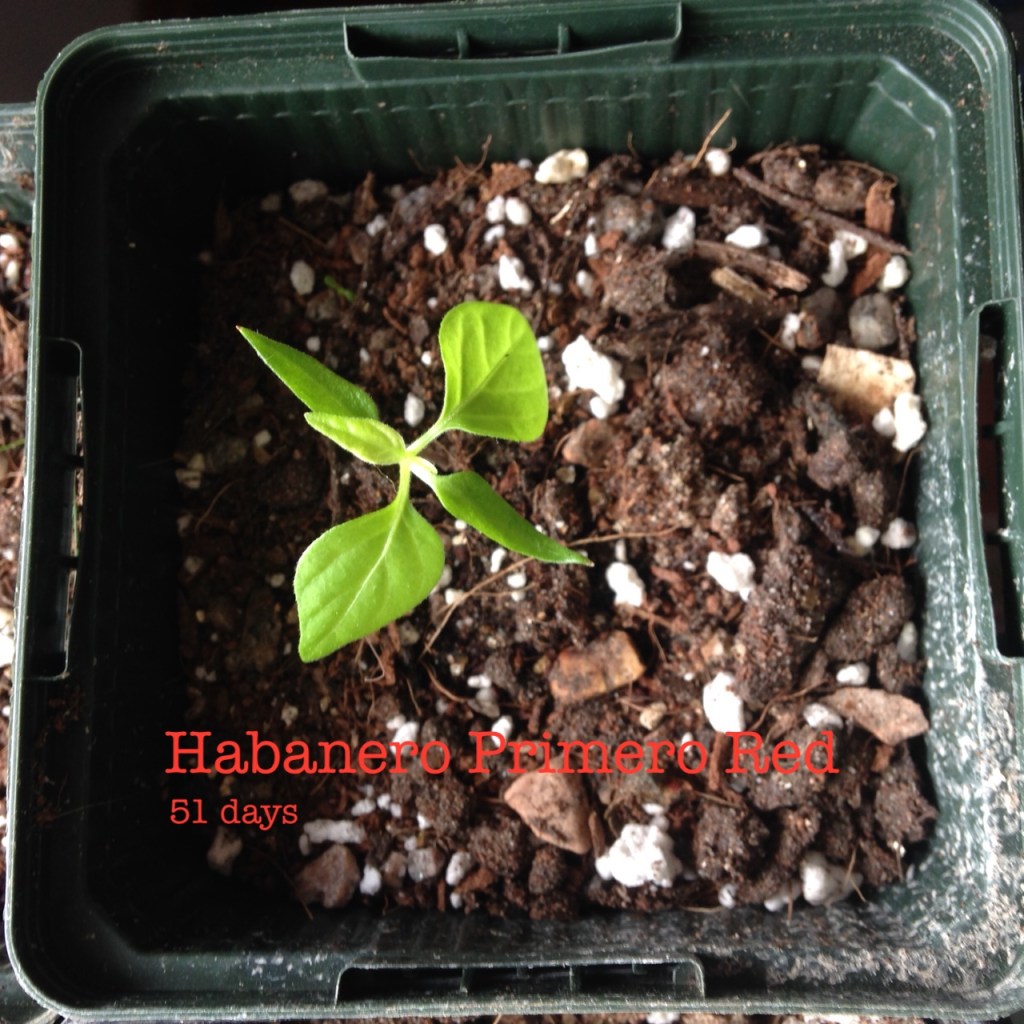
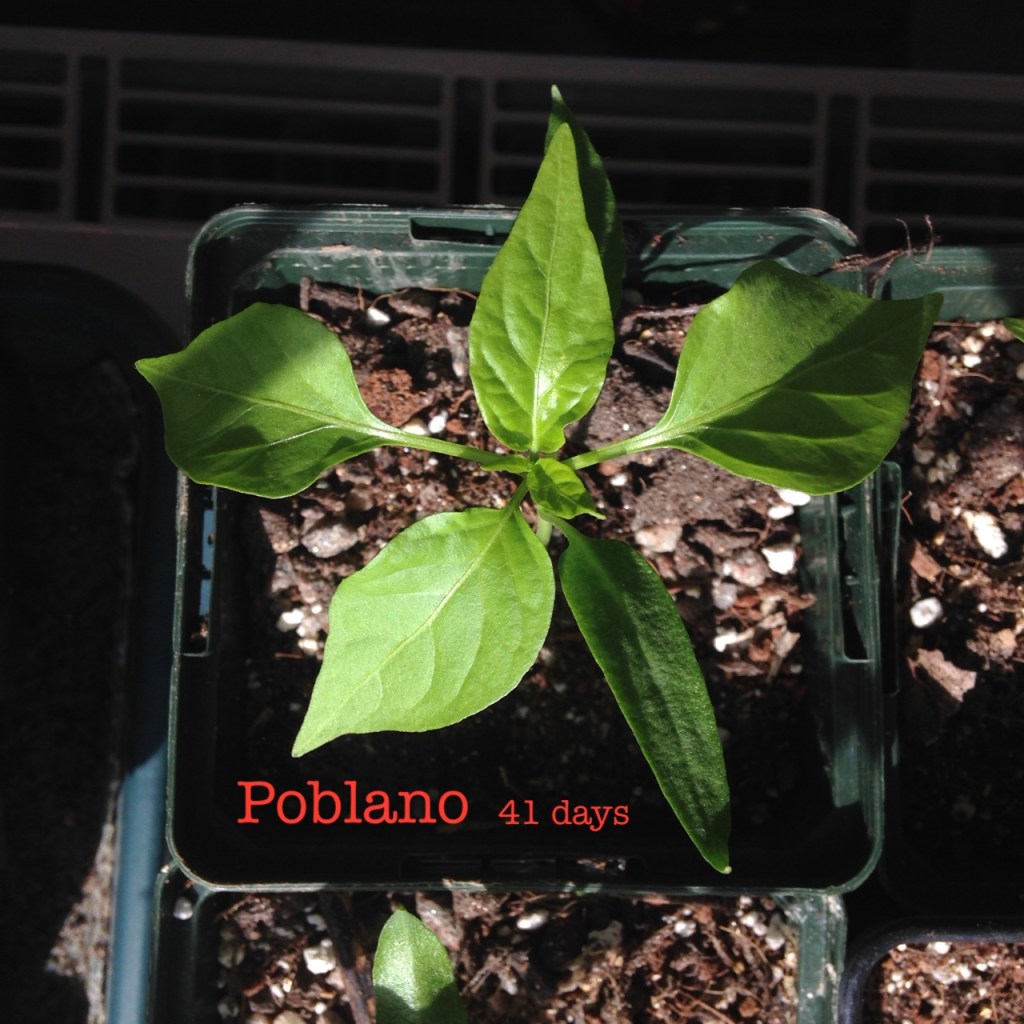
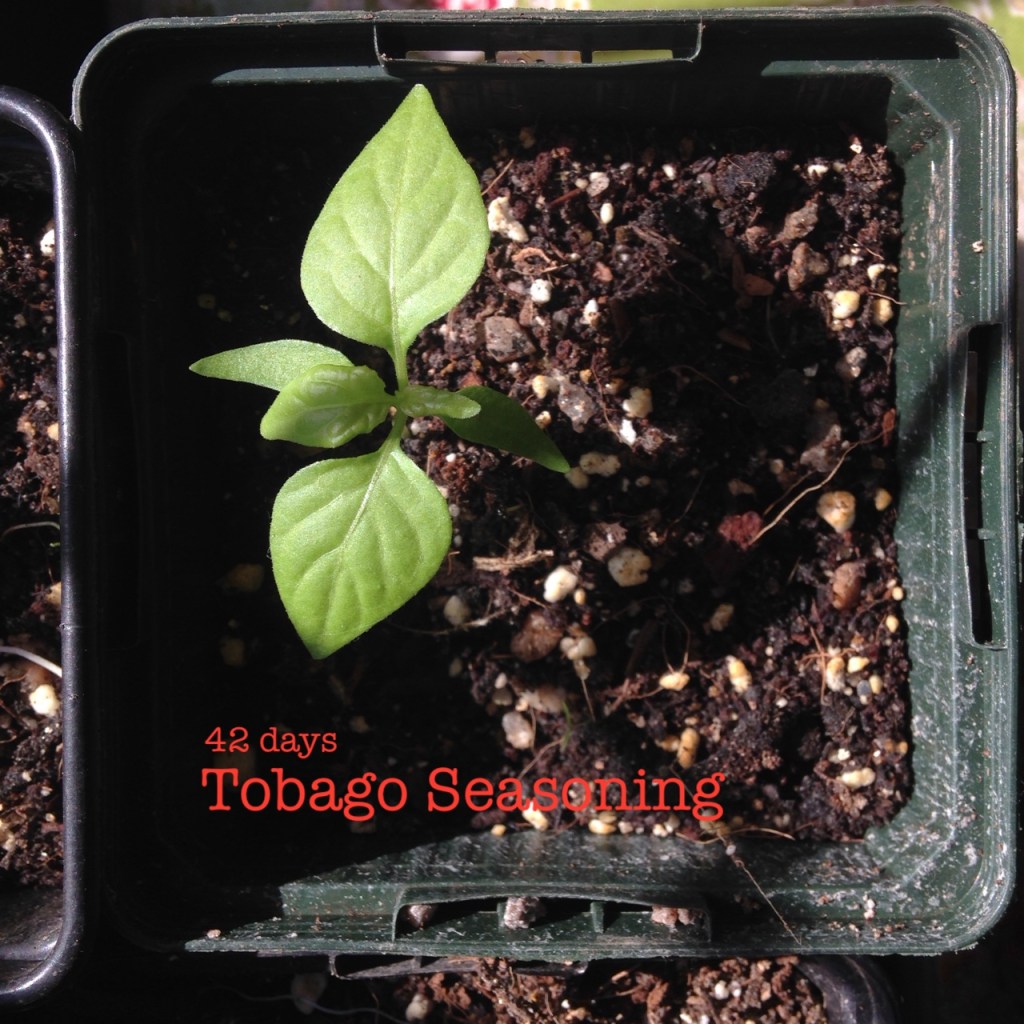
Chilli varieties with varying numbers of true leaves. Showing days since germination…
And if we do it all again next year?
We have not used heaters, reflectors, heated pads, lights or anything else too specialist…yet. Next year we might consider providing extra lighting once the seeds are germinated and potted up. A quick social media peek at specialist chillihead groups soon reveal the types of plant that can be grown under specialist UV lights with a little extra heat. Short, dark, glossy beasts that are poised to surge up when the frosts are finally over. Something to aim for.
A lot has happened since things kicked off this year. Our seeds were hot housed in the steamy propagator in the hope that germination would be quicker, more consistent and we would be a bit more successful with the chinense types. And things have indeed gone well. Hundreds of seeds germinated, hundreds of paper pots were made and now it is time to pot on the strongest of the plants to a more substantial home.
Germinated chilli seeds in their forever paper pots. Some seedlings just showing their leaves
How do we know it is time to pot on?
The seedlings are starting to show roots through the bottom of their paper pots. Many have two or more sets of leaves. The sun is shining in the UK and is forecast to be so for at least a couple more days. Perfect for a bit of window sunbathing to help the chillies settle in to their new pots. All good signs.
Seedlings ready to pot on
Using the specially formulated potting compost mix, the plants are tucked into 9cm square black pots. A layer of grit is put in the bottom and the paper pots are not removed, just buried within the new pot. Minimal root disturbance and the plants hopefully don’t feel swamped by the new pot.
Hey presto, 151 seedlings are potted on, fed and watered and basking in the sun.
Capsicum pubescens is a late entry to the heated propagator. Whilst using the last of our homegrown Rocoto chillies it was impossible to just throw the seeds away. So, they were introduced to the chitting pod. Having sworn we would get going earlier with the seeds this year, to allow the longest growing period possible, a quick diary check reveals that these seeds are starting off at pretty much the same time as last year. So much for planning.
Alberto Locato Rocoto
Four days later the roots have emerged. Much quicker than the chinense types and almost as quick as the speedy annuums.
Chitted Rocoto seeds
And why did we bother with these seeds? Well, it turns out we’ve got a bit of a crush on these squishy fellas. There are far less varieties of Capsicum pubescens available on the market and you would certainly never see them in a UK food store to buy. The chilli fruit are all pretty similar with thick walls, juicy flesh and matt black seeds. With a round shape: some are a little more apple shaped, others lemony and some occasionally cheeked like bell peppers. Heat levels are medium to hot and they have a punchy fresh fruit flavour. They come in a range of -green-yellow-red but not purple or white. So far.
Capsicum pubescens are the smaller group of the five domesticated species of chilli. They are further away from others genetically. They trace back to pre-Incan times in Peru. In fact it is thought that the chilli remains found in the Guitarrero caves 10,000 years ago was a pubescens type. Historically significant as the chilli in question was found alongside evidence of campfires, grinding stones and human bones. It seems chillies were considered pretty valuable food stuffs. Not much has changed in 10,000 years then.
At The Birdhouse, we only grew one plant of this type last year: the high shine red Alberto Rocoto Locato. Gifted to us by my mother. It was easy to spot in the greenhouse as the plant grew differently to the others. For one, it had tiny white hairs on its leaves. Secondly, once it had got going, it split into two branches about 30cm up. It then sprawled out sideways and needed support from other plants. It snapped easily if knocked. It had bright violet flowers, with dusty white stamen. The chillies were late to set and took a long time to ripen to glossy red, maybe a 100 days or more. It matured about sometime similar to the Scotch Bonnets and they supposedly take 120 days. The plant was prolific despite being in a smallish 2.5 L pot. Whilst it was fed well it could probably have done with more root space.
Striking purple flowers
A quick bit of research tells us that these chillies are a fan of cooler nights, although still happy basking during the day. They are far more tolerant to lower temperatures generally. Although not frost tolerant. This bodes well for a UK climate and the need for a longish growing season. They are also long lived perennials, living up to 15 years. They can be climbers or tree formations. I think we might have a few Winter inmates this year. Let the pubescens journey begin.
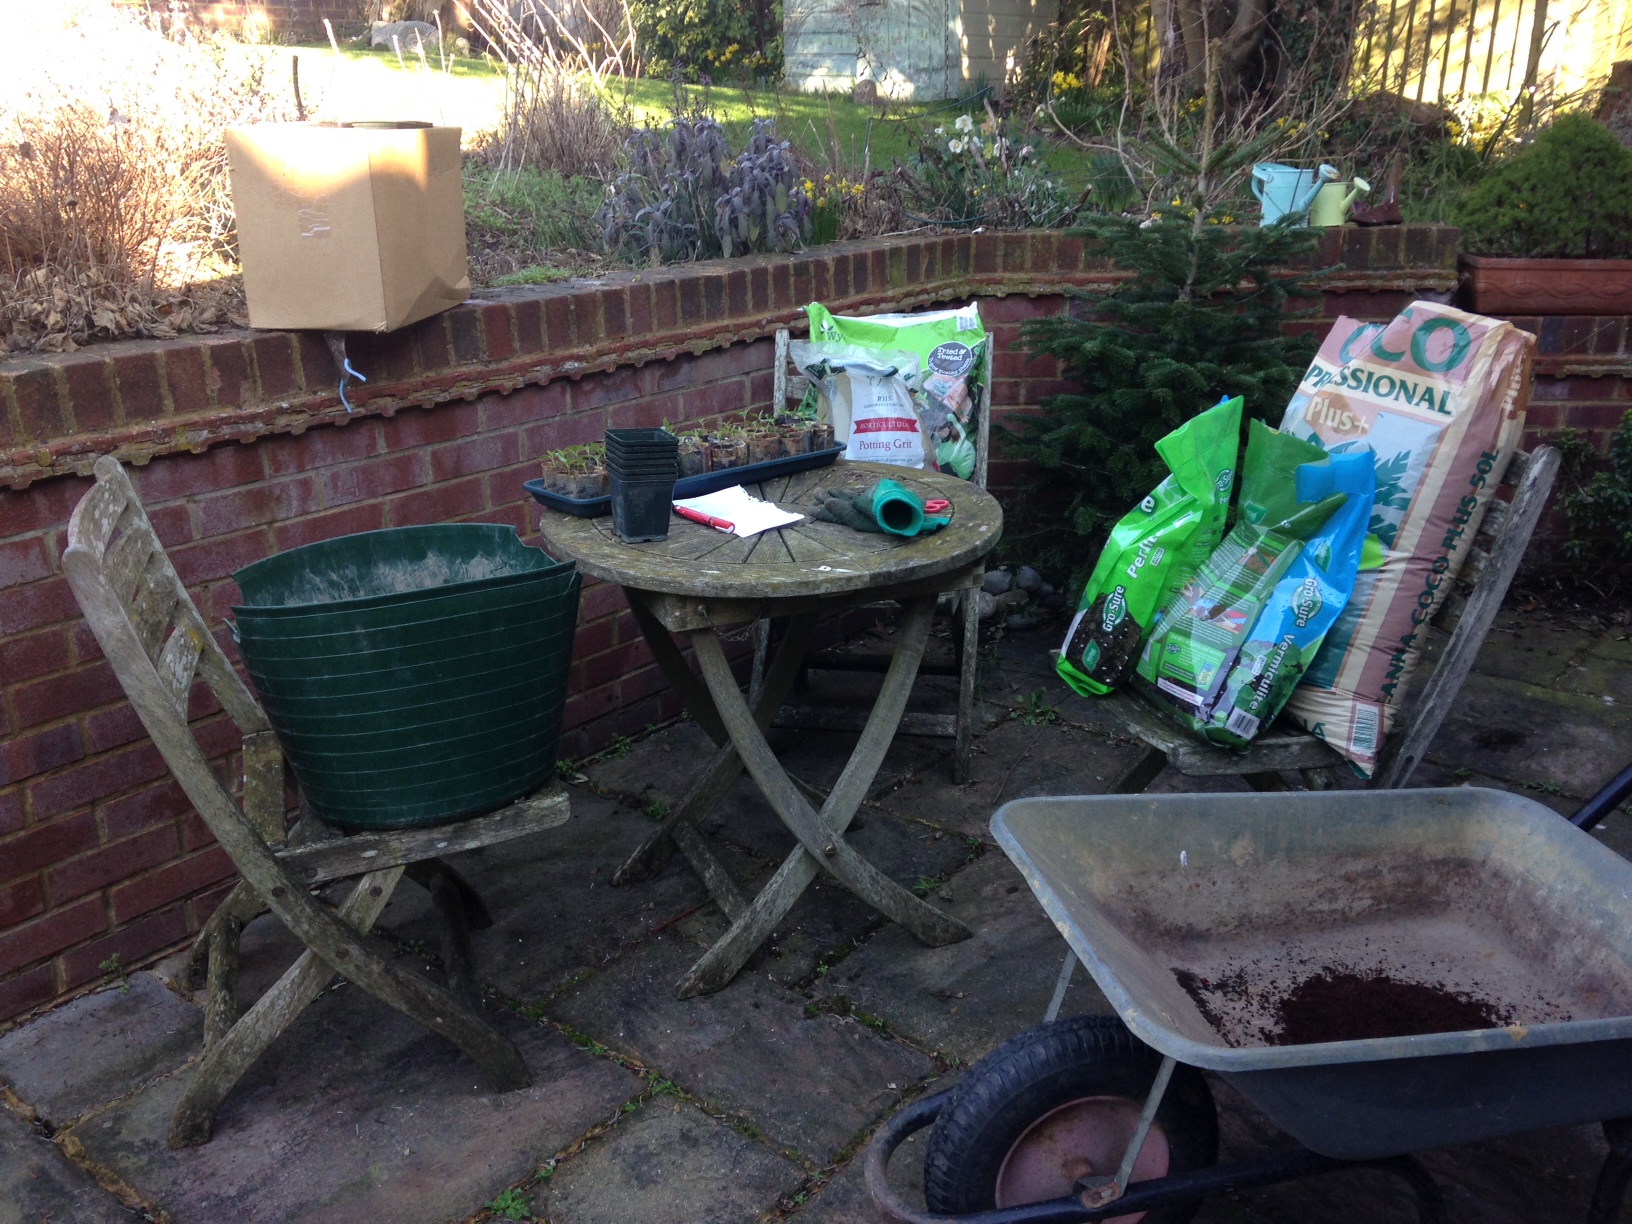
Just which compost to choose for our precious chillies?
Loam. Peat. Coir. Grit. Vermiculite. Sand. Clay. Silt. Perlite. Manure. Compost. Sand. So much to consider.
The options are a little overwhelming but let’s dig down to what we know about chilli plants to see if we can come up with our perfect potting medium.
Cultural roots
Considering the geographical heritage of our chilli plants should hopefully give some guidance to the type of soil required for perfect chilli production. Chillies originated from Mexico. They gradually became mainstream as part of the Columbian Exchange in the 15th & 16th Centuries. A large percentage of the soil in Mexico is shallow to medium depth, dry, free draining, not layered or super structured, contains gravel, often fertile, pH leaning towards acid: 5.5-6.5. (Food Agricultural Organisation for the United Nations state that Leptosol, Regosol and Calcisol make up nearly 65% of the soil in Mexico if you want the scientific terms) Replicating this soil composition seems like a good starting point for creating the perfect chilli compost.
Back here in the UK
However, where chillies come from is not the only factor in soil choice. Surely where they are actually going to grow plays a part too. The UK offers a dizzying range of soil types, some of which would be incredibly inhospitable to a poor little chilli plant. Our Hampshire soil is about 6 inches top soil and then solid chalk. Not sure what our chilli amigos would say to that. A slightly acid, sandy loam in the South Hams of Devon would be perfect for growing chillies in the ground. With that in mind, we will be planting in pots.
Our UK weather is such that too much organic matter, such as peat or manure, silt or clay could easily become water logged and get cold. No one likes a soggy cold bottom, especially not chilli plants.
The potting soil in question will have two main functions for our plants: 1. to provide a habitat for our chilli roots to do their thing. 2. To be a vessel for the chemical requirements for great plant growth and chilli production. Let’s tackle each function separately.
A cosy home
We want the roots to have plenty of space to stretch out. Soil is typically 50% solids (mineral and organic) and 50% spaces, about half of which is occupied by water and soluble and suspended nutrients. A light, airy soil, with small particles would match the requirements. The roots can work their way through the gaps.
We will be gradually moving our chillies into progressively bigger pots. They sulk for ages if the pot size goes up too quickly. The indicator that they need to move home is when their roots poke through the bottom. Watering from the bottom should avoid compaction (which leads to a reduction of spaces within the soil available for root growth & essential gas, water and nutrient storage). Perhaps a layer of Horticultural grit in the base of each pot would avoid aforementioned sulky soggy bottom too.
Adding Perlite to the mix is another way to allow the soil mix to stay loose, encourage root growth and water drainage. No rotten roots here.
Feed the need
No great nutrient supply is needed from the soil solids as we will be feeding with Chilli Focus regularly. The organic components of the soil provided by the garden compost will ensure a good supply of microorganisms to exist alongside our chilli plants and work their bio magic. No doubt a few extra seeds will germinate as well but that is all part of the fun of doing things yourself.
We do not want too much green Nitrogen releasing organic matter. We hope to encourage good all round plant health and then fabulous flowering and fruiting. Extra Nitrogen may cause bushy green plants that forget to flower.
The seedlings are currently receiving a weekly feed of 5ml per litre of Chilli Focus. This will increase to 10mls per litre once a week when the plants have been pinched out and show some signs of flowers forming. At the height of flowering and fruiting the plants will have two feeds each week.
Vermiculite is another ingredient to consider. A natural product that is a good addition to any soil type. Added to clay soils it allows aeration and flow through the soil, reducing water logging and stunted or bound root growth. In sandy soils it soaks up water allowing retention where there would be very little otherwise. Good access to water, slowly released, means good access to those soluble and suspended nutrients. Sounds like Vermiculite is definitely going into our chilli mix.
So what does this all mean?
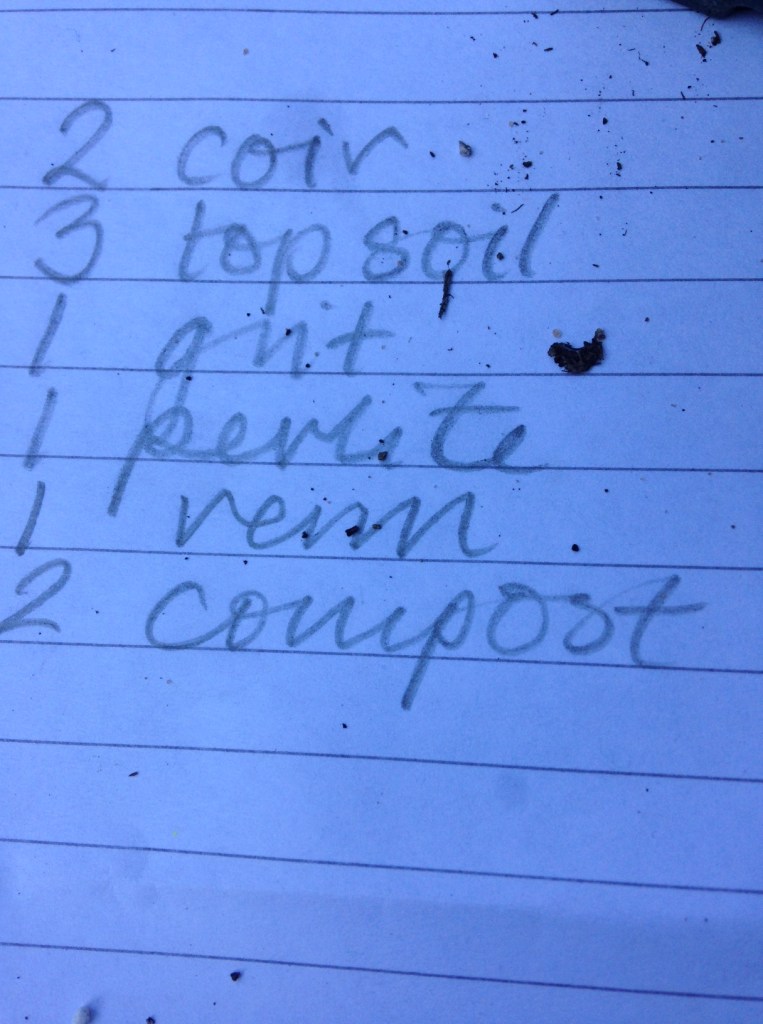
It’s looking like a hand mixed potting medium of 3/10 loam top soil, 2/10 coir, 2/10 organic homegrown well rotted compost, 1/10 grit for the bottom of the pot, 1/10 vermiculite to hold on to water and nutrients between watering and feeds, 1/10 perlite for free drainage within the soil. Probably very similar to John Inness No 2!
It’s time to give these little chilli seedlings a bit of what they fancy. They have been potted on into seed compost and are settling in admirably. The seed leaves are opening, they are a good green colour and generally they look healthy. The seed compost has no nutrients in it though.
Seven day old seedlings looking healthy after moving into their newspaper pots.
In the future we’d like to have a go at producing a homemade, maybe organic, specialist chilli feed. Using local ingredients. Perhaps with a seaweed enrichment? But not just yet.
Seemingly THE recommended chilli food is Chilli Focus. Containing ‘A precise formulation for optimal performance of chillies and peppers in pots, grow bags or the open ground.’ We used it all last season and the chilli plants and crop were spectacular. It turns out that Chilli Focus is ‘Made with care in the UK’, and ‘enriched with organic complex plant acids and pure concentrated extracts of kelp’ and comes in a 5 litre bottle, ‘enough for 1,000 litres of feed’.
With added Kelp extract
Err, sounds pretty good to us. Homemade fertiliser can wait for further research on a rainy (or snowy, check the forecast!) day.
The seedlings have been given a gentle dilute feed of 5mls per litre. This will be given once a week for now. Once the plants start to flower it will increase to 10mls per litre and then twice weekly when they set fruit.