Morrocan Spiced Lamb

Like a tagine, only cooked in whatever pot you have to hand. A whole shelf of wonderful store cupboard ingredients make this recipe deep, smokey, rich and utterly unctuous. As firey or sweet with chilli as you would like: just add more of the hot stuff to ramp up the heat.

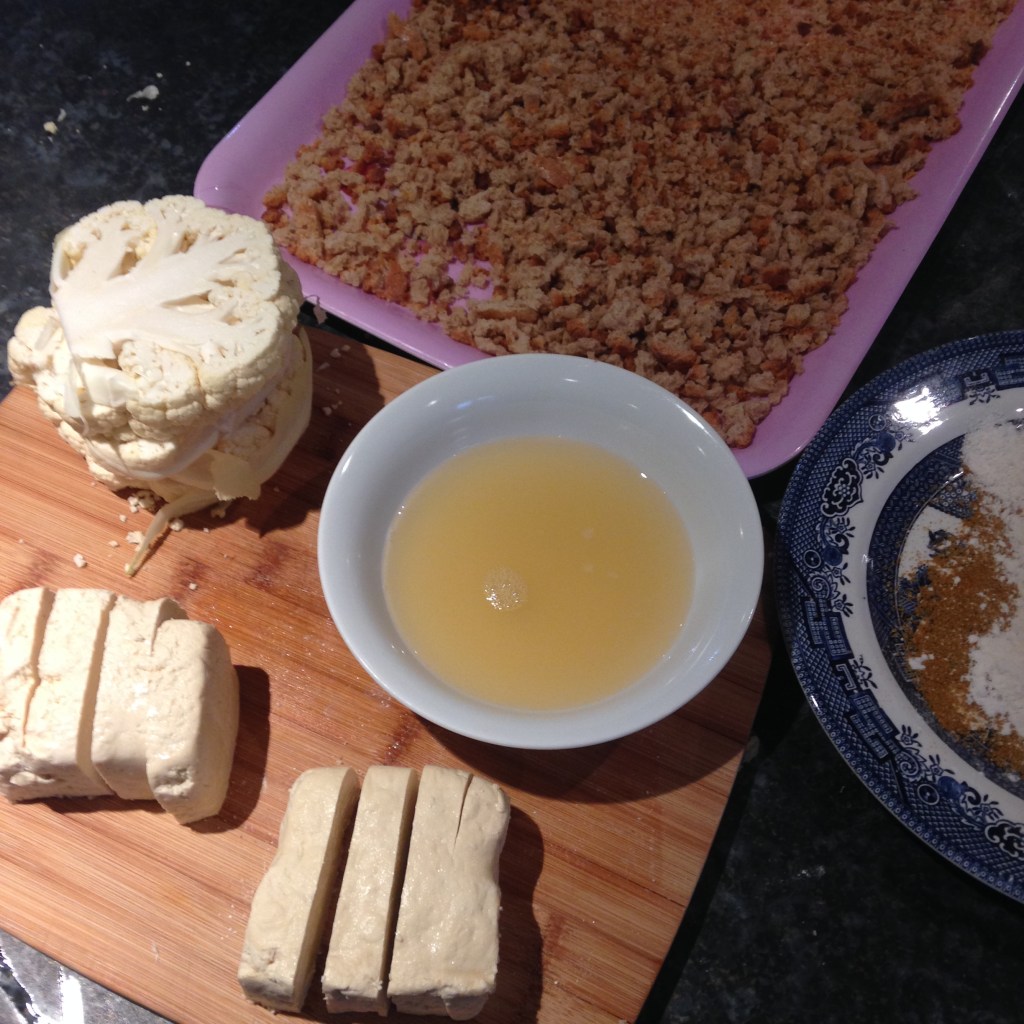
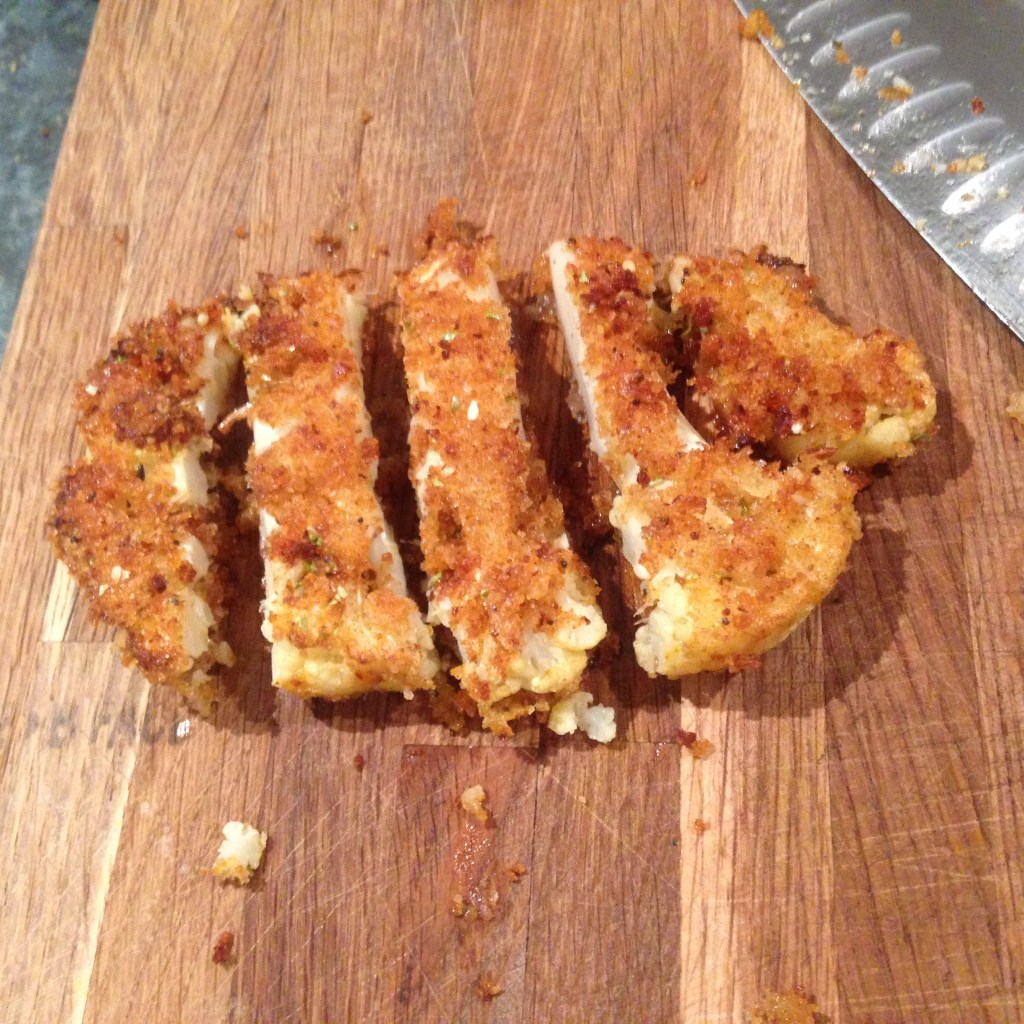
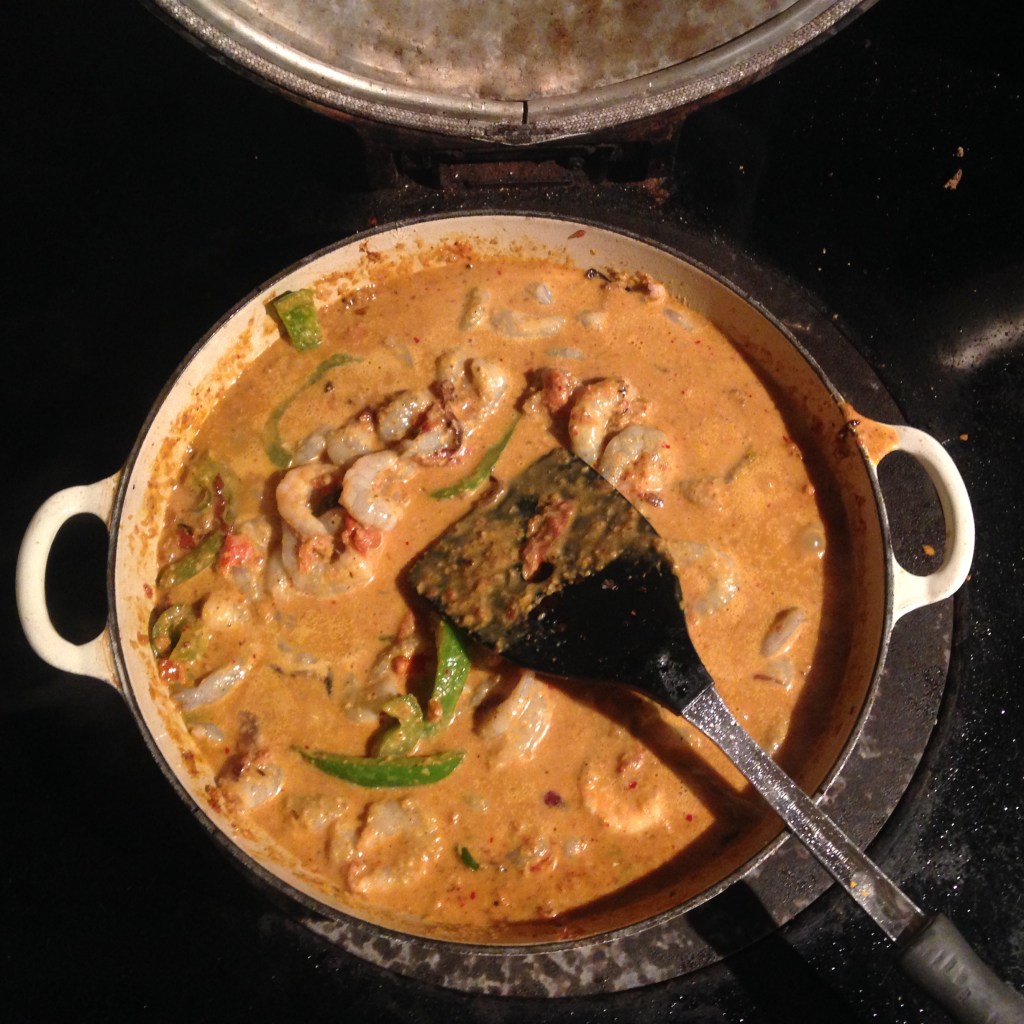
This rich stew can be a plant based or meat free dish, we added paneer for our vegetarian … but Tofu, large hunks of roasted vegetables or chickpeas would work well as veggie or vegan options. Just remember that not all these need as long to cook as lamb will do.

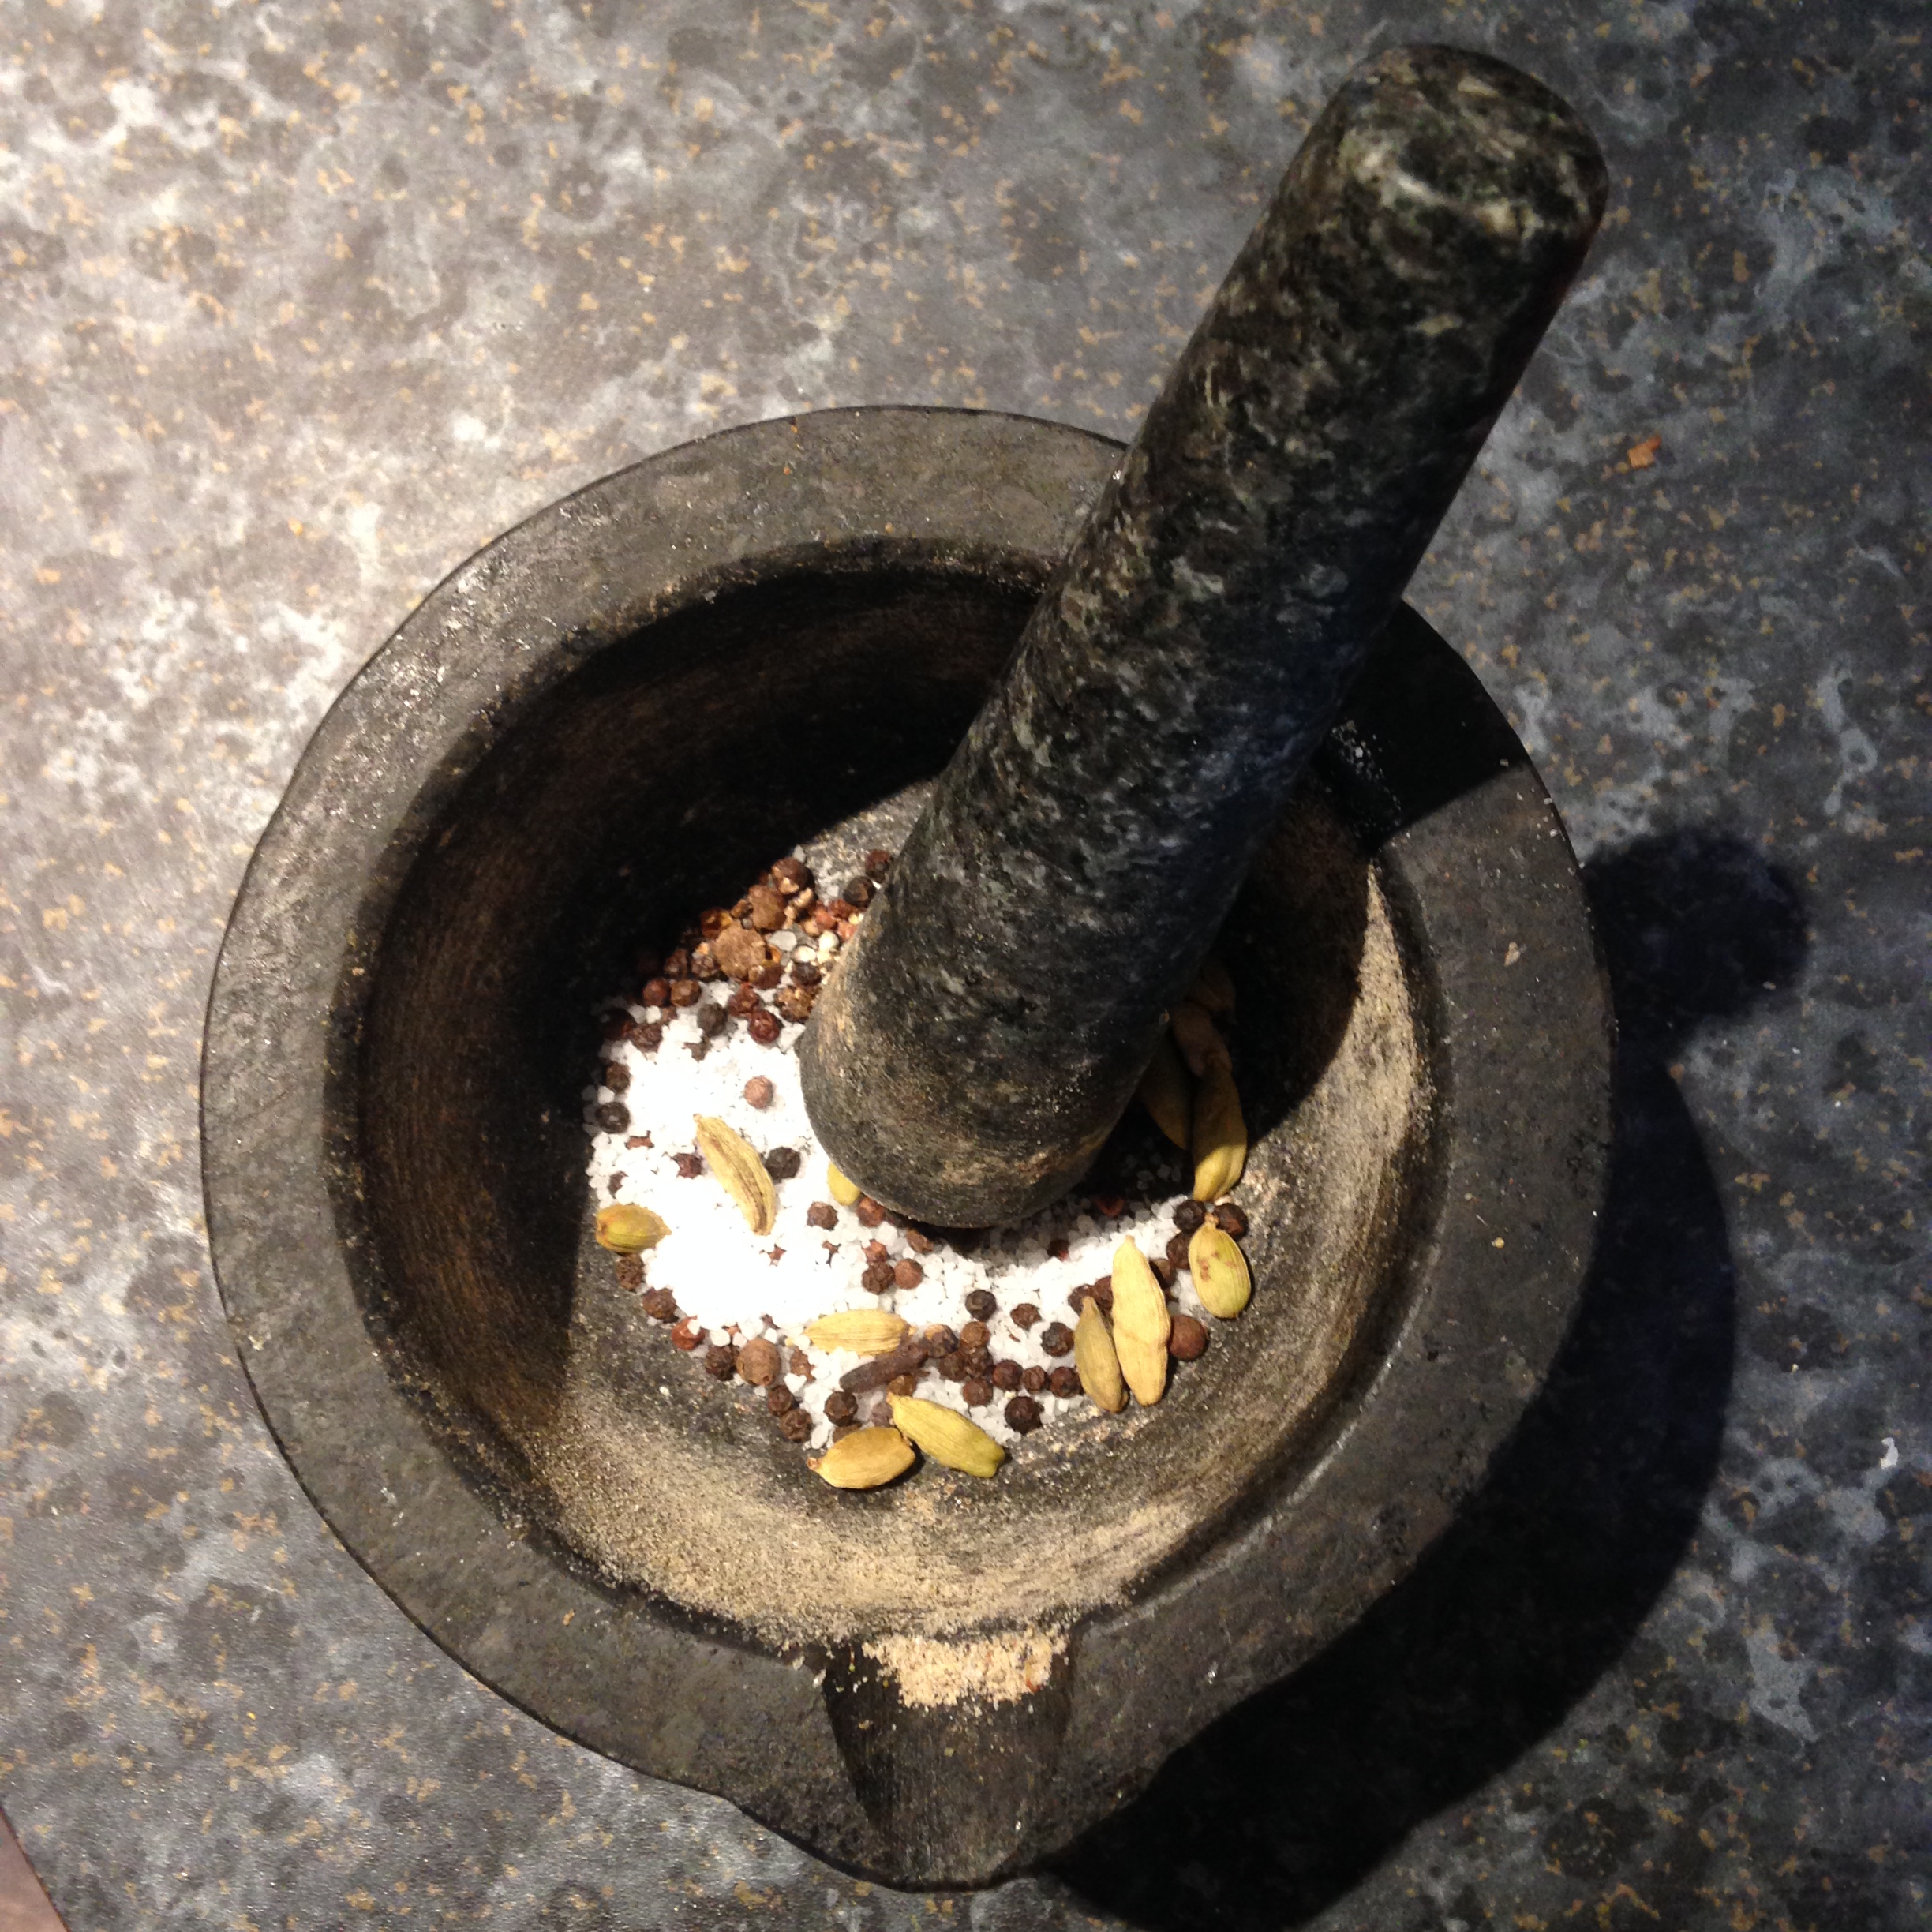
Don’t attempt to rush this meal: it is a slow cook. Savour collecting the ingredients; the grinding of the spices and the gentle changes in the flavours as the sauce starts to come together. Cook indoors on a rainy Sunday or bubble away over a woodfire on a blazing Saturday.

Ingredients to marinade the meat:

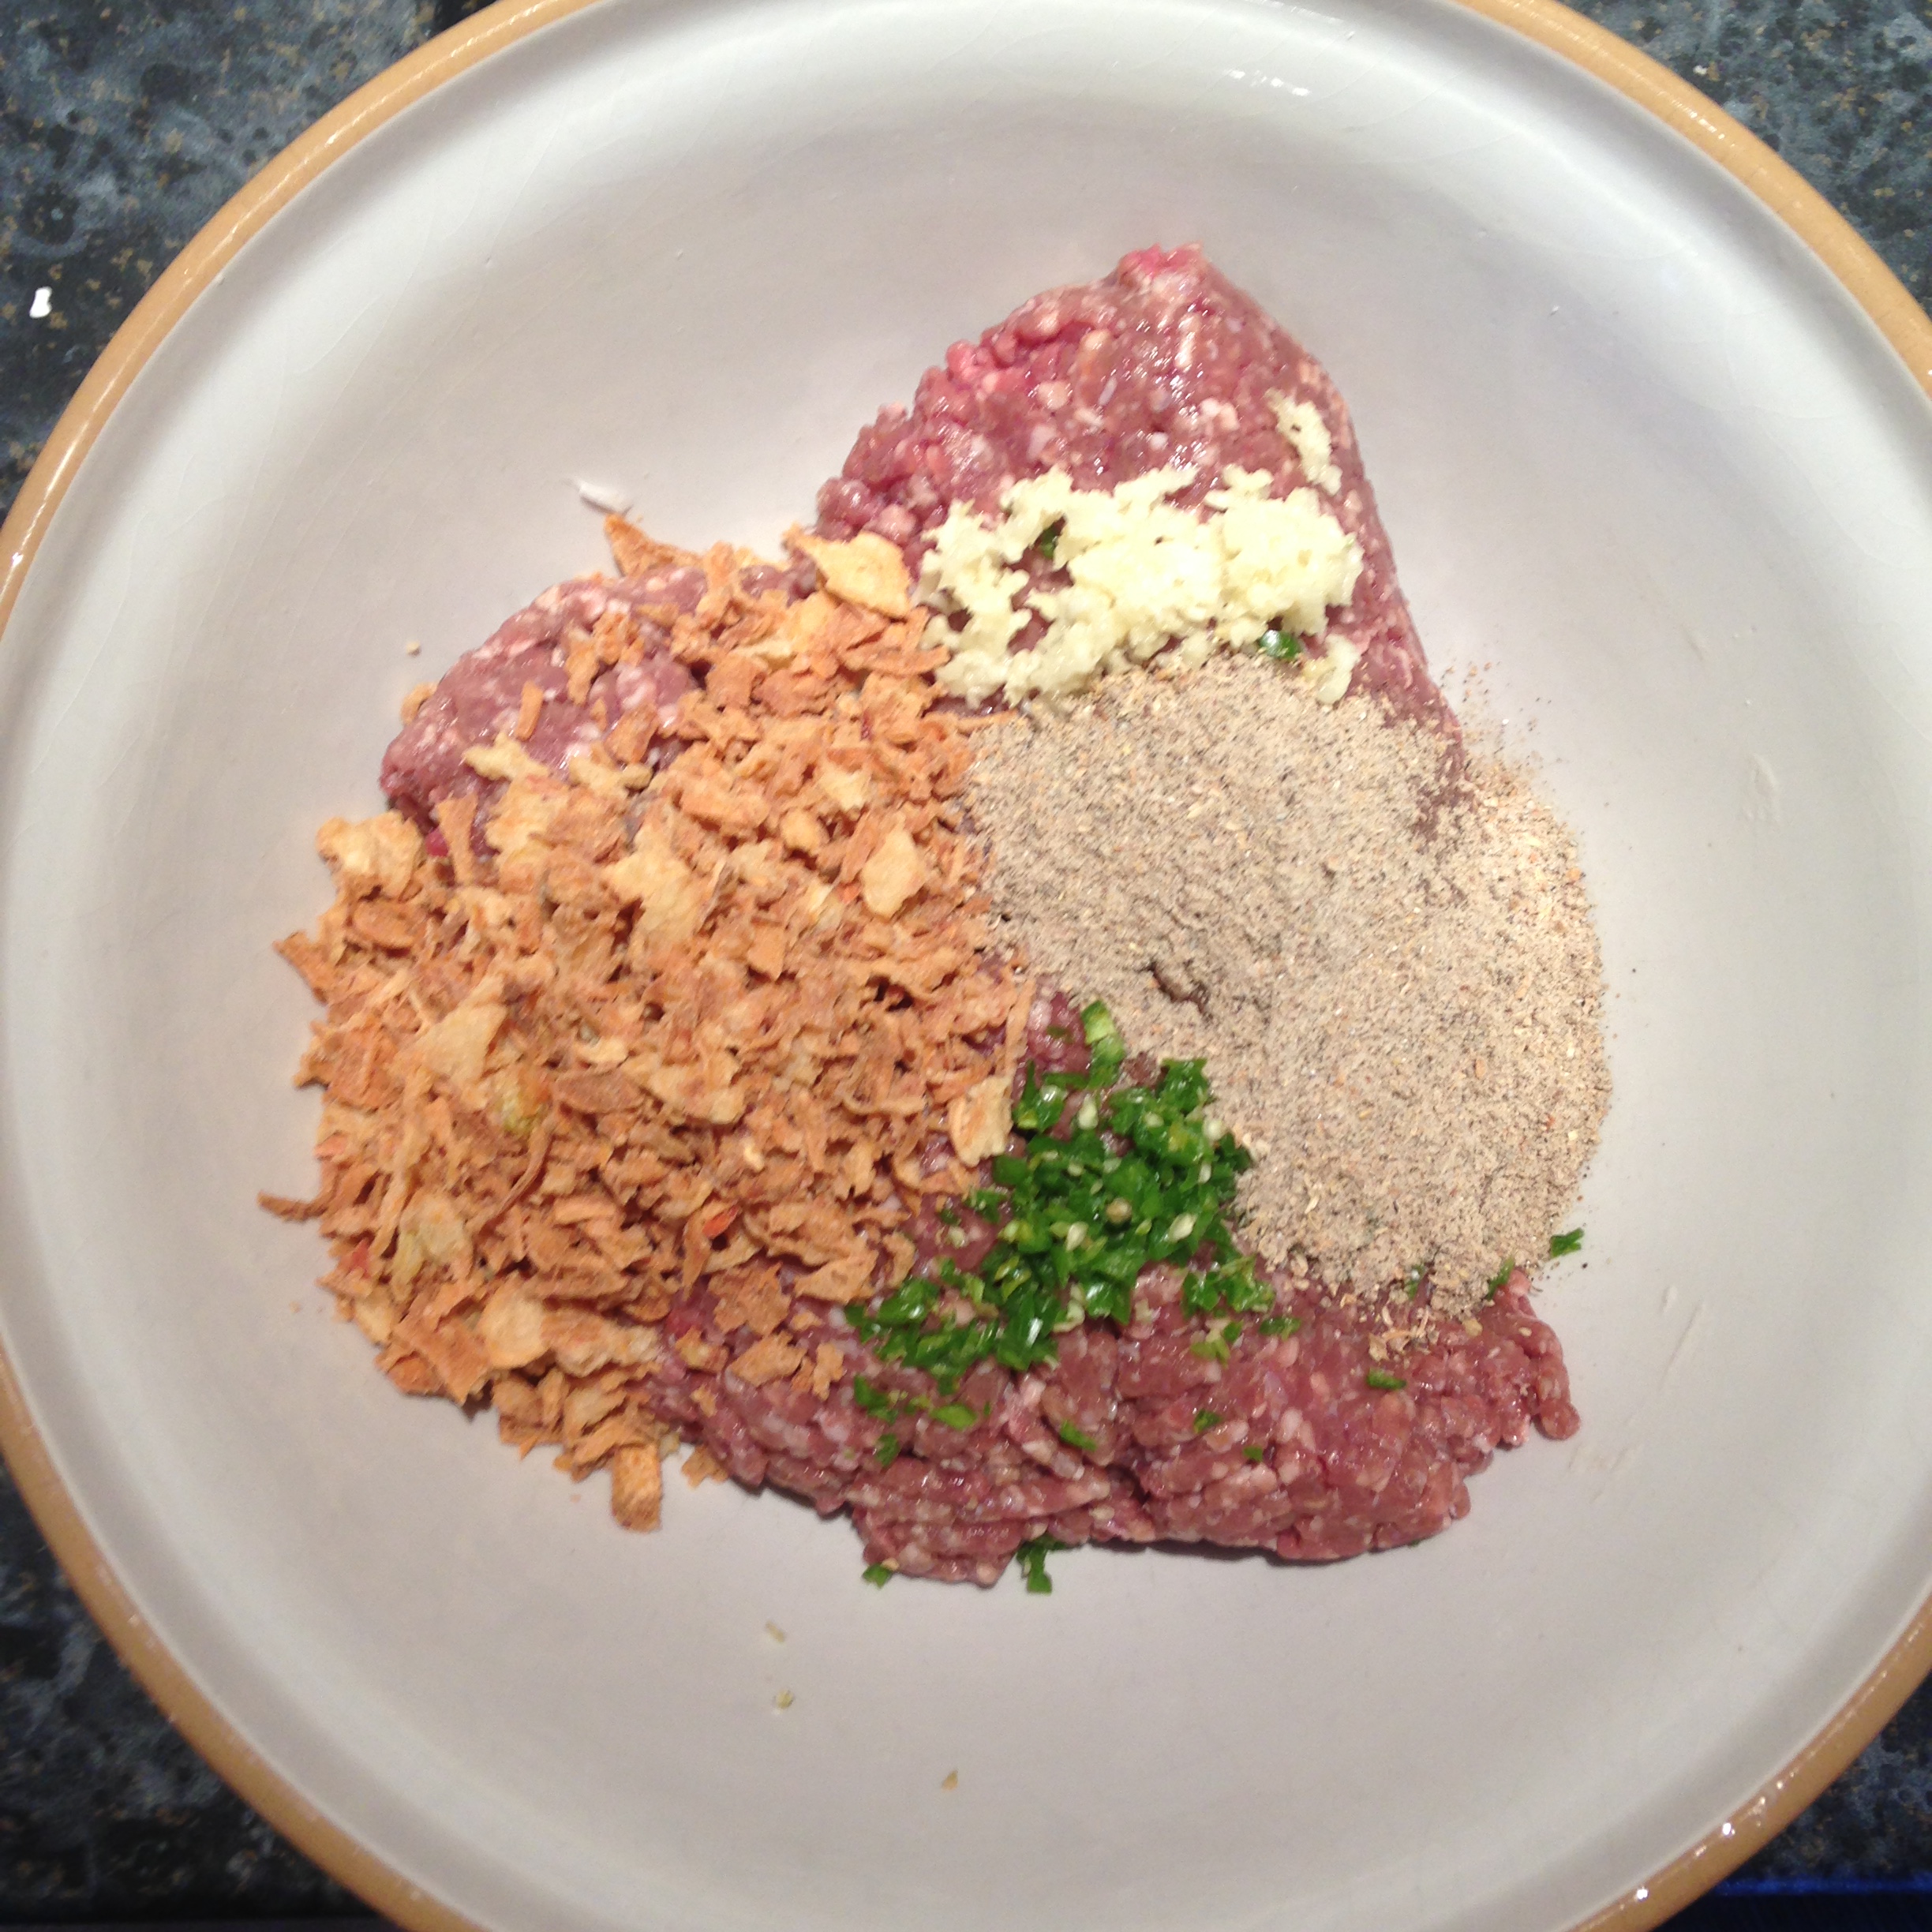
  • 1kg of lamb shoulder, large dice (or a block or two of paneer cubed)
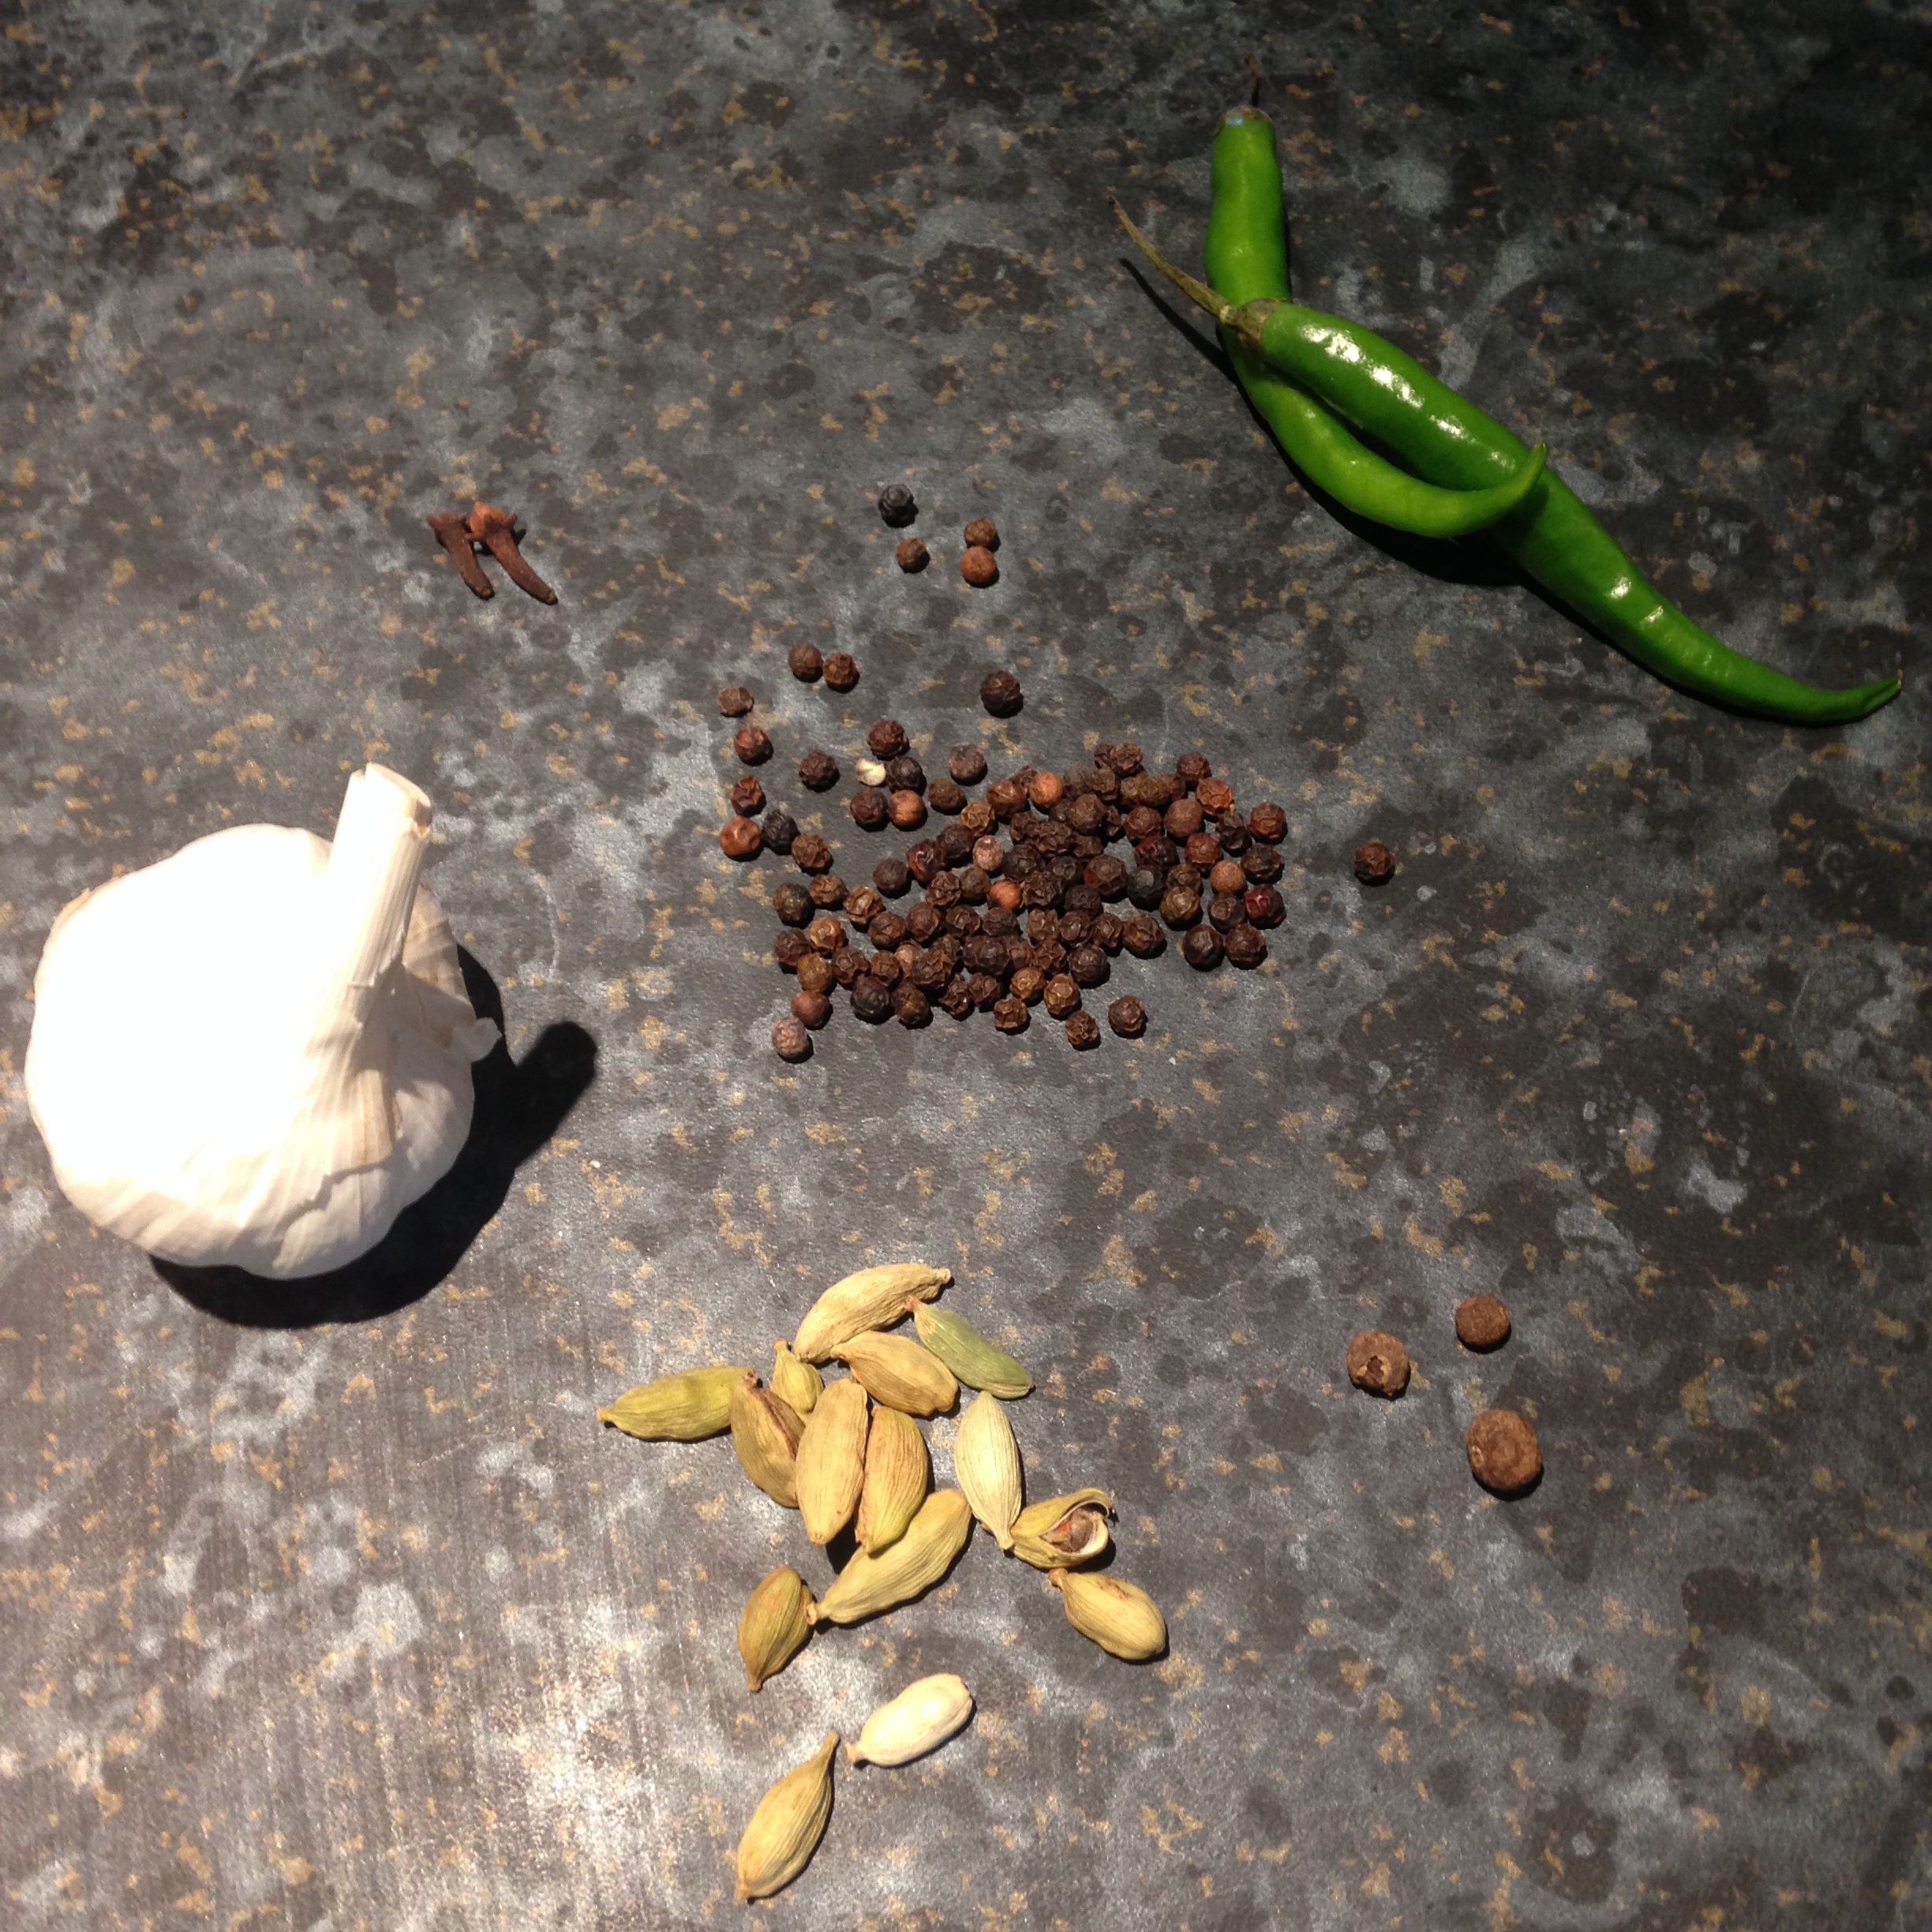
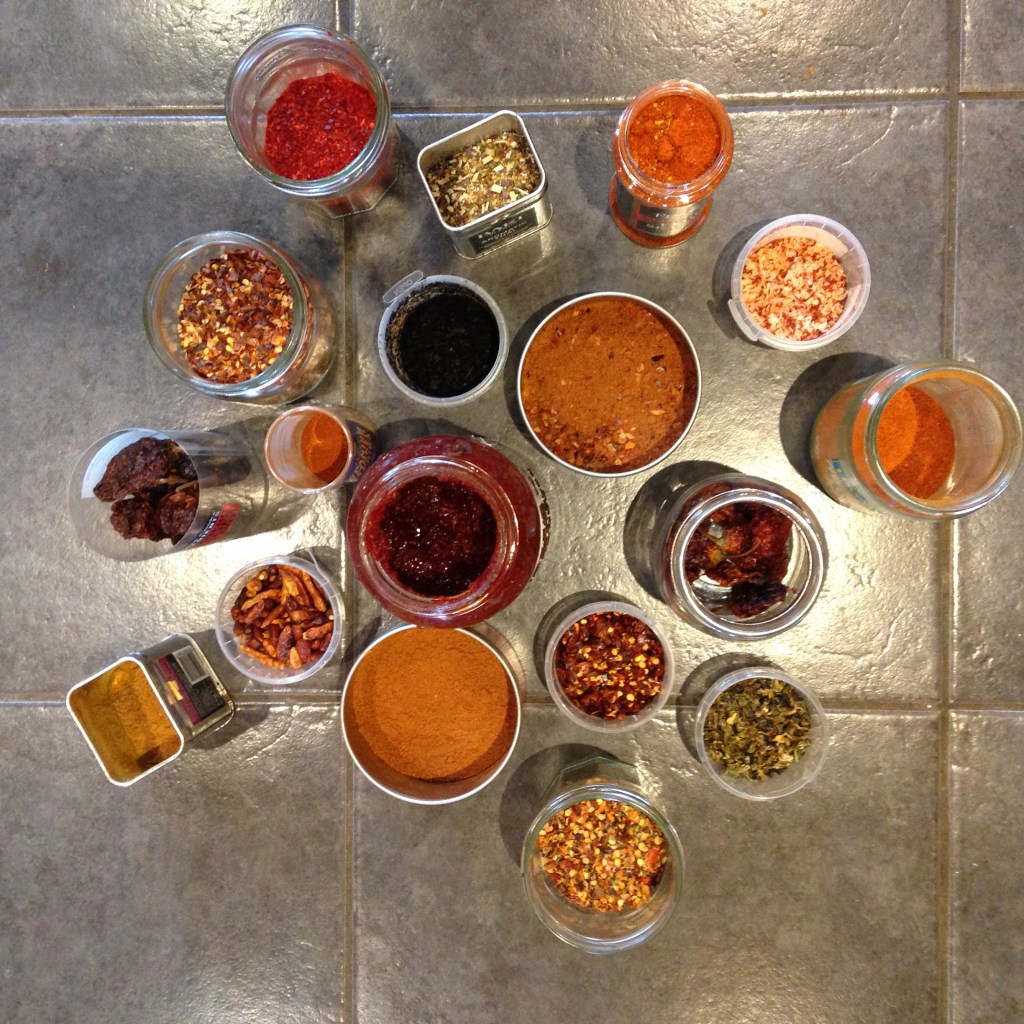
  • 2 tsp red peppercorns (ground)
  • 2 tsp cinnamon
  • 2 tsp dried Espelette chilli flakes
  • 2 tsp black peppercorns (ground)
  • 2 tbsp smoked paprika
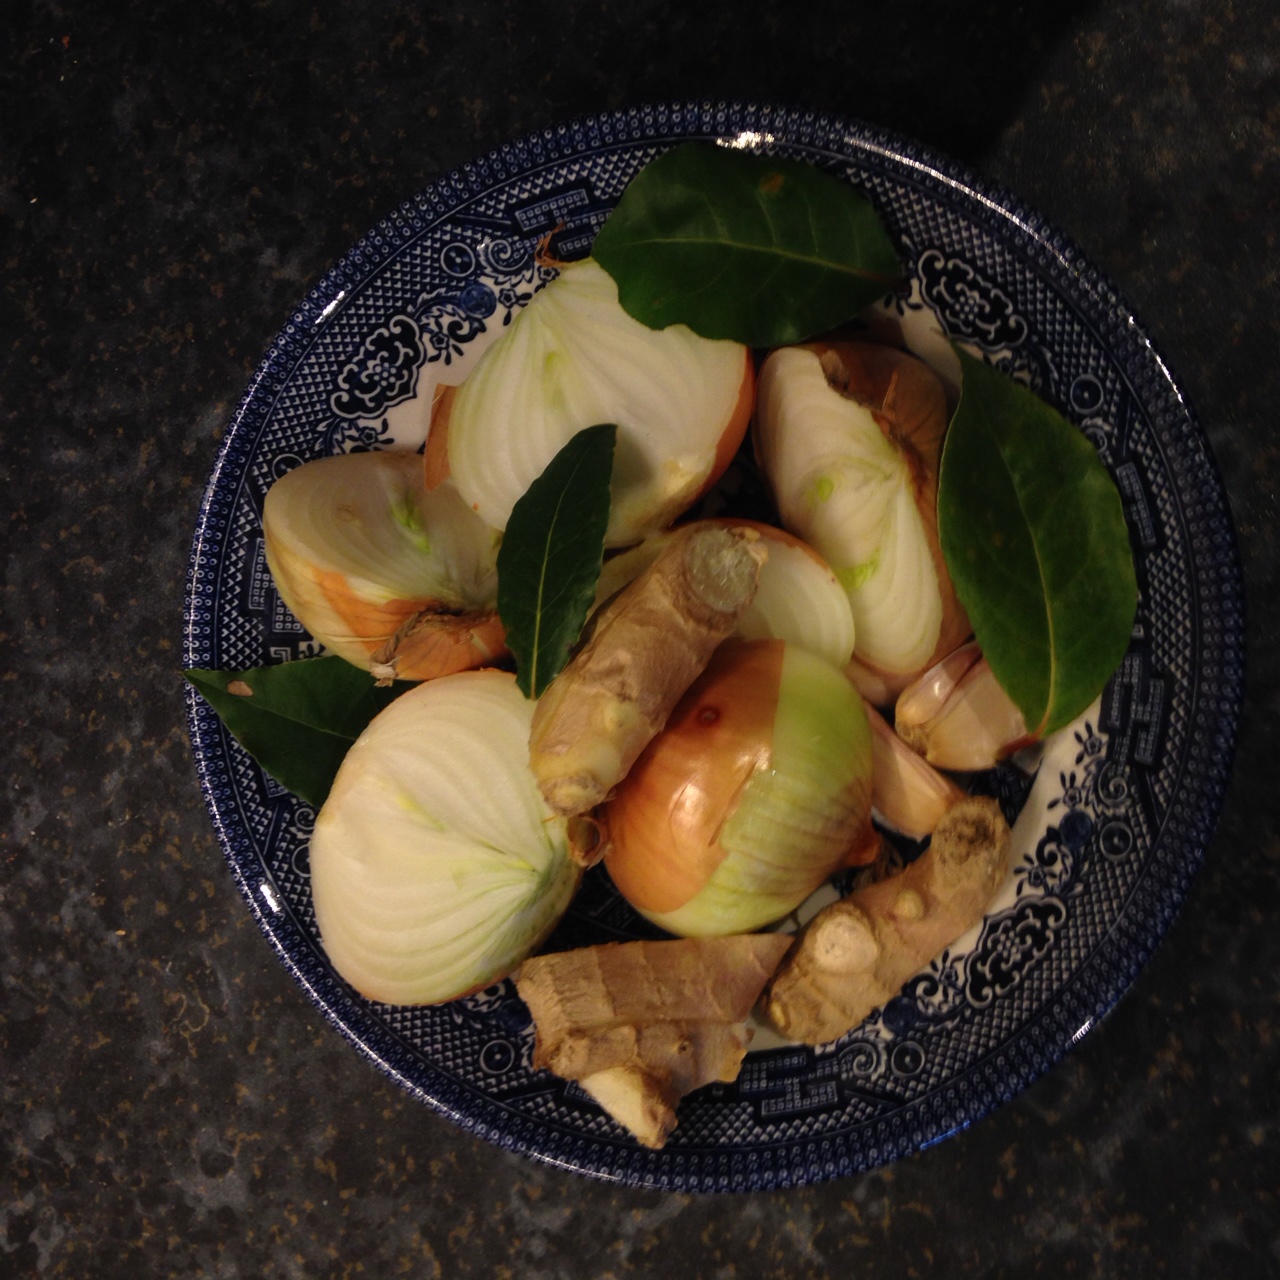
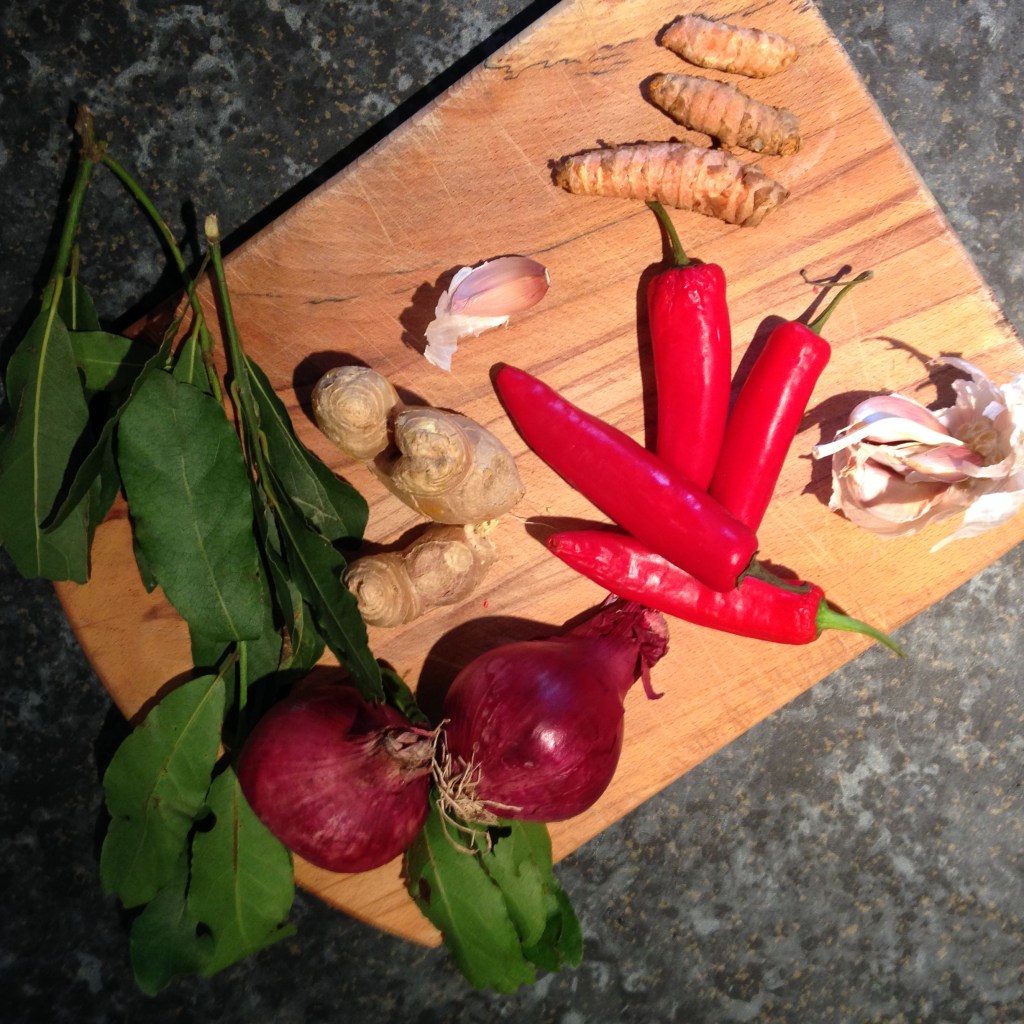
  • 2 inches fresh grated ginger
  • 1 inch fresh grated turmeric
  • 3 garlic cloves crushed
  • 2 tsp salt
  • a couple of teaspoons of Belazu Rose Harissa paste. One day we might venture into making our own paste but today, this is what we used. It is darn good, a blend of spices like carawy, cumin and rose petals. Hard to beat.

Cover the meat/cheese with the marinade and leave in the fridge for a couple of hours. Maybe chill with a beer.

Starting to cook…

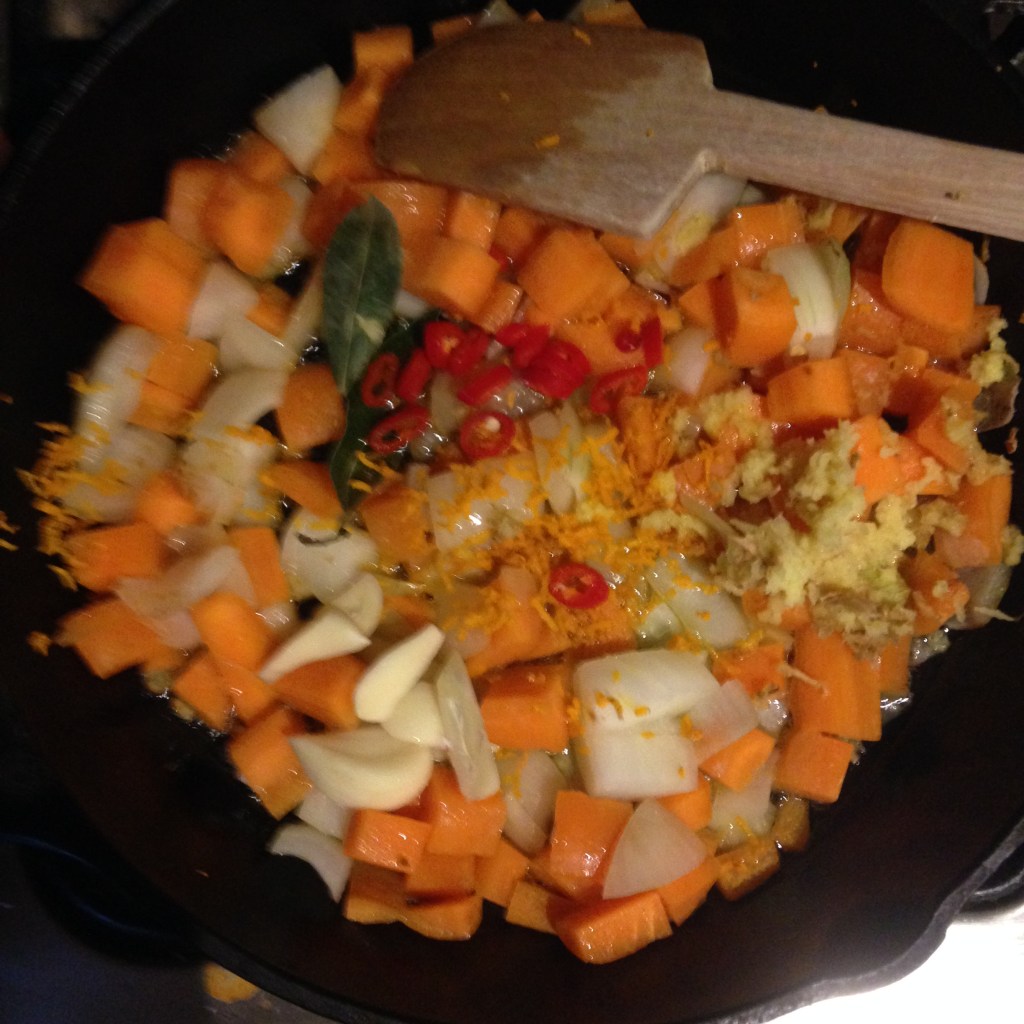
Collect up the next round of ingredients:

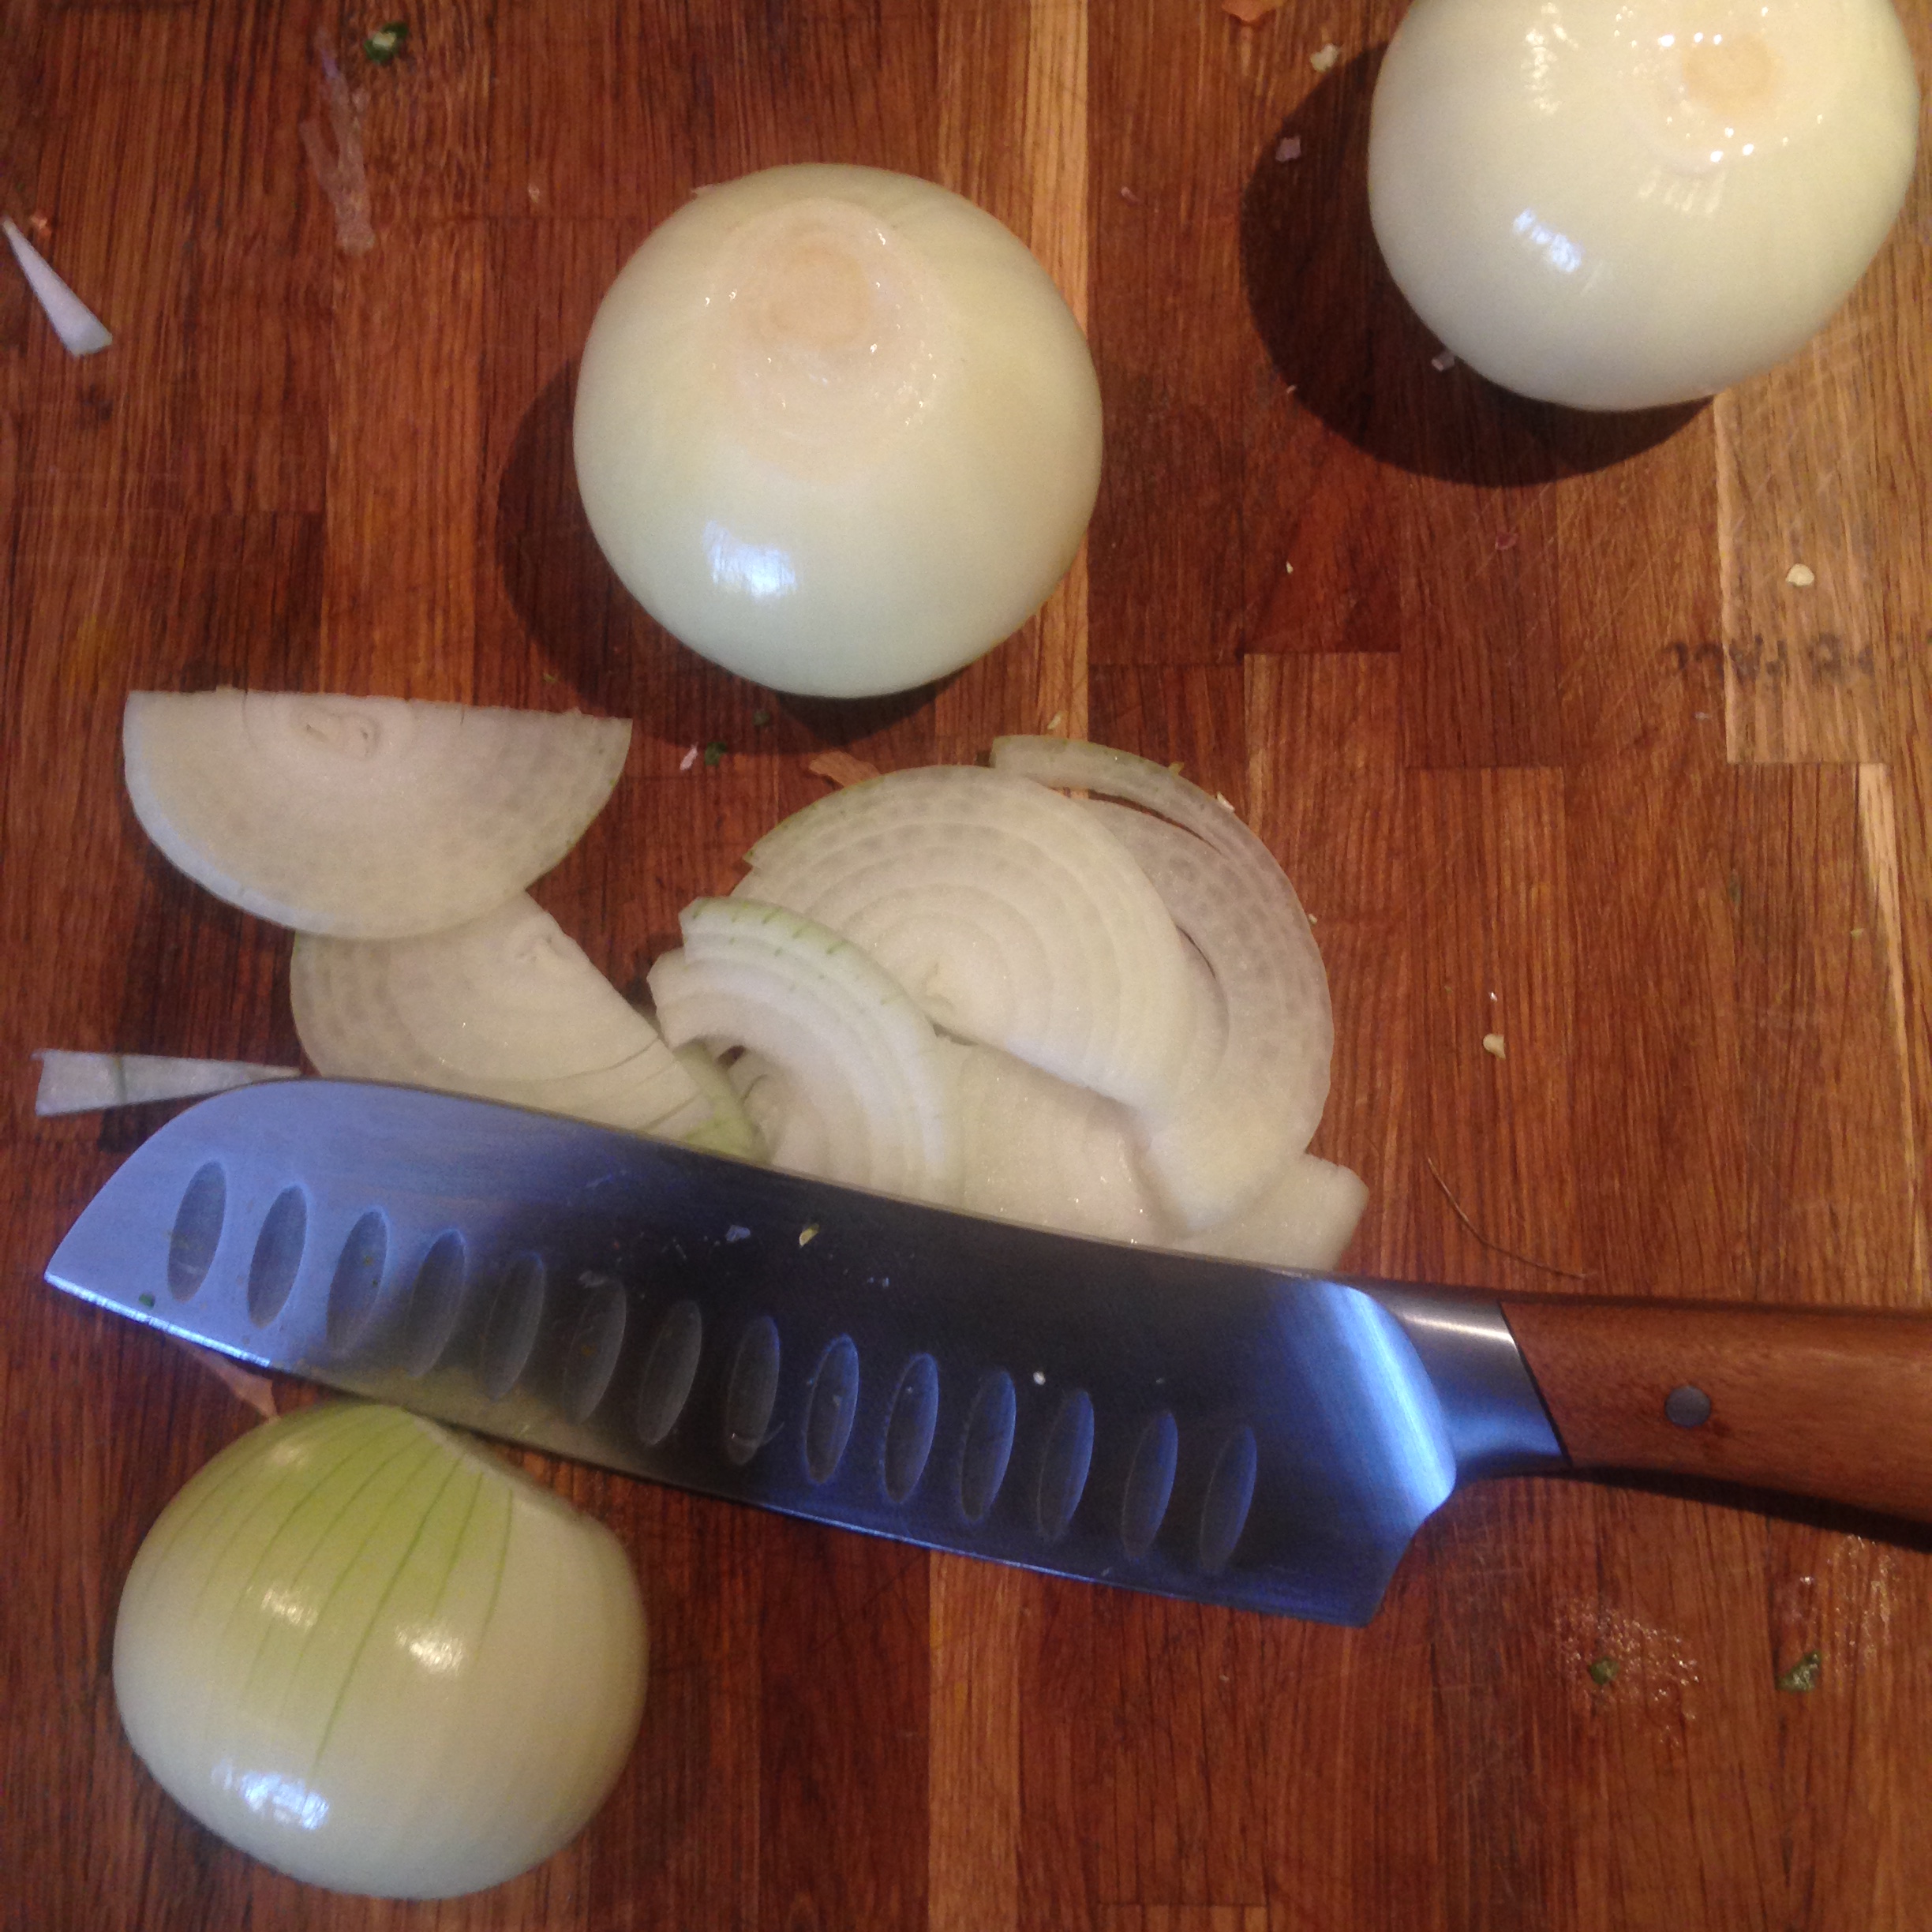
  • 3 x red onions, finely diced
  • 2 x fresh red ripe chillies. Your choice for adding heat. We like Espelette or Aleppo, definitely an Annuum or Frutescens as Chinense or Baccatum flavour is not quite right here.
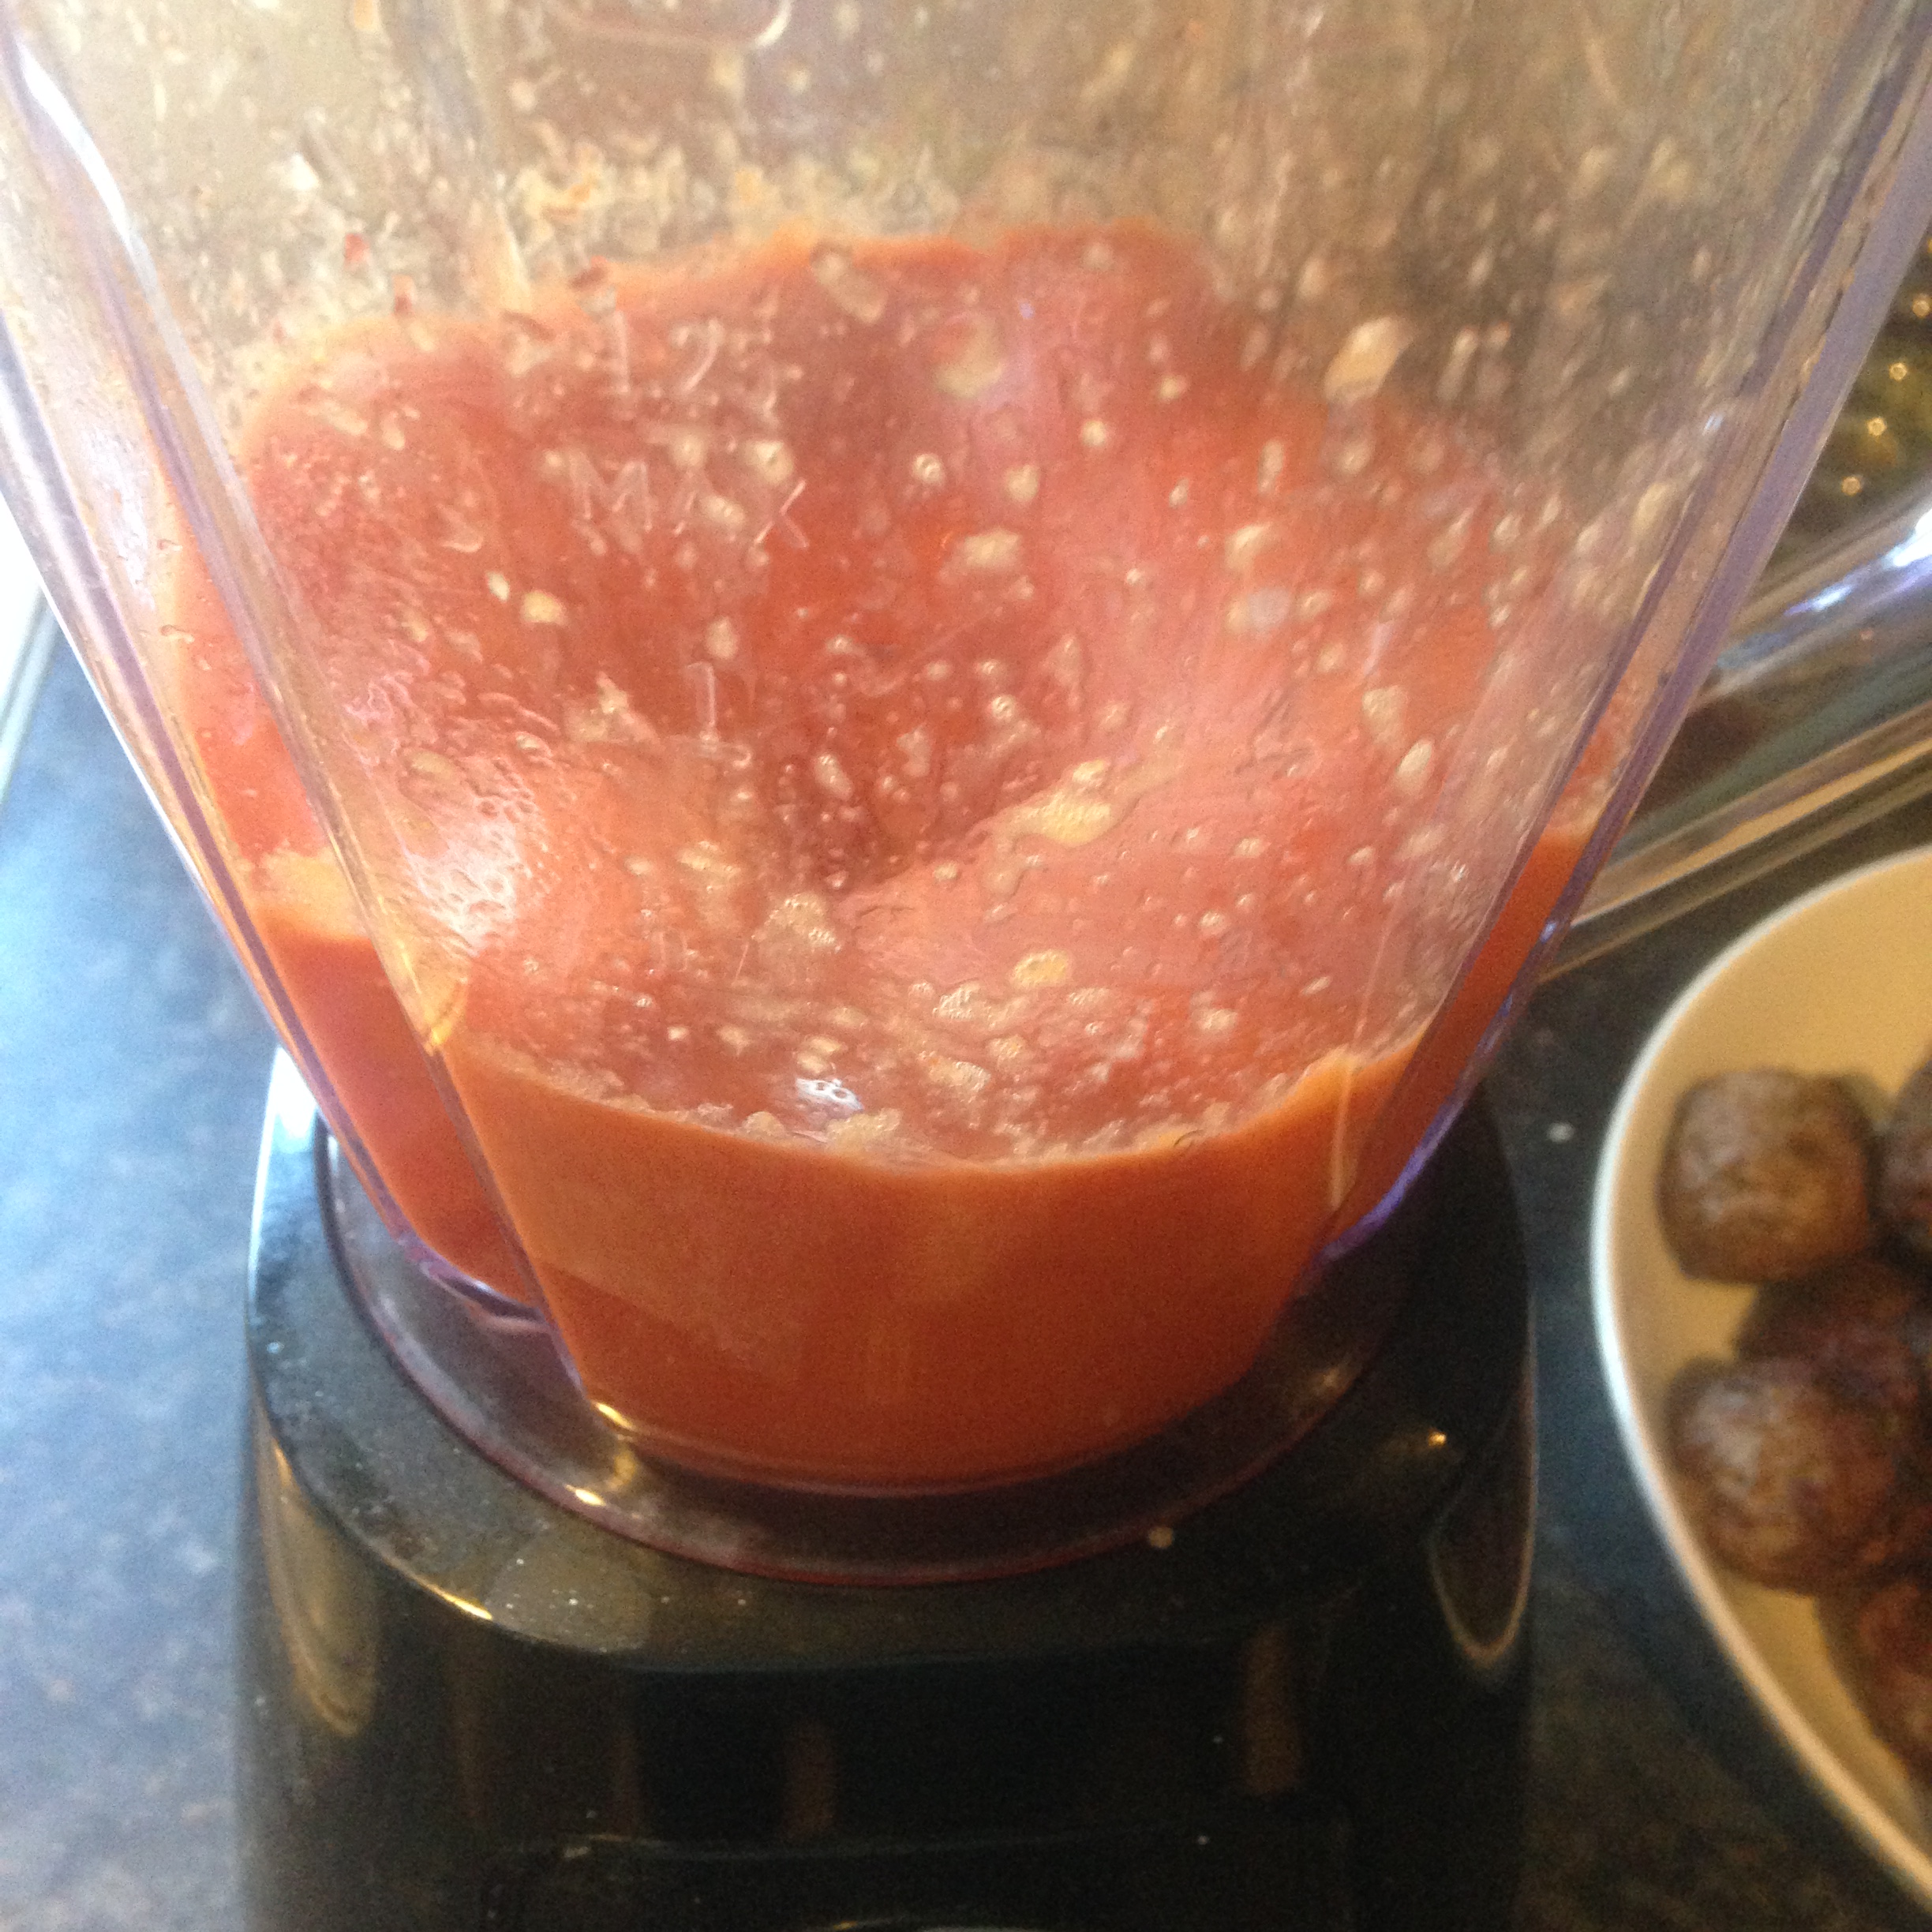
  • 2 x tins of chopped tomatoes
  • 1 pint of tomato juice
  • a good pinch of saffron strands
  • 1 & 1/2 pints of lamb stock (add saffron strands into the stock to bring them back to life a little)
  • 100g dried apricots
  • 100g pitted dates
  • 100g sultanas
  • 100g flaked almonds

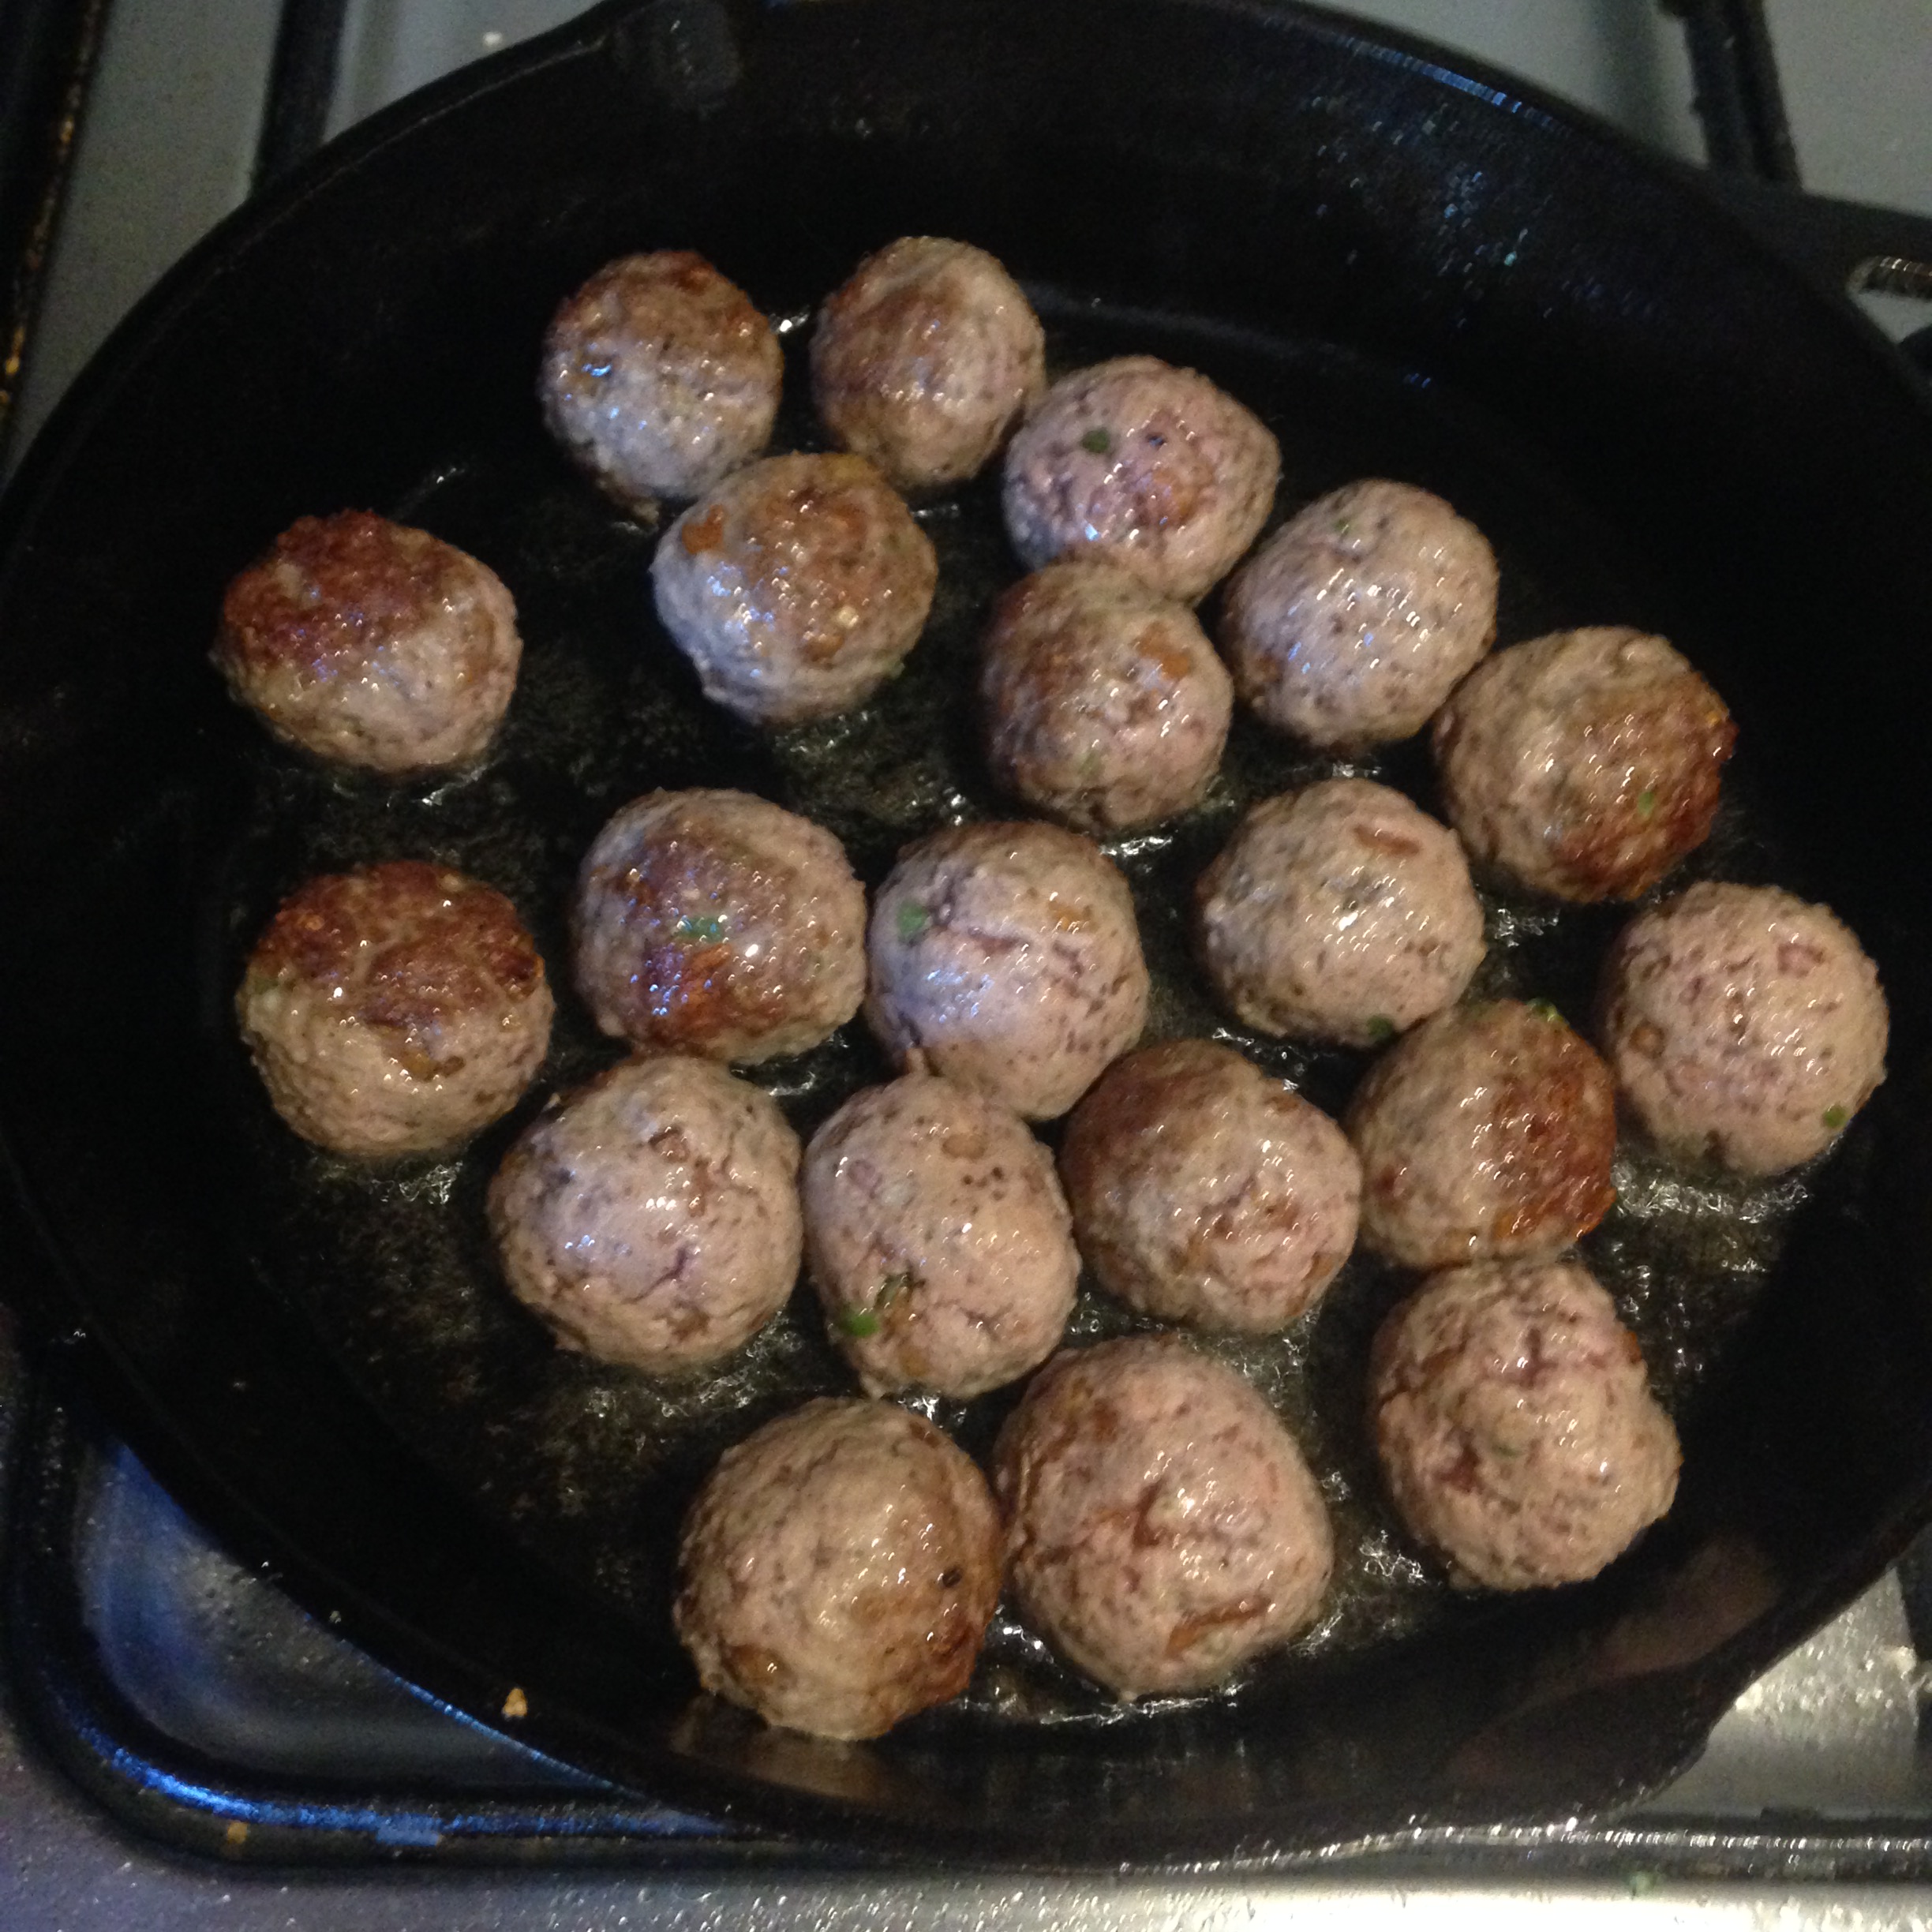
Heat your cooking vessel to fry off the marinated meat/paneer. Once it has browned remove and keep to one side until the sauce has been prepared.

Fry off the meat in batches to seal in the flavour. Not too much at one time.

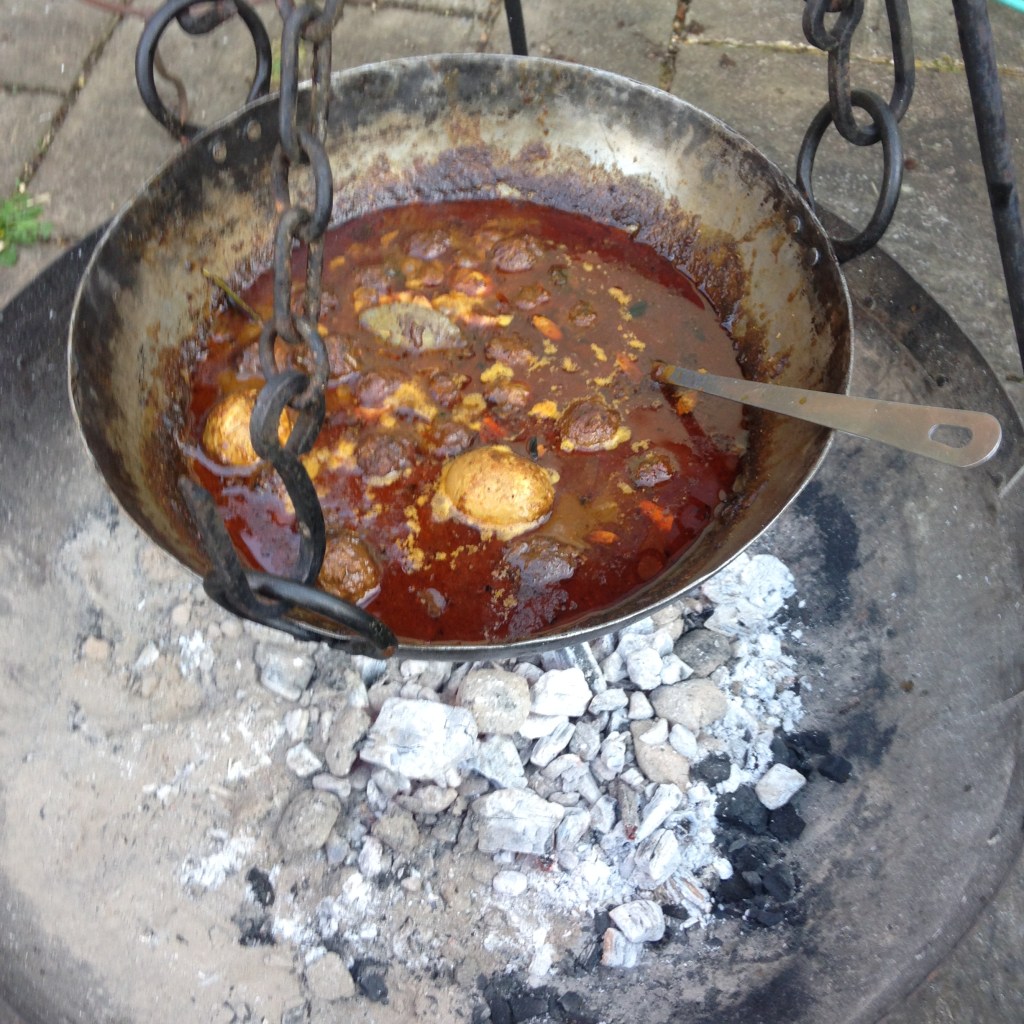
Fry off finely chopped red onions and red chillies. Add tinned tomatoes, bring to a bubble, then add the meat back. Cheese does not need as much cooking time as lamb but the sauce itself does need a reasonable cooking time to develop its flavours and depth fully.

Top up with tomato juice and stock. Bring to the boil, add fruit & nuts.

Allow it to simmer…

We love to cook outdoors. Our Kadai firebowl is perfect for a dish like this.

Bubble away for a good couple of hours. Check tenderness of meat. Add a bit more tomato juice if the sauce is becoming a little thick or dry. This can be especially important when cooking outside. Taste and season, including a squeeze of honey to balance the spices.

Perfect comfort food to feed the soul

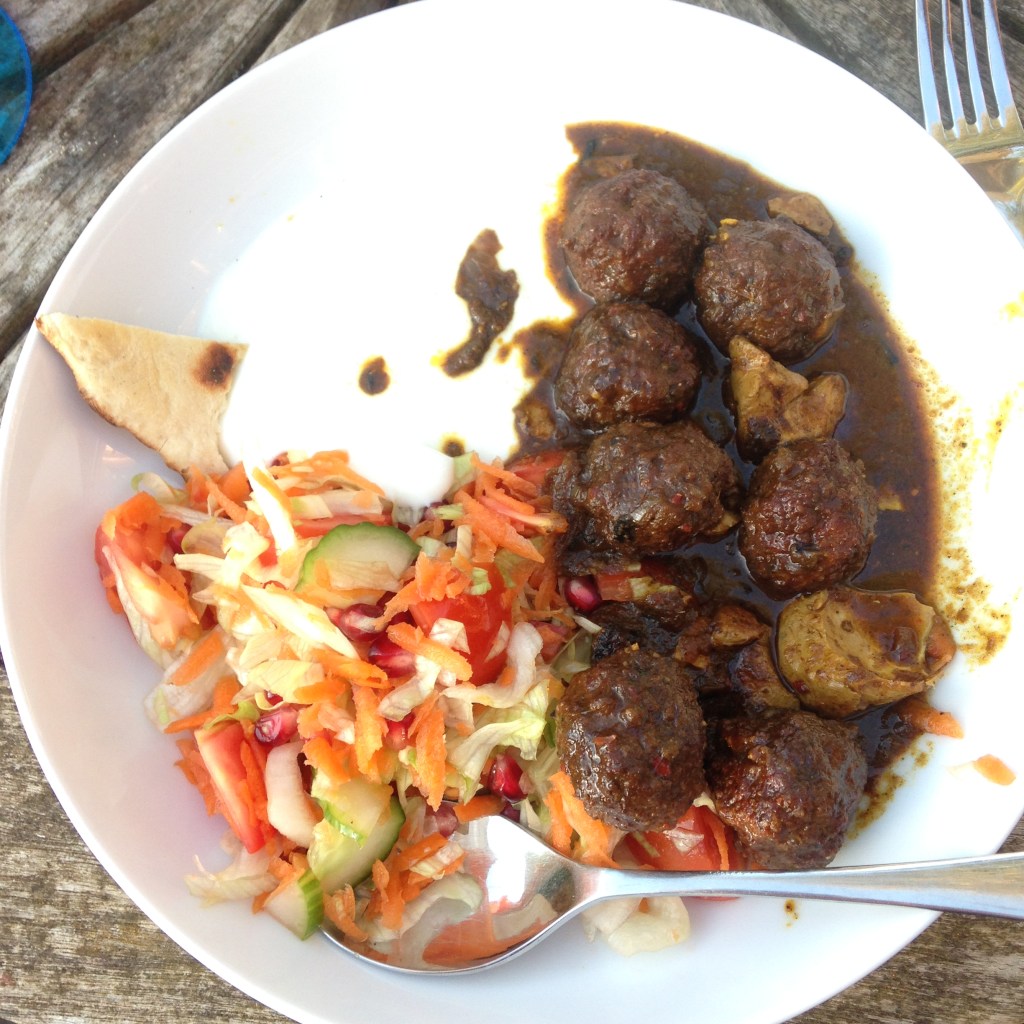
Serve with traditional cous cous, wholemeal flatbread, plain yoghurt, roasted veggies, a tomato & onion salad, a handful of coriander. It’s up to you.

An oxymoron of a delicate & robust dish.

Vegan/GF Cauliflower Katsu Curry

Colourful Katsu Curry

Katsu curry: crazy Japanese, French, Indian hybrid of a dish. Panko coated, pan fried escallops of anything you could possibly imagine: beef, pork, chicken, Tofu, veggies, and in our case, cauliflower.

Smothered in a velvety blanket of sweet, savoury, spicy and creamy curry sauce. Think of curry sauce on chips…think of a creamy Korma…think of that classic school dinner curry from the 1980s: foods that comfort you to the core. This is that.

We happen to have made a vegan/gluten free version here but this can easily be vegetarian or include meat. The choice is for you to make, every time you make it. And make it you will, time and time again.

A whole host of store cupboard ingredients combine to make a fab weekday dinner, a Wagamama recreation or a starter for a datenight at home.

This is our version of a Japanese classic: Katsu curry:

For the Katsu:

  • 1 large cauliflower
  • Panko crumbs (we actually used leftover sourdough crumbs this time)
  • sunflower oil to fry
  • spice seasoning of your choice (we found a cute little pot of Schichimi Togarashi. A Japanese seven spice blend with seaweed, orange peel and sesame seeds)
  • Flour
  • Aquafaba (tinned chickpea water)

We’ve used aquafaba instead of the classic egg in our panĂ© process. (Told you it was a bit French). It’s worth mentioning that aquafaba is a little less sticky than egg but did tick a lot of boxes: used a ‘waste’ product; made the dish vegan, store cupboard ingredient, and, most importantly it did stick the crumbs onto the cauliflower. Egg replacer could also be used to help the coating stick.

Another point of note is that a cauliflower does not slice up with zero wastage. What do we do with the left over odd florets and leaves? Well, watch this space for Bang Bang Cauliflower and cauliflower leaf soup!

Now for the Curry sauce:

Hmm, now what on earth did we actually put in there? Copious internet research presents many many many recipes. So many. Our biggest inspirations were:

Wagamama themselves

Jamie Oliver because, you know, he’s always got a recipe for everything

Gizzi Erskine on the Happy Foodie

Essentially this is a French roux based sauce, but with coconut milk as the liquid and Indian curry powder to flavour. Made by the Japanese.

Core common ingredients are as follows:

  • 2 carrots
  • an onion
  • 5 garlic cloves, roughly chopped
  • a thumb sized piece of ginger
  • turmeric (we used 2cm grated fresh but 1/2 tsp powdered would work)
  • flour (we used cornflour to keep this GF)
  • curry powder (pick a GF brand like Sharwoods)
  • 500 ml veggie stock: homemade, cubes, low salt, GF, up to you

And further ingredients that we have selected to make our sauce our own:

  • 1 can of coconut milk (we used light)
  • soy sauce to taste (use GF if you want) about 50mls
  • honey: to taste. About 2 tbsp
  • 1 teaspoon of garam masala (beware gluten can lurk in spice blends)
  • 2 fresh red chillies
  • 1 tsp your fave chilli flakes, not too hot
  • 2 curry leaves

Bubble the sauce until the veggies are soft and the spices cooked out. Remove curry leaves and blitz the whole dang thing.

Return to the pan and simmer, reduce until it is the thickness you like. It should coat the breaded katsu, not too thin. This is why we like to keep the veggies in the mix, rather than strain them out like some other recipes do.

Add honey and soy to adjust the seasoning to your liking.

And there you have it, our Cauliflower Katsu Curry (Vegan and Gluten Free)

Serve with plain boiled sticky rice and a cheeky pickled salad.

You’re welcome.

Aromatic Lamb Meatballs

We’re still in comfort food season in the UK. There may be sunshine during the day but the nights are cooler and a hearty dish is just the ticket. Meat doesn’t happen every day at The Birdhouse so when it does it is given careful consideration from beginning to end. An unexpected sunny evening has led us to cook outside. Everything is better outside, isnt it?

Meatballs are a family fave. Any style is good but, household heritage dictates that it is curried meatballs today. Lamb takes spices well and has the fat to avoid drying out too much. Let’s go make meatballs!

The more the merrier

You should be prepared for the vast quantity of ingredients we have used here. This is Pakistani Asian cooking. Every Pakistani household would have all of these ingredients to hand. If you don’t then perhaps buy a jar of sauce. Unapologetic.

The dish is our own Birdhouse recipe. Not necessarily unique but no recipe books were opened or packet mixes used. All ingredients were carefully chosen, as basic as possible and blended by us for our own tastes. No hacks here. All quantities can be adjusted to suit your good selves. We are just a guide.

We have a wonderful local butcher: Kevin. He will supply all sorts of meaty goodies at the drop of a hat. He has minced a kilo of lamb shoulder for us. This will easily feed our family of six and maybe we’ll use any leftover sauce to turn into a ‘slightly’ more veggie meal next week (add a can of chickpeas, fry off some paneer, slice in tofu, a bag of spinach…your choice).

Here we go:

For the meatballs:

  • 1kg lamb mince
  • 2 green finger chillies, finely chopped (check they’re good and hot)
  • 10 cardamom pods (yes, really ten)
  • 3 allspice berries
  • 3 cloves
  • 3 cloves of garlic, crushed
  • a small handful of coriander seeds
  • a tablespoon of black peppercorns
  • half a cup of fried onions. These can be fried by hand or, bought pre-fried.
  • teaspoon of salt

The meatballs are flavoured with highly aromatic spices. This is not a dish for the fainthearted.

Grind up the spices with the salt, add to the mince, along with the garlic, green chilli and the fried onions. Smoosh the mince together and shape into walnut sized meatballs. Fry until golden brown.

It’s always worth doing a little taste test by frying a mini patty. This will give you a chance to taste the seasoning and heat levels before frying the whole batch of meatballs. And gives you an excuse to eat the meatballs before anyone else!

For the Sauce:

  • Whole spices: 3 bay leaves, 2 black cardamom pods, 4 green cardamom pods, 1 cinnamon stick
  • 3 onions, sliced
  • 2 red chillies, mild. Our’s come from Watt’s Farm, via Ocado. Seeds and all.
  • Tomato paste
  • Ginger root
  • Fresh turmeric
  • 1 tablespoon fenugreek seeds
  • 2 tablespoons corainder seeds
  • 1 tablespoon black peppercorns
  • 3 allspice berries
  • 3 tablespoons garam masala
  • Chilli flakes/powder to taste. We used our Birdhouse blend from 2019.
  • 2 cans coconut milk
  • 4 hardboiled eggs (honestly, don’t knock it until you’ve tried it)

Grind the seed spices: fenugreek, coranider, appsice and black pepper. Add the garam masala. Blend the ginger, garlic, tomato paste and turmeric with water until it is a smooth paste. Fry the onions in a little sunflower oil. Add the whole spices and then the spice grind. Fry off until the aromatic oils are released. Add the ginger/garlic/tomato blend. Add now the coconut milk. Cook until it had reduced to about half.

Or just plop everything in a pan until it is a brown, thick amalgam.

Still with us? Here we go for another round. We promise you’ll have a scrummy dinner at the end of this epic journey.

For the final dish:

  • Add the meatballs to the sauce
  • Add hard boiled eggs if you like that sort of thing.
  • Bubble away until it is all thick and unctuous. We’re cooking on a kadai but this stage could happen on the hob or in an oven.

And now the dish is ready. Meatballs are served with homemade bread, chopped salad and plain yoghurt.

Is it worth it? Totally. Cooking is a tonic for the soul. Feed yourselves and your family well and all is well.

Tangy Prawn and Coconut Curry

It’s a bank holiday weekend and we are cooking on an Aga. Life is pretty good. So, what to cook? OK, how about something with chilli? Sure thing!

It’s Aga time!

Gather and prepare the ingredients before you start as the cooking of this dish is fast and furious. Make your chilli and spice selection. Will it be chilli powder, fresh chilli, chilli paste, chilli flakes, chilli sauce, homemade spice mix, fermented chilli paste. In the ingredient list below is our choice. Go with whatever flavours suit your mood, palette and heat tolerance. The choice is all yours!

Choose wisely.
  • sunflower oil
  • 2 red onions, sliced
  • a spoonful of gochujang (such an amazing, yummy product, adding depth and umami to dishes like this)
  • 2 cloves of garlic, sliced
  • a thumb of ginger, peeled and grated
  • a chilli of your choice, sliced
  • small handful of garam masala (we ground our own for this recipe with coriander seed, cumin, fennel seed, white peppercorn, lots of cardamon, cloves and cinnamon)
  • a finger of fresh turmeric, finely grated
  • 4 tomatoes, chopped roughly
  • 2 tsp of runny honey
  • a handful of desiccated cocount
  • a can of coconut milk
  • bunch of coriander, chopped
  • a whole lot of prawns (100 g per person)
  • green pepper, sliced
  • pak choi, leaves and stems chopped
  • a lime for squeezing

Now you’re ready to cook up one tasty prawn dish.

  • Heat a wide pan, big enough to fit the entire dish in it. We opted for a 30cm almond Le Creuset shallow casserole, needs must and all that.
  • Add the sunflower oil and onion. Fry until the onions start to take on a little colour.
  • Add ginger, garlic, chilli and turmeric. Fry for 30 seconds. Don’t let the garlic burn now. That’s why we tend to slice garlic, not crush. Less chance of burning.
  • Add garam masala, gochujang, honey and tomatoes. Allow it all to smoosh together.
  • Now for the coconut. Chuck in the dessicated stuff and let it absorb the liquid from the tomatoes. Then give the can of coconut milk a good shake and tip it in. You might need to scrap the more solid part out if the can is cold.
  • Let the sauce come up to a bubble and thicken slightly.
  • Thrown in the peppers, pan choi stalks and the prawns.
  • When the prawns are pink, stir the pan choi leaves in and serve.
  • Add a squeeze of lime and a sprinkle of coriander leaves.
Ready to be served on a bed of spicy noodles. Just squeeze on some lime and garnish with coriander sprinkles.

Lime & Chilli Curd

Here we are on a blustery March Saturday afternoon in Hampshire. After an erratic Winter, the chickens have come into full lay at The Birdhouse. Huzzah!

The Birdhouse eggs

Normally that means eight eggs every day. But the neighbours are away and this results in the luxury of their eggs too. So twelve eggs a day. That’s a lot of eggs for our family. And although we really like eggs, what to do with them all?

Obviously this week egg meals have been on the menu: poached eggs for a scummy and nutritious school breakfast; scrambled eggs with fried mushrooms for lunch; spicy cheese and tomato omelettes for dinner. A quick banana loaf to utilise up some browning bananas brings down the egg count. But still the eggs keep a coming. Now we are into egg specialist recipe. What to opt for? Pancakes? Curd? Mousse? Yorkshire puddings? How about all of the above?

Today is curd and mousse day. A quick check of the fruit bowl reveals four limes: two mottled & mature bad boys and two fresh glowing newbies. The former perfect for flavoursome and plentiful juice, the latter good for zingy zest and vibrance of colour. And, of course, this is a house that lets not a day pass by without an element of chilli infuse our cooking. So, Lime & Chilli Curd, let’s get cooking!

The recipe is super simple, it makes 1 x 500ml jar of curd:

Just add eggs
  • 225g sugar
  • 50g butter
  • 4 eggs
  • juice of four limes
  • zest of two limes
  • 2 tsp of chilli flakes

The citrus juice and zest can be replaced with any acidic liquid and complimentary flavours. Strawberries & mint, champagne & passionfruit, bergamot orange & bay. Lemon and cardamon. The options are endless and tantalising.

  1. Place the sugar, juice, eggs and butter in a heavy bottomed pan and very gently heat the mix.
  2. Stir frequently with a wooden spoon. Do not let it cook too quickly or you will have lime flavoured scrambled egg on your hands. Expect to spend 15 minutes standing at the stove, stirring. Don’t be tempted to turn the heat up. It just takes time. You are looking for a thickened liquid, cloudy with a subtle sort of whitish foam forming as it heats.
  3. Then strain through a sieve. Some curd recipes use only yolk, this avoids the blobby white bits but doesn’t use the whole egg. Not the aim here. Straining produces a smooth, silky curd.
  4. Add the lime zest and chilli flakes whilst still warm to allow the flavours to integrate.
  5. Jar up and you’re done. The curd will keep for a week in the fridge.

Simple, right?

Lime and chilli curd, zingy!

And what will we be doing with our curd? Why serving it under a pillow of chocolate mousse of course. And the recipe for the mousse? Simple again…

  • 2 eggs
  • 60g dark chocolate (at least 70%)
  • 2 tsp sugar
  1. Melt the chocolate in a bain marie. Set aside to cool slightly.
  2. Separate the eggs. Careful to make sure no yolk goes into the whites. This would stop the whites from whisking properly.
  3. Whisk the whites to stiff peaks. Use an electric beater. It takes about a minute.
  4. Add the sugar, whisk again. Just a quick blast with the beater.
  5. Add the yolks to the chocolate. Stir in with a spatula. The mix will thicken but don’t worry, it will loosen when you add the whites,
  6. Add a third of the egg whites and whisk in. Good old beater again.
  7. Now carefully fold the rest of the whites into the mix. Use a spatula and make sure there are no white streaks. Classic folding figure of eight, Don’t lose that air now. At this stage you could add a few chilli sprinkles if you want-mmmm!
  8. Spoon into your chosen vessel and refrigerate for a couple of hours.
Lime, chocolate and chilli. A classic combination.

So there we have it, a whole lot of egg gone to a good place and with the added bonus of using chillies too.

Lamb Pulao

Friendly warning…

This is not a recipe for the time poor…or those who like one-pot dishes…or folk who enjoy a jar of sauce as the backbone of their curries…or someone who is really hungry right now. No, not for them. Fair warning has been issued.

Lamb Pulao is a slow, luxurious layering of phenomenal flavours, built over a whole day, maybe even a number of days. Multi-staged, multiple pots & pans and many, many ingredients. A cooking experience to be cherished and best cooked for times of togetherness.

Don’t back away if you don’t have time today though. Bookmark the recipe and save it for a rainy day, for there is bound to be one soon. This sumptuous, aromatic dish deserves time and attention. It can wait until you’re ready.

First things first…the rice.

This may be a recipe that contains chilli but it is the quality and preparation of the rice that will make or break the dish. Basmati is the grain of choice here. It has super perfumed, long grains with snow white qualities. The Perfect Prince of Persia.

The rice should be treated with the care and consideration it deserves. Give it a thorough washing by gently whooshing it around in a large bowl. Replace the water a good few times. Try not to bash the grains too much. The aim is too remove the dusty starch from the outside of the grains but not break the grains and release more starch. After the initial rinsing, soak the rice overnight in plenty of cold water. The next day change the water a couple more times. The rice is more fragile after an overnight soak so again, try not to break it. Aim for clear water. Leave it sitting in a bowl of water until ready to cook the pulao.

Time for the stock. Apart from the lamb, there is a vast store cupboard list of ingredients. Perhaps grab a cuppa before reading on:

  • 1 kilo of lamb bones, preferably with some meat left on them. Or pieces of lamb specifically for making pulao. Neck, cutlets and the like. The goal is to have the flavour from the bones but with pieces of meat within the finished rice. Ask your butcher, make him your friend and you will most certainly receive all sorts of goodies.
  • 3 brown onions
  • 3 bay leaves
  • 2 inches of ginger
  • 1 head of garlic
  • 1 cinnamon stick/cassia bark
  • 1 tbsp black peppercorns
  • 1 tsp red chilli powder/flakes
  • 6 cloves
  • 6 black cardamon
  • 3 Allspice berries
  • small handful of cumin seeds
  • 10 green cardamon
  • handful of coriander seeds
  • salt to taste
  • 3 whole green finger chillies
  • 1 large tomato
  • fresh turmeric, only about a 1cm length.
  • 3 tbsp sunflower oil

Here we go, the method…

  1. Find your biggest pan and open the windows. Roll up your sleeves and get this show on the road.
  2. Heat the oil in the pan. Brown the lamb. Smokey!
  3. Once all the bones are sealed it’s time for the veggies, just halve them and add to the pot. You could deseed the chillies if you want. Your choice. Give everything a quick hot fry.
  4. Chuck in the spices. There may be a lot but no need for special treatment, in they go like George’s Marvellous Medicine.
  5. Then pour in the water. Stand back unless you want a spicy (and meaty) facial.
  6. Bring the pan up to boil and then simmer for a good long while. Probably a couple of hours. The meaty bits of the lamb should be tender.
  7. At this stage you should test the stock for salt. It should be a little over salty as it will be used with bland rice.
  8. Strain the stock. The veggies and spices have done their work but when things have cooled down pick the meat from the lamb bones and keep it in a separate bowl.
  9. The stock can be stored for a couple of days in the fridge or divided into meal sized quantities and frozen. Cook a great big vat of the stuff and your midweek meals will be transformed.

Your work for today is done.

And now, the pulao ingredients,

Don’t be scared but here comes another hefty shopping basket of ingredients. This makes enough rice for 6 hungry adults, maybe with a little leftover for the next day.

  • 3 cups of pre-soaked, washed basmati rice
  • 6 cups lamb pulao stock (double the number of cups of rice you will be using)
  • 3 brown onions, sliced
  • ghee
  • 1 cinnamon stick
  • pinch of saffron
  • small handful coriander seeds
  • 2 tbsp cumin seeds
  • lamb pieces from the stock
  • 3 black cardamon
  • 5 green cardamon
  • 1 bay leaf
  1. Fry the onions in the ghee until as dark as you would like. A little caramelisation is no bad thing. This adds a good depth of flavour and that strangely desirable dirty look to the rice.
  2. Pop the whole spices into the pan and allow them to release their aroma. Careful not to burn anything at this stage.
  3. And now the lamb pieces. Remember them? Ooooh, they’re going to be soooo good in the finished dish. Gently though, don’t break them up.
  4. Add the rice, fry until slightly translucent. Keep it moving to allow all grains to be coated in the ghee and spice mix.
  5. Stock next. Double the quantity of rice. So, 1 cup of rice = 2 cups of water. Just remember to use the same cup to measure.
  6. Bring to the boil. Put on a tight lid. You can add a layer of tinfoil before the lid if need be. The pulao can be cooked in the oven or simmered on the lowest heat on the hob. There is less chance of the bottom layer of rice sticking if you bake it in the oven.
  7. Cook for 30 minutes. Remove from the heat and allow to stand for a further ten minutes. The grains should be light and fluffy and separate.
  8. Serve with your favourite dahl and maybe something yoghurty. A salad on the side would be perfect. Perhaps some fermented chilli sauce or fermented lime pickle. Ooooh, dinner is served.

Authentic, wholesome, comforting, aromatic and overwhelmingly delicious. Not much else to say except, you’re welcome.

Homegrown, homemade, chilli and squash soup

February soups at The Birdhouse are typically thick enough to put hairs on your chest. Hearty and wholesome, they keep you going through the gloom when you’d rather dive under the duvet as soon as the sun sets. However, the weather in the UK has been a little odd over the last week or so. Far milder than normal, with hardly any rain, light and bright. Spring is in the air, in the form of the scent of early flowers, the buzzing of insects. It is predicted to go on like this for the next week.

The warmer temperatures mean than a fresher soup is in order. A check in the stores reveals Crown Prince squashes, garlic and red chillies. Sounds perfect for the soup we’re after.

Homegrown Crown Prince squash

Peel the squash, easier said than done, it seems to fight back at every stage. Once battle is done, chunk it up and place it in a roaster with some whole garlic cloves. Splash liberally with olive oil, season then roast in a medium oven until soft and caramelised around the edges.

Chopped and ready to roast
Soup base

While the squash is roasting, prepare the soup base by sautéing roughly chopped onion, celery, carrot and leek in a pan. Add bay, rosemary and red chillies of your choice. Add the roasted squash and garlic. Top up with stock. We had a pot of smokey liquor left over from boiling a ham, perfect.

Squash soup ready to blitz

Bring the soup to a gentle boil and simmer until the veggies are cooked. Remove the bay leaf. Plug in the stick blender and blitz the hell out of that soup. Squash always makes such a smooth, velvety consistency, very satisfying. Add a slosh of double cream to enrich it and bind all the ingredients together. Check for seasoning, add chilli flakes or powder of your choice. We opted for Aleppo pepper, not too hot, vibrant red and sweet sun-dried tomato oiliness notes (no really).

A sprinkle of Apello pepper finishes the soup

Dinner is served.

Sweet Chillies for Valentine’s Day

We have four rocoto (Capsicum pubescens) chillies left from our bumper Autumn harvest. Surprisingly as they are such juicy chillies, the rocoto have stored very well indeed in the top of the fridge door. It seems like a special recipe is in order. How to preserve them and make those precious last chillies count? Today is Valentine’s Day so let’s go crazy!

How about candied chillies? With the intention of adding them to some knock-your-socks off florentines.

Sounds like a plan…

Heat a 50:50 mix of white sugar and water to form a sugar syrup. Add a few extra flavourings to enhance the fruity floral flavours of the rocoto: rose essence and scrapes of tangerine zest. Next, add the sliced, deseeded chillies and bubble away.

The house fills with the aromatic scent of rose and tangerine. Then I add the chillies and begin to choke. The capsaicin explodes into the air and hits the back of my throat, ticket tickle cough, tickle tickle cough.

And yet, sniffing the vapours rising from the saucepan is irresistible. Mmm, warming and aromatic.

As the candy mixture thickens it’s time to get ready to take the chillies out. Place a sheet of greaseproof paper and find a long pronged fork for fishing. There is a fair amount of caramel left in the pan so a handful of pistachios are thrown in to make a last minute chilli nut brittle. Why not?

The caramel brittle is too hot to taste. By the time it has cooled down I find out it is also hot-spicy. Rocoto are fierce and have a long burn. Excellent flavour with the tangerine peel and pistachio though. Must remember that when I make the florentines.

All that remains is to put the matt black seeds in the germinator because it would just be rude not to.

Hot Chilli Glazed Ham

Hmm, first question of the day, what to do with the final jar of last year’s marmalade? Next question…can I use it with chilli?

Well, bake a ham is the simple answer.

So what will we need?

Flavour the boiling liquor with ingredients that will compliment the glaze
  • a ham, a good smokey fella. We always go big when cooking a ham as it lasts for ages, freezes well and goes with pretty much anything you want.
  • For the boiling pot: dried casabel, whole onion, couple of tangerines, fresh bay leaf, fresh thyme sprigs, a few garlic cloves, an apple, jalapeños, allspice berries and peppercorns. Do not stress too much peeling or prepping this as it will all be discarded.
  • For the glaze: marmalade, mustard of your choice, black onion seeds, fresh red fruit chilli, we used a rocoto.
Simmer for 20 mins per 500g
  1. Soak the ham overnight as the salt levels could be high. Discard the water.
  2. Put the ham in a big old pot, add enough water to cover and bring to the boil. Discard the water and start again. More salt management.
  3. Add more water, the liquor flavourings: and bring to the boil again.
  4. Reduce the heat until gently simmering. Cook for 20 mins per 500g.
  5. Remove the ham and let it sit for 20 mins. This just lets it cool down a bit and then it is easier to handle. The remaining stock will make a wonderful pea and ham soup.
  6. Prepare the glaze by mixing the ingredients together. Quantities really depend on the size of your ham.
  7. Carefully slice away the skin. Leave the fat and score in a diamond pattern.
  8. Gently apply the glaze, trying to get in between the criss cross lines.
  9. Bake in a 180 0 C oven for about 30 mins. Keep checking as the sugar in the marmalade could darken quickly.
  10. Take out the ham and try really hard not to eat it all in one go. One nibble won’t hurt though.

Gochujang

Korean fermented chilli paste

We’ve been waiting for a rainy day to attempt this. After surprising each other with Onggi for Christmas it feels like the time is right to attempt Gochujang.

Korean Onggi fermenting pots

Err, Onggi?

A Korean earthenware pot. They’ve been made pretty much the same way for about 5,000 years or so. If it ain’t broke then don’t fix it, right? Onggi have lots of uses including water storage, dry food storage but predominantly fermentation. Korean soy sauce is traditionally produced in Onggi. The porous nature of the iron rich clay pots adds to the ferment and encourages the ripening and breathing of the fermenting food within. The pores in the clay draw out impurities and encourage air flow. Thus keeping everything from decaying.

Our first ever batch of Gochujang will be split between a traditional Onggi and a glass Kilner jar. A bit of an old vs new, East vs West comparison. Surely the glass will allow more UV to hit the paste…but glass is certainly not porous. Hmm, how different will the products be? We’ll be reporting back in a couple of months.

Next, what is Gochujang?

It is a fermented chilli pepper paste from Korea, made to 400 year old recipe. It is a burgundy red, hot, pungent paste used to marinate meat, enrich soups & sauces and generally add all round yumminess to a lot of Korean dishes. Uber umami. Traditionally it is made in Onggi and left out in the sun to ferment, occasionally stirred. Commercially produced Gochujang is readily available in familiar red boxes in Asian supermarkets and online. Not sure it compares to the homemade stuff. Let’s find out!

How do you make Gochujang?

OK, after copious amounts of food channel watching and internet research here are the top two sources of inspiration and information we will be using:

Good Food Channel’s John Torode Korean Food Tour: seeing and tasting Gochujang Onggi made in the traditional style

Korean born, New Yorker, Maangchi’s amazing Korean food blog. Gochujang recipe

And here is the list of somewhat crazy ingredients us UK Birdhousers have had to source to get this wonder paste up and fermenting:

  • 2 litres of water
  • 227g barley malt powder
  • 2 1/2 cups sweet rice flour
  • 2 cups rice syrup
  • 1 cup fermented soybean powder
  • 400g hot Korean pepper powder
  • 1 cup Kosher salt

And now what to do…

  • Mix the 227g barley malt powder into the 2 litres of water. Use a whisk to get the lumps out.
  • Strain into a large saucepan and gently warm. You want a temperature that is warm when you stick your finger in but not hot.
  • Add 2 1/2 cups of sweet rice flour.
  • Now leave it to sit for 2 hours. It will separate out slightly and have a layer of clear, sweetish liquid on top.
  • Bring to the boil and heat over a medium heat for between 1-2 hours. You want it to reduce by about a 1/3. Stir occasionally to stop it sticking.
  • Add the 2 cups of rice syrup. Stir in well and leave to cool completely.
  • Add the 1 cup of fermented soybean powder. Whisk gently to clear any lumps.
  • Add the 400g of chilli powder. Really hoping to harvest and dry enough chillies to produce homegrown Gochujang. Maybe with smoked chillies? Just a thought.
  • Finally, add the 1 cup of Kosher salt. Stir again to remove any lumps.

Transfer to the vessel of your choice.

Cover the opening with a muslin to allow air circulation. Rest the lid on top. Keep on a sunny windowsill. Open the lid whenever the sun is shining.

Leave for 2-3 months (sigh, it’s going to be soooo long) Stir occasionally to mix the dark crust in.

Must research which Korean recipes we’ll be trying first.